Looking for a guide to send retargeting push notifications?
Retargeting notifications are gaining a lot of popularity these days. For a long time, you could only send retargeting email drip campaigns. But now, you can recreate the same effective campaigns and use the targeting options in push notification software as well.
But how do you get started? Do you need experience with retargeting campaigns? Do you need any experience setting up push notification campaigns?
In this article, we’re going to help you create retargeting push notifications in less than 10 minutes. We’ll also answer all your questions about retargeting push notifications.
听起来不错?让我们开始吧。
Why Use Retargeting Push Notifications?
With any business your run, you’ll see a group of subscribers who are extremely engaged. They buy anything you sell, happily offer testimonials and reviews, and refer new customers to you.
And then again, you’ll see subscribers who simply aren’t interested in anything about your business.
Retargeting push notifications help you focus on subscribers who want to be sold to. You can retarget them for cross-selling, upselling, renewals, or just give them enough incentive to buy from you using a welcome offer or coupon.
One methodology for sending retargeting push notifications is to use waterfall push campaigns.
Push notification campaigns come with detailed analytics. So, you can see both groups pretty clearly in your subscriber list. And the cool thing is that you can create Audience Groups in PushEngage to retarget both types of subscribers.
Then, you can create targeting options for your push notifications to retarget specific behavior on each notification you send. All retargeting push notifications have two core components:
- A set of push notifications with a common goal
- Audience groups to retarget different types of subscribers
Let’s get you started with creating your own retargeting push notifications next.
How to Send Retargeting Push Notifications
Now that we know what a retargeting push campaign is and why you should create them, let’s take a look at a real example with step-by-step instructions to create one.
Before you get started with sending retargeting notifications, you need to select a push notification service. We recommend using PushEngage.
第 1 步:创建免费的 PushEngage 账户
前往 PushEngage 并点击 立即免费开始:

您可以从免费套餐开始。但如果您正在寻找最强大的浏览器通知,您应该根据您的业务需求选择付费套餐:
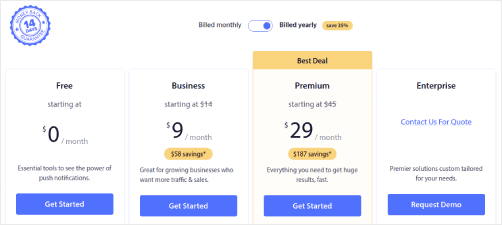
一旦您知道想要哪个套餐,请点击 开始 来创建您的 PushEngage 账户。
第 2 步:注册 PushEngage
现在,是时候创建您的 PushEngage 账户了。首先使用电子邮件地址或 Gmail ID 注册:

然后,填写您的账户详细信息:

并添加您的信用卡信息以购买您的套餐:

如果您选择了免费账户,那么在您选择升级套餐之前,您的信用卡永远不会被收费。现在,您已准备好访问您的 PushEngage 仪表板。只需点击 完成注册并立即访问。
第 3 步:安装 Web 通知 WordPress 插件
您已完成账户创建。因此,请前往 PushEngage 仪表板 并按照以下步骤操作:

点击 网站设置 » 网站详细信息,然后点击 点击此处获取设置说明 按钮:

点击 WordPress 选项卡,然后点击 安装 PushEngage WordPress 插件 按钮将插件安装到您的网站上。

Here’s the cool part: When you created your PushEngage account, you already synced your website with your PushEngage account. So, click on the installation link in the PushEngage dashboard to automatically install the PushEngage WordPress plugin to your website.
第 4 步:将您的 WordPress 网站与 PushEngage 连接
安装并激活 PushEngage WordPress 插件后,您将看到 PushEngage 设置向导:

该向导非常简单。如果您是新用户,请点击 新用户?认领您的免费账户。如果您已经注册,请点击 连接您现有的账户。
接下来,您可以在 连接已注册的网站 下的 选择网站 下拉菜单中选择您的网站,如果您在注册过程中已注册了网站:

或者,如果您有 高级定价计划或更高版本,您可以点击 注册新网站 来添加新网站。在下一步中,设置向导将提示您安装其他 必备的 WordPress 插件。

如果您正确遵循了每个步骤,您将从向导中看到此成功消息:

You are now ready to create campaigns.
Step #5: Create Retargeting Push Notifications
Finally, it’s time for our example. To show you a real use case for retargeting push notifications, we’re going to take the example of Black Friday promotions. Our objective is to maximize the conversions on our Black Friday offer.
To retarget our subscribers based on their behavior, we’re going to send a broadcast to all our subscribers. Then, based on their engagement levels, we’re going to create different Audience Groups for retargeting.
How to Send Your Notification to All Subscribers
We want the maximum reach for 3 notifications:
- Early Black Friday Announcement
- Black Friday Flash Sale
- Cyber Monday Sale
So, we’re sending those 3 notifications to everyone. In the Audience tab, select Send to All Subscribers:

How to Retarget Subscribers Who Didn’t Click the Broadcast to Everyone
If you’re not sending the notification to all subscribers, you’ll need to create an Audience Group. For instance, if you want to target the subscribers who didn’t click on the broadcast to everyone, you’ll need to create a new Audience Group.
In your WordPress dashboard, go to Audience » Audience Groups and click Create New Audience Group:

To target subscribers who didn’t click the last notification, you’ll need to filter by Last click date:
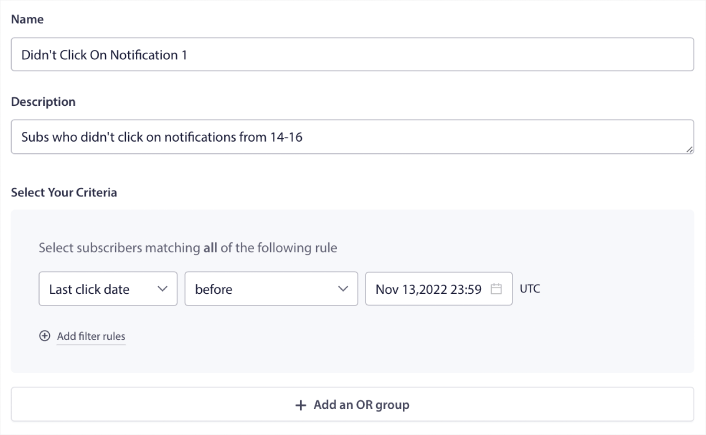
Filter by last click date before the date you sent your previous notification. So, if you sent the last push notification on 14th November, filter for subscribers who clicked on notifications only before 13th November at midnight.
NOTE: Unlike an email campaign, you can’t actually filter by click rate on the last notification. The closest approximation is to filter for clicks in a date range.
When you’re done, click on Save Notification.
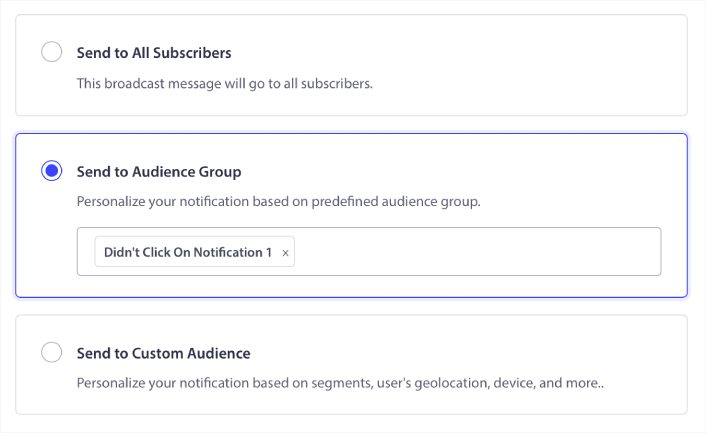
Then, head back to your push notification broadcast and select Send to Audience Group. From the dropdown, select your Group:
How to Retarget Subscribers Who Clicked the Broadcast to Everyone
如果您想定位那些点击了您上次通知的订阅者,您可以创建另一个受众群组。
Filter your subscribers by Last click date after the date you sent your previous notification AND before the date you want to send your next notification:
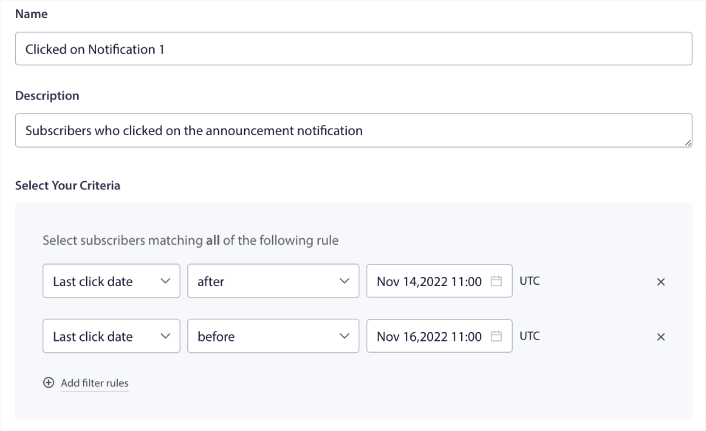
You can add AND criteria to your filter by clicking on Add filter rules. A filter like this is great for cross-selling push notifications.
The outcome of these Audience Groups is more granular targeting. So, each time, you can send different offers to improve your conversion rates.
What to do After You Create Retargeting Push Notifications
One of the most important things to remember about retargeting push notifications is that you can only use this methodology on broadcast push notifications. Drip campaigns in push notifications don’t have targeting options that granular yet.
So, make sure to A/B test your push notifications. We also suggest that you take some time to read our articles and learn how to supercharge your automated push notifications. Start with our article on push notification best practices.
如果您是推送通知的新手,在上线之前,您应该遵循一个完整的推送通知测试流程。这将帮助您在访问者看到它们并开始抱怨糟糕的用户体验之前,排除常见问题。而且您绝对应该设置 Google Analytics 以跟踪推送通知。
对点击了推送通知或未点击的订阅者进行再营销。让我们知道这对您有什么帮助。在此期间,请查看这些资源:
- 如何通过好奇心提高推送通知的点击率
- 如何个性化每个推送通知
- 如何在推送通知中使用富媒体脱颖而出
- 如何重新激活不活跃的推送订阅者
- 如何使用推送通知让客户了解最新信息
- 如何在推送通知中使用表情符号以提高点击率
- 如何通过制造紧迫感来增加转化次数
And if you haven’t already, get started with PushEngage.


