
正在寻找一种使用 Google Tag Manager 为您的网站添加购物车放弃推送通知的方法?
Google Tag Manager 就像一个存储您的推送通知脚本等的存储桶。购物车放弃活动是自动提高参与度和销售额的好方法。因此,让我们将这两个史诗般的自动化结合起来。
在本文中,我们将在 10 分钟内帮助您安装 GTM 推送通知。
让我们开始吧。
如何使用 GTM 创建购物车放弃推送通知
使用 Google Tag Manager 安装推送通知是一个非常快速简便的过程。使用 GTM 设置购物车放弃活动稍微技术性一些,但我们可以一起完成。只需按照这些步骤操作,在本文结束时,您应该能够像这样从您的网站发送推送通知:

使用 Google Tag Manager 进行此操作的好处是您根本不需要使用任何代码。您也不需要编辑您网站的 HTML 来安装推送通知。
让我们开始吧。
第 1 步:使用 GTM 设置您的 PushEngage 帐户
在创建购物车放弃活动之前,您需要将 PushEngage 安装到您的网站上。而且,由于我们将使用 Google Tag Manager 设置购物车放弃活动,因此将 PushEngage 也通过 GTM 安装是有意义的。
不过,我们不会在本文中介绍这一点。如果您是推送通知的新手,请继续查看我们关于如何使用 GTM 在您的网站上安装推送通知的教程。
请按照该文章中的步骤操作。完成后,我们将开始创建您的购物车放弃活动。
第 2 步:在 PushEngage 中创建购物车放弃活动
完成选择加入设置后,您的网站就可以收集订阅者了。
现在,是时候创建您的购物车放弃活动了。
前往活动 » 触发活动并点击创建新的触发活动:

然后,从活动模板中选择购物车放弃,然后点击创建新:
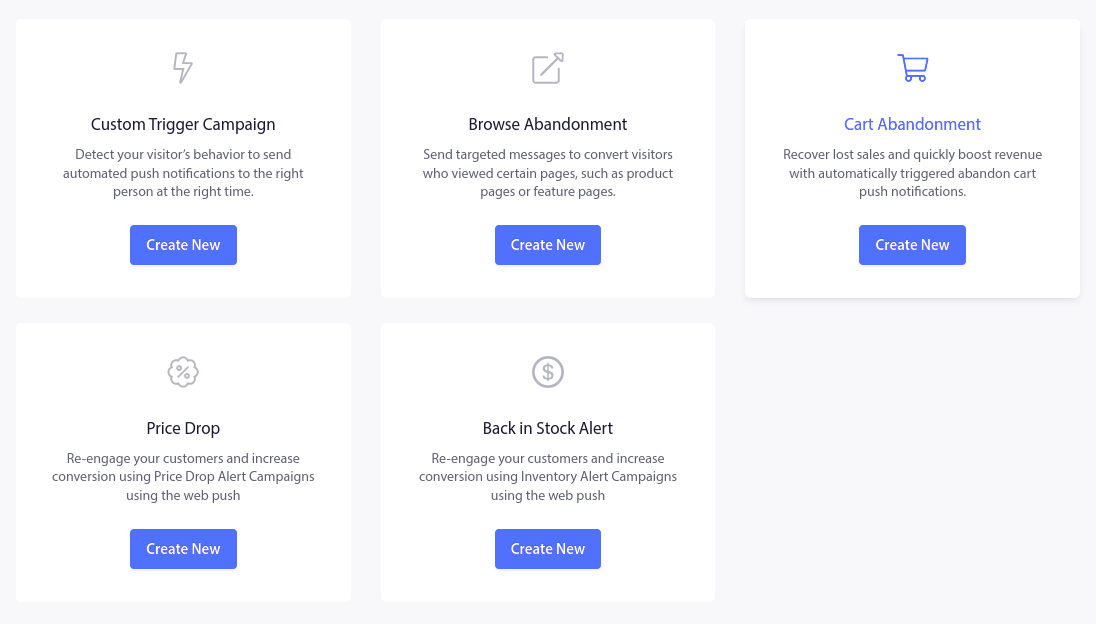
如果您需要有关创建购物车放弃活动的详细教程,请查看这篇关于如何设置购物车放弃推送通知的文章。完成后,您需要配置 Google Tag Manager 来触发和发送购物车放弃提醒。
第 3 步:创建 dataLayer 对象
根据 Google 的说法,“为了确保最大的灵活性、可移植性和易于实施,Google Tag Manager 在与数据层一起部署时效果最佳。数据层是一个包含您想传递给 Google Tag Manager 的所有信息的对象。例如事件或变量可以通过数据层传递给 Google Tag Manager,并且可以在 Google Tag Manager 中根据变量的值设置触发器。”
dataLayer 对象是数组中的一组变量,用于动态获取信息。简单来说,dataLayer 就是您的产品 Feed。请查看Google 的文档以了解有关 dataLayer 对象的更多信息。
这是一个示例:
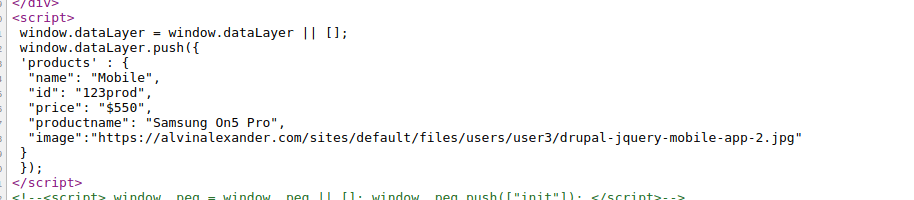
创建此 dataLayer 后,您需要将其添加到您网站的 HTML <body> 中。
Next, you’ll want to add a trigger event in your ‘Buy Now’ or ‘Add to Cart’ buttons so that when your visitors click on these buttons, the abandoned cart campaign is activated.

NOTE: Your abandoned cart campaign doesn’t start immediately after the event is triggered. Usually, the campaign starts if your visitors have added something to their cart but haven’t purchased anything even after half an hour.
Step #4: Create dataLayer Variables in GTM
In your Google Tag Manager Account, head over to Workspace » Variables » Configure and scroll down to Clicks:
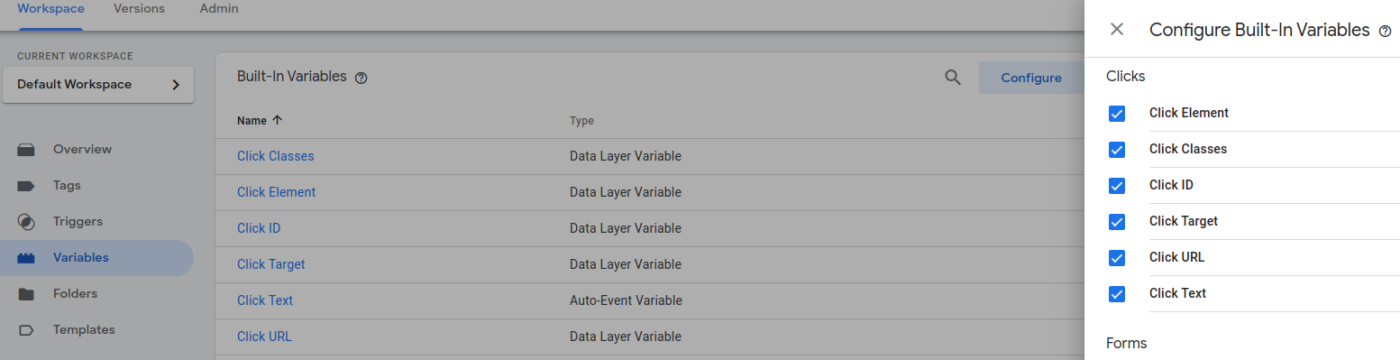
And enable all variables under Clicks.
Then, go back to Variables and under User-Defined Variables, click on Create New:
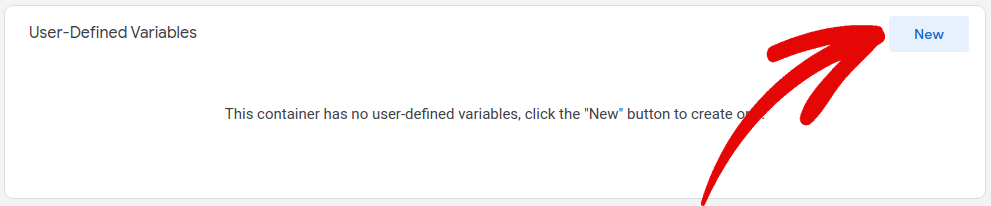
Here, add your dataLayer variables to Google Tag Manager:
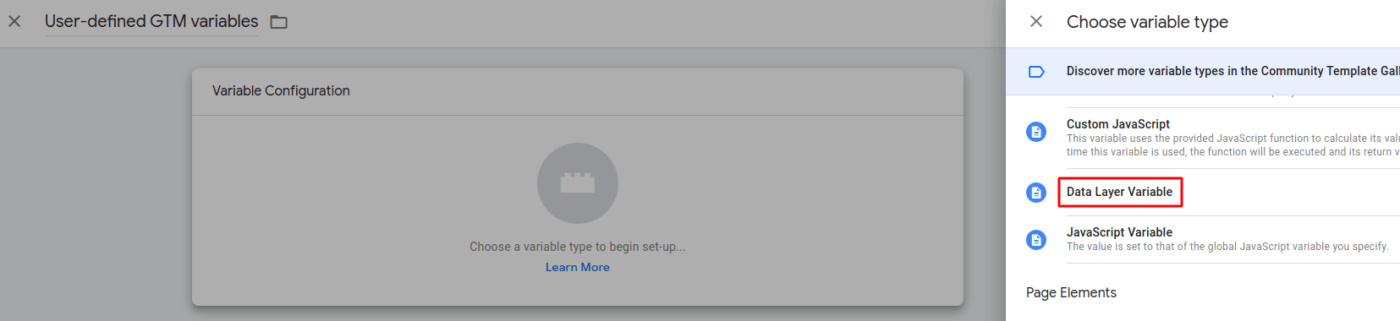
Your dataLayer variables are the different attributes of your products. In our example, the dataLayer variables would be:
- products.name
- products.id
- products.price
- products.productname
- products.image
You’ll need to add all these dataLayer variables in GTM.

IMPORTANT: Follow the syntax exactly or the campaign will never get fired at all.
Step #5: Create a Trigger in GTM
Head over to Triggers and click on Add New:
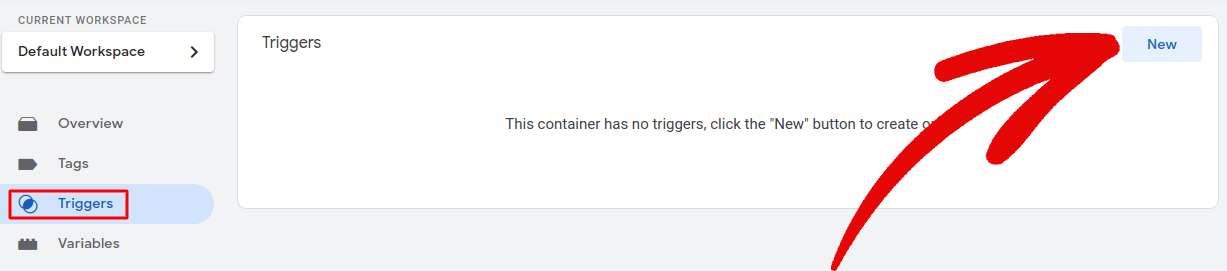
And create a Custom Event to trigger your abandoned cart campaign when someone clicks a Buy Now button:
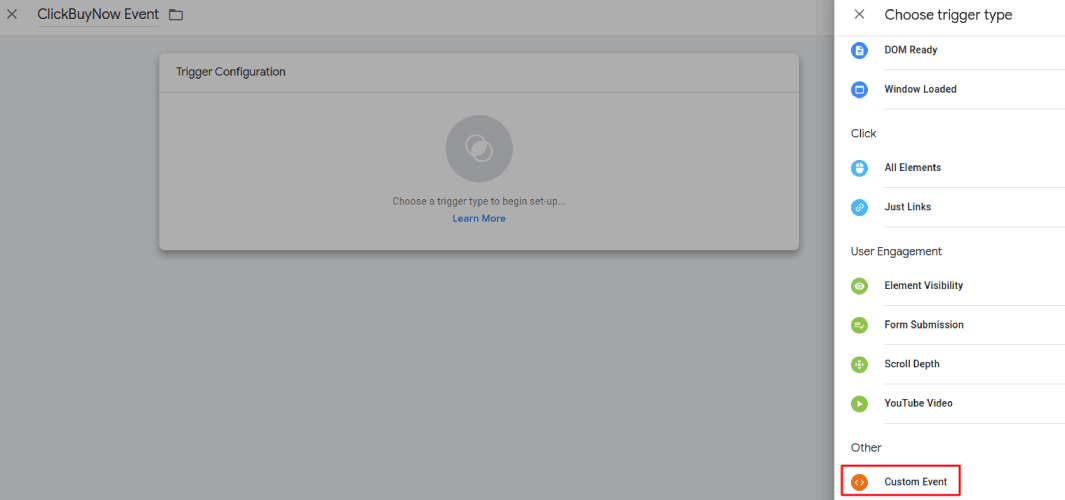
Configure the custom event to fire when someone clicks on a button with the button text “Buy Now”:

Step #6: Configure Tag with dataLayer Variables and Triggers
Finally, you’ll want to head back to your PushEngage dashboard and update the cart abandonment tag with dataLayer variables and triggers. Head over to Campaign » Triggered Campaigns and click on the Your Code button:
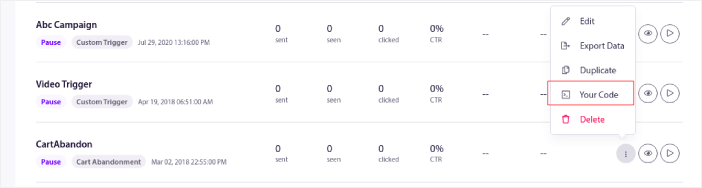
And copy your campaign code:

Once that’s done, you’ll want to paste the code into your website’s HTML code right above your Buy Now buttons.
就是这样!您已完成。
What to do After You Set Up Cart Abandonment Notifications
好了,各位,本次分享就到这里!
You can also create segments dynamically through GTM. Maybe check that out next?
如果您是推送通知新手,在上线之前,您应该遵循一个完整的 推送通知测试 流程。这将帮助您在访问者看到它们并开始抱怨糟糕的用户体验之前,排除常见问题。
You should also check out these epic resources while you’re at it:
如果您还没有尝试过PushEngage,现在就去试试吧。PushEngage是全球排名第一的推送通知服务。所以,如果您想认真发展您的业务,就应该投资PushEngage。


this post is missing a screenshot of the tag itself. Towards the end you reference “Then in your GTM Dashboard create the tag with abandon cart code and add the dataLayer variables to it, you can see in the below example.” without an example available.
Please update with an example tag setup image.
also I’m assuming there’s a point where we’ll need to add the pushEngage script to the custom tag? That part could be more clear on this post.
Thanks,
How would you do this with a platform like Marketo or Pardot?
Hey, Dan! That’s a really great question. I think you should hit up our Customer Success team for a more detailed answer on this. Drop us a line on our contact page.