
Looking for a way to enable a single-step optin on your site to collect push notification subscribers?
Push notifications can be a really great tool to generate engagement, repeat traffic, and sales. It’s also a very affordable marketing tool that’s perfect for growing small businesses.
But before you create send push notifications, you must first create an optin to collect a subscriber list from website visitors.
In this article, we’re going to set up a single-step optin for your site in less than 10 minutes. We’re going to use PushEngage for this article to show you how to get started with push notifications. PushEngage is the #1 push notifications software in the world. So, your campaigns will be in safe hands.
让我们开始吧。
How to Enable Push Single Step Opt-in On Your Site
IMPORTANT: Before you get started, there are a couple of quick things to take care of. To install a single-step optin for push notifications, you must have:
- An HTTPS Website (a website with an SSL certificate)
- Access to the root directory in your hosting service
All good? Let’s get started!
第 1 步:设置您的 PushEngage 帐户
前往 PushEngage 主页,然后点击“开始使用”按钮:

You can try out PushEngage for free. If you’re running a small blog that needs repeat traffic and engagement, that’s probably good enough. But if you’re serious about sales, you should get the Enterprise package and unlock the automated campaigns.
注册 PushEngage 帐户后,请前往您的 PushEngage 仪表板 并转到 网站设置 » 网站详细信息:

Here, you get to update the basic details of your site. You can set your logo, site name, and site URL. It’s really important to sort this stuff out right now so that you can test your entire setup later.
Step #2: Install PushEngage On Your Site
In the same tab, scroll down and click on the button that says Click Here For Setup Instruction:

Depending on the platform on which your site was built, the installation process will vary. Check out our installation guides to finish this process. If you’re using a CMS to build your site, most of the installation process will be done by the PushEngage plugin for that platform. For a custom site, you’ll need to download the Service Worker package.
After you click on the Click Here For Setup Instruction, click on Download Service Worker File:
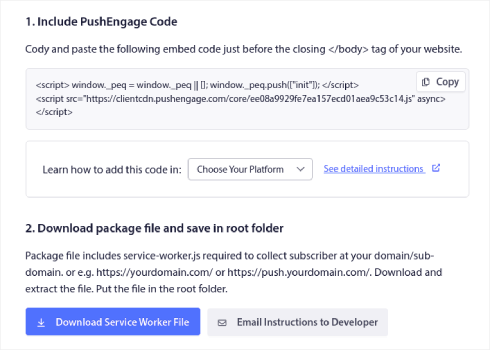
Then, upload the zip file to the root directory of your website in the public_html folder.
Once you have added the file here make sure it is accessible. Go to https://yoursite.com/service-worker.js and check if it’s a valid URL (replace yoursite.com with the URL to your site).
Here’s the PushEngage service-worker.js file URL for example: https://www.pushengage.com/service-worker.js.
Step #3: Create Your Single-Step Push Notification Optin
在您的 PushEngage 仪表板中,转到设计 » 弹出窗口模型,查看不同的订阅类型列表:
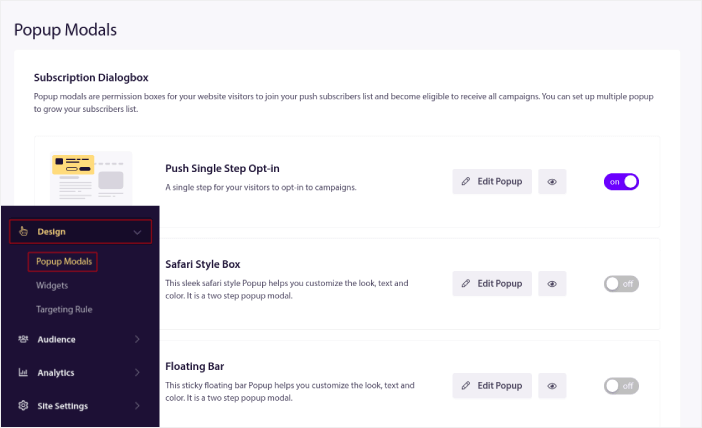
从列表中,转到推送单步订阅并单击切换开关以启用订阅:
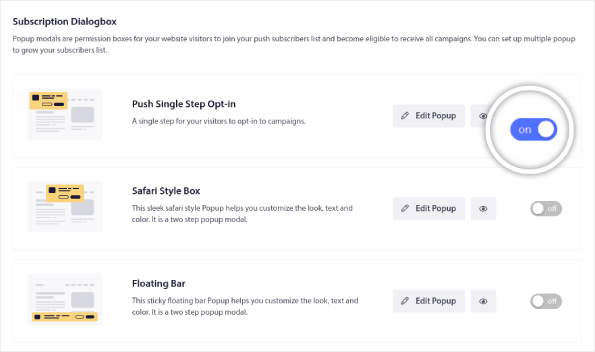
然后,单击编辑弹出窗口按钮来自定义订阅:
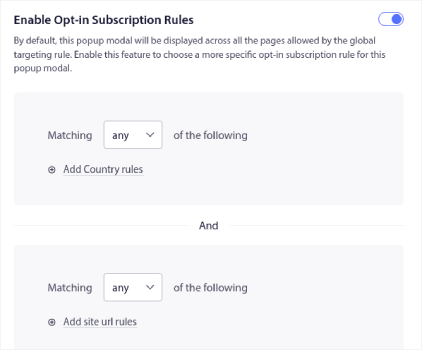
您还可以选择在网站的何处显示您的弹出窗口。单击启用订阅规则:
如果您希望您的订阅非常醒目,您可以使用订阅叠加层模糊网站的其余部分,直到访问者订阅您的通知或退出弹出窗口模型。单击启用订阅叠加层:
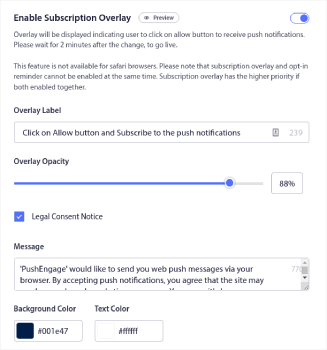
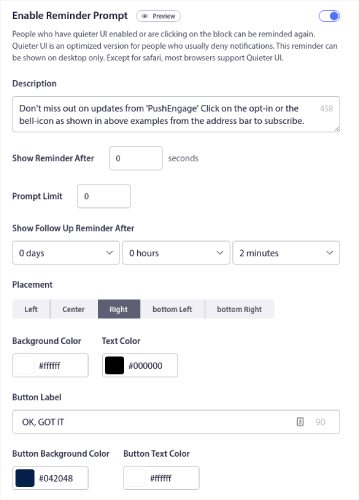
You can customize your overlay so that it fits your brand and looks awesome on your site. Finally, you can also enable reminder prompts for visitors who have QuieterUI mode activated on their browser:
When you’re done, click on Save and Choose Display Options.
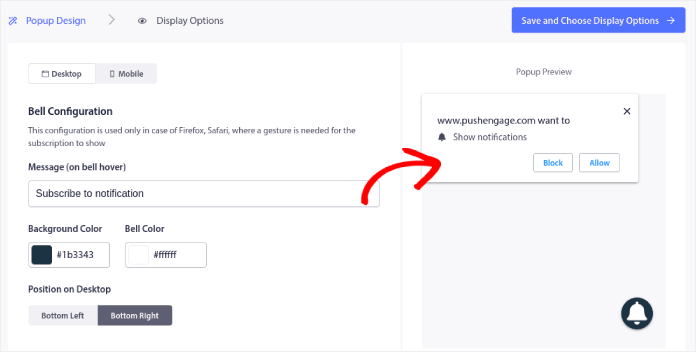
在显示选项下,您可以设置访客访问您的网站后何时显示您的订阅弹窗:
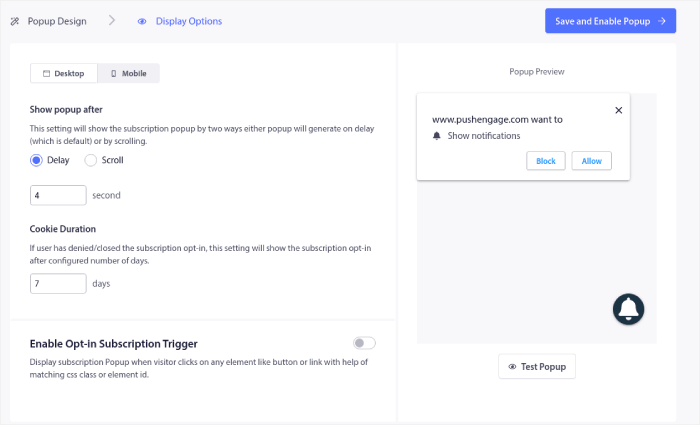
您可以设置一个延迟时间,之后弹窗就会显示。或者,您可以设置在网站访客滚动浏览网页达到一定百分比后显示订阅弹窗。
如果您想创建点击订阅按钮,您也可以启用订阅触发器。完成后,请点击保存并启用弹窗。
您就完成了!
总结
好了,各位,本次分享就到这里!
You just added a single-step push notification optin to your site in less than 10 minutes!
Check out how to create automated push notification campaigns as well. Most push campaigns are simple and effective. So, we recommend setting up multiple campaigns for your site. Here are a few great ones to start with:
如果您还没有开始,请立即开始使用 PushEngage。PushEngage 是全球排名第一的推送通知软件。因此,您的营销活动是安全的。


