
Looking for a way to create an exit intent popup for your WordPress site?
An exit intent popup can be incredibly effective for capturing leads. They’re designed to convince and convert by pulling the visitor’s entire focus on themselves.
But having to code one from scratch is a real pain. For one thing, you’d have to know enough HTML, CSS, and Javascript to create the popup along with trigger rules for when to show it. Then, you’d have to create a manual integration with your email service provider. And finally, you’d have to deal with any privacy and security issues.
Good news: there’s a much simpler way.
In this article, we’re going to show you how to launch a full screen popup in WordPress with zero coding in less than 10 minutes.
让我们开始吧。
What is an Exit Intent Popup?
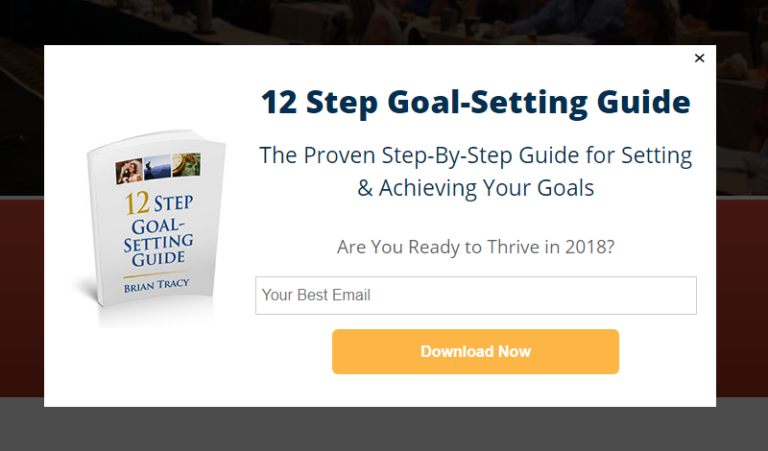
An exit intent popup is an opt-in form that pops up when your visitors try to leave your site. Your exit intent popup typically gives any abandoning visitors an offer in exchange for their email address. But if you want, you can also redirect them to a product with a discount code or even your most high-converting content.
In short: an exit intent popup is built to convert visitors who would have otherwise left without converting.
这是一个示例:
You can use exit intent popups to:
- Welcome new visitors
- Offer a discount coupon
- Point visitors to your best content
- Send visitors to your social media profiles
And more. You can even create popup contact forms. Popups are super flexible and as long as you’re creative, you can set up high-converting ones easily.
How to Create an Exit Intent Popup in WordPress
Now that you understand what an exit intent popup is and why you’d want to create one, how do you create one? We recommend using OptinMonster to create all your popups.
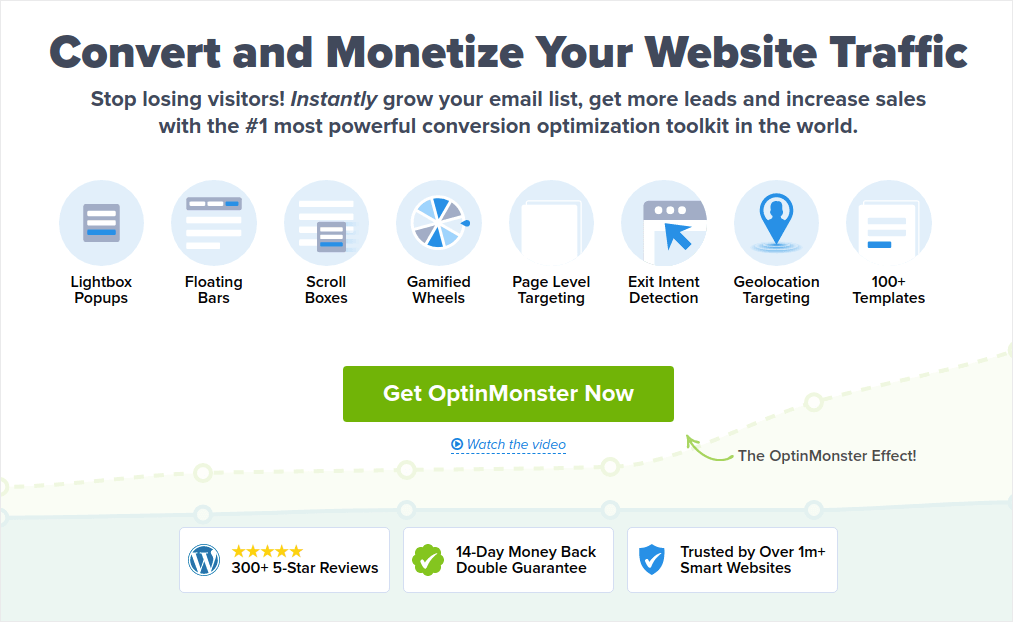
OptinMonster 是全球排名第一的转化工具包,我们自己也使用它。OptinMonster 可以非常轻松地创建强大的、能够带来转化的弹出窗口。而且您永远不需要编写任何代码。
OptinMonster 几乎拥有您开始、发展和扩展电子邮件潜在客户生成流程所需的一切。
以下是使用该工具包可以执行的操作的快速概述:
- 顺畅地增长您的电子邮件列表以进行再营销
- 将首次访问者转化为常规读者
- 降低购物车放弃率和浏览放弃率
- 创建带有实际倒计时器的限时优惠
- 增加电子书下载和数字产品销售
- 为直播活动创建漏斗
- 使用游戏化弹出窗口提高网站参与度
- 将您的流量重定向到能为您带来收入的页面和帖子
- 通过两步选择加入来创建真实的潜在客户列表并删除虚假电子邮件
我们经常使用 OptinMonster,甚至撰写了完整的 OptinMonster 评测。您可以查看一下,或者立即开始您的营销活动。您只需注册 OptinMonster 并按照本文其余部分的说明进行操作即可。
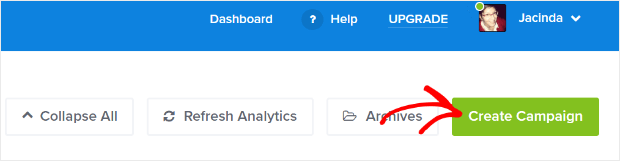
Step #1: Create a Campaign
前往您的 OptinMonster 仪表板,然后点击 创建 按钮:
选择 模板 选项,开始使用预设计的模板创建注册表单:
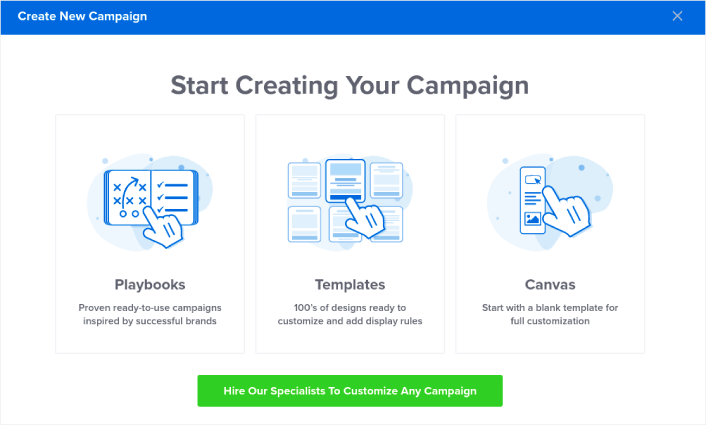
For this tutorial, we’re going to create a full screen popup. Select the Fullscreen to get started with full screen popup templates:
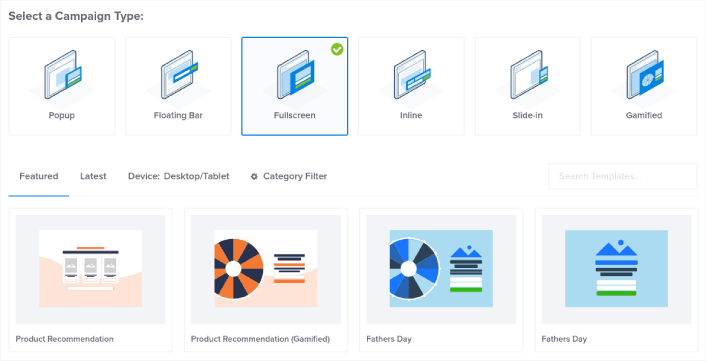
Then, choose a campaign template. You can choose whatever template you like, but we’re going with the Product Recommendation (Gamified) campaign template for this tutorial.
选择模板后,为您的营销活动命名。请记住,此营销活动名称仅供您自己参考,您很可能会创建大量具有不同定位选项的弹出窗口。因此,请为营销活动起一个有意义的名称,否则以后您会非常困惑。
Also, depending on your plan, you can also use OptinMonster on multiple sites. So, select the website where you want to display your campaign as well.
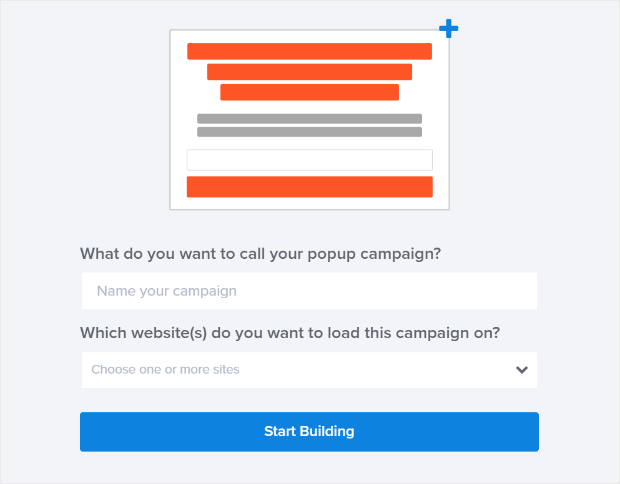
完成后,按开始构建。
Step #2: Edit Your Popup
With OptinMonster, you’ll get a visual drag and drop popup builder. Once you’re done creating your campaign, you’ll be able to edit even the tiniest details about your popup. Start by editing your popup headline:
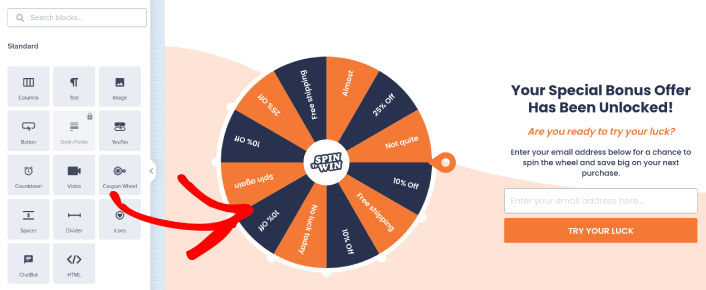
这里最神奇的部分是,您只需点击想要编辑的任何文本即可在线更改。无需填写表单或编辑弹出窗口中的任何 HTML 代码。
You can edit everything you want about your popup. When you’re happy with the optin’s appearance, you can move on to more advanced settings.
Step #3: Add a Click to Subscribe Button to Your Popup
推送通知可帮助您自动增加网站流量和参与度。如果您经营在线商店,PushEngage 还可以通过帮助您创建自动电子商务推送通知来帮助您增加销售额。
您可以免费开始使用,但如果您想认真发展业务,则应购买付费套餐。此外,在购买任何推送通知服务之前,您应该查看这篇关于 推送通知成本的指南。
PushEngage 提供以下功能,快速概览:
- 高转化率的自动化营销活动
- 多种定位和营销活动调度选项
- 目标跟踪和高级分析
- 智能 A/B 测试
- 专属客户成功经理
您会发现,如果您想为您的业务带来流量、参与度和销售额,PushEngage 绝对是最佳选择。而且,如果您预算有限,您总是可以 在推送通知方面发挥创意。
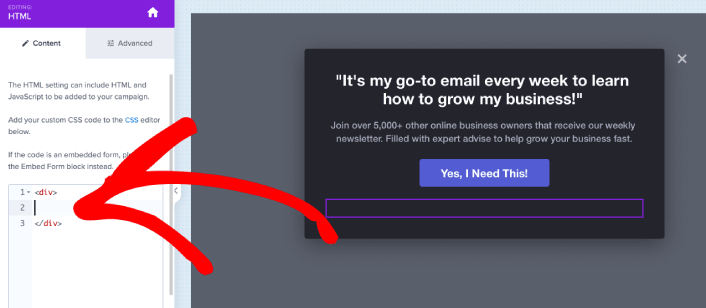
首先,从 OptinMonster 中的侧边栏将一个HTML块添加到您的弹出窗口。
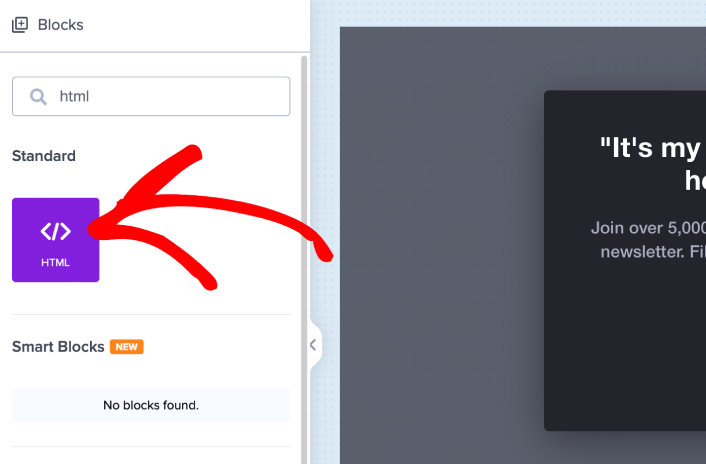
这是我们将添加代码以收集推送通知订阅者的地方。首先,粘贴以下代码以创建可点击按钮:
<button onclick="subscribeOnClickButton()" style="border: none; width: 100%; padding-left: 15%; padding-right:15%; text-align: center; display: inline-block; color: white;">Get Updates via Push Notifications</button>将代码粘贴到显示可以添加 HTML 的位置:
当然,您可以调整样式使其看起来更具吸引力。接下来,我们将使按钮在被点击时收集推送通知订阅者。
前往 PushEngage 主页,然后点击“开始使用”按钮:

然后,您可以选择免费计划来试用 PushEngage,或者如果您想认真发展您的业务,可以选择付费计划。付费计划提供更多的营销活动选项,并能够建立更大的订阅用户列表。
在您的 PushEngage 仪表板中,转到“网站设置”»“网站详细信息”,然后点击“单击此处获取设置说明”按钮。在“任何网站”下,您将获得安装代码:

警告:您需要复制从仪表板获取的代码。该代码对于每个 PushEngage 用户都是唯一的。您将无法复制图像中的代码并收集推送通知订阅者。
在您的 PushEngage 仪表板中获得代码后,复制第二个脚本并为其添加一些额外的代码。您的最终代码应如下所示:
<script src="https://clientcdn.pushengage.com/core/02a6e92667ae2279fcba8932356c1d93.js" async></script>
<script> window._peq = window._peq || [];
function subscribeOnClickButton(){
window._peq.push(['subscribe',{}.pe,function(res){
console.log(res);
}]);
}
</script>
将此代码添加到 OptinMonster 中的HTML块,紧跟在按钮代码之后,并放在<div></div>代码块之间,这样就完成了!
Step #4: Set Exit Intent Popup Display Rules
Display rules are meant to define when your campaign shows up on your site and who sees it.
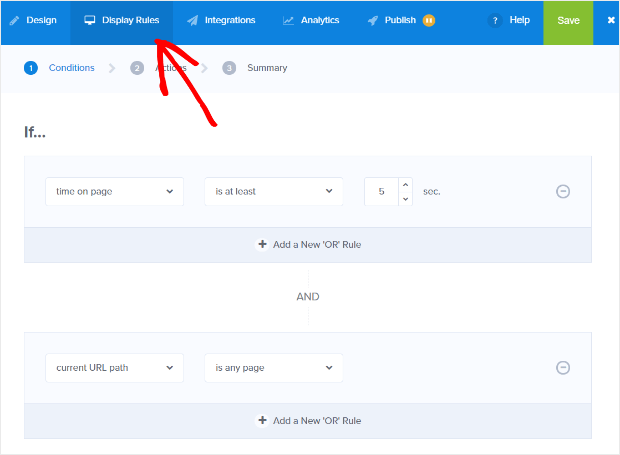
Our recommendation is that you set the popup to display if exit detected:
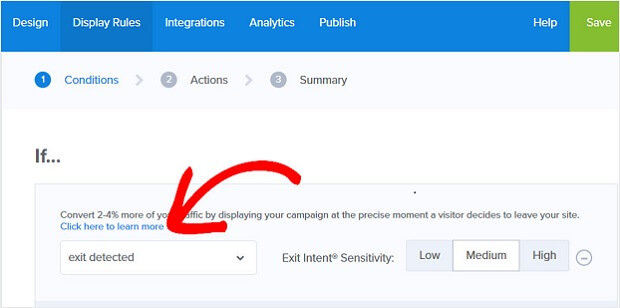
This creates an exit intent popup. Your popup doesn’t have to be a full screen popup to get triggered by exit intent. Simply by changing the display rules, you can convert any popup into an exit intent popup.
Click Next Step to choose the Action. Here, we recommend that you set Show the campaign view to Optin View, set the show with MonsterEffect to any entry animation you like, and play sound effect to any sound effect for your popup.
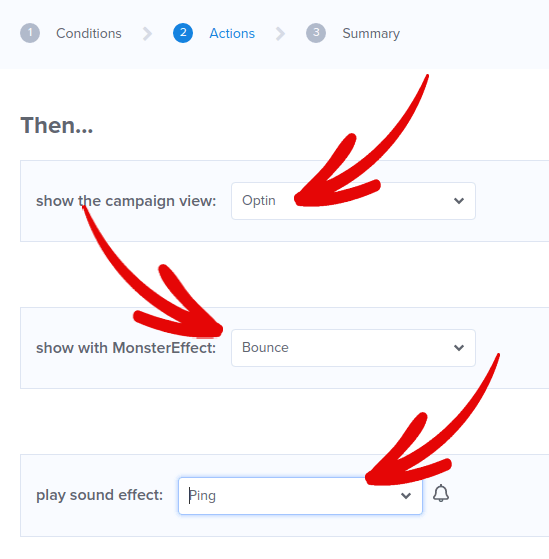
And then, click the Next Step button. You can see the full extent of your settings in the Summary tab.
Step #5: Setup Your Email Integration
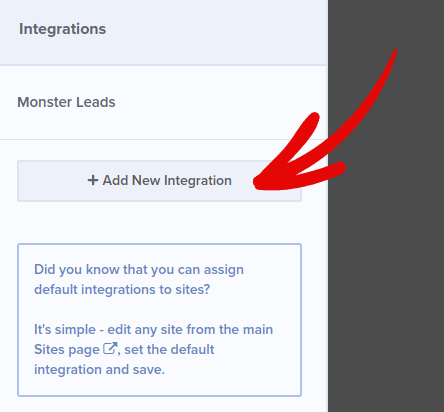
The next step is to set up your email integration. Click Add New Integration from the Integrations tab and select your email service provider:
We recommend using Drip for your email marketing if you don’t already have an email service provider.
Step #6: Publish Your Exit Intent Popup in WordPress
创建新广告系列时,它默认处于暂停状态。
转到顶部菜单的发布选项卡,查看发布选项。然后,将状态设置为发布并选择网站平台:
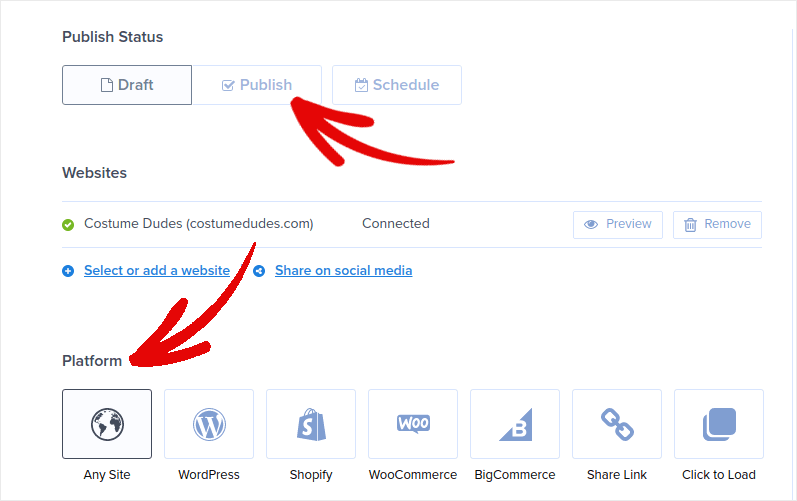
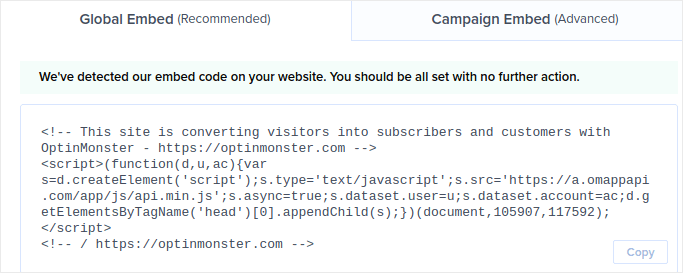
如果您运行的是 WordPress 网站,OptinMonster 插件会自动处理其余的设置。Shopify 和 BigCommerce 也是如此。对于任何其他网站,请点击任何网站并将嵌入代码粘贴到您网站的 head 中:
您就完成了!
What to do After Creating an Exit Intent Popup in WordPress
好了,各位,本次分享就到这里!
Let us know if this article helped. Creating popups on your site can help you convert your traffic into email subscribers and genuine business leads. And we highly recommend that you start creating exit intent popups right away.
如果您正在寻找一种经济高效的方式来增加流量,我们建议使用推送通知。推送通知可以帮助您带来更多重复流量和网站互动。您还可以创建自动推送通知广告系列来产生销售。
不信?查看这些资源:
我们建议使用 PushEngage 来创建您的推送通知广告系列。PushEngage 是全球排名第一的推送通知软件。所以,如果您还没有,请立即开始使用 PushEngage!


