Looking for a guide on how to send automated notifications?
Automated notifications are single web push notifications or a series of push notifications that keep working in the background. Unlike push notification broadcasts, they work without any manual action on your part. You can simply set them up once and they’ll keep working forever.
But what notifications should you send? How do you know if they’ll work for your business? And how do you get started?
In this article, we’ll show you how to use simple, actionable tricks to bring in traffic and sales on autopilot.
Sounds good? Let’s just dive right in.
Broadcast vs. Triggered vs. Automated Notifications
Broadcasts are push notifications that you send out as a single notification. You can schedule them, but they will only fire off once. Triggered campaigns involve setting up a push notification, defining a trigger to set it off, and a workflow to control its scheduling. Automated notifications are a series of notifications that set off automatically at specific or when specific conditions are met.
For all intents and purposes, they look the same from the outside. The critical difference is that trigger campaigns are way more flexible and customizable. If you consider that push notifications cost way less than most other channels, then triggered campaigns are the way to go.
However, most triggered campaigns need some experience with development. You’d need to use an API to make the best use of triggered notifications. If you’re curious, check our article on eCommerce push notifications for a better idea.
What Service Should You Use to Send Automated Notifications?
Let’s start things off by saying that most of the “free push notification services” out there are actually free trials. Some of the providers we’ve listed here are trial software, while others have a forever-free plan that you can opt for.
There are some other freemium options such as Firebase Cloud Messaging (FCM), but that’s not really a good option at all. You can read more about why FCM can’t compete with a service provider like PushEngage. But for now, just take our word for it and jump into the better options.
我们推荐使用PushEngage。

PushEngage 是世界上最好的推送通知服务。我们不仅仅是指免费版本。它允许您通过定向推送消息在访问者离开您的网站后与他们建立联系。
为什么?因为它……
- 对初学者和高级用户来说都超级容易设置;
- 在HTTP和HTTPS网站上都有效;
- 拥有大量您可以使用的 自动推送通知营销活动(付费版本);
- 提供大量选项以发送个性化推送通知(在付费版本中);
- 配备了目标跟踪和高级分析功能(在付费版本中);
And this is barely scratching the surface. Check out PushEngage’s full list of features before you go any further.
但PushEngage最吸引人的地方在于,您可以从一个永久免费的计划开始。而且您可以使用它通过多种自定义选项来发展您的业务。
The free version allows up to 200 subscribers and 30 lifetime notifications. That’s good enough to get your business to a point where you can easily afford the paid plans that start at $9/month for 100,000 subscribers.
And don’t worry if you know absolutely nothing about coding. You can install PushEngage using one of the many installation guides for any website and CMS.
How to Send Automated Notifications
Now that you know what automated notifications are and what service you need to send them, it’s time to check out how to send different notifications. For practical purposes, we aren’t talking about custom triggered campaigns you can create using an API service here. If you’re more interested in custom notifications, you should check out our documentation.
#1. 自动欢迎推送通知
欢迎通知是一条简单的推送通知,旨在感谢任何新订阅者。
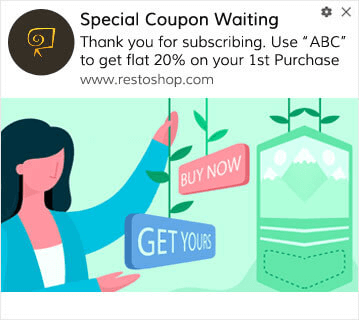
You can also an offer or gift for subscribing to your push notifications. This is pretty common with a lot of our customers. You can use your welcome push notifications to:
- 分享欢迎优惠券
- 提供高级功能
- 发送免费送货
- 提供免费礼品
- 通过演练引导您的订阅者
现在,让我们使用 PushEngage 设置您的第一个欢迎推送通知。
以下是如何在PushEngage中启用欢迎通知。 前往PushEngage仪表板,然后转到Campaign » Drip Autoresponders,然后点击Create New Drip Autoresponder:

然后,为您的广告系列命名(我们建议使用类似“欢迎滴灌”的名称),然后在内容下,选择显示“用户订阅后立即发送通知”的选项):

此时,您可以单击通知旁边的箭头来编辑通知的内容。如果您拥有PushEngage的高级或企业版套餐,您将能够添加多个通知来创建一系列自动欢迎消息。只需点击Add New Notification并编辑内容。
完成后,点击邮件序列设置并选择将您的欢迎广告系列发送给所有订阅者的选项:

然后,向下滚动以设置您自己的 UTM 参数以跟踪推送通知:

完成后,滚动回顶部并点击激活自动回复器按钮:

Now you know why welcome push notification is important. You also know how to set it up. Go ahead and activate welcome push notifications to re-engage new subscribers or check out this article on website welcome messages for inspiration.
#2. Abandoned Cart Campaigns
购物车放弃是指潜在客户将产品添加到购物车但未完成结账过程。
您的工作是尽可能减少购物车放弃。
挽回损失销售额的一种方法是使用购物车放弃推送通知广告系列。购物车放弃恢复广告系列会定位有废弃购物车的订阅者,并向他们发送后续消息、提醒、优惠、优惠券和折扣。

这是一个简单的想法:让尽可能多的人购买东西。
购物车放弃推送通知对您的最终利润有着非常实际的影响。例如,WickedWeasel 的购物车放弃推送活动每周可带来 2,000 至 4,000 美元的额外销售额。
现在,让我们来设置您的第一个购物车放弃活动。
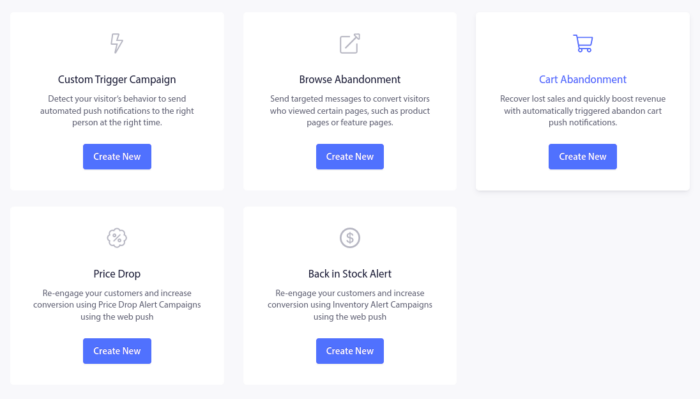
转到 PushEngage 仪表板,然后转到 **Campaign » Triggered Campaigns**,然后点击 **Create New Triggered Campaign**:

然后,选择 **Cart Abandonment** 模板,然后点击 **Create New**:
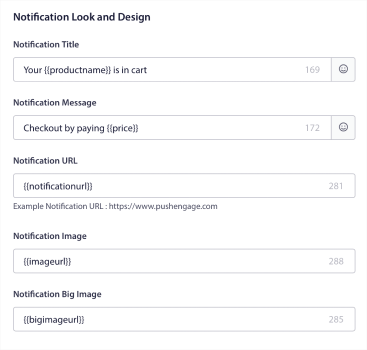
And you can start drafting an abandoned cart autoresponder. Under the Content tab, you can create a series of push notifications:
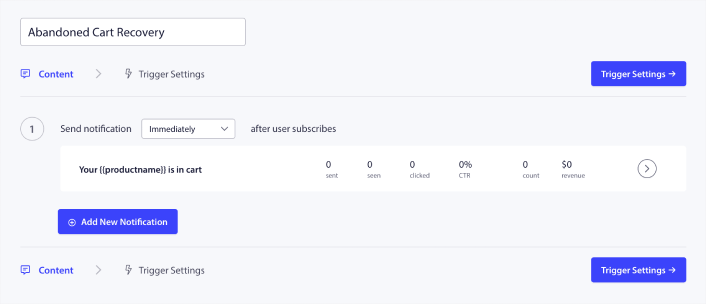
要编辑通知,只需点击旁边的箭头,即可自定义推送通知:
For a more tutorial, check out this article on how to set up abandoned cart push notifications.
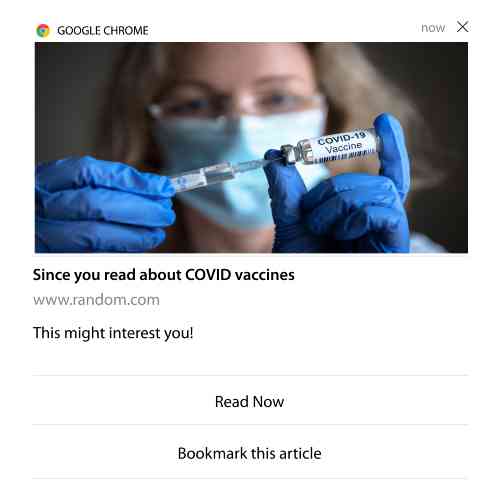
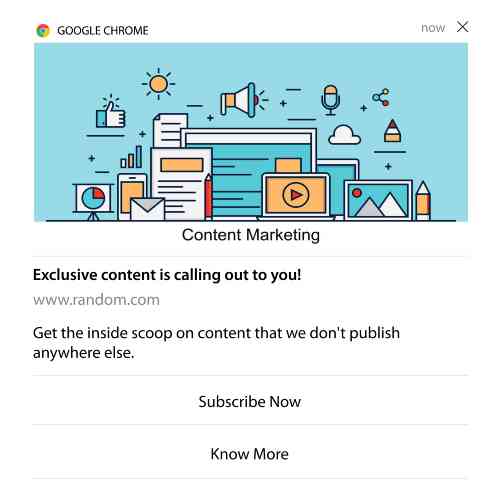
#3. Browse Abandonment Campaigns
浏览放弃顾名思义。当网站访问者浏览您的网站并突然离开时发生。其他供应商也将这些事件称为漏斗放弃。
浏览放弃几乎在所有行业中都非常普遍。
而且很难减少或控制,因为没有办法激励随机用户留在您的网站上。这就是浏览放弃活动如此强大的原因。
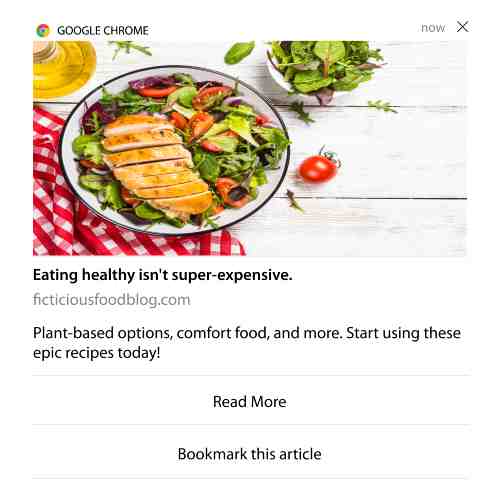
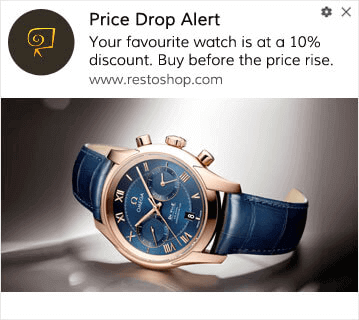
这是发布商的浏览放弃推送通知示例:
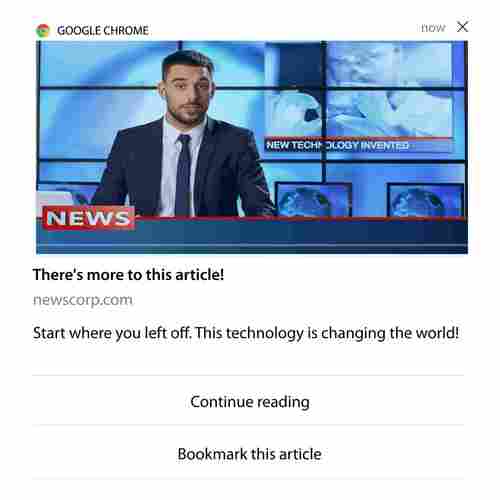
PushEngage 的出色之处在于,您可以为几乎任何行业设置活动。因此,您也可以为 SaaS 和旅游网站发送浏览放弃推送通知。
那么,如何设置浏览放弃活动?
对于购物车放弃,有一个非常明确的参数来触发您的推送通知。对于浏览放弃,您可能需要考虑以下参数:
- 将产品添加到心愿单
- 查看同一产品的次数超过 X 次
- 浏览同一类别中的产品超过 X 件
- 搜索网站上的特定产品
- 在跳出之前至少在网站上停留 X 分钟
对于电子商务网站,此活动背后的想法是让订阅者将产品添加到购物车。对于发布商来说,这可能是他们正在阅读的文章的点击或下载。
Head over to the PushEngage dashboard again and go to Campaign » Triggered Campaigns to create a new triggered campaign:

Then, create a new Browse Abandonment campaign by click on the Create New button:

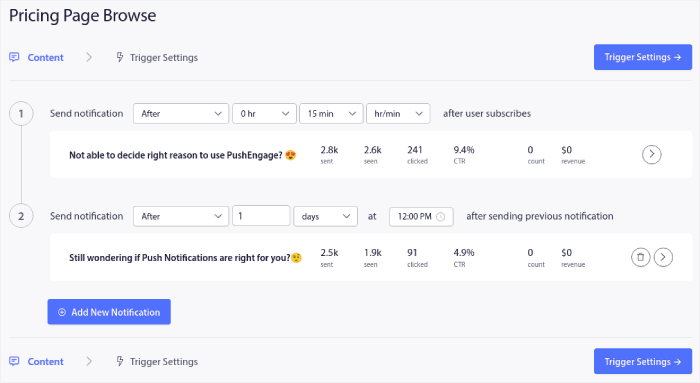
Next, you’ll be able to set up your entire sequence of push notifications along with a delay in between each notification:
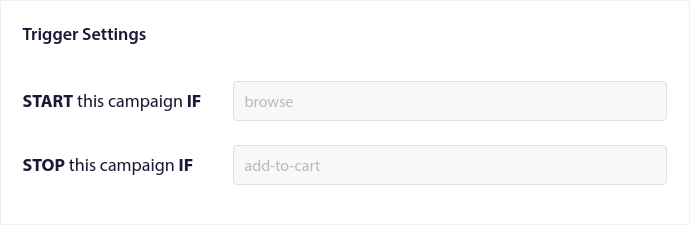
If you’re new to push notifications, you should check out our article on push notification best practices. When you’re happy with your push notification content, click on Trigger Settings. You’ll see that the conditions for a browse abandonment campaign have been pre-configured into the sequence.
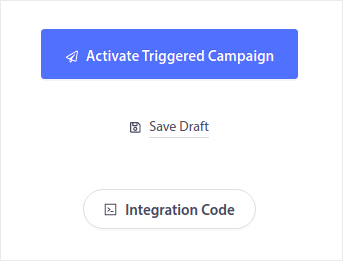
Click on the Integration Code button to get the code snippet you need to embed the browse abandonment campaign on your site.
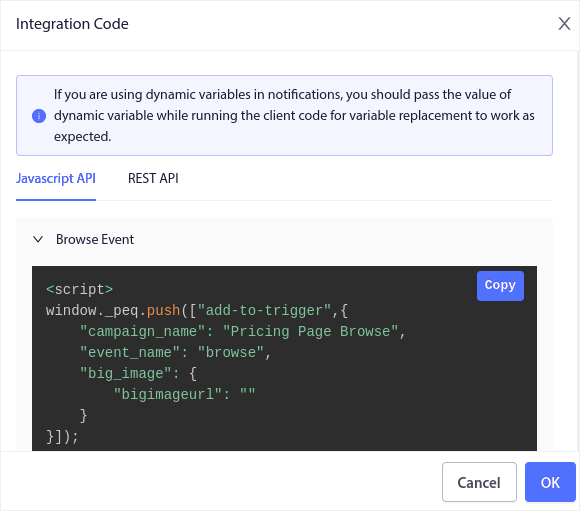
Then, copy the code and paste it into your site. You want to paste that code into the HTML <head> section of the page that you want to track. Finally, click on the Activate Triggered Campaign button:
您就完成了!
#4. RSS Feed Campaigns
RSS 自动推送允许您通过 RSS 自动发送通知。
PushEngage 每 10 分钟检查一次 RSS Feed 中是否添加了新帖子。如果找到新帖子,PushEngage 会将其转换为推送通知并发送给所有订阅者。最棒的是,这一切都是完全自动完成的。
RSS Feed 活动非常适合发布商和新闻网站:
如果您是大型发布商,并且发布帖子的频率高于每 30 分钟 1 篇,PushEngage 会在 2 个帖子通知之间保持 5 分钟的延迟。
在我们继续之前,您应该阅读这篇关于如何使用 RSS Feed 的文章,以获取更多精彩的技巧和窍门。
现在,让我们在 PushEngage 上设置一个 RSS Feed 广告系列。
Head over to Campaign » RSS Auto Push and just turn it on:
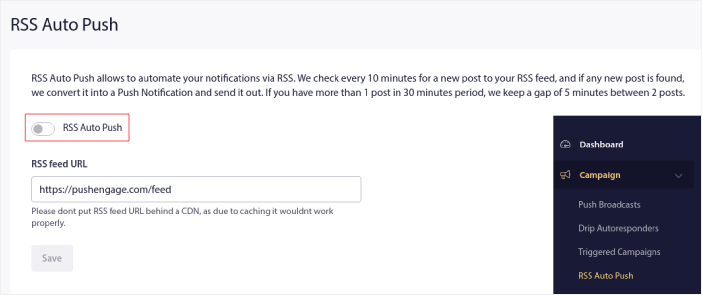
您需要粘贴您的 RSS Feed URL。对于 WordPress 网站,它通常的格式是:
Then, click on Verify RSS. And finally, click on Save.
就是这样!您已全部设置完毕。每次发布新帖子时,它都会自动发送给所有订阅者。
#5. Automated Re-engagement Notifications
您可以为一段时间未与您的内容互动的订阅者设置自动化的再互动广告系列。
但您为什么要这样做呢?
怎么样:
- 获取新客户的成本是留住现有客户的 5 倍
- 我们可以轻松地定位和再营销给一个我们已经了解其个人偏好的已知受众。
- 从长远来看,互动的客户为公司带来的业务比那些几乎不与您的品牌联系的人更多。
Ofertia 通过提供个性化优惠的推送通知,将其重复用户增加了 39%。他们不是唯一的例子。您可以有效地将此用于电子商务网站:
有很多重新吸引订阅者的方法。
但最有效的方法之一是使用细分。使用动态细分,您可以了解很多关于您的订阅者的情况,并向他们发送他们会喜欢个性化内容。
在您的 PushEngage 仪表板中,转到细分并创建一个新的细分:
This allows you to create segments based on behavior and browsing patterns. You can actually set up a sequence of AND/OR operations that decide when certain segments receive automated push notifications.
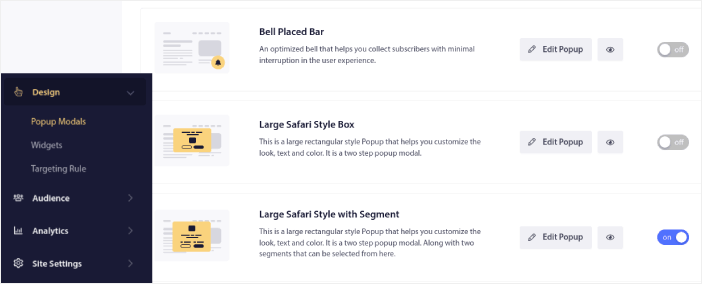
You can even segment your users when they subscribe to push notifications. Head over to Design » Popup Modals and select the Large Safari Style with Segment.
如果您需要更多细分用户的方法,可以使用PushEngage Javascript API 根据用户操作创建自定义细分。
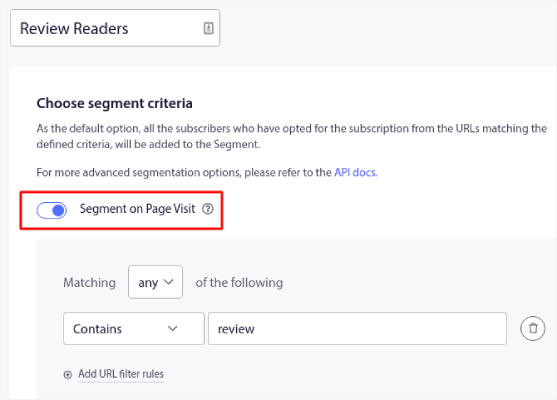
#6. Page Visit Trigger Campaigns
页面访问触发器是推送通知细分的扩展。您所要做的就是创建一个细分,当网站访问者浏览包含特定短语或模式的 URL 时。
Then, you just head over to Audience » Segments and set your audience to a specific segment:
这使您可以创建真正个性化和自动化的推送通知。
And the best part is that you can create custom segments in PushEngage in a couple of minutes.
#7. Automated Push Notifications from Click-Through
您无法使用 PushEngage 创建在订阅者点击已发送的通知时触发的推送通知。
但有一个非常巧妙的变通方法。
您可以根据特定通知指向的网址创建一个细分。每次有人访问此网址时,他们都会被添加到细分中,然后您可以使用此细分来发送有针对性的通知。
推送通知点击广告系列本质上是滴灌广告系列标准受众细分的延伸。
Check out this tutorial on how to create a click-to-subscribe button.
#8. Repeating Automated Push Notifications
想象一下,您有……
- 每周的跳蚤市场促销;
- 或周末促销;
- 或清仓促销;
- 或每月闪购。
为每次活动手动创建推送通知将是多么不方便?
幸运的是,您可以使用 PushEngage 设置重复通知。
重复通知是针对周期性事件安排的自动化推送通知。您可以一次设置它们,指定一个时间表,然后就完成了。
这只是 MyDeal 使用推送通知 的一种方式。请务必阅读完整的案例研究!
Head over to Campaign and add an automated notification in your PushEngage dashboard. Then, scroll down to the scheduling section and go to the Send/Schedule tab:
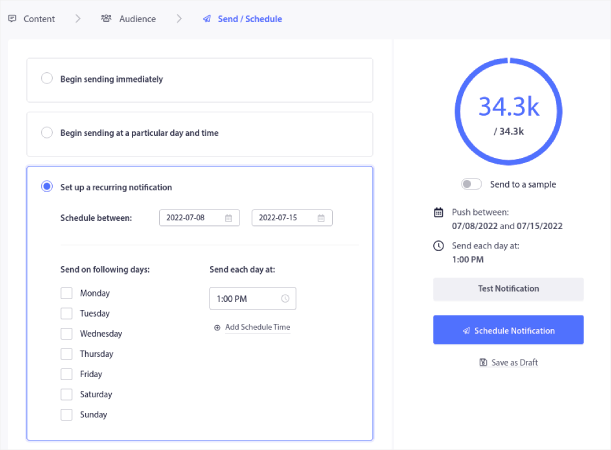
只需设置好时间即可!
#9. Subscriber Timezone Notifications
订阅者时区通知顾名思义。您会在订阅者的时区向他们发送自动推送通知。
这为什么如此重要?
订阅者时区通知的打开率更高。通常,即使您的订阅者离线,任何推送通知都会被发送。这些通知会堆积起来,当您的订阅者最终上线时就会被忽略。
另一方面,订阅者时区通知会在您知道订阅者最有可能在线时发送。
专业提示:使用 A/B 测试 来找出向订阅者发送推送通知的最佳时间。
订阅者时区通知感觉更加个性化。而且,如果您足够聪明,可以将它与地理位置数据结合起来,以进一步个性化您的通知。这正是 Phoot 在使用本地语言 来使其打开率飙升时所做的。
现在让我们在 PushEngage 中设置订阅者时区通知。
When you create a new notification, head to the scheduling options and click on the checkbox that says Send Notifications in Subscriber Timezone:
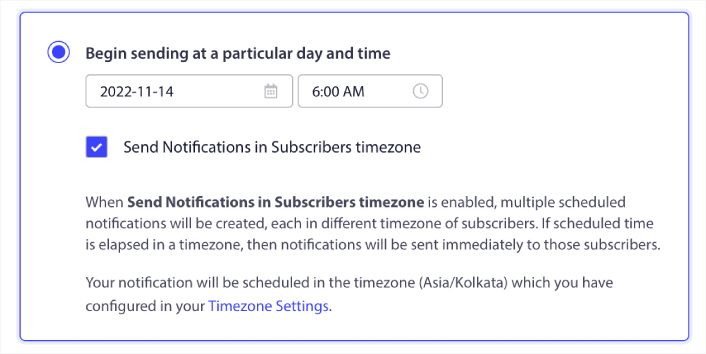
就这样!您也必须为您的滴灌广告系列执行相同的操作,但结果绝对值得为每个广告系列单击一个按钮的努力。
专业提示:最后两个策略都与安排推送通知有关。但这两种并不是安排自动推送通知的唯一方法。请查看我们的文章 如何安排推送通知 以获取更多精彩技巧。
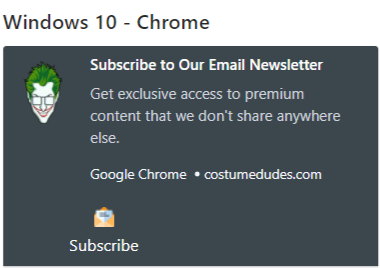
#10. Email Opt-In Notifications
电子邮件营销早已是获取和培养潜在客户的最佳方式。自动推送通知最棒的一点是,你可以利用它们来吸引更多电子邮件订阅者。
设置非常简单,并且结合使用电子邮件和推送通知比单独使用其中一种要有效得多。
你所要做的就是发送一个触发通知,要求用户选择接收电子邮件通知。
只需创建一个自定义号召性用语 (CTA) 按钮,并将订阅链接插入为按钮的 URL。这真的就是你所需要的一切。如果你不确定如何获取订阅按钮,请继续操作。
In any notification, you can scroll down and turn on Multi-action buttons:
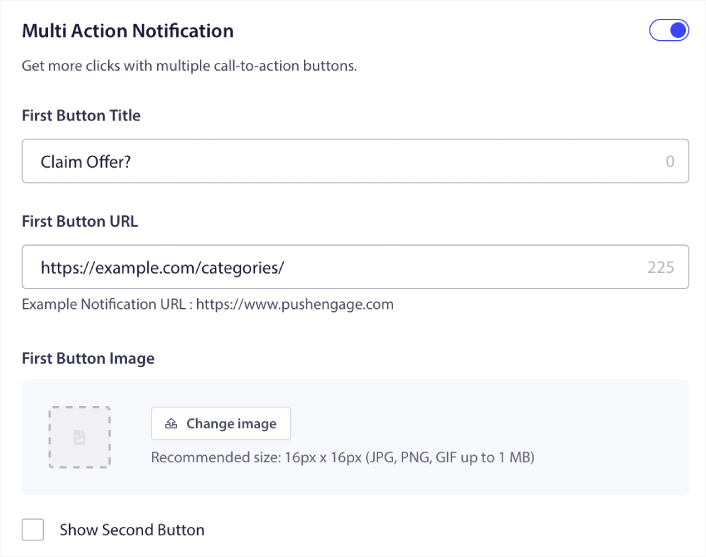
URL 应为电子邮件注册表单的链接。你可以使用几乎任何电子邮件服务提供商(如 Drip)创建一个。只需点击注册表单的共享选项并复制该 URL。然后,将其粘贴到推送通知的按钮 URL 中。
Check out our tutorial on multi-action buttons for more details. You can even add an email icon to your button to make it super-clear that you’re asking your users to subscribe to your email notifications:
专业提示: 你可以使用相同的想法来发展你的 YouTube 频道。只需在你的频道 URL 末尾添加“?sub_confirmation=1”,然后将其粘贴到你的推送通知按钮 URL 中。
每次有人点击推送通知上的订阅按钮时,他们都会被重定向到你的 YouTube 频道并收到订阅提示。
What to do After You Set Up Automated Notifications
Automated notifications don’t guarantee success. As with any marketing tool, you need to test and improve your messaging and your segments. Unfortunately, you can’t A/B test automated notifications directly. But these resources will help you get on the fast track:
- 如何将Web通知WordPress插件安装到您的网站
- 如何进行推送通知 A/B 测试(最佳实践)
- 7 个推送通知最佳实践,立即获取流量
- 21 Best eCommerce WordPress Plugins in 2022 (Free and Paid)
- 7 Best WordPress News Plugins in 2022 (Compared)
此外,PushEngage 还提供了相当多的 集成。你甚至可以使用 Zapier 设置一些自定义触发器。这些是相当高级的广告系列,我们建议在你熟悉我们其他内置自动化功能后,再进行设置。
你还应该知道 PushEngage Javascript API 非常灵活,你可以为网站上的几乎任何操作设置自定义触发器。
一旦你阅读了所有这些资源,你就会意识到 PushEngage 是市场上排名第一的推送通知软件。
所以,如果你还没有开始,请 立即开始使用 PushEngage!


