
Looking for a tutorial to create a WordPress multi-step form?
A multi-step form splits up large forms into smaller parts. Multi-step forms reduce the clutter and make it simpler for your visitors to sign up. It’s a great way to increase conversions and improve the overall user experience.
But creating one from scratch is really tiring and if you have to hire a developer to create one, it’s going to be expensive as well.
In this article, we’re going to show you how to create a WordPress multi-step form the easy way without coding.
Hadi başlayalım.
Step 1: Create a New Form With WPForms
Yapmanız gereken ilk şey WPForms'u kurmak ve etkinleştirmektir.

WPForms, dünyanın 1 numaralı WordPress form oluşturucu eklentisidir. WPForms'u nasıl kuracağınızdan emin değilseniz, WordPress'e eklenti nasıl kurulur hakkındaki bu adım adım kılavuza göz atmalısınız.
Ardından, WPForms kontrol panelinize gidin ve eklentinizi almak için İndirilenler bölümüne gidin:
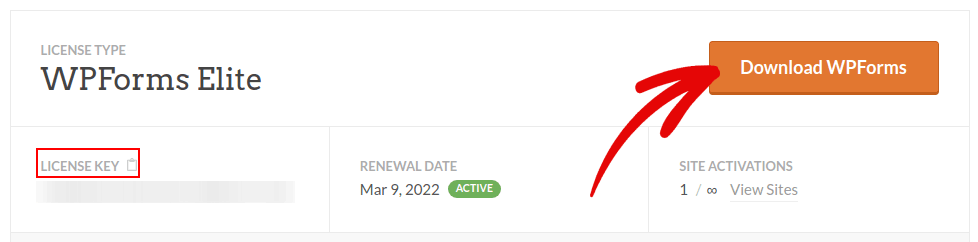
Ardından, eklentiyi sitenize kurun ve etkinleştirin. Lisans anahtarınızı aynı sekmeden kopyalayın.
Son olarak, WordPress kontrol panelinize gidin ve WPForms » Ayarlar bölümüne gidin ve Lisans Anahtarınızı buraya yapıştırın:
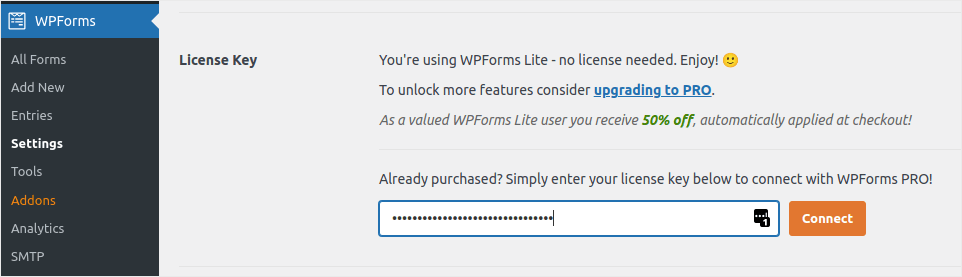
İşiniz bittiğinde Bağlan'a tıklayın.
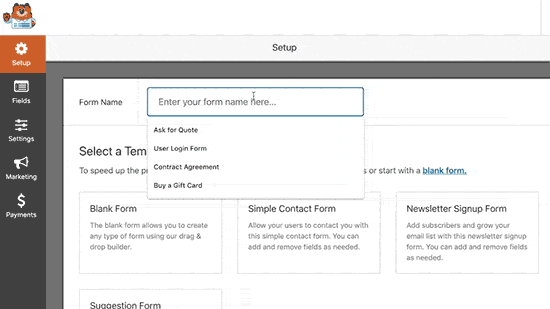
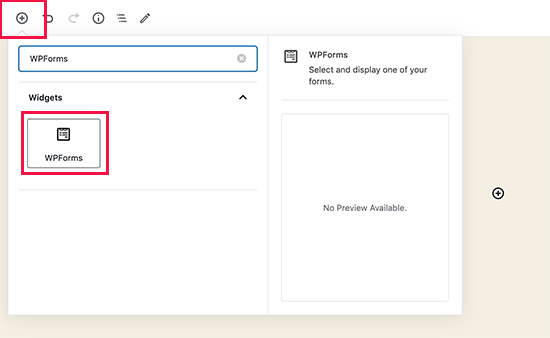
WPForms yüklendi ve etkinleştirildiğine göre, ilk formunuzu oluşturma zamanı. WPForms » Yeni Ekle bölümüne gidin:

Bu, WPForms sürükle ve bırak form oluşturucusunu açacaktır.
Yeni bir form oluşturmak için ona bir ad verin ve form şablonunuzu seçin:
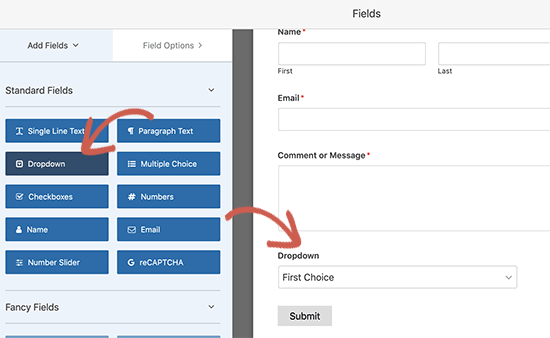
Ve hepsi bu kadar! İletişim formunuzdaki alanları eklemek veya düzenlemek istiyorsanız, bunu kenar çubuğundan yapabilirsiniz. Yeni alanlar eklemek için form alanlarını sürükleyip bırakın ve bunları düzenlemek için mevcut alanlara tıklayın:
İşiniz bittiğinde, Kaydet'e basın.
Step 2: Insert the Page Break Field Into Your Form
Splitting your form into multiple pages is very simple and easy with WPForms.
Once you’ve added and customized all the form fields on your form, you need to add the Page Break form field to your site to split it into different pages.
To do this, drag the Page Break form field, found under Fancy Fields, from the left-hand panel to the right-hand panel.
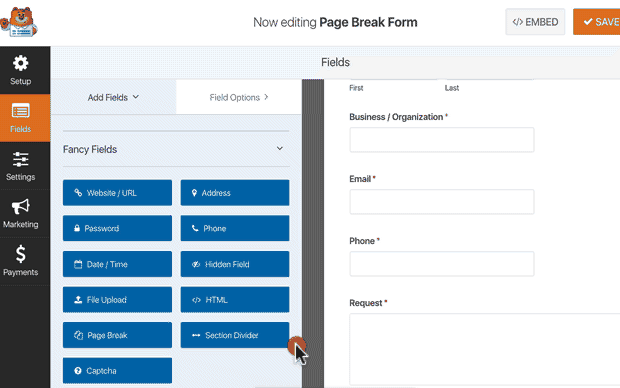
Place the field where you want the form to split. If you want multiple breaks, just use multiple page break modules.
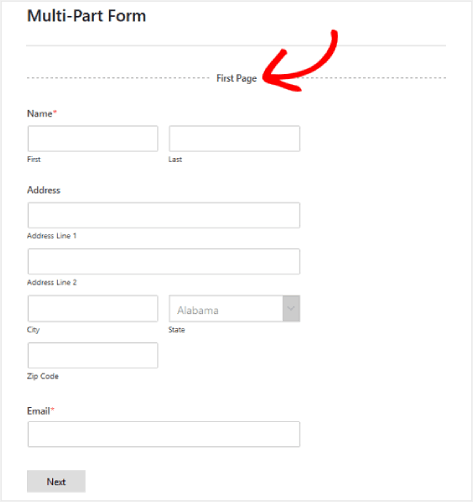
Step 3: Customize the Multi-Page Form Progress Bar
Most of your work in designing the form is done at this point. But for any multi-page form, we recommend using a progress bar to let your visitors know how far along they are in the signup process. You can go above and beyond to give your pages titles as well.
To customize the progress bar and page title of the first page of your multi-step form, click on the First Page break section.
In the sidebar, you can set the type of progress indicator as either Circles or Connectors. You can also set the title for the page.
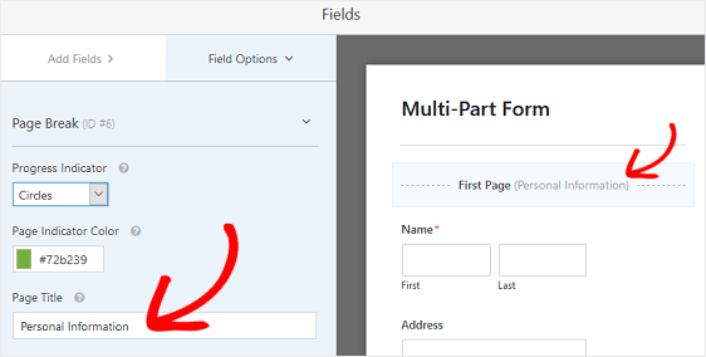
The epic thing is that you can also set a custom Page Indicator Color. When you’re happy, you can also customize the other page breaks in the exact same way.
You can also toggle on the feature that lets you show site visitors a Previous page button. This way they can return to the previous page of your form if they need to.
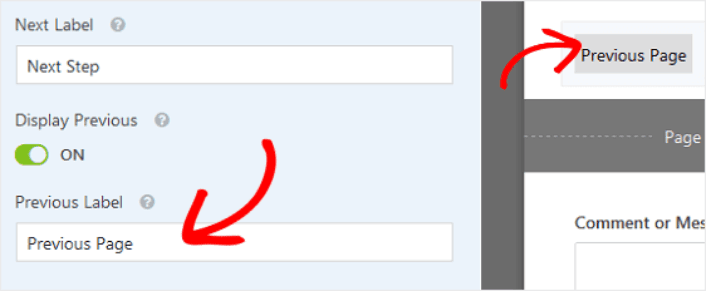
When you’re done, just hit the Save button.
Step 4: Configure Your Multi-Step Form Settings
Ardından, bildirimleri ve onayları ayarlamak isteyeceksiniz.
Bildirimler, biri formu doldurduğunda aldığınız e-postalardır. Onaylar, kullanıcıyı formu başarıyla doldurdukları konusunda uyarmak içindir. Genellikle bu bir "Teşekkürler" mesajıdır, ancak kullanıcılarınızı özel bir sayfaya da yönlendirebilirsiniz.
Onay ayarlarını yapılandırmak için Ayarlar » Onaylar bölümüne gidin:

Ardından, aynı menüde bildirim iletilerinizi yapılandırmak için Bildirimler'e gidin:

Varsayılan olarak, bildirimler WordPress yönetici e-postasına gönderilir. Bu nedenle, e-postaların Satış Direktörünüzün e-posta kimliği gibi başka bir yere gönderilmesini istiyorsanız, bunu buradan yapabilirsiniz.
Step 5: Add Your Multi-Step Form to Your WordPress Website
Bu noktada WordPress iletişim formunuzu yapılandırmayı bitirdiniz. Öyleyse, devam edip bir sayfaya ekleyelim. Bir WPForms iletişim formunu WordPress sitenize eklemenin 3 temel yöntemi vardır. Her birine göz atacağız.
Yöntem #1: Formu Blok Düzenleyiciyi Kullanarak Ekleyin
İletişim formunuzu eklemek istediğiniz sayfaya gidin ve yeni bir WPForms bloğu ekleyin:
Ardından, açılır menüyü kullanarak yeni oluşturduğunuz formu seçin:
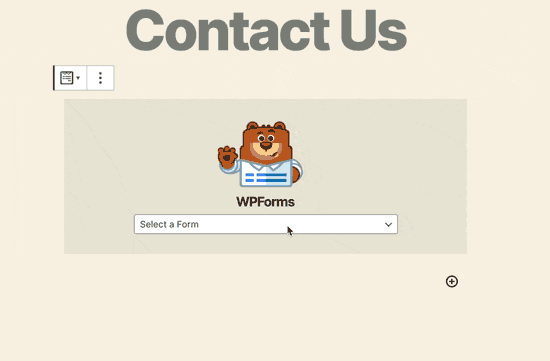
Ve iletişim formunuzun otomatik olarak sayfanıza eklendiğini görmelisiniz.
WordPress formunuzu çalışırken görmek için Kaydet ve Yayınla'ya basın.
Yöntem #2: İletişim Formunuzu WPForms Kısa Kodlarını Kullanarak Ekleyin
WPForms ayrıca her WordPress iletişim formu için bir kısa kod oluşturur. Kısa kodu şu adresten kopyalayabilirsiniz: WPForms » Tüm Formlar:
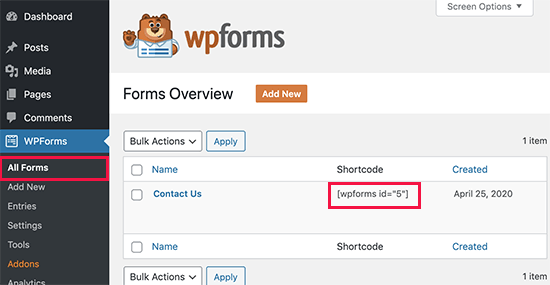
And then, paste the shortcode into any post or page you want. It’s that simple.
Kısa kodlara yeniyseniz, WordPress sitelerine kısa kod nasıl eklenir hakkındaki bu makaleye göz atmalısınız.
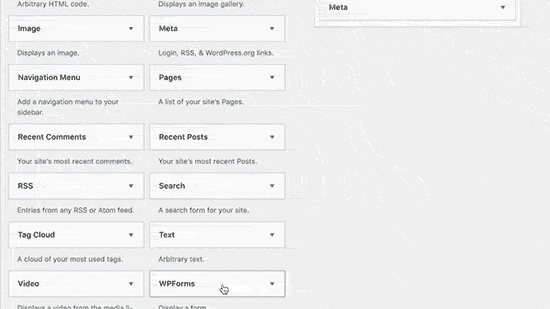
Method #3: Add Your Contact Form to the Sidebars
Kenar çubuğu, çoğu WordPress sitesindeki en az kullanılan özelliklerden biridir. İletişim formunu sitenizin kenar çubuklarına eklemenizi şiddetle tavsiye ederiz. WordPress kontrol panelinizde Görünüm » Widget'lar'a gidin ve WPForms widget'ını kenar çubuğunuza ekleyin:
Ve işte bu kadar!
How to Promote Your WordPress Multi-Step Form
Bu kadar, millet!
By now, you’ve created a WordPress multi-step form. Next, you should set up form abandonment tracking to reduce your form abandonment rates.
After that, all that’s left is generating traffic to your site so that your contact forms can get to work. A simple way to do that is to start using push notifications. Sending push notifications is a great way to generate repeat traffic for your site. If that’s something you’re interested in, you should check out these articles as well:
- Anlık Bildirim Maliyeti: Gerçekten Ücretsiz mi? (Fiyat Analizi)
- WordPress Blogunuza Nasıl Daha Fazla Trafik Çekilir (9 Kolay Yol)
- Web Anlık Bildirim Opt-In Oranınızı Nasıl Artırırsınız (7 Yol)
- Sitenize Bir Web Bildirimleri WordPress Eklentisi Nasıl Eklenir
Anlık bildirimlerinizi göndermek için PushEngage kullanmanızı öneririz. PushEngage, dünyada 1 numaralı anlık bildirim yazılımıdır. Bu nedenle, henüz yapmadıysanız, bugün PushEngage ile başlayın.


