
Looking for a resource on how to sell online yoga classes?
Doğru platformu seçmek, e-ticaret sitenizi oluşturmak, satılacak ürünler yaratmak ve fiyatlandırma modeliniz üzerinde çalışmak gibi pek çok şeyi zaten geride bıraktınız. Ancak o zaman dijital ürünleri çevrimiçi satmanın ne kadar çok farklı yolu olduğunu fark edersiniz.
WordPress'te dijital indirmeleri satmanıza yardımcı olan bir sürü eklenti var.
Peki, satmaya başlamak için doğru eklentiyi nasıl seçeceksiniz? Eklenti ücretsiz mi? İhtiyacınız olan tüm özelliklere sahip misiniz yoksa gerçekten satmaya başlamak için daha sonra başka eklentiler satın almak zorunda mı kalacaksınız?
En kafa karıştırıcı kısım şu ki...
Baktığınız eklenti dijital indirmeler için mi? Yoksa çoğunlukla fiziksel ürün satmak için tasarlanmış genel bir mağaza eklentisi mi ve ihtiyacınız olmayan bir ton gereksiz ayarla mı uğraşmak zorunda kalacaksınız?
Don’t worry. In this article, we’re going to show you step by step how to make money selling documents on WordPress. The best part? You can complete the setup in 10 minutes or less!
Hadi başlayalım.
How to Sell Online Yoga Classes from Scratch
Now that we understand why you should sell yoga classes online, it’s time to show you how to get started. Don’t worry if you’ve never done this before. This article is meant for complete beginners. All you have to do is follow along.
- Step #1: How to Set Up Your Hosting Server
- Step #2: How to Install WordPress on Your Server
- Step #3: How to Create a Website Theme
- Step #4: Setting Up Easy Digital Downloads
- Step #5: How to Sell Online Yoga Classes as Digital Products
- Step #6: How to Customize Your Website
- Step #7: How to Integrate Your Email Marketing Service with Your Site
- Step #8: Add a Click to Subscribe Button to Your Landing Page
- Step #9: How to Publish Your Site
- How to Sell Online Yoga Classes Even Faster
Başlayalım.
Step #1: How to Set Up Your Hosting Server
Before you create a website, you need to get:
- A domain name
- Web hosting
- An SSL certificate
You might run into videos and articles online that talk about building a free website. Believe us when we say it, there’s no such thing as a truly free website. Most free hosting sites offer extremely bad hosting, no technical support, and slap their branding on your website.
If you’re testing themes for web development or looking to experiment with a web page and its design, that’s fine. But for any self-respecting business owner, “free websites” are a horrible way to go.
Select a Hosting Service
Most modern hosting services will offer a custom domain name, web hosting, and an SSL certificate. But we recommend using one of these three hosting providers to start building:
All three hosting services are completely optimized for WordPress. And you get a free domain name and SSL certificate when you buy website hosting. For this article, we will show you how to get started using Bluehost. But it’s a somewhat similar process for our other recommended hosting services.
NOTE: These are all paid hosting services. You can create a website for free using free hosting. But if you’re serious about building a business, we recommend using hosting services that take your business seriously.
Sign Up for WordPress Hosting
Head over to Bluehost and click on Get Started:
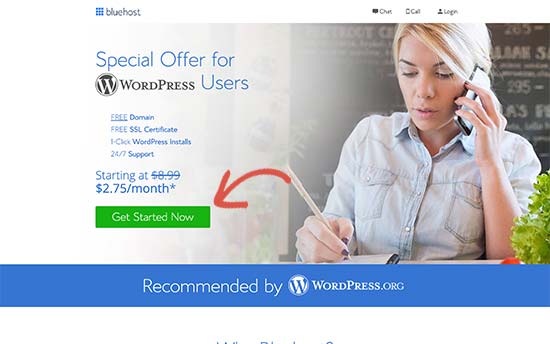
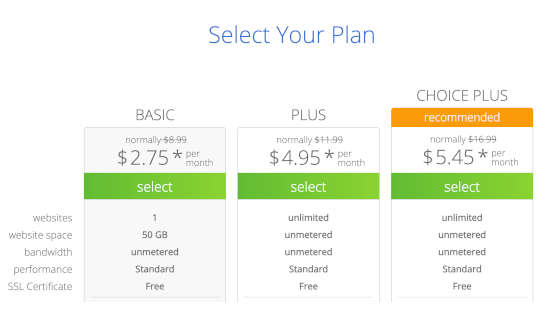
Then, choose your hosting plan on the next screen. We recommend getting the Plus plan if you’re looking to scale the business. But if you’re just looking to get started, even the Basic plan should be fine for you.
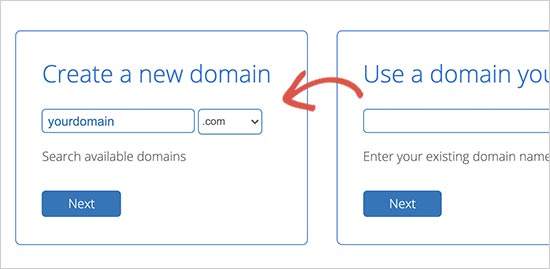
After that, you’ll choose the domain name for your website.
Finally, Bluehost will confirm your order and try to upsell you some added services such as Domain Privacy Protection. It’s entirely up to you whether you want to get this extra stuff. We don’t recommend it for small businesses, but if you think that the upsells are worth it, go ahead and add them to your cart.

After that, you complete the checkout process.
Step #2: How to Install WordPress on Your Server
Once you’re done with the checkout, Bluehost will send you an email to log in to your cPanel account. The cPanel is your web hosting control panel. From there, you can manage your email inboxes and FTP accounts, get support from Bluehost, and more.
When you log in to cPanel, you’ll see that Bluehost has already installed WordPress for you. WordPress is a website builder and content management system (CMS) to create and publish content on your website. It’s open-source software that anyone can use to make any kind of website imaginable.
Why Choose WordPress?
It started out as a blogging platform in 2003 but soon transformed into a CMS and later a full-fledged website building platform. Today it powers more than 38% of all websites on the internet.
If you want to build an eCommerce website, then you have a choice between Wix, Shopify, Squarespace and WooCommerce. These are the most popular apps to create a new website for an online store.
We recommend using WooCommerce over other platforms as it’s the leading eCommerce website software in the world and unlike most other services, it’s free. The cool part is that WooCommerce acts like a WordPress plugin and is based on WordPress. So, even if you want to build an eCommerce store, we recommend getting started with WordPress.
Log In to Your WordPress Site
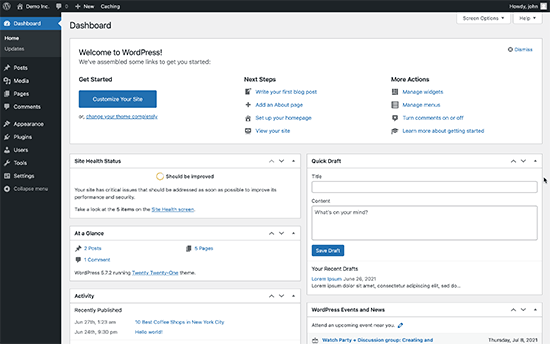
To get into your WordPress dashboard, all you have to do is click on the Log in to WordPress button:

Your WordPress dashboard will look something like this:
NOTE: The WordPress installation process is different for different hosting services. You may have to manually install WordPress if you’re not using Bluehost, depending on your hosting service. Mostly, you’ll need to locate a software installer inside your cPanel called Softaculous. Softaculous is a setup wizard that will help you install WordPress on your server.
Configure Your WordPress Settings
When you first log in to your WordPress dashboard, you’ll want to take care of a few small details before launching your product.
Head over to Settings » General to set the website title and description tags:
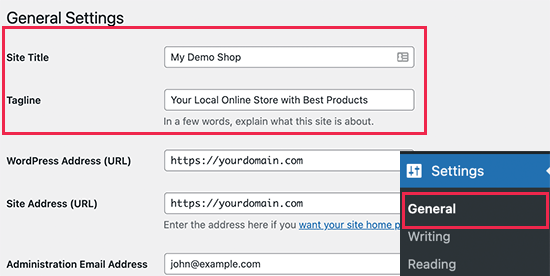
Then, change your WordPress Address and Site Address to their HTTPS versions to use SSL on your site:
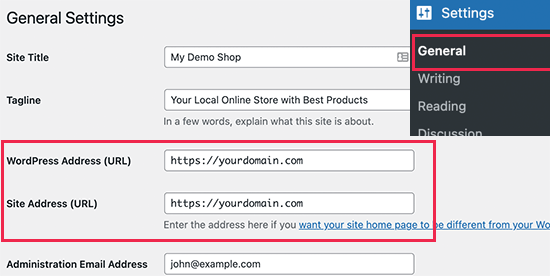
When you’re done, hit the Save Changes button at the bottom.
Step #3: How to Create a Website Theme
Before you can dive into building a lead generating machine, you need to design your website. The traditional way is to hire a designer to design a website with an amazing user experience for you.
But you can skip this step altogether and use a WordPress theme instead. Most WordPress themes come with design templates that you can use straight away and customize according to your need.
What is a Theme?
A WordPress theme allows you to create pages and posts on your site with zero coding. WordPress themes are template files written in PHP, HTML, CSS, and JavaScript. Each file works together to create the design and functionality of your WordPress site.
A typical WordPress theme will include some, if not all, of the following theme files:
- footer.php
- header.php
- index.php
- page.php
- sidebar.php
- archive.php
WordPress themes also include a functions.php file and style.css file.
If you’re not sure what any of this means, don’t worry. You don’t need to be a coding expert to install and use a WordPress theme.
Selecting a WordPress Theme
There are tons of free and paid WordPress themes that can help you create a website easily. We recommend using a theme builder such as SeedProd.

SeedProd is the #1 drag-and-drop WordPress website builder.
You get a drag-and-drop landing page builder that’s packed with options to build product sites and landing pages. Unlike WordPress website builders, you can customize every inch of your landing page including navigation menus, footers, fonts, and styles. SeedProd also works with any WordPress theme and creates mobile-friendly landing pages.
With SeedProd, you get pre-built website templates for high-converting landing pages that you can publish instantly. This includes templates for:
- Satış sayfaları
- Yakında gelecek sayfalar
- 404 sayfaları
- SSS sayfaları
- Bakım sayfaları
- Uygulama açılış sayfaları
- Giriş sayfaları
- Teşekkür sayfaları
- Web semineri sayfaları
- Video sayfaları
And lots more! You can even create your own theme using the SeedProd Theme Builder. The best part is that any website you build with SeedProd looks just as good on a mobile device. Check out the full list of features in our SeedProd review.
Install and Activate SeedProd
Go ahead and install and activate the SeedProd plugin.

If you’re not sure how to do that, check out this article on how to install a WordPress plugin.
Create a WordPress Theme Without Coding
Then, in your WordPress dashboard, head over to SeedProd » Theme Builder:
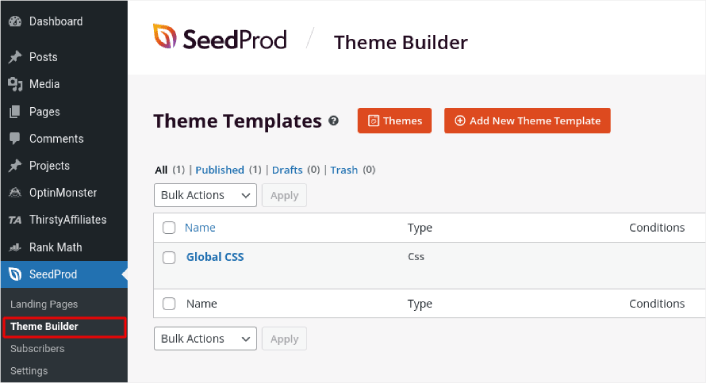
This is where you can create all the individual parts that make up your theme, including:
- Header
- Altbilgi
- Single Post
- Single Page
- Archive (Blog Page)
- Home Page
- Sidebar
You can create each of these theme parts individually by clicking the Add New Theme Template button. And then, you can edit each of these elements using a drag-and-drop visual builder.
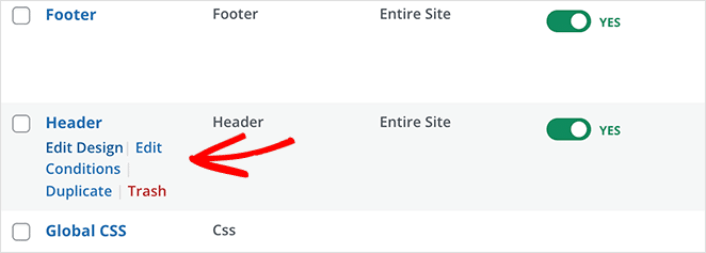
Or, you can use one of the many fully designed themes in SeedProd by clicking on the Themes button. Just choose any theme that matches your business closely to get started:
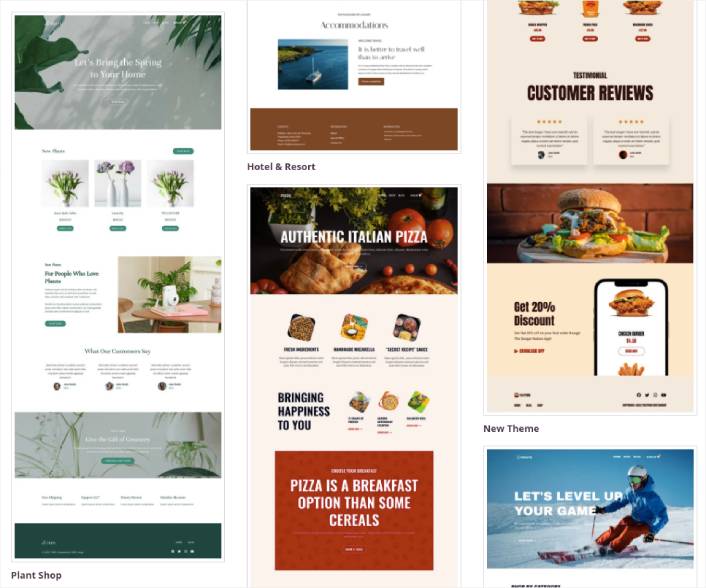
It doesn’t have to be an exact match. You can even select one based on the design. You can edit everything about these themes including fonts, the web design, and the overall user experience. But you can also check for a template for yoga classes.
Step #4: Setting Up Easy Digital Downloads
WordPress'teki en popüler e-ticaret eklentisi WooCommerce'dir. Şüphesiz, fiziksel ürün satıyorsanız WooCommerce kullanmalısınız. Ama siz fiziksel ürün satmıyorsunuz.
Bu makale tamamen WordPress'te dijital ürünleri nasıl satacağınıza odaklanıyor. Dijital ürünler için, Easy Digital Downloads'tan daha iyi bir e-ticaret eklentisi yok.
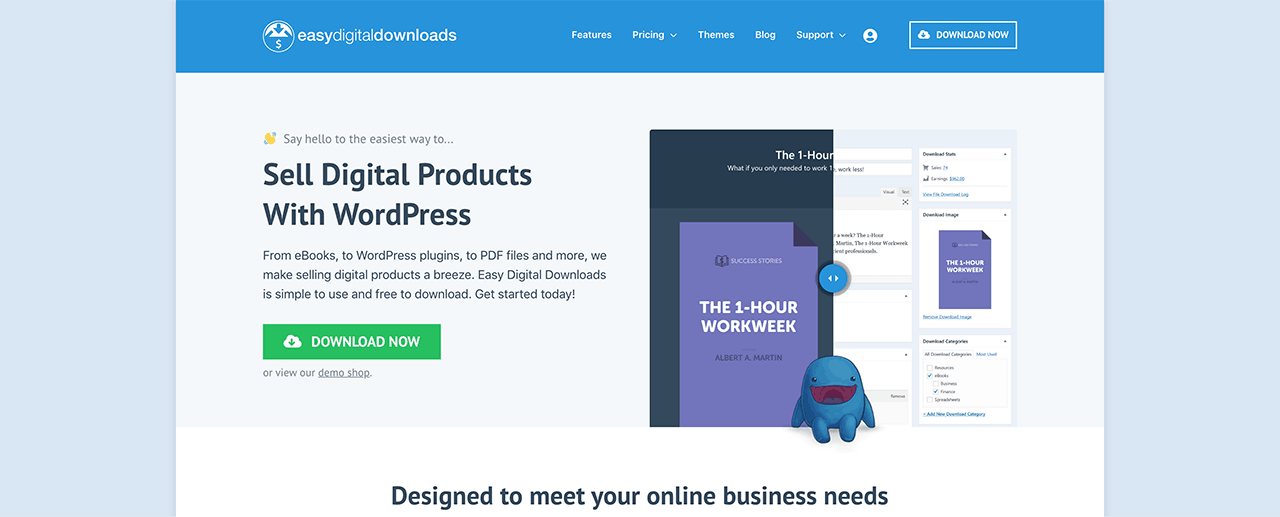
Easy Digital Downloads tamamen dijital ürün satmaya odaklanmıştır. Bu nedenle, WooCommerce'de bulunan gereksiz seçenekler ve kullanıcı arayüzleriyle uğraşmak zorunda kalmazsınız. Easy Digital Downloads kullanarak çevrimiçi bir mağaza kurmak çok kolaydır ve eklentiyi şunlar dahil olmak üzere herhangi bir dijital ürünü satmak için kullanabilirsiniz:
- Online classes and courses
- Yazılım
- eKitaplar ve PDF'ler
- Belgeler
- Videolar
- Ses ve müzik dosyaları
- Fotoğrafçılık, grafik tasarımlar ve dijital sanat
Ve pratikte güneşin altındaki diğer tüm medya dosyası türleri. Ayrıca aşağıdaki gibi bir sürü harika özellik elde edersiniz:
- Çoklu ödeme ağ geçidi entegrasyonları
- Eklentiler ve oyunlar gibi lisanslama modelleri için bir yazılım lisansı oluşturucu
- Abonelik modeli işletmeleri için yinelenen ödemeler
- Pazar yeri siteleri için çok satıcılı platformlar
- Daha hızlı büyümek için e-posta pazarlama entegrasyonları
- Serbest çalışanlar için özel teslimatlar
- Ortaklar ve pazar yeri satıcıları için komisyonlar
- Ürünleriniz için yorumlar
- Müşterileriniz için özel cüzdan
- Anında ürün karşılaştırma tabloları
- Ürün vitrinleri
Ve daha fazlası. Tam özellik listelerini ve bu özellikleri kullanmanın ne kadar kolay olduğunu Easy Digital Downloads incelememizde görebilirsiniz.
Easy Digital Downloads'ı neden kullanmak istediğinizi biraz öğrendiğimize göre, eklentiyi nasıl kuracağımıza bakma zamanı. Öncelikle, eklentiyi kurun. Bunu nasıl yapacağınızdan emin değilseniz, WordPress eklentileri nasıl kurulur hakkındaki bu makaleye göz atın.
Ardından, Easy Digital Downloads kontrol panelinize gidin ve Lisans Anahtarları'na gidip Site Yönetimi'ne tıklayın:
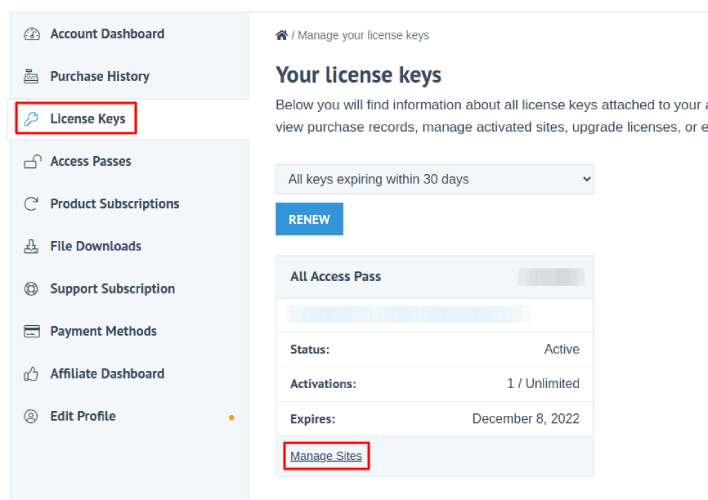
Ve sitenizi kontrol paneline ekleyin:
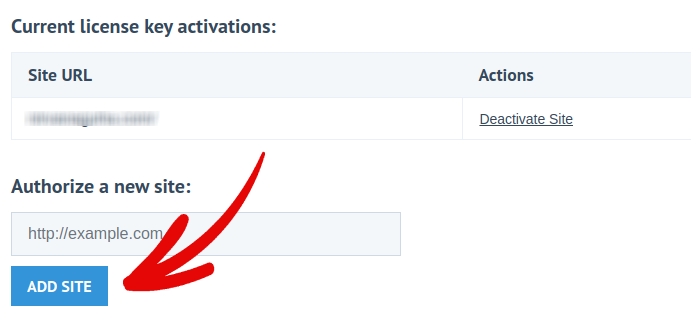
Bundan sonra tek yapmanız gereken ödeme işlemcinizi kurmak. WordPress kontrol panelinize geri dönün. WordPress kontrol panelinizde İndirilenler adlı yeni bir bölüm görmelisiniz.
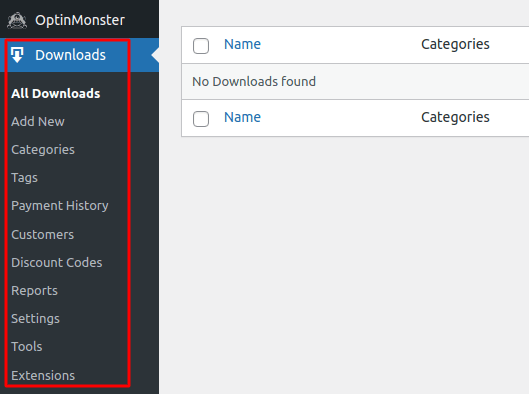
Ödeme ağ geçidinizi seçmek ve kurmak için İndirilenler » Ayarlar'a tıklayın ve ardından Ödeme Ağ Geçitleri sekmesine tıklayın.
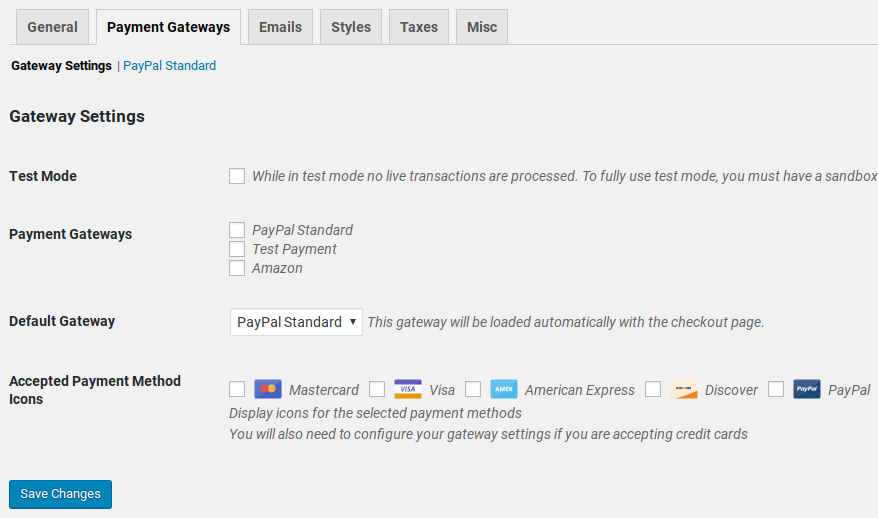
Ve kurulum tamamlandı!
Step #5: How to Sell Online Yoga Classes as Digital Products
Now that your store is ready, it’s time to start adding yoga classes to your store.
By default, Easy Digital Downloads will create and set up pages for your eCommerce store. The primary checkout page, success page, failed transaction page, and purchase history page is pre-defined. So, you’re ready to start uploading your products to your store.
İndirilenler » Yeni Ekle'ye gidin:
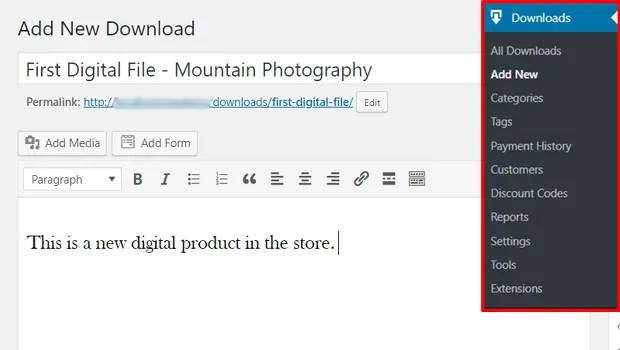
Başlamak için ürününüze bir başlık ve açıklama verin. Ardından, ürününüzün fiyatını belirlemek için aşağı kaydırıp İndirilen Fiyatları bölümüne gidin. Ardından, ürününüzün dosyasını yükleyin:
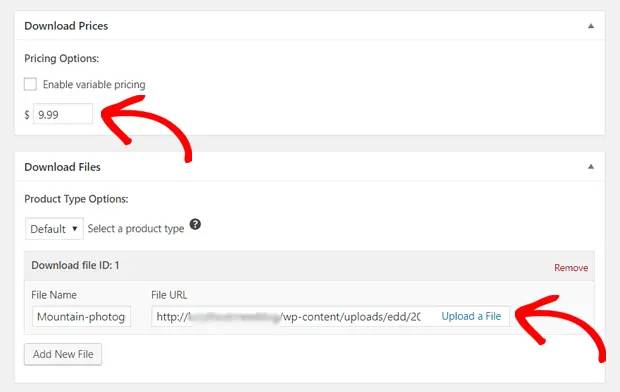
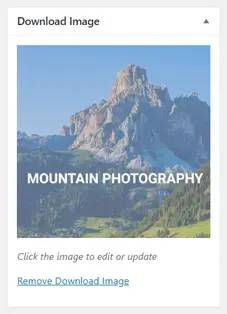
Ardından, ürününüz için güzel bir öne çıkan görsel yüklemek isteyeceksiniz. Bu, ürün listelerinizde görünen görseldir. Bu nedenle, süper çekici bir tasarım yükleyerek bunu değerli kılın.
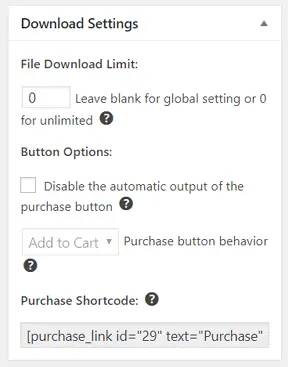
Then, scroll up to Download Settings and review the download options. If you’re selling documents as a limited edition product, you can set a limit on the product downloads. If not, go with the default options:
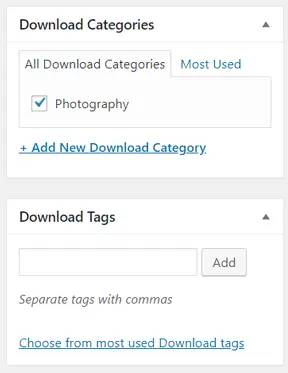
Son olarak, ürününüz için uygun olan herhangi bir ürün kategorisi veya etiketi ekleyin:
İşte bu kadar! İlk dijital ürününüzü yayınlamak için Yayınla'ya tıklayın.
İşte ürün sayfanız hiçbir özelleştirme olmadan böyle görünecek:

Şimdi sayfanızı özelleştirin.
Step #6: How to Customize Your Website
Now that you have a theme to get you started, you’ll want to edit that theme to suit your business. This is super easy to do.
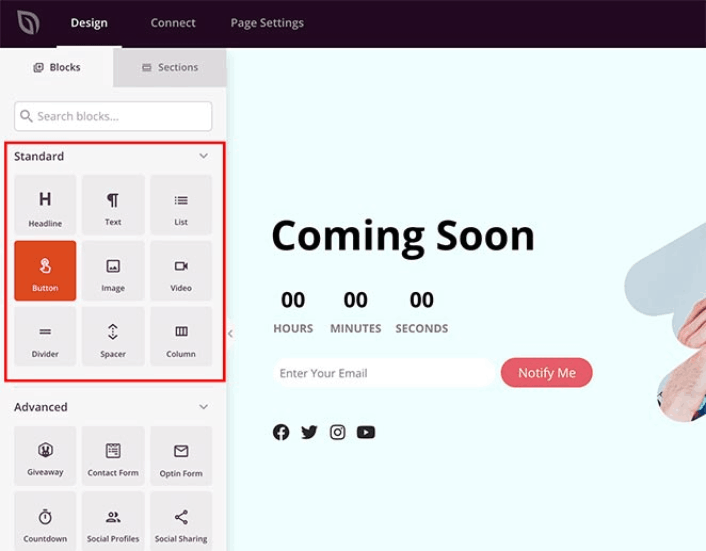
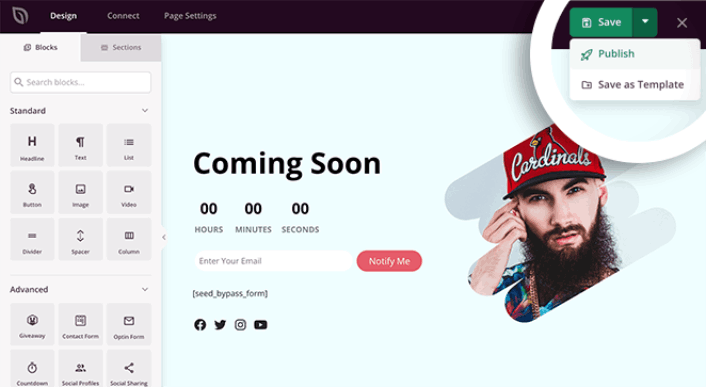
SeedProd’s page builder comes with various content blocks in a drag and drop editor. Even if you’re never used a page builder before, you’re going to find it super easy to use. Just drag and drop different design elements from the sidebar:
Bu blokları şunlarla süper etkileşimli açılış sayfaları oluşturmak için kullanabilirsiniz:
- Çekilişler ile lansmandan önce sitenizde etkileşim oluşturmak için
- İletişim formları ile sitenizde potansiyel müşteriler toplamak için
- Çıkış tarihiniz etrafında FOMO ve heyecanı artırmak için geri sayım sayaçları
- Sosyal medya paylaşımları almak için sosyal düğmeler
- FAQ blocks for better Search Engine Optimization
Ve çok daha fazlası!
You can edit any of the content blocks on the page by simply clicking on them. This includes the navigation menu or the blog posts on your site. Once you lock down your website’s design, you can build your website any way you want it.
Step #7: How to Integrate Your Email Marketing Service with Your Site
Yapım aşamasında sayfanızı tasarlamayı bitirdikten sonra, sayfanızın oluşturucusunun üst kısmındaki Bağlan sekmesine tıklayın ve sitenizde potansiyel müşteriler toplamak için e-posta pazarlama sağlayıcınızı seçin.

Marketing tools and integrations can help build your online presence. So, we highly recommend setting up an email list.
We recommend using Constant Contact as your email marketing service. It’s a robust service that allows you to create powerful email marketing campaigns easily.
When you’re done configuring your email marketing service, click the Page Settings tab at the top of your screen as an added bonus.

Burada, açılış sayfanıza bir SEO eklentisi ve bir Google Analytics eklentisi ekleyebilirsiniz. Reklam performansını izlemek için Facebook Pikseli veya Pinterest pikseli gibi özel izleme kodları bile ayarlayabilirsiniz.
Pro Tip: You should also set a blog subscription widget on your site. It doesn’t matter if you’re running a personal blog or a business website.
Step #8: Add a Click to Subscribe Button to Your Landing Page
You can also add a click to subscribe button to collect push notification subscribers. Push notifications are a great way to increase your repeat traffic, get more engagement and even sell official merch if you have some.
In SeedProd, just drag and drop the Custom HTML module from the sidebar.
We’ve put the subscribe button directly underneath the email signup form in the first fold.

But you can insert the button anywhere you like.
For this part, you need some experience with HTML and CSS. Or, you can copy this code and paste it into your Custom HTML block:
<button onclick="subscribeOnClickButton()" style="border: none; padding-left: 5%; padding-right:5%; text-align: center; display: inline-block; color: blue;">Get Updates via Push Notifications</button>That’s a standard button in HTML with very little styling. The only fancy bit is the onclick function in the code. It basically means that your visitors can click on the button to subscribe to something. Now, we need to give the button some extra code to allow your visitors to subscribe to push notifications.
PushEngage ana sayfasına gidin ve Başlayın düğmesine tıklayın:

Ardından, PushEngage'i denemek için ücretsiz planı seçmek isteyeceksiniz veya işletmenizi büyütme konusunda ciddiyseniz ücretli bir planı seçin. Ücretli planlar daha fazla kampanya seçeneği ve daha büyük abone listeleri oluşturma olanağı sunar.
PushEngage kontrol panelinizde, Site Ayarları » Site Detayları bölümüne gidin ve Kurulum Talimatları İçin Buraya Tıklayın düğmesine tıklayın. Herhangi Bir Site altında, kurulum kodunuzu alacaksınız:

UYARI: Kontrol panelinizden aldığınız kodu kopyalamanız gerekir. Kod, her PushEngage kullanıcısı için benzersizdir. Görüntüdeki kodu kopyalayarak anlık bildirim aboneleri toplayamazsınız.
Kodunuzu PushEngage kontrol panelinizde aldıktan sonra, bu kod parçasını kodunuza ekleyin:
<script> window._peq = window._peq || [];</script> <script>
function subscribeOnClickButton(){
window._peq.push(['subscribe',{}.pe,function(res){
if(res.statuscode==1)
{
// Code to return response
console.log(res);
}
}]);
}
</script>
Nihai kodunuz şuna benzer görünmelidir:
<script src="https://clientcdn.pushengage.com/core/02a6e92667ae2279fcba8932356c1d93.js" async></script>
<script> window._peq = window._peq || [];</script> <script>
function subscribeOnClickButton(){
window._peq.push(['subscribe',{}.pe,function(res){
if(res.statuscode==1)
{
// Code to return response
console.log(res);
}
}]);
}
</script>
You’ll want to add this code to the HTML block in your landing page after the code for the button. It should look something like this:

Feel free to customize the styles for the button any way you please. When you’re done customizing your webinar landing page, go ahead and hit the Save button. You should check out eCommerce push notifications if you’re still wondering how to sell online yoga classes.
Step #9: How to Publish Your Site
When you’re done editing your WordPress site, go ahead and publish it by clicking on Save » Publish:
Then, go back to your Theme Builder and click on Enable SeedProd Theme:
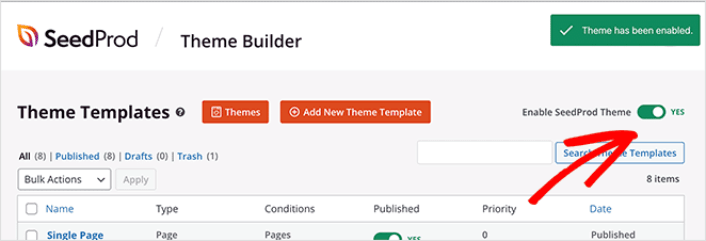
Ve işte bu kadar!
How to Sell Online Yoga Classes Even Faster
Now that your product is up, it’s time to selling documents online.
Satışlarınızı artırmanın harika bir yolu otomatik anlık bildirim kampanyaları oluşturmaktır. Anlık bildirimler, sitenizdeki tekrar trafiğini, etkileşimi ve satışları artırmak için harika bir araç olabilir. Anlık bildirim kampanyalarına yeni başlıyorsanız, çok daha hızlı büyümenize yardımcı olacak bu inanılmaz kaynaklara göz atın:
- Dönüşümü Yüksek 7 Anlık Bildirim İzin Verme Örneği
- Web Anlık Bildirimlerini Sitenize Nasıl Kurarsınız
- Aboneleri Web Anlık Bildirimleri Kullanarak Alıcılara Dönüştürme
- Sitenize Bir Web Bildirimleri WordPress Eklentisi Nasıl Eklenir
Push bildirim kampanyalarınız için PushEngage ile başlamanızı öneririz. PushEngage, dünyadaki 1 numaralı anlık bildirim yazılımıdır. Böylece kampanyalarınız güvende olacak ve anlık bildirimlerinizle süper yaratıcı olabilirsiniz. İşte bunun gibi:

İşletmenizi büyütme konusunda ciddiyseniz, PushEngage'e yatırım yapmalısınız.


