
Looking for a quick tutorial on how to make a one-product website in WooCommerce?
Don’t worry. We’ve got your back.
A single product site is perfect for solopreneurs, drop shippers, and other small businesses. You could sell both digital and physical goods from an online store.
So, if your business is trying to get a single product launched, follow the steps in this article. We’re going to help you launch your site in 5 simple steps. The cool part is that you don’t have to know how to code to launch a killer website.
Hadi başlayalım.
Step #1: Set Up Your Hosting Server
Before you create your single-product website, you need to get:
- A domain name
- Web hosting
- An SSL certificate
Most modern hosting services will offer all three things as a combo. But we recommend using one of these three hosting providers:
All three hosting services are completely optimized for WordPress. And you get a free domain name and SSL certificate when you buy web hosting. For this article, we will show you how to get started using Bluehost. But it’s a somewhat similar process for our other recommended hosting services.
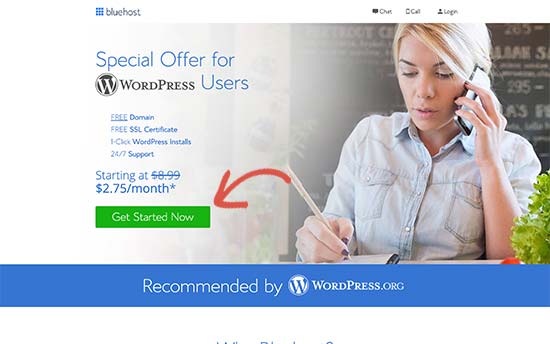
Head over to Bluehost and click on Get Started:
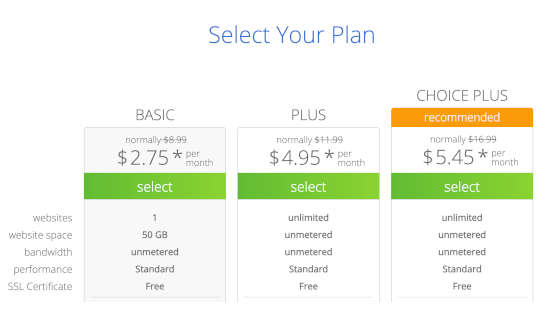
Then, choose your pricing plan on the next screen. We recommend getting the Plus plan if you’re looking to scale the business. But if you’re just looking to get started, even the Basic plan should be fine for you.
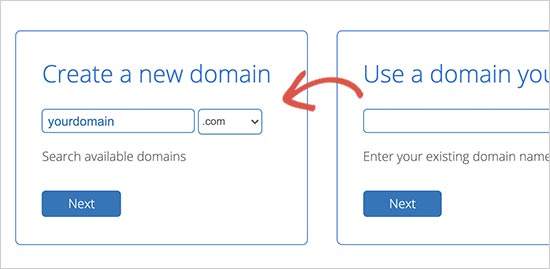
After that, you’ll choose the domain name for your website.
Finally, Bluehost will confirm your order and try to upsell you some added services such as Domain Privacy Protection. It’s entirely up to you whether you want to get this extra stuff. We don’t recommend it for small businesses, but if you think that the upsells are worth it, go ahead and add them to your cart.

After that, you complete the checkout process.
Step #2: Install WordPress on Your Server
Once you’re done with the checkout, Bluehost will send you an email to log in to your cPanel account. The cPanel is your web hosting control panel. From there, you can manage your email inboxes and FTP accounts, get support from Bluehost, and more.
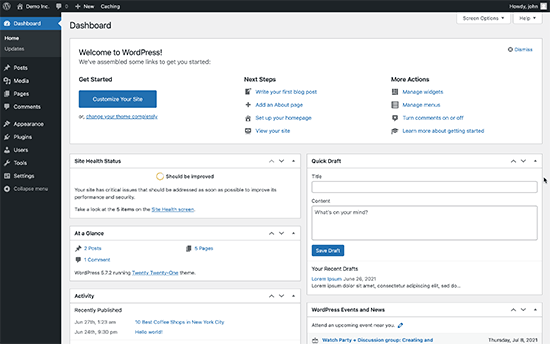
When you log in to cPanel, you’ll see that Bluehost has already installed WordPress for you. To get into your WordPress dashboard, all you have to do is click on the Log in to WordPress button:

Your WordPress dashboard will look something like this:
NOTE: The WordPress installation process is different for different hosting services. You may have to manually install WordPress if you’re not using Bluehost, depending on your hosting service. Mostly, you’ll need to locate a software installer inside your cPanel called Softaculous. Softaculous is a setup wizard that will help you install WordPress on your server.
When you first log in to your WordPress dashboard, you’ll want to take care of a few small details before launching your product.
Head over to Settings » General to set the website title and description tags:
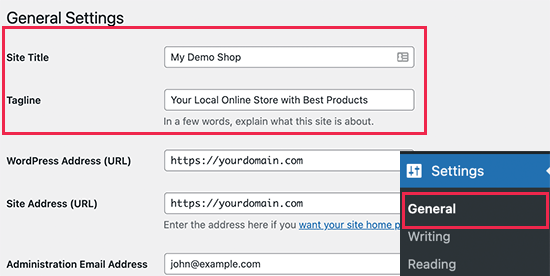
Then, change your WordPress Address and Site Address to their HTTPS versions to use SSL on your site:
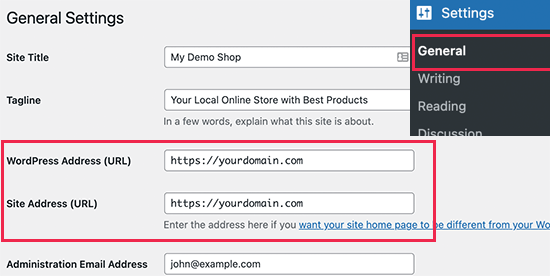
When you’re done, hit the Save Changes button at the bottom.
Step #3: Install WooCommerce
Now that you’ve installed and configured WordPress correctly, you have a basic website where you can upload and manage content. At this point, your site is no better than a very simple blog. To sell products online, we will install a plugin called WooCommerce.
WooCommerce essentially turns your site into an online store without having to custom code anything at all.
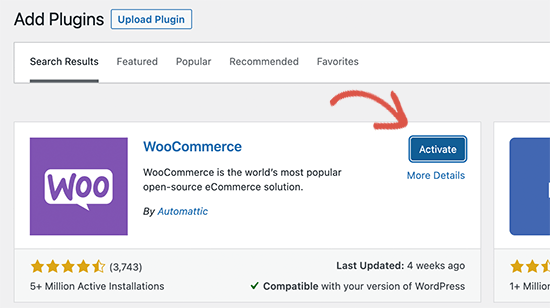
First, you need to install and activate the WooCommerce plugin.
Go to Plugins » Add New page and search for WooCommerce. Click on the Install Now button next to the WooCommerce listing in the search results.
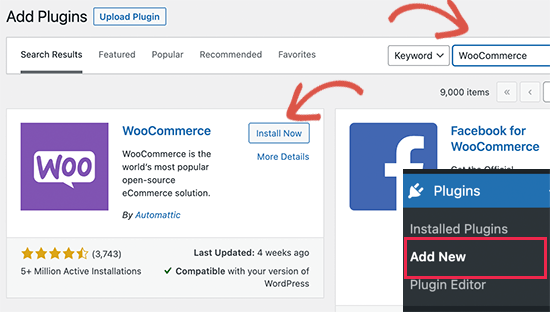
Wait for the plugin to finish downloading, and then click on the Activate button to continue.
Upon activation, WooCommerce will launch a setup wizard. After that, all you have to do is follow the steps. For more details, see this step-by-step guide on how to install a WordPress plugin.
NOTE: You’ll get to a point where WooCommerce will prompt you to install a theme. You can use a theme builder such as Divi. Or, you can continue with your default theme and install a landing page builder like SeedProd to create a custom product page.
Step #4: Setting up Payments for Your Online Store
Next, you need to set up payment methods to accept online payments in your store. WooCommerce provides a bunch of payment gateways that you can easily set up.
Head over to WooCommerce » Settings, and under the Payments tab, you can choose between different payment options:
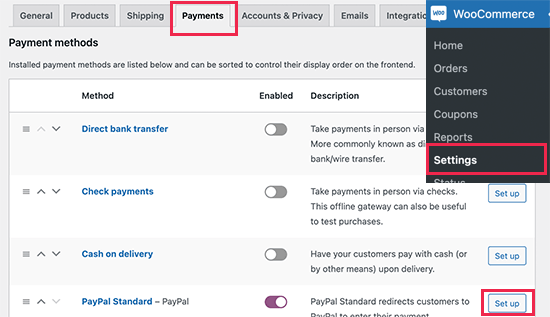
Scroll further down, and you get options to install Stripe and PayPal Standard plugins to process your payments. And if you need even more flexible payment options, you can install WP Simple Pay to get extra features for Stripe payments. If you’re curious about what added features you get from the plugin, check out our review of WP Simple Pay.
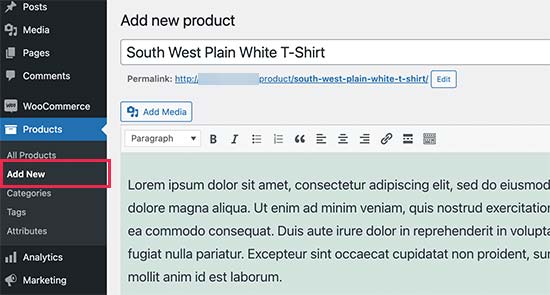
Step #5: Publish Your Product
You’ve set up a website with eCommerce capabilities, and you’ve also installed a payment processor. So, you have all the makings of an online store. Now, all you need is to create and publish your product.
Let’s start by adding the first product to your online store. Go to the Products » Add New page to add a new product. Let’s start things off by adding a product name and description.
Next, you’ll want to scroll down to the Product Data box:
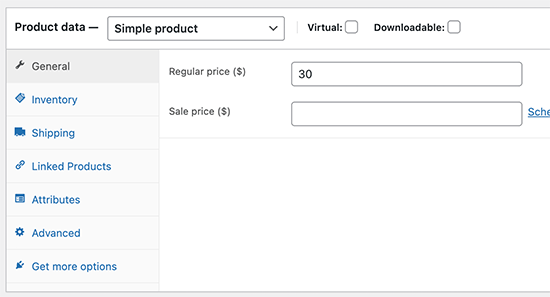
Here, you’ll want to update product details such as:
- Regular price
- Sale price
- Inventory for physical products or limited-edition digital products
- Shipping costs
- Similar products for upsells and cross-sells
And more. Take your time and fill out this form. Look at the sidebar and find the Product Image and Product Gallery fields when you’re done.
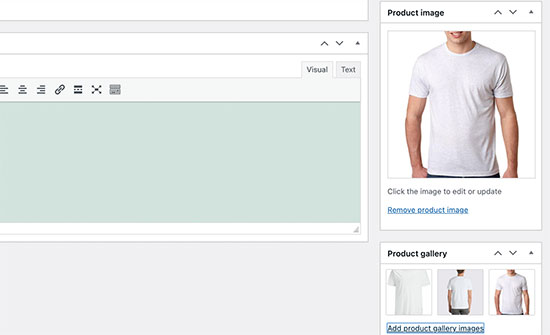
We highly recommend uploading as many images as possible. Good product images can inspire confidence in your site visitors to buy your products. When you’re done, hit the Publish button at the top.
Your one-product website is now fully built!
Bonus Step: Supercharge Your Store With Plugins
Once your store is live, you’ll want to extend your functionality to get better conversion rates on your site.
Here’s a quick list of essential plugins you can use to boost your growth instantly:
#1. PushEngage

PushEngage, dünyadaki 1 numaralı anlık bildirim eklentisidir.
Push notifications help you grow your website traffic and engagement on autopilot. And if you’re running an online store, PushEngage also enables you to increase your sales by helping you create automated eCommerce push notifications.
You can get started for free, but you should buy a paid plan if you’re serious about growing your business.
Here’s a glance at what you get with PushEngage:
- Yüksek dönüşüm sağlayan otomatik kampanyalar
- Birden fazla hedefleme ve kampanya zamanlama seçeneği
- Hedef takibi ve gelişmiş analizler
- Akıllı A/B testi
- Özel Bir Başarı Yöneticisi
You’ll see that PushEngage is hands down the best bet if you want to build traffic, engagement, and sales for your business. And if you’re on a budget, you can always get a little creative with your push notifications.
#2. OptinMonster
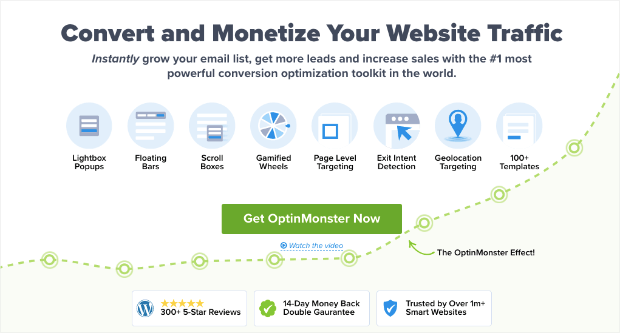
OptinMonster is the world’s most powerful conversion toolkit. This plugin has everything you need to start, grow, and scale your email lead generation process. You can create some incredibly high-converting campaigns such as:
- Lightbox açılır pencereleri
- Sticky headers and footers
- Video popups
- Geri sayım sayaçları
- Spin to win welcome mats
- Popup contact forms
Ve daha fazlası!
Check out our review of OptinMonster to get a closer look at what it can do to grow your business.
#3. AffiliateWP
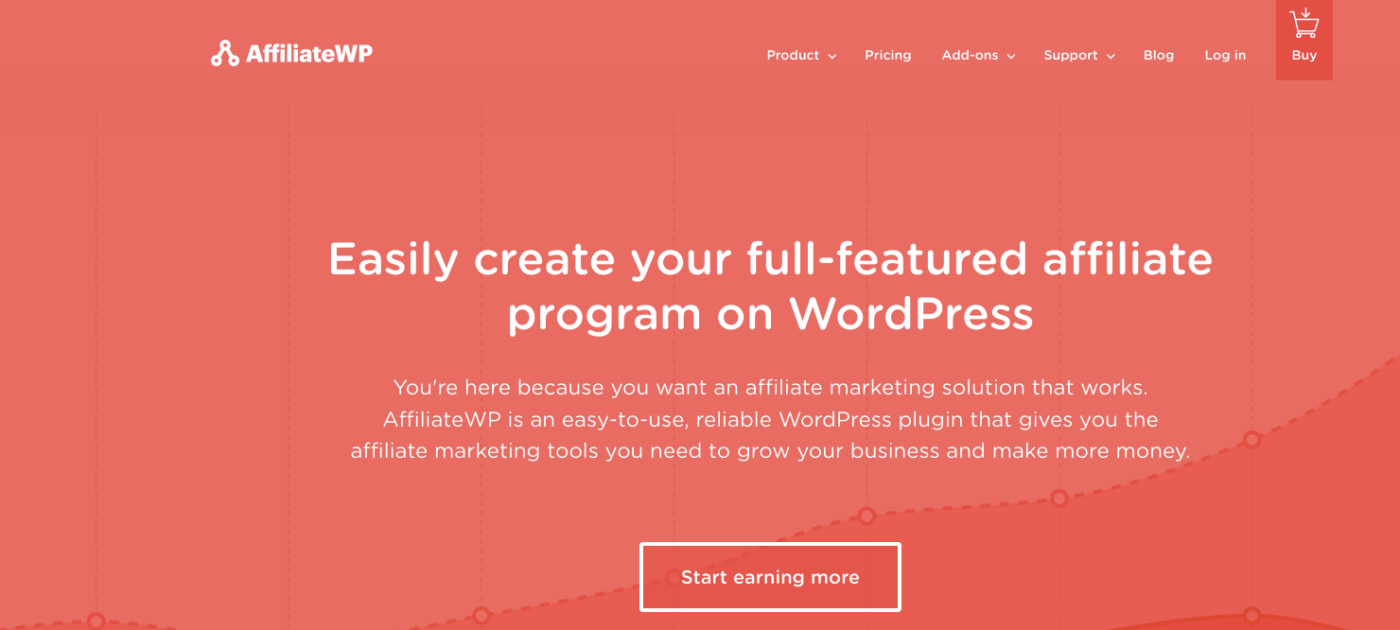
AffiliateWP, ürünleriniz ve hizmetleriniz için bir satış ortağı programı oluşturmanıza olanak tanıyan bir WordPress eklentisidir. Kullanımı kolay, son derece güvenilir ve kurulumu için kodlama gerektirmez.
En iyi yanı? AffiliateWP, satış ortağı ağınızı tamamen otomatik araçlar kullanarak büyürmenize olanak tanır.
AffiliateWP has a whole host of great features, including:
- Affiliate Tracking and Management
- Gerçek Zamanlı Raporlama
- Kullanıcı Dostu Satış Ortaklığı İşe Alım
- Otomatik Satış Ortaklığı Ödemeleri
- Özelleştirilebilir E-posta Bildirimleri
- Popüler Eklentiler ve Hizmetlerle Entegrasyonlar
- Tek Tıkla Satış Ortaklığı Veri İçe/Dışa Aktarma
- Ücretsiz ve Pro Eklentiler
It’s super easy to use AffiliateWP, which separates the plugin from its alternatives. Get started right now and start growing your affiliate network. If you’re not 100% convinced, you can check out our review of AffiliateWP first.
#4. All in One SEO

All In One SEO, dünyanın en iyi WordPress SEO eklentisidir.
AIOSEO, en son SEO en iyi uygulamalarını uygulamak için yeterince güçlü olmakla kalmaz, aynı zamanda belirli SEO sorunlarını kutudan çıkar çıkmaz çözmek için gelişmiş seçenekler de elde edersiniz. Buna şunlar dahildir:
- Yerel bir kitleye sahip küçük işletmeler için Yerel SEO modülleri
- Çevrimiçi mağazalar için WooCommerce SEO
- WordPress düzenleyiciniz içinde bir SEO iyileştirici
- Arama Motorlarında anında indeksleme için Akıllı Site Haritaları
- İçeriğinizin Zengin Snippet'lerde sıralanmasını sağlamak için bir Schema eklentisi
And a lot more! You can learn more about the features in our review of AIOSEO.
#5. MonsterInsights

MonsterInsights is a WordPress plugin that makes it easy to use Google Analytics. Google Analytics is too complicated to use for a beginner. But even worse, it’s easy to get lost in a sea of data without getting any actionable insights on growing your business.
MonsterInsights focuses on insights over volumes of data. You don’t need a single line of code to install Google Analytics on WordPress.
MonsterInsights'ın sizin için neler yapabileceğine hızlı bir bakış:
- Kodsuz Google Analytics İzleme
- Herhangi Bir Google Analytics Sürümüyle Uyumlu
- En İyi Performans Gösteren İçerikleri Bulmak İçin Raporlar
- Detailed Audience Insights
- E-ticaret Analizleri
- Form Kayıt Analizleri
- Özel Boyutlardan Ek İçgörüler
- Ortaklık Bağlantısı Tıklama Takibi
- GDPR Uyumluluğu
- Premium Entegrasyonlar
If you need to look at the features, check out our review of MonsterInsights.
Sonuç
Bu kadar, millet!
Creating your online store is actually the easiest part of building an online business. The tricky part is to generate traffic on your site and get people to buy from you consistently.
Our recommendation is to start with push notifications. Push notifications are great tools to increase your engagement and conversions as well. We recommend using PushEngage to send your push notifications.
PushEngage, dünyada 1 numaralı anlık bildirim yazılımıdır. Bu nedenle, henüz yapmadıysanız, bugün PushEngage ile başlayın!


