
Looking for a simple and easy tutorial on how to edit footer in WordPress?
The footer appears at the very end of every page on your WordPress site. By default, WordPress gives you a footer. But it’s really not that great. In order to create a compelling footer, you need to be able to edit it.
But how do you do it? Do you need coding experience? What kind of customization can you do? Do you need to pay a developer to do it for you?
The good news is that you can do it yourself even if you don’t have any coding experience. In this article, we’re going to give you 2 simple ways on how to edit the footer in WordPress.
Låt oss dyka in!
DISCLAIMER: These are not the only two methods to customize a WordPress footer. You can also edit the footer.php file for your WordPress to modify the footer. But that involves custom coding and we don’t recommend that method unless you’re a seasoned coder.
Method #1: How to Edit Footer in WordPress with SeedProd
If you want to create a custom footer in WordPress using a drag-and-drop visual builder, then you should use SeedProd. You can do the same thing with a few themes such as Divi. But SeedProd works for absolutely any theme. So, you can customize your WordPress footer no matter what theme you’re using.

SeedProd is the best WordPress landing page builder. It’s perfect for businesses, bloggers, and website owners looking to build high-converting landing pages without any development skills.
Med SeedPreed får du förbyggda mallar för högkonverterande landningssidor som du kan publicera omedelbart. Detta inkluderar mallar för:
- Säljsidor
- Kommer snart-sidor
- 404-sidor
- Underhållssidor
- Squeeze-sidor
- Inloggningssidor
- Tack-sidor
- Webinar-sidor
- Videosidor
And lots more! We love using SeedProd and we even wrote an in-depth review of the SeedProd plugin. Go ahead and check that out. And then, get started with how to edit footer in WordPress using SeedProd.
Step #1. Install The SeedProd Theme Builder Plugin
First, install and activate SeedProd on your WordPress site. If you’re not sure how to do that, go ahead and check out this article on how to create a landing page for step-by-step instructions. After activating the plugin, go to the SeedProd » Settings page to enter your plugin license key.

Click the Verify key button and you’re ready to create a custom footer in WordPress.
Step #2. Choose a Starter Theme Template
Head over to SeedProd » Theme Builder in your WordPress dashboard:
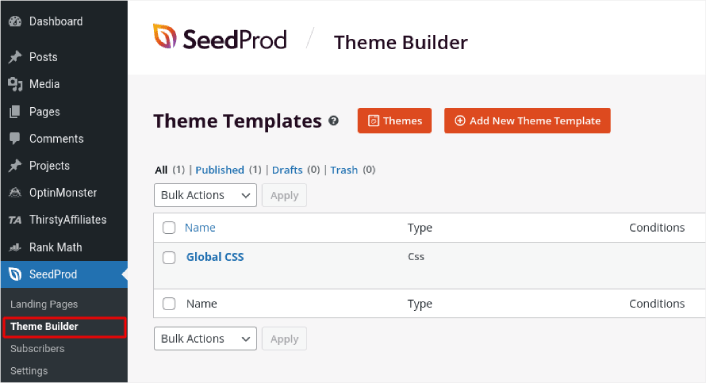
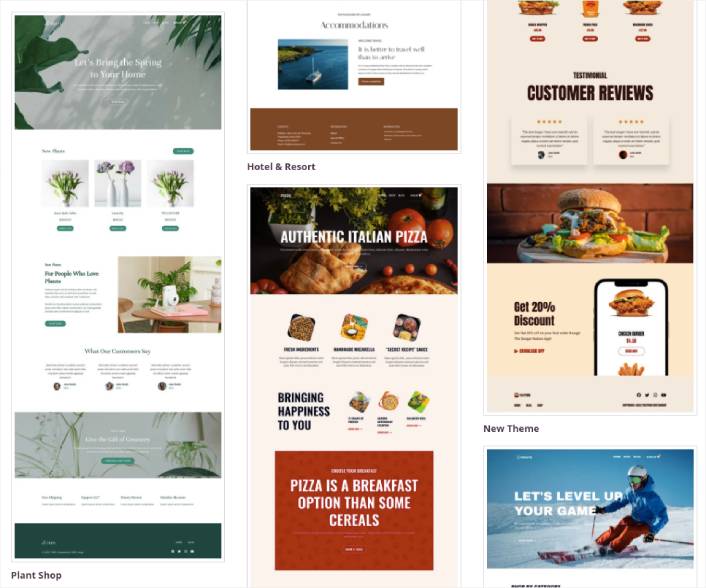
Here, you can select a starter theme with SeedProd. You can create a custom theme using SeedProd very easily. But for now, we’re going to select a pre-built template. Click on the Themes button and select your starter theme.
After choosing a theme, SeedProd will automatically create all the theme templates. From here, you can edit each template using the drag-and-drop editor.
Step #3. How to Edit Footer in WordPress
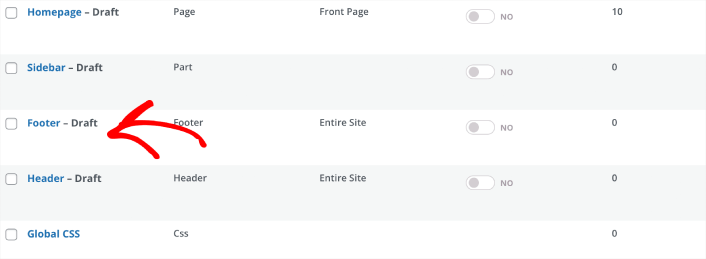
To edit your footer with SeedProd, go to the Footer template and click the Edit Design link:
You should see the SeedProd visual builder open up. This is where you can drag and drop design elements from the sidebar to customize your site footer:
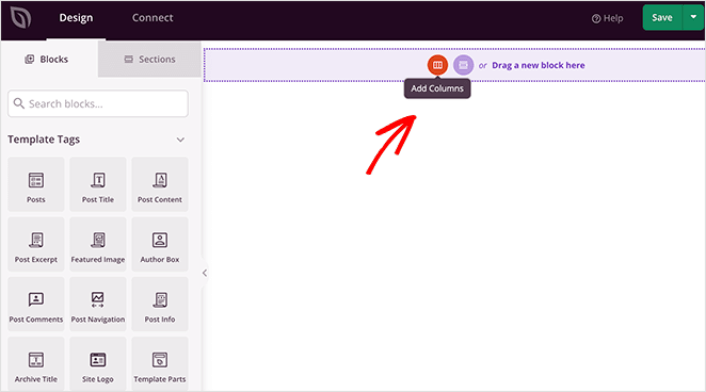
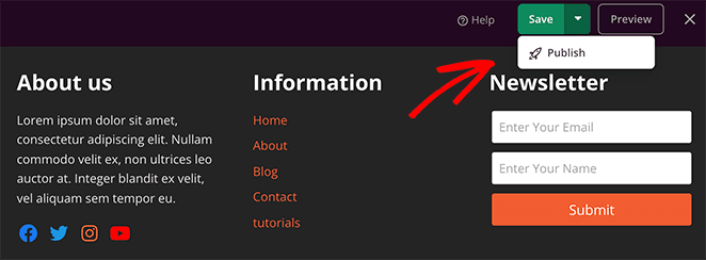
You can customize colors, fonts, background, spacing, and more. When you’re done customizing your site footer, click the Save button in the top-right corner.
Step #4. Publish Your Custom WordPress Footer
In SeedProd, you can launch your custom footer whenever you want. All you have to do is go to SeedProd » Theme Builder and click on the Enable SeedProd Theme toggle button.
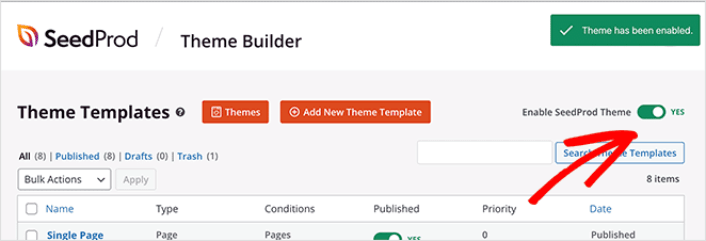
SeedProd will automatically replace your theme with your SeedProd theme and start using all your custom templates. This includes your WordPress footer as well. Once you go live with your new footer, you will be able to see it on your site:
And that’s it! You now know how to customize footers in WordPress using SeedProd.
Method #2: How to Edit Footer in WordPress with Theme Customizer
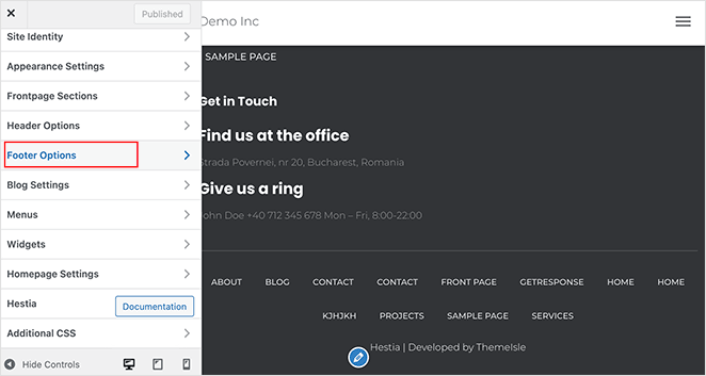
WordPress themes will typically give you some settings to customize your footer. It’s not usually a very flexible set of customization options. Go to Appearance » Customize from your WordPress admin area. Then click the Footer Options heading from the list in the left column.
You can then edit the footer text under Footer Credits.
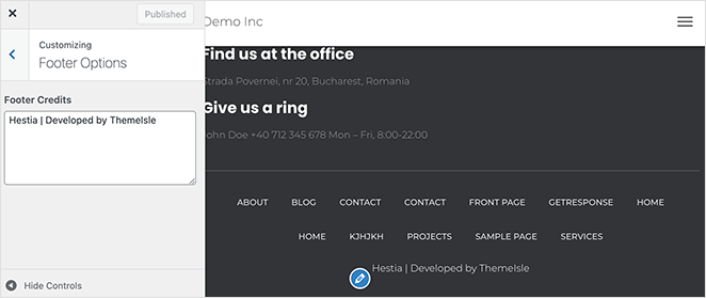
NOTE: This is an example using the Hestia theme. Every WordPress theme will offer different options. If you want to stick to your current theme and customize your WordPress footer, you should check out the theme documentation.
Now That You Know How to Edit Footer in WordPress
Det var allt för den här gången, gott folk!
Now that you know how to edit footer in WordPress, it’s time to optimize your footer to increase conversions. Ideally, you want your footer to lead your site visitors to click on your most important links.
Och om du letar efter ett prisvärt sätt att öka din trafik, rekommenderar vi att använda push-notiser. Push-notiser kan hjälpa dig att få mer återkommande trafik och webbplatsengagemang. Du kan också skapa automatiserade push-notiskampanjer som genererar försäljning.
Inte övertygad? Kolla in dessa resurser:
- 7 smarta strategier för att öka kundengagemanget
- Är push-notiser effektiva? 7 statistik + 3 experttips
- Hur du ställer in pushmeddelanden för övergivna kundvagnar (Enkel handledning)
- Hur man lägger till ett WordPress-plugin för webbnotiser på din webbplats
Vi rekommenderar att använda PushEngage för att skapa dina push-notiskampanjer. PushEngage är den främsta push-notisprogramvaran i världen. Så, om du inte redan har gjort det, kom igång med PushEngage idag!


