Looking for a guide on how to create a FAQ page for your WordPress site?
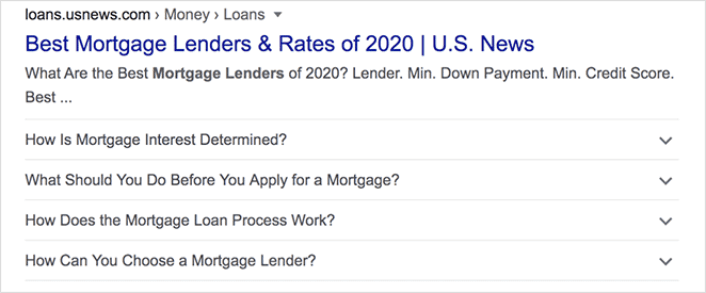
FAQ pages can address sales objections in potential customers. At the same time, it can bring in search traffic straight from Google’s “People Also Ask” featured snippets.
The coolest part is that you can use a FAQ page as a landing page that redirects visitors to product and sales pages.
In this article, we’re going to show you how to create a FAQ page for your WordPress site the easy way. Then, we’ll show you how to optimize your page to generate a ton of search traffic.
The best part? It’s perfectly fine if you’ve never done this before. This article is meant for complete beginners.
Låt oss dyka in.
What the Best FAQ Pages Have in Common
Before we jump into our tutorial on how to create a FAQ page, here’s a checklist that will come in handy when you’re writing the content for your FAQ page:
- Does the FAQ page have a clear structure that’s easy to navigate?
- Are the answers clear and concise?
- Are there links to more comprehensive guides when needed?
- Does the business update the FAQ pages as it grows?
- Is it easy to search and find queries?
- Does the FAQ page include a search bar for users to find answers quickly?
- Is there a call to action for users to buy the product or service?
If you’re just getting started with FAQ pages yourself, you should also consider all these factors before you create one. And if you already have a FAQ page, you should consider updating it so that it follows these best practices. Also, you can check out our list of epic FAQ pages from six-figure businesses.
How to Create a FAQ Page in WordPress
Now that you know what kinds of FAQ pages work well, it’s time to create your own FAQ page. The easiest way to add a FAQ page to your WordPress site is with a drag-and-drop page builder plugin. We did a breakdown of the most powerful landing page builders and compared the best in the world.
Our recommendation is that you use SeedProd.

SeedProd is the best website builder for WordPress. It lets you create WordPress themes, landing pages, and flexible layouts for your WordPress site without code.
If you need the quick version of why you should use SeedProd, here it is:
- SeedProd works with any WordPress theme. There’s no messy transition and if you switch themes, you won’t break your landing pages completely.
- The designs are mobile-friendly and you actually get a mobile preview of your page. Seeing as most people use the internet from mobile devices rather than PCs, this is pretty important.
- SeedProd är stolt över att vara blixtsnabb och lättviktig. Så det kommer inte att göra din webbplats långsam att ladda. Och det kommer definitivt inte att förbruka en massa serverresurser.
For a more detailed look at the features, you should check out our review of SeedProd. With this plugin, you can quickly launch your FAQ pages. The best part is that you can customize your entire page in the visual editor. This saves a lot of time and money you’d otherwise have spent on custom development.
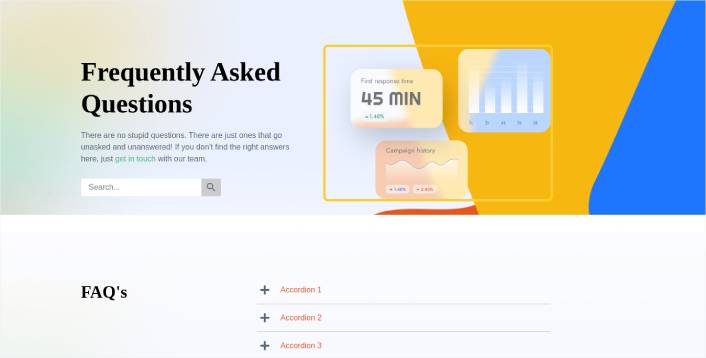
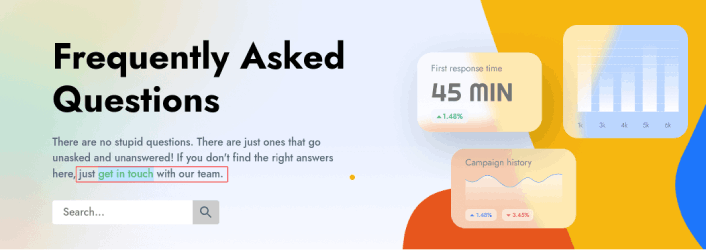
If you follow every step in this tutorial, you should be able to create a FAQ page just like this one:
Steg #1: Installera SeedProd-pluginet på din webbplats
Först vill du skaffa SeedProd Pro pluginet och aktivera det. Om du är osäker på hur du gör det, kolla in den här artikeln om hur man installerar ett WordPress plugin. Gå sedan till SeedProd » Inställningar i din WordPress-instrumentpanel och aktivera Pro-versionen:

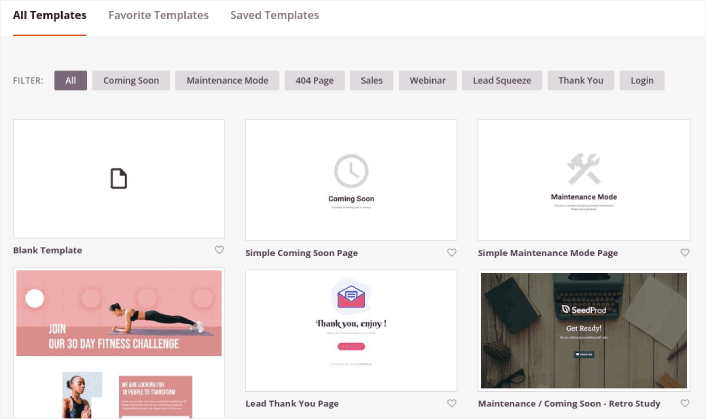
Gå sedan till SeedProd » Sidor för en översikt över Seed પ્રોડs landningssidors instrumentpanel. Det är här du kan se de olika typerna av landningssidor du kan skapa med SeedProd:

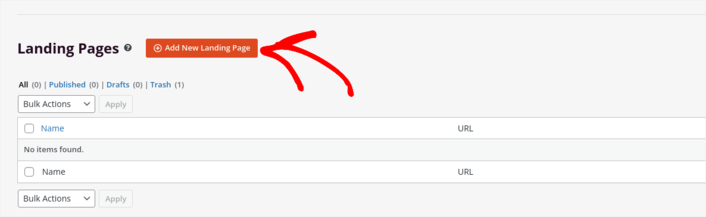
Keep in mind that these are all special pages with pre-built functionality and design templates. For an FAQ page, you don’t want to use ANY of these special landing pages. Instead, you’re going to create a custom landing page.
Scroll further down and click the Add New Landing Page button to get started:
Step #2: Create a FAQ Page with SeedProd
After clicking the Add New Landing Page button, you’ll see SeedProd’s library of landing page templates. These are professionally designed landing page templates that are completely responsive.
Next, you can select one of these templates to help you get started. Remember, the template is just a starting point. you can customize everything about the page later on. For now, find a template that you think will fit:
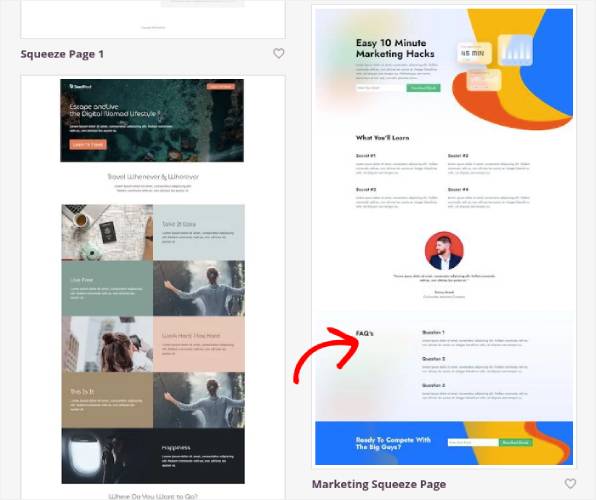
We’re using the Marketing Squeeze Page template for this tutorial because it already has a FAQ section in it. But you can select any template you like. The template is mostly a place to start your page design.
If you find an exact match for your page, that’s great. For instance, in our podcast landing page tutorial, we found an exact template built especially for podcast landing pages. If you don’t find an exact match, it’s still perfectly fine because we’re going to customize our page anyway.
Step #3: Customize the FAQ Page Template
SeedProd’s visual builder allows you to customize your landing page using drag-and-drop content blocks.
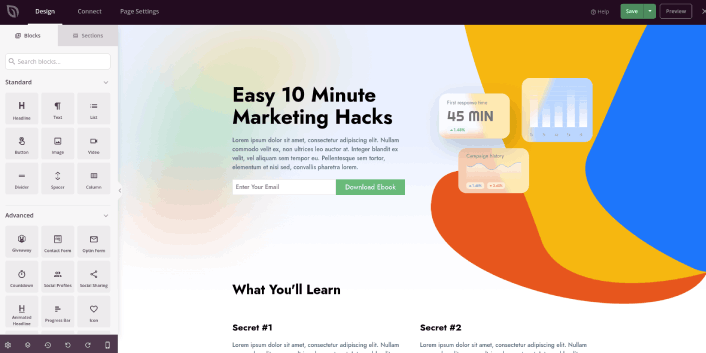
The first thing you should do is edit the headline for the page. You want it to be super clear and to the point. Just click on the headline in the preview and start editing it:
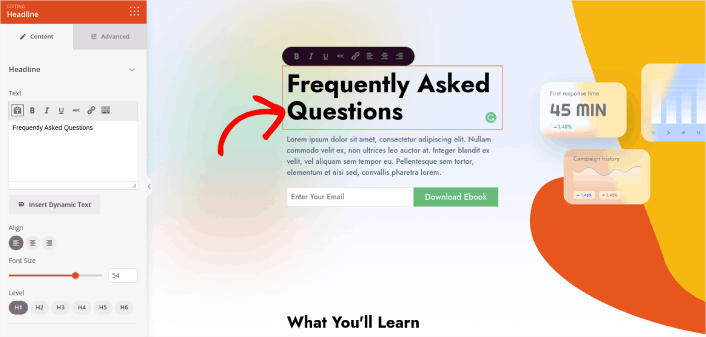
Next, add a little body copy in the exact same way:
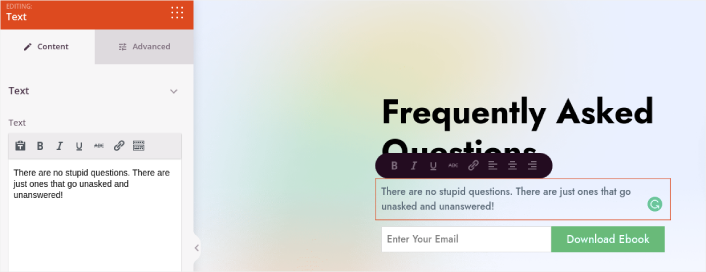
In the template, you can see a call to action (CTA) that says Download Ebook. Of course, for an FAQ page, you don’t necessarily want to collect leads in the first 10 seconds. So, you can click on the email optin and delete it. Instead, we highly recommend using a search bar in the hero section.
Just drag and drop the Search Form content block from the sidebar on the left onto your page preview section:
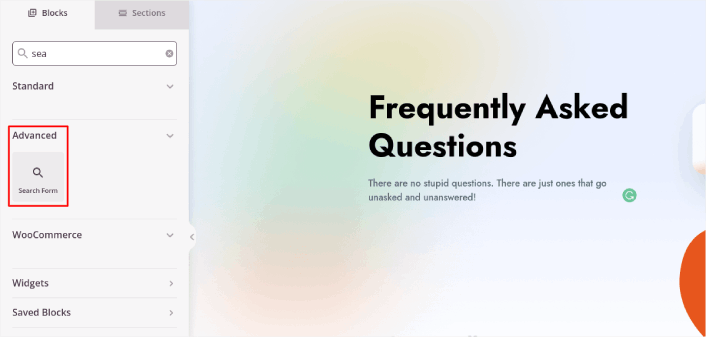
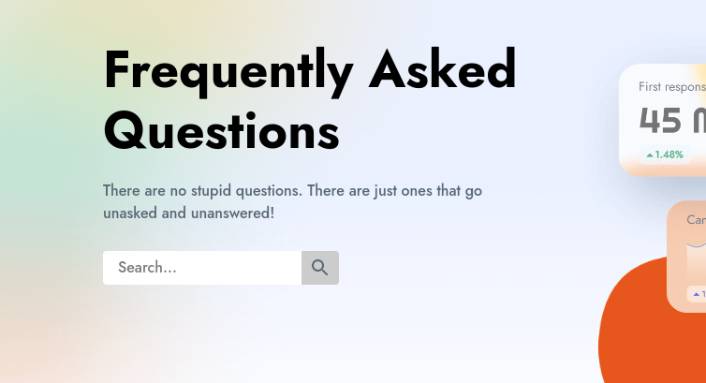
Det bör se ut ungefär så här:
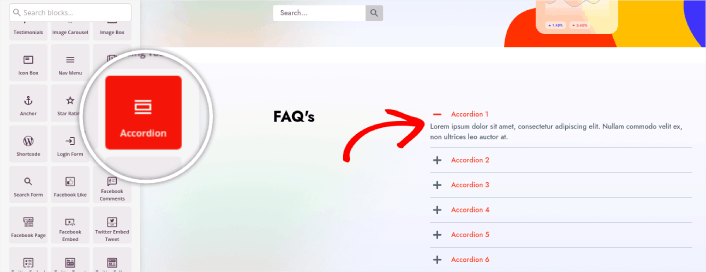
You can get rid of all the other blocks in the hero section and keep only the FAQs section. In the FAQs section, you’ll see a simple Q&A format with normal headers and paragraphs. You can keep this if you like the style. But we recommend using the Accordion module for your FAQ section:
After that, all you have to do is fill out the content. And there you have it!
Your basic FAQ page is done. If you want to supercharge it, you can also add a few tweaks to it. For instance, you can create a link to the contact page in the body copy of your hero section.
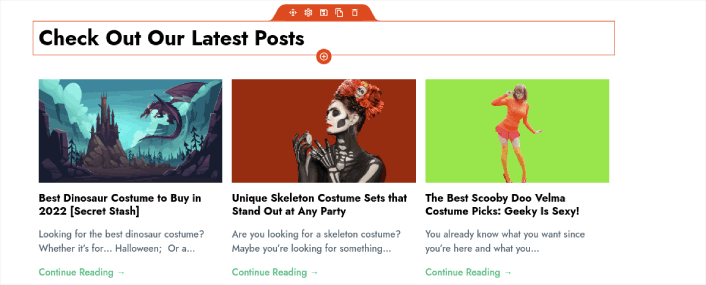
You can also add a blog section below the FAQs to redirect visitors to your latest posts using the Post block:
Finally, modify the CTA section at the bottom to collect email leads if that’s one of your marketing objectives:

You can do a lot more in terms of design and all from drag-and-drop content blocks. Once you’re happy with the overall look and feel of your FAQ page, it’s time to connect your email marketing service.
Step #4: Connect Your Email Marketing Service
After you’re done designing your FAQ page, click the Connect tab at the top of your page builder, and select your email marketing provider to collect leads on your site.

Klicka sedan på fliken Sidinställningar högst upp på skärmen.

Här kan du lägga till ett SEO-plugin och ett Google Analytics-plugin till din landningssida. Du kan till och med ställa in anpassade spårningskoder som en Facebook Pixel eller en Pinterest-pixel för att spåra annonsresultat.
Vi rekommenderar att använda All in One SEO som ditt WordPress SEO-plugin.

Om du använder AIOSEO tillsammans med SeedProd kan du helt enkelt gå till Sidinställningar » SEO » Schema och ställa in FAQ-schemat på sidan:
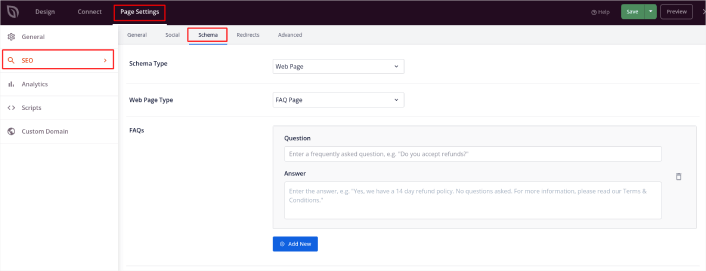
Ställ in Schematyp till Webbsida och Webbsidetyp till FAQ-sida. Klistra sedan helt enkelt in dina vanliga frågor i FAQ-fälten nedan.
Step #5: Publish Your Landing Page
Now let’s go ahead and publish your design. To do this, click the dropdown arrow next to the save button and click Publish. You can then click the See Live Page button to see how it looks.
And you’re done! If you followed every step, your FAQ page should look something like this:
Bonus Step: Add a Click to Subscribe Button to Your FAQ Page
Du kan också lägga till en klick-för-prenumerera-knapp för att samla in prenumeranter på push-notiser. Push-notiser är ett utmärkt sätt att öka din återkommande trafik, få mer engagemang och till och med sälja officiella varor om du har några.
I SeedProd, dra och släpp bara modulen Anpassad HTML från sidofältet.
Vi har placerat prenumerationsknappen direkt under e-postregistreringsformuläret i den första vyn.

Men du kan infoga knappen var du vill.
För den här delen behöver du viss erfarenhet av HTML och CSS. Eller så kan du kopiera den här koden och klistra in den i ditt anpassade HTML-block:
<button onclick="subscribeOnClickButton()" style="border: none; padding-left: 5%; padding-right:5%; text-align: center; display: inline-block; color: blue;">Get Updates via Push Notifications</button>Det där är en standardknapp i HTML med väldigt lite styling. Det enda speciella är onclick-funktionen i koden. Det betyder i princip att dina besökare kan klicka på knappen för att prenumerera på något. Nu behöver vi ge knappen lite extra kod för att tillåta dina besökare att prenumerera på push-notiser.
Gå till PushEngage startsida och klicka på knappen Kom igång :

Sedan vill du välja gratisplanen för att prova PushEngage eller välja en betald plan om du menar allvar med att växa din verksamhet. De betalda planerna kommer med fler kampanjalternativ och möjligheten att bygga ännu större prenumerantlistor.
I din PushEngage-instrumentpanel, gå till Webbplatsinställningar » Webbplatsdetaljer och klicka på knappen Klicka här för installationsinstruktioner. Under Valfri webbplats, får du din installationskod:

VARNING: Du måste kopiera koden du får från din instrumentpanel. Koden är unik för varje PushEngage-användare. Du kan inte kopiera koden i bilden och samla prenumeranter på push-notiser.
När du har koden i din PushEngage-instrumentpanel, lägg till detta kodavsnitt i din kod:
<script> window._peq = window._peq || [];</script> <script>
function subscribeOnClickButton(){
window._peq.push(['subscribe',{}.pe,function(res){
if(res.statuscode==1)
{
// Code to return response
console.log(res);
}
}]);
}
</script>
Din slutliga kod bör se ut ungefär så här:
<script src="https://clientcdn.pushengage.com/core/02a6e92667ae2279fcba8932356c1d93.js" async></script>
<script> window._peq = window._peq || [];</script> <script>
function subscribeOnClickButton(){
window._peq.push(['subscribe',{}.pe,function(res){
if(res.statuscode==1)
{
// Code to return response
console.log(res);
}
}]);
}
</script>
Du vill lägga till den här koden i HTML-blocket på din landningssida efter koden för knappen. Det bör se ut ungefär så här:

Feel free to customize the styles for the button any way you please. When you’re done customizing your FAQ page, go ahead and hit the Save button.
What to Do Once You Know How to Create a FAQ Page
You just learned how to create a FAQ page that looks awesome and converts really well. The only challenge you have left is to send traffic to it.
Och om du letar efter ett prisvärt sätt att öka din trafik, rekommenderar vi att använda push-notiser. Push-notiser kan hjälpa dig att få mer återkommande trafik och webbplatsengagemang. Du kan också skapa automatiserade push-notiskampanjer som genererar försäljning.
Inte övertygad? Kolla in dessa resurser:
- 7 smarta strategier för att öka kundengagemanget
- Är push-notiser effektiva? 7 statistik + 3 experttips
- Hur du ställer in pushmeddelanden för övergivna kundvagnar (Enkel handledning)
- Hur man lägger till ett WordPress-plugin för webbnotiser på din webbplats
Vi rekommenderar att använda PushEngage för att skapa dina push-notiskampanjer. PushEngage är den främsta push-notisprogramvaran i världen. Så, om du inte redan har gjort det, kom igång med PushEngage idag!


