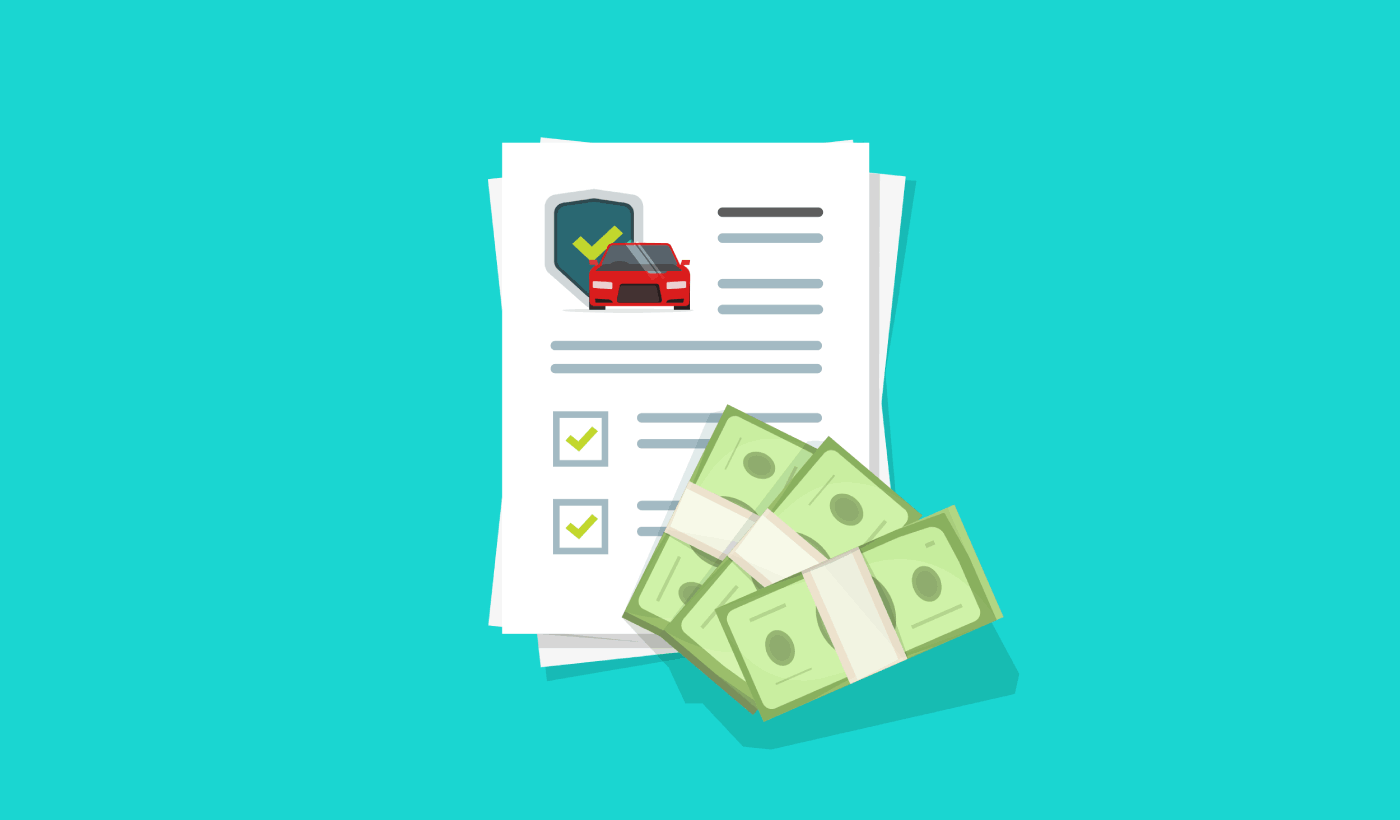
Looking for a tutorial on how to create an expense approval form in WordPress?
An expense approval form is a superb tool to streamline and monitor company expenditures. But, you might wonder, how do you craft one? Is it worth designing an expense form from the ground up?
The straightforward scoop? Probably not. You can whip up a WordPress expense approval form with a form plugin in significantly less time than starting from zero. And if you’re no tech whiz, leaning on a plugin is will likely be much kinder on your wallet too.
But hold on! The plugin universe is vast. So, which one should you choose?
In this article, we’re going to show you step by step how to create your own expense approval form in WordPress. The best part? You’ll be done in 10 minutes and you don’t need to write a single line of code.
Låt oss dyka in.
Why You Need an Expense Approval Form in WordPress
Incorporating an expense approval form into your WordPress website streamlines the way you manage, monitor, and authorize company expenditures. It becomes an essential tool for maintaining financial discipline and transparency in your organization.
PushEngage är det främsta push-notiser-pluginet i världen. Skaffa det gratis!
Through a clear format like, “What’s the purpose of this expense?” or “Attach your expense receipt here”, you can maintain a consistent record of every penny spent. Expense forms can categorize expenses based on their nature like travel, supplies, or entertainment, ensuring clarity in documentation.
Often, expense approval forms also allow a section for notes or clarifications. This section provides valuable context to approvers, making sure there are no ambiguities when it’s decision time.
By routinely processing expenses through this system, you’re creating a clear financial trail. This periodic review ensures that expenses align with company policies and budgets. Plus, it’s a quick way to spot any irregularities or misuse.
The insights you gather can lead to tangible policy improvements. Over time, you might spot patterns – maybe your team frequently overspends in one area or there are recurrent unjustified expenses. This can guide policy updates or staff training.
To integrate an expense approval form into your WordPress platform, you can use specific plugins or incorporate forms from external finance tools. Ensure your form is straightforward, intuitive, and easily accessible to those who need it.
In essence, expense approval forms in WordPress help synchronize company spending with financial guidelines, ensuring budget adherence and fiscal responsibility.
How to Create an Expense Approval Form in WordPress
Now that you know why you should be creating your expense approval form, it’s time to start building one for your site. To create your expense approval form, we’re going to use a super popular form builder plugin for WordPress called WPForms.
Låt oss börja.
Steg #1: Skapa ett nytt WordPress-formulär
Det första du behöver göra är att installera och aktivera WPForms.

WPForms är världens främsta WordPress-formulärbyggare. Om du är osäker på hur du installerar WPForms bör du ta en titt på den här steg-för-steg-guiden om hur man installerar ett tillägg i WordPress.
Gå sedan till din WPForms-instrumentpanel och gå till Nedladdningar för att hämta ditt tillägg:
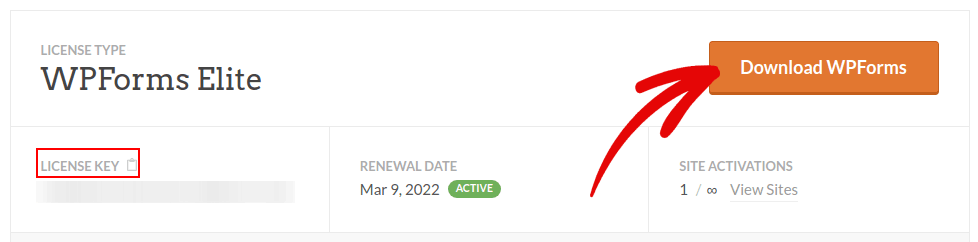
Installera och aktivera sedan tillägget på din webbplats. Och kopiera din licensnyckel i samma flik.
Gå slutligen till din WordPress-instrumentpanel och gå till WPForms » Inställningar och klistra in din licensnyckel:
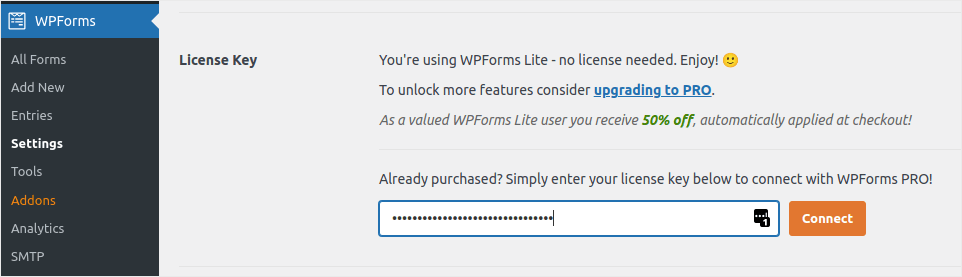
När du är klar klickar du på Anslut.
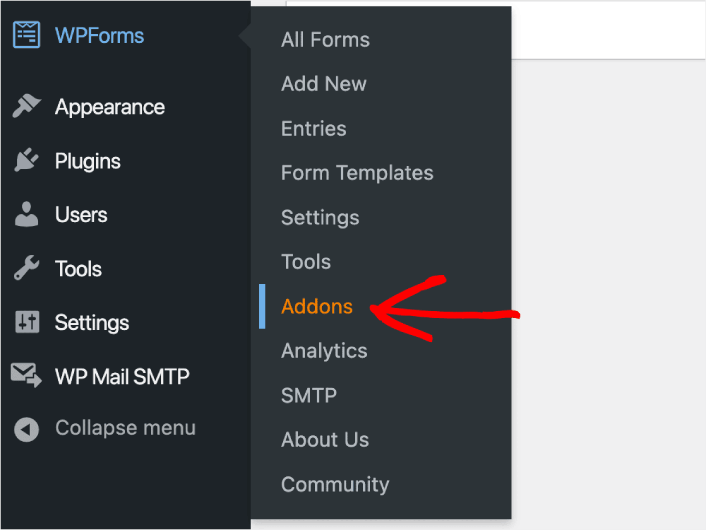
Step #2: Add the Right WPForms Addons
Navigera från din WordPress-instrumentpanel till WPForms » Tillägg.
Now, search for the Save and Resume Addon by typing its name in the Search Addons field. Next, click on Install Addon.
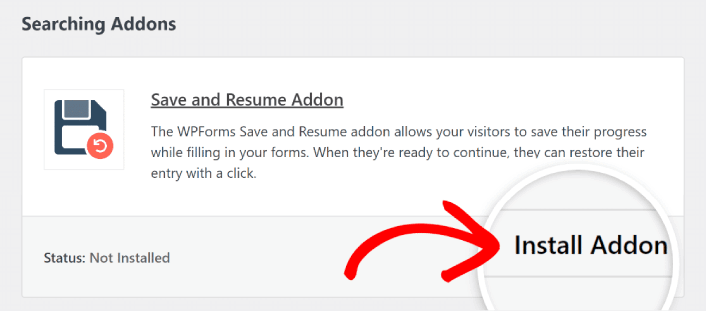
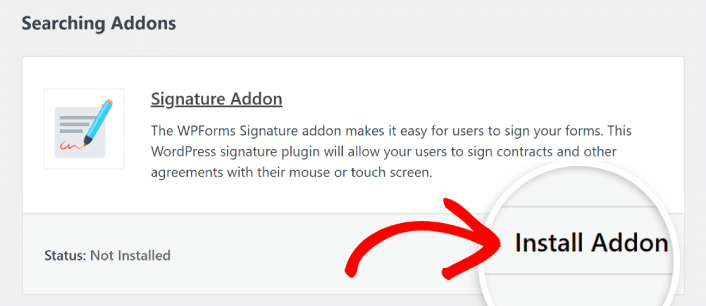
After the addon has been installed successfully, press the same button again to Activate it. And do the same thing for the Signature Addon.
Nu när WPForms är installerat och aktiverat är det dags att skapa ditt första formulär. Gå till WPForms » Lägg till nytt:

Detta öppnar WPForms dra-och-släpp-formulärbyggare.
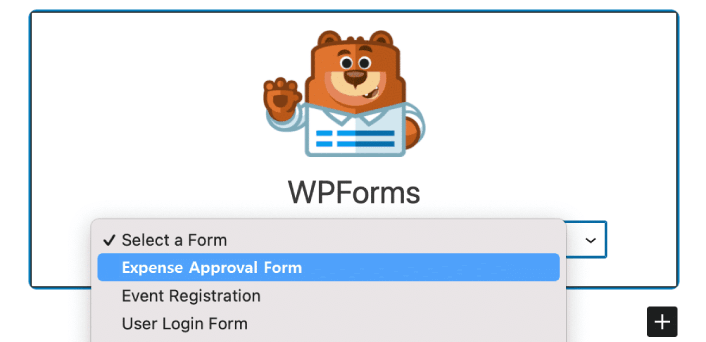
Step #3: Select Expense Approval Form Template
För att skapa ett nytt formulär, ge det ett namn och välj din formulärmall:
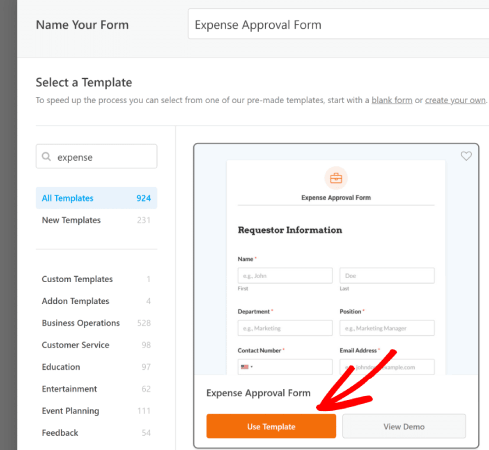
Med WPForms får du en mängd fördesignade formulärmallar som du helt enkelt kan importera med ett enda klick och sedan anpassa som du vill. För en närmare titt på hela listan med funktioner bör du ta en titt på vår recension av WPForms.
Step #4: Customize Your Expense Form
Därefter kommer du till formulärbyggaren med din mall laddad.
Du kan använda mallen direkt för att samla in feedback från dina kunder. Men du är fri att göra ändringar i den här mallen om du vill lägga till ytterligare fält för att samla in mer detaljer och insikter från dina kunder.
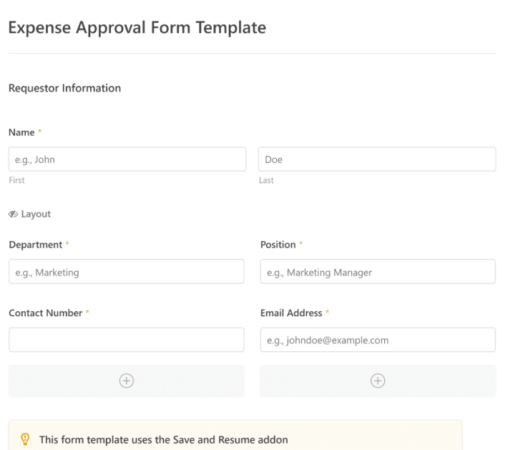
You’ll notice that this template is built with fields that automate capturing the requestor’s information, expense details, and approval via Signature.
If required, you can use WPForms’ intuitive form builder to easily add, modify, and arrange fields to tailor the form to your liking.
Du kan också få formulär att se bra ut genom att följa stegen i vårt inlägg om hur man skapar ett formulär i flera steg i WordPress. Det är ett utmärkt sätt att förbättra användarupplevelsen och minska antalet avbrutna kundvagnar. Men vi håller oss till en enda sida för den här handledningen.
Step #4: Enable Save and Resume Settings
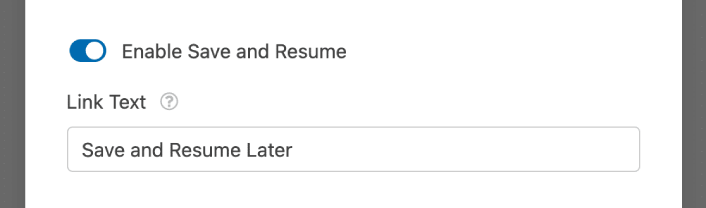
First, you’ll want to add the Save and Resume feature to your expense approval form. Go to Settings » Save and Resume from the form builder. To turn on save and resume functionality, toggle on the Enable Save and Resume option.
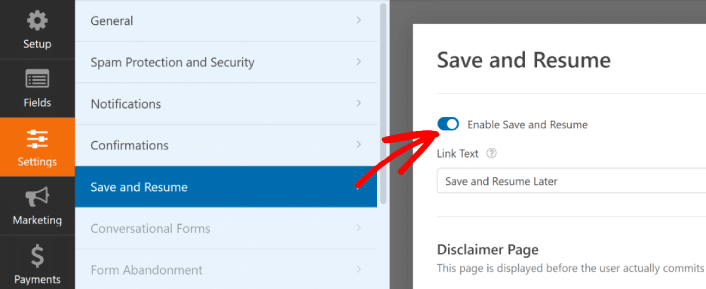
To begin, you can personalize the wording on the link that users will click to save their progress in your form.
You can change the text in the supplied field. By default, it says Save and Resume Later, but you can change it to anything you like.
This link will show up at the bottom of your form, next to the button labeled Submit.
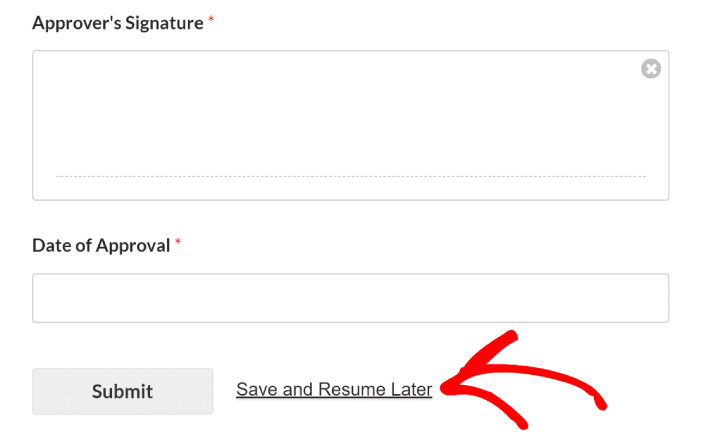
NOTE: The resume URLs will stop working after 30 days. So, make sure to add a disclaimer on your form that mentions this fact.
Step #5: Configure Your WordPress Expense Approval Form Settings
Därefter vill du ställa in aviseringar och bekräftelser.
Aviseringar är e-postmeddelanden som du får när någon fyller i formuläret. Bekräftelser är avsedda att meddela användaren att de har fyllt i formuläret framgångsrikt. Vanligtvis är detta ett "Tack"-meddelande, men du kan också omdirigera dina användare till en dedikerad sida.
Gå till Inställningar » Bekräftelser för att konfigurera bekräftelseinställningar:

Och sedan i samma meny, gå till Aviseringar för att konfigurera dina meddelanden:

Som standard skickas aviseringarna till WordPress admin-e-postadressen. Så om du vill att e-postmeddelandena ska skickas någon annanstans, till exempel till e-postadressen för din försäljningschef, kan du göra det här.
Step #6: Add the Expense Approval Form to Your Site
You can add the expense approval form on your site using the WPForms Gutenberg block:
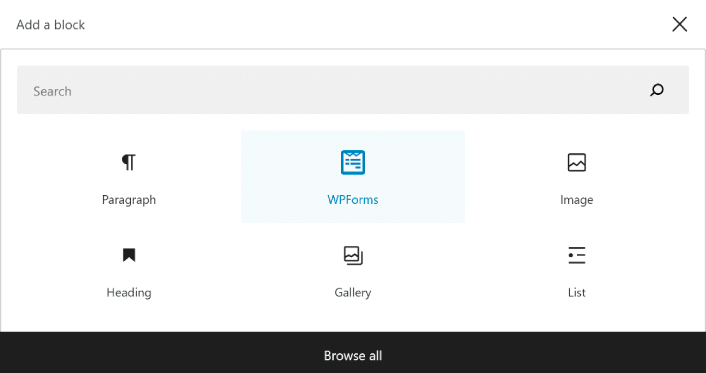
All you need to do is select your expense approval form.
If you’re satisfied with the way your form looks, hit the Update or Publish button, and your form will go live.

Och du är klar!
How to Promote Your Expense Approval Form
Det var allt för den här gången, gott folk!
By now, you’ve learned how to create expense approval form in WordPress. Next, you should set up form abandonment tracking to reduce your form abandonment rates.
Efter det är allt som återstår att generera trafik till din webbplats så att ditt formulär kan börja fungera och konvertera. Ett enkelt sätt att göra det är att börja använda push-aviseringar. Att skicka push-aviseringar är ett utmärkt sätt att generera återkommande trafik till din webbplats. Om det är något du är intresserad av bör du även titta på dessa artiklar:
- Kostnad för pushmeddelanden: Är det verkligen gratis? (Prisanalys)
- Hur du får mer trafik till din WordPress-blogg (9 enkla sätt)
- Hur du ökar din webbpush-notis opt-in-frekvens (7 sätt)
- Hur man lägger till ett WordPress-plugin för webbnotiser på din webbplats
Vi rekommenderar att använda PushEngage för att skicka dina pushmeddelanden. PushEngage är den främsta pushmeddelandemjukvaran i världen. Så om du inte redan har gjort det, kom igång med PushEngage idag.


