
Looking for a quick and easy tutorial on how to embed Instagram photos in WordPress?
Instagram embeds are not the same as having a link to an Instagram post. With Instagram embeds, you can showcase your entire Instagram feed or parts of it as you see fit.
But the tricky part is to create an Instagram embed for WordPress. WordPress doesn’t support Facebook and Instagram oEmbeds anymore. oEmbed was a simple way to fetch Instagram photos on any site by simply pasting the link. But now, you have to sign up as a Facebook app developer and create an app with oEmbed permissions to embed Instagram photos in WordPress.
If that sounds complicated, that’s because it really is. The good news is that there’s a super simple way to embed Instagram photos in WordPress. In this article, we’re going to see exactly how you can embed Instagram photos in WordPress without a single line of code.
Och vi kommer att göra det på 10 minuter eller mindre!
Låt oss dyka in.
Why You Should Embed Instagram Photos in WordPress
If you can embed Instagram photos in WordPress, you’ll see a lot of benefits right away. It’s a great way to get the website visitors you bring in from other channels such as SEO to become your Instagram follower.
But that’s just the most obvious benefit. With Instagram feeds, you can customize the section to show your customer reviews, content from your top affiliates and influencers, and your most successful campaigns. It’s super easy to do as well. You can filter the showcased posts by specific hashtags and brand mentions.
Det dynamiska innehållet ökar också engagemanget på din webbplats. Du kan till och med få lite SEO-boostar på din webbplats på grund av det extra innehållet på dina sidor.
How to Embed Instagram Photos on Your WordPress Site
You can easily embed Instagram feeds on your website using the Instagram Feed Pro plugin from Smash Balloon.
Smash Balloon is the #1 social media feed plugin for WordPress. The Instagram Feed Pro plugin by Smash Balloon is the easiest way to embed Instagram photos in WordPress.
Du kan använda Smash Balloon för att:
- Använd dina hashtag-flöden på din webbplats som sociala bevis
- Display interactive Twitter feeds to boost website engagement
- Bädda in dina YouTube-videor på din webbplats för att öka dina prenumeranter
- Lägg till autentiska Facebook Business Page-recensioner på din webbplats för att öka konverteringarna
And lots more! Most importantly, Instagram Feed Pro lets you embed an Instagram feed without registering as an app developer. This will save you a ton of time and hassle.
Om du vill se hela listan över funktioner i Smash Balloon bör du ta en titt på vår recension av Smash Balloon.
The next few steps are all you need to do to embed Instagram photos in WordPress. If you follow every step, you should be able to create an Instagram feed on your site like this one:

Låt oss börja.
Step #1: Install and Activate the Instagram Feed Pro Plugin
First off, install and activate the Instagram Feed Pro plugin. You can download the Instagram Feed Pro plugin from your Smash Balloon account under Downloads:

Then, activate the plugin using your license key in your WordPress dashboard by going to Instagram Feed » Settings » General » License Key:
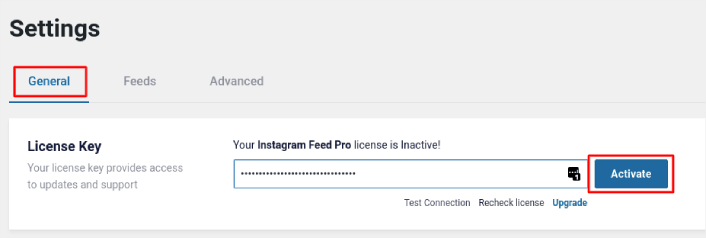
Paste in your license key and click on the Activate button.
Step #2: Connect Your Instagram Account to WordPress
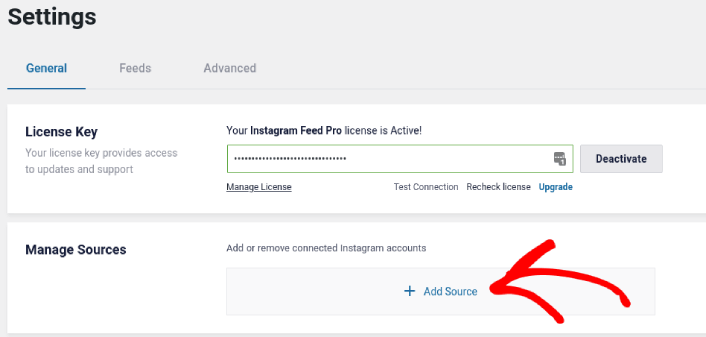
In your WordPress dashboard, go to Instagram Feed » Settings » General » Manage Sources and the click the plus (+) button:
Then, click on the Login with Instagram button:
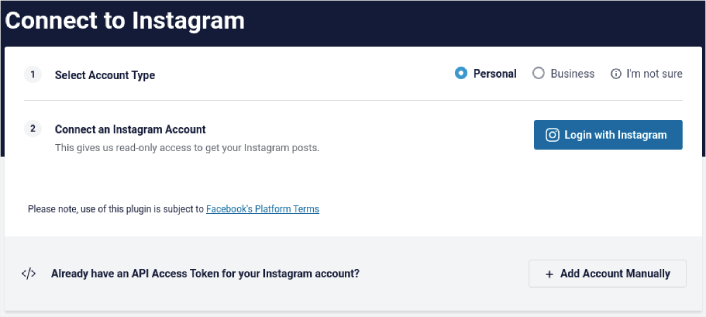
Once you’re done logging in to your account, you can start creating Instagram feeds for your site.
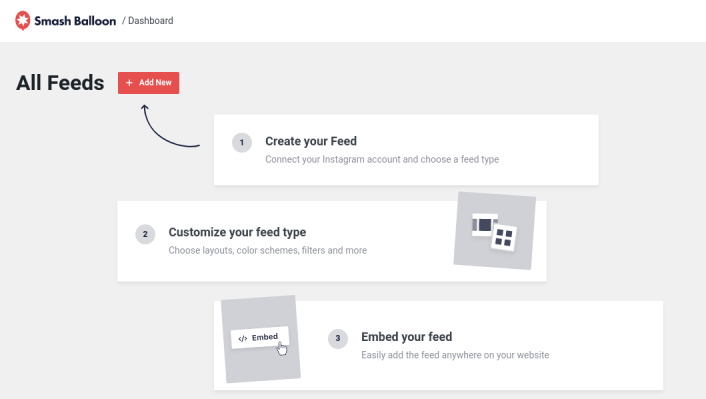
Step #3: Choose the Instagram Content to Display
In your WordPress dashboard, go to Instagram Feed » All Feeds and click the Add New button:
Next, you’ll need to select the type of content you want to display on your site:
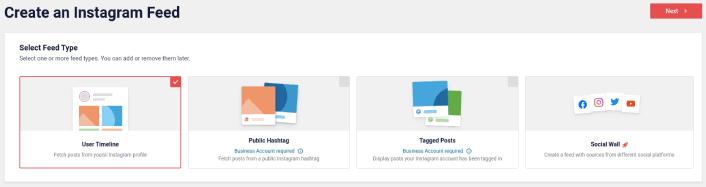
You can create 4 types of Instagram feeds:
- Användartidslinje: Denna typ av flöde är tillgänglig för alla konton och du kan använda den för att visa dina senaste inlägg.
- Public Hashtag: You can embed this type of feed to display only posts with a specific hashtag.
- Tagged Posts: This type of feed displays only posts where your Instagram handle is tagged. It’s perfect for showcasing social media reviews.
- Social Wall: You can embed Instagram photos in WordPress as part of a custom wall with feeds from other social media platforms as well.
Pick the right type of content for your site and click the Next button. You’ll be prompted to select the source for your Instagram feed. Just select the account you connected with your WordPress site earlier.
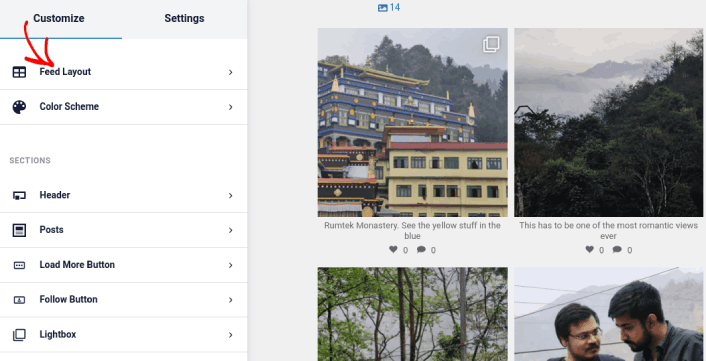
Step #4: Customize Your Instagram Feed
Now for the coolest bit about Smash Balloon. You can use a drag-and-drop editor to customize your Instagram feed! In the left-hand sidebar, you get a bunch of design options that are super easy to use.
Anpassa flödets layout
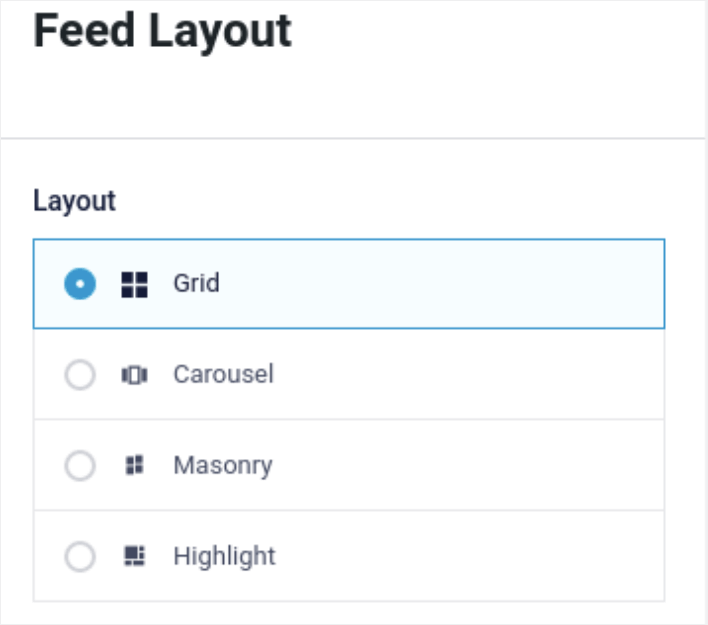
Du kan klicka på fliken Flödets layout under Anpassa för att välja en layout för din inbäddning:
Det finns 4 typer av layouter du kan välja mellan. Du kan se hur var och en av dessa ser ut i förhandsgranskningen och sedan välja den du gillar bäst:
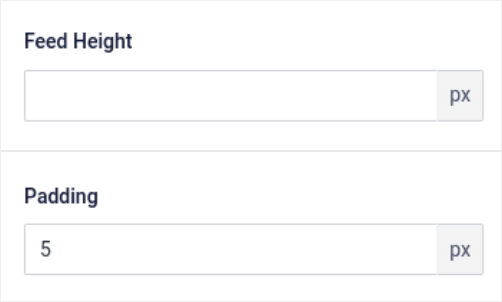
Du kan också ställa in en anpassad flödeshöjd och stoppning:
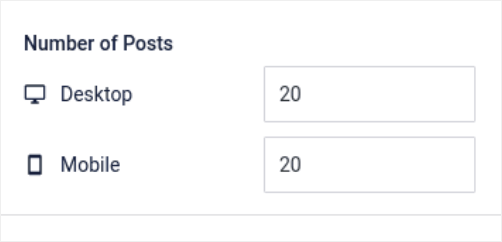
Du kan till och med välja antalet inlägg du vill visa åt gången:
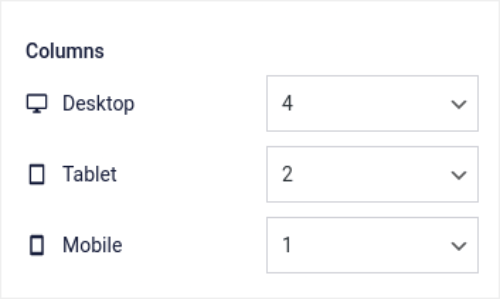
And if you’re feeling really fancy, you can also set the number of columns in your Instagram feed:
Anpassa färgschema
The default color scheme in Instagram Feed Pro is meant to work with almost any site’s design. But just in case you feel that it’s out of place with the rest of your site, you can customize the feed’s color scheme as well.
Under Anpassa, gå till Färgschema för att välja ett anpassat utseende:
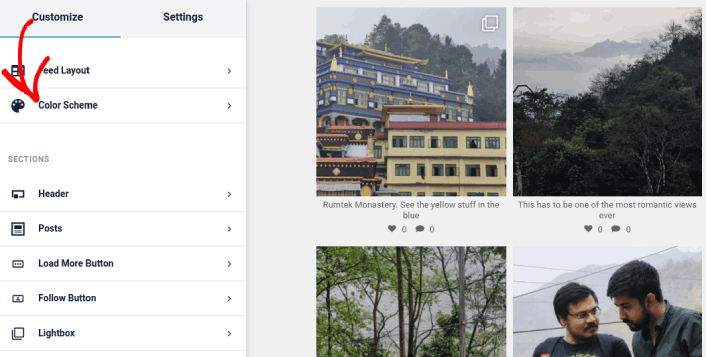
Vi rekommenderar att använda alternativet Ärv från tema eftersom det automatiskt hämtar din temas stilar.
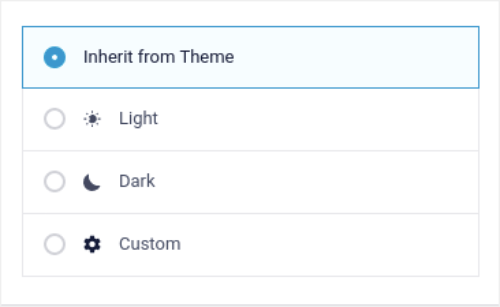
Men du kan klicka på Anpassad för att skapa ditt eget färgschema.
Lägg till sektioner i ditt Instagram-flöde
Finally, you can also add custom sections to your Instagram feed under Customize » Sections:
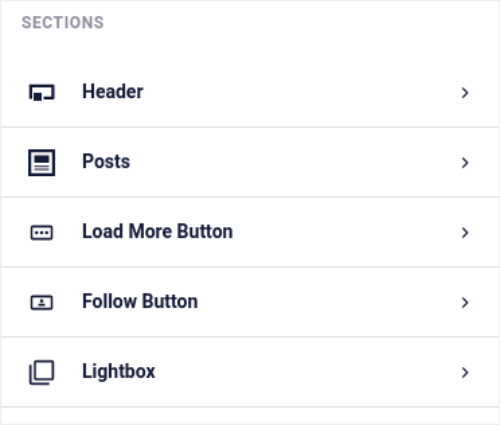
Detta inkluderar:
- Rubrik: Du kan anpassa rubriken för att inkludera teckensnittsstilar, en anpassad profilbild, en anpassad biografi och mer.
- Inlägg: Du kan anpassa bild- och videoupplösning för dina inlägg, tillåta bildtexter, inkludera sammanfattningar av gillamarkeringar och kommentarer samt skapa hover-effekter.
- Ladda mer-knapp: Du kan lägga till en Ladda mer-knapp i ditt flöde för att hämta fler bilder när dina besökare klickar på dem.
- Follow Button: You can add a button to nudge your website visitors to follow you on Instagram.
- Ljuslåda: Du kan skapa en ljuslådepopup där dina inlägg dyker upp i helskärmsläge när de klickas på.
När du är nöjd med inställningarna, klickar du på knappen Spara.
Step #5: Embed Instagram Photos in WordPress Page/Post
Now that your feed has been fully customized, it’s time to embed Instagram photos on your site. In your WordPress dashboard, go to Instagram Feed » All Feeds and copy the feed shortcode:
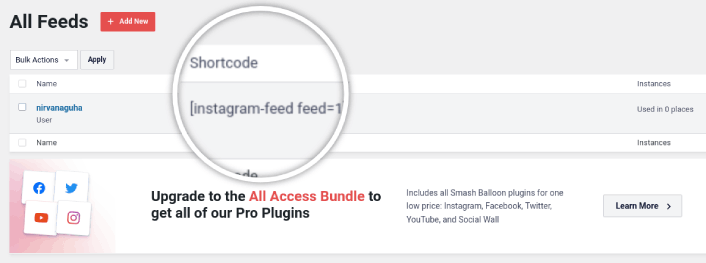
Now, you can use this shortcode to embed Instagram photos in WordPress instantly. You can add it to the sidebar, footer, posts, and even pages across your site.
If you followed all the steps from start to finish, you should have an Instagram feed on your site like this one:
Det var allt! Du är klar.
What to do After You Embed Instagram Photos in WordPress
Det var allt för den här gången, gott folk!
By now, you’ve managed to embed Instagram photos in WordPress. Next, you should set up a viral giveaway to supercharge your social media following.
Därefter återstår bara att generera trafik till din webbplats så att dina kontaktformulär kan börja fungera. Ett enkelt sätt att göra det är att börja använda push-meddelanden. Att skicka push-meddelanden är ett utmärkt sätt att generera återkommande trafik till din webbplats. Om det är något du är intresserad av bör du även titta på dessa artiklar:
- Kostnad för pushmeddelanden: Är det verkligen gratis? (Prisanalys)
- Hur du får mer trafik till din WordPress-blogg (9 enkla sätt)
- Hur du ökar din webbpush-notis opt-in-frekvens (7 sätt)
- Hur man lägger till ett WordPress-plugin för webbnotiser på din webbplats
Vi rekommenderar att använda PushEngage för att skicka dina pushmeddelanden. PushEngage är den främsta pushmeddelandemjukvaran i världen. Så om du inte redan har gjort det, kom igång med PushEngage idag.


