تنبيه: لا تتوفر وثائق قديمة لهذا العنصر، لذا فإنك ترى الوثائق الحالية.
الحملات المتسلسلة أو الردود التلقائية المتسلسلة هي مفهوم جديد في إشعارات الويب. سنحاول تسهيل المهمة ووصف خطوات محددة لتشغيلها في PushEngage.
You can enable a Web Push Notification Autoresponder campaign and send it to all subscribed users or to a list/segment of users in PushEngage. Segment your users into specific lists, which can happen on specific pages, or when the user subscribes to a curriculum of notifications.
قبل البدء
- You need a WordPress Account and access to the PushEngage Plugin.
- Drip Autoresponders are available in Premium Plans & above in PushEngage.
Creating Drip Autoresponders
Step 1 – Login to your WordPress dashboard and navigate to PushEngage Plugin > Drip. You can edit the existing Welcome Drip or create a new series as per your business case.
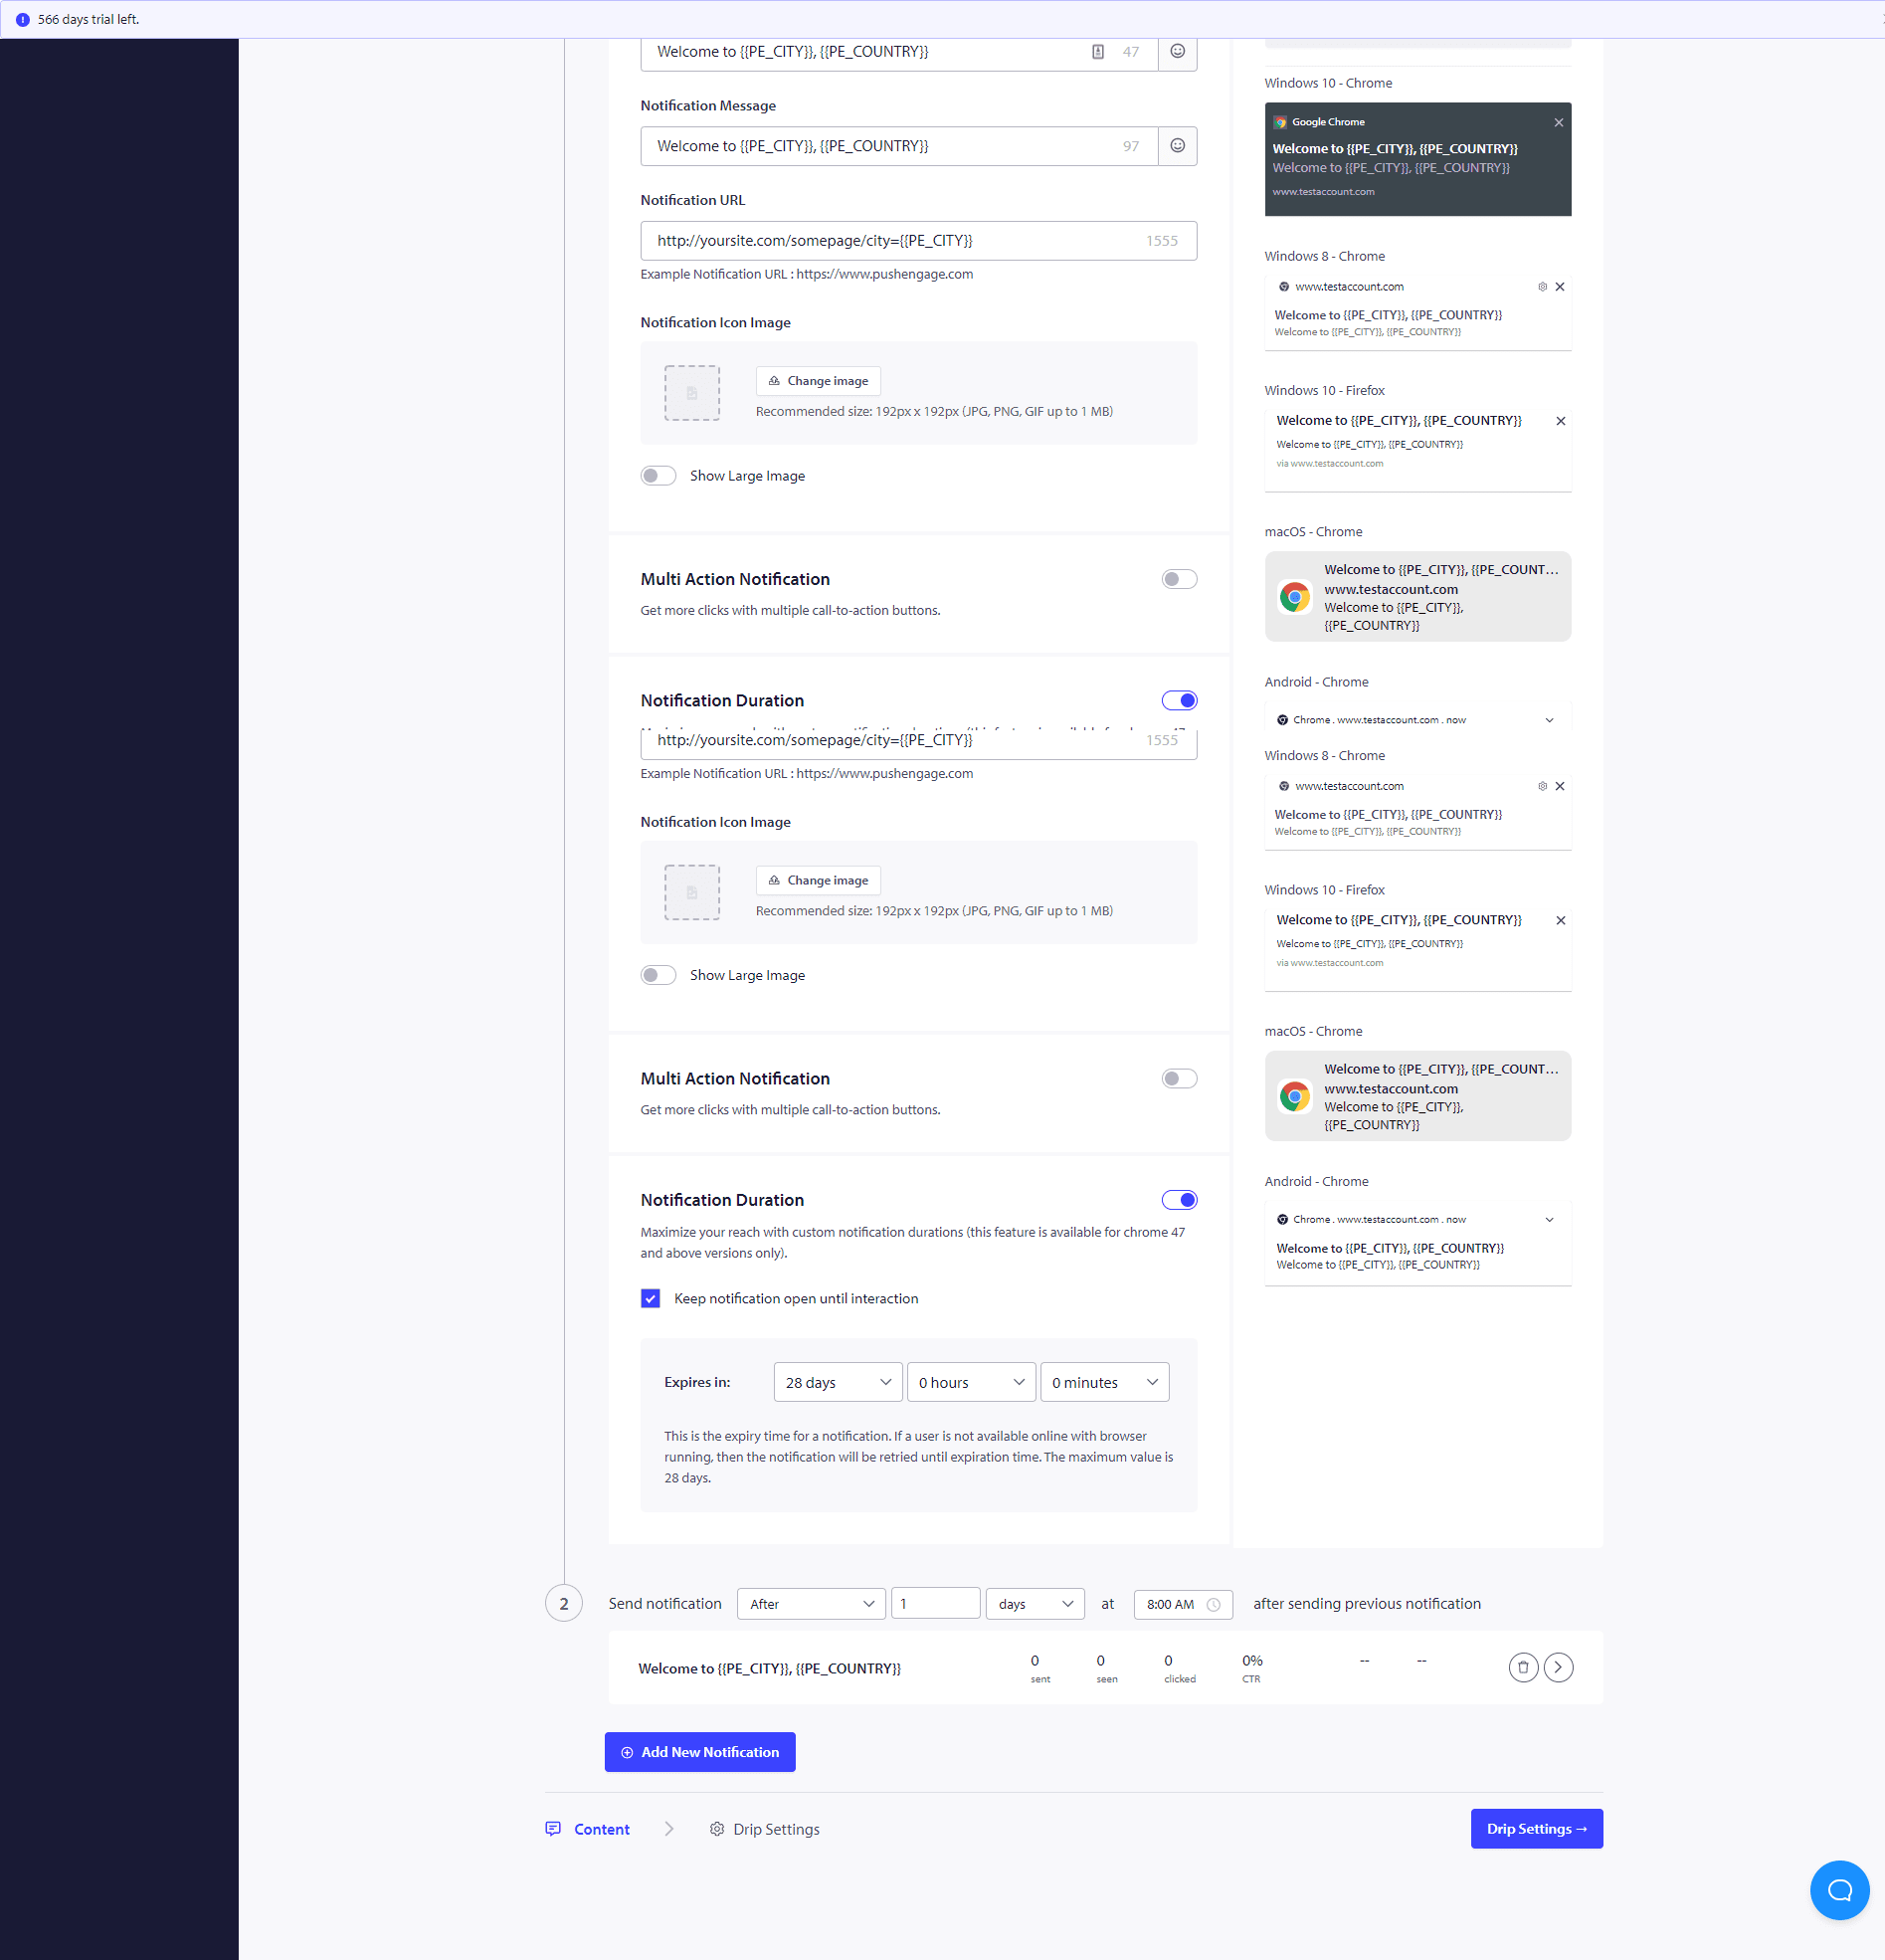
Step 2 – Now Create the Auto Responder Series by adding one or as many notifications as you are willing to have in the Series.
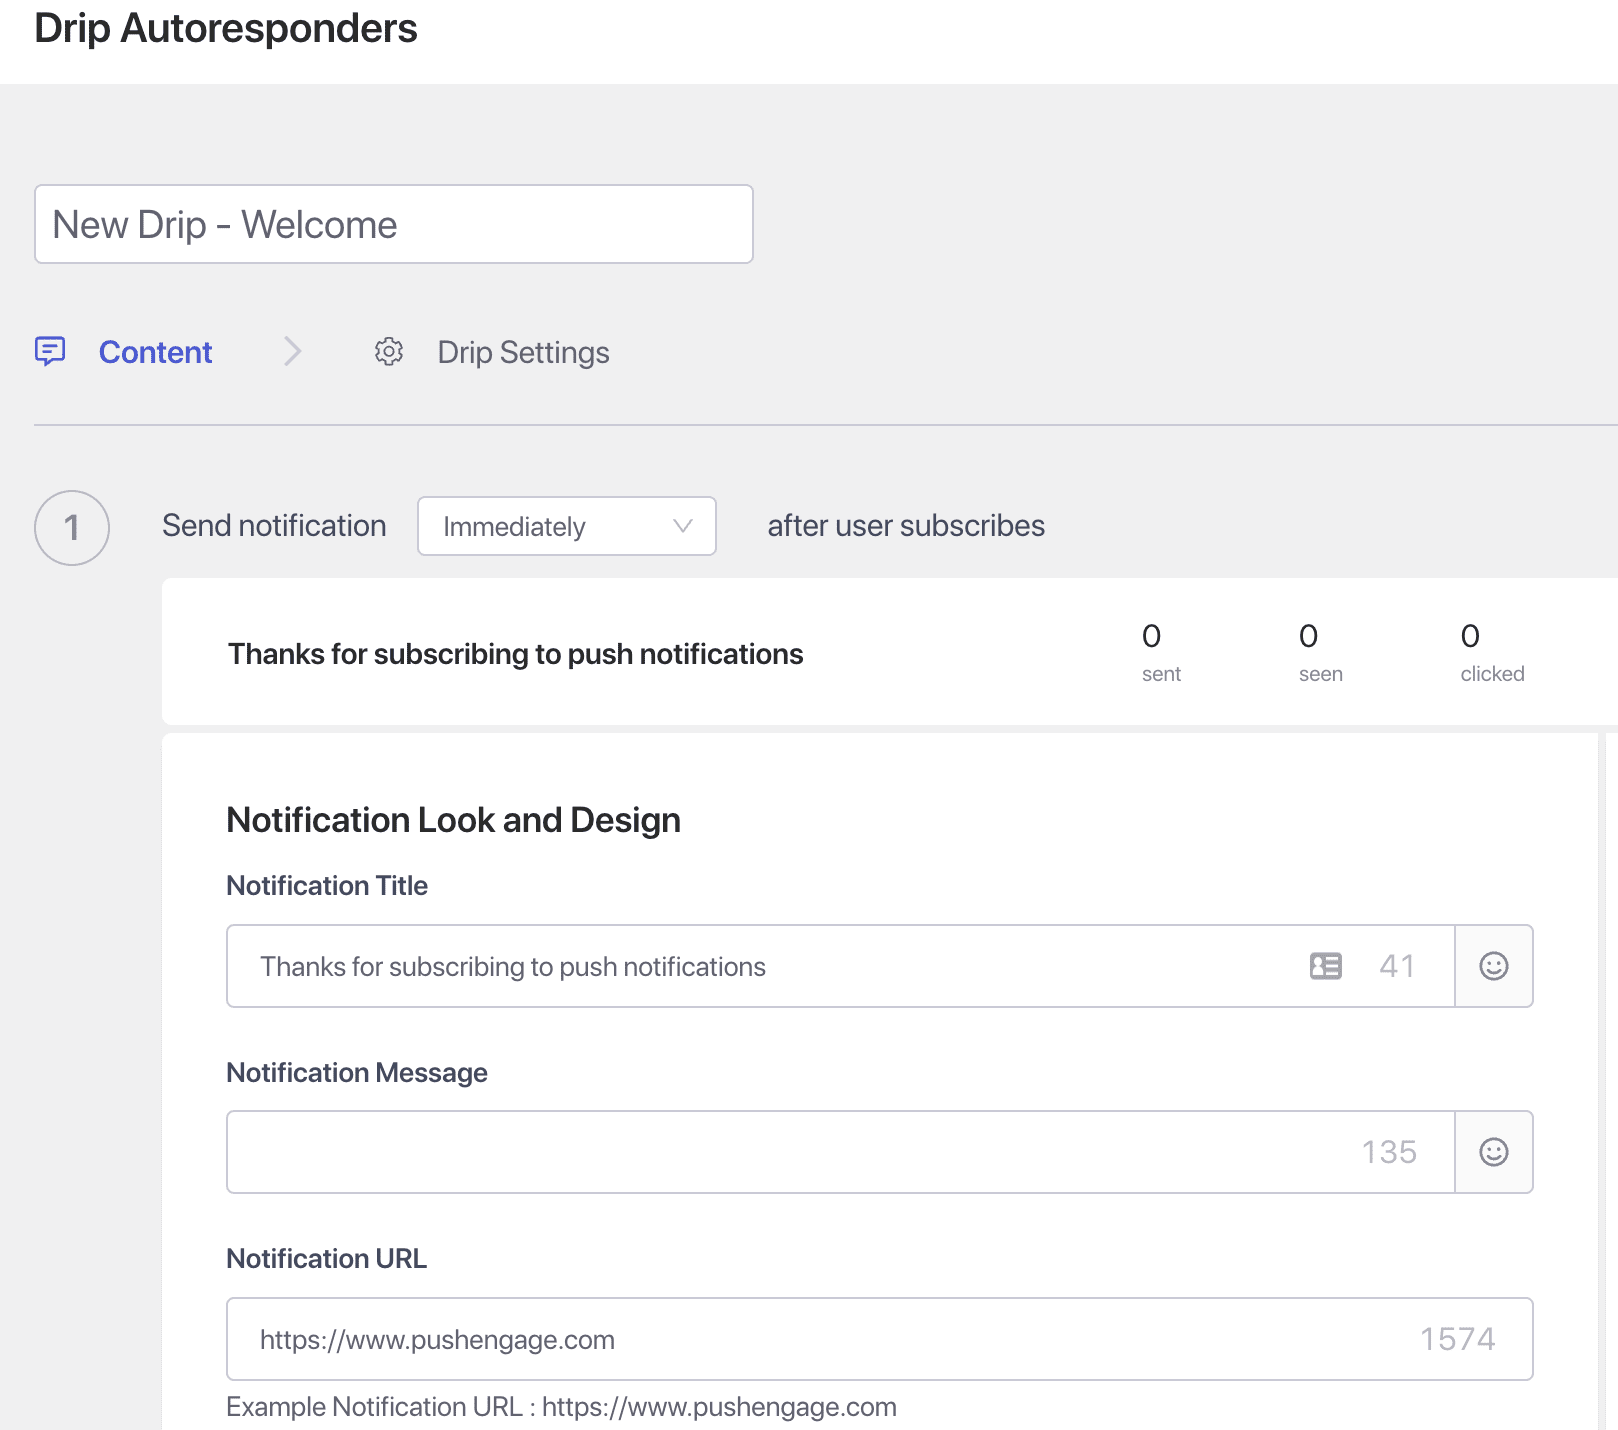
Step 3 – Set the Delay – Now Create series of Notifications to be sent after 10 mins or 1 hour and after 1 day as an example.
Once you have completed these Drip Campaigns, you would be interested in seeing how each of the notification stages is performing. For that Visit Autoresponder Analytics and Click on the Just Created Drip Campaign.
الرد التلقائي المتسلسل الخاص بك جاهز الآن. هذا كل شيء، اجلس وشاهد حركة المرور تزداد وزوارك يتفاعلون ويعودون إلى موقعك مع الحملات المتسلسلة.
كيفية تخصيص الحملة المتسلسلة؟
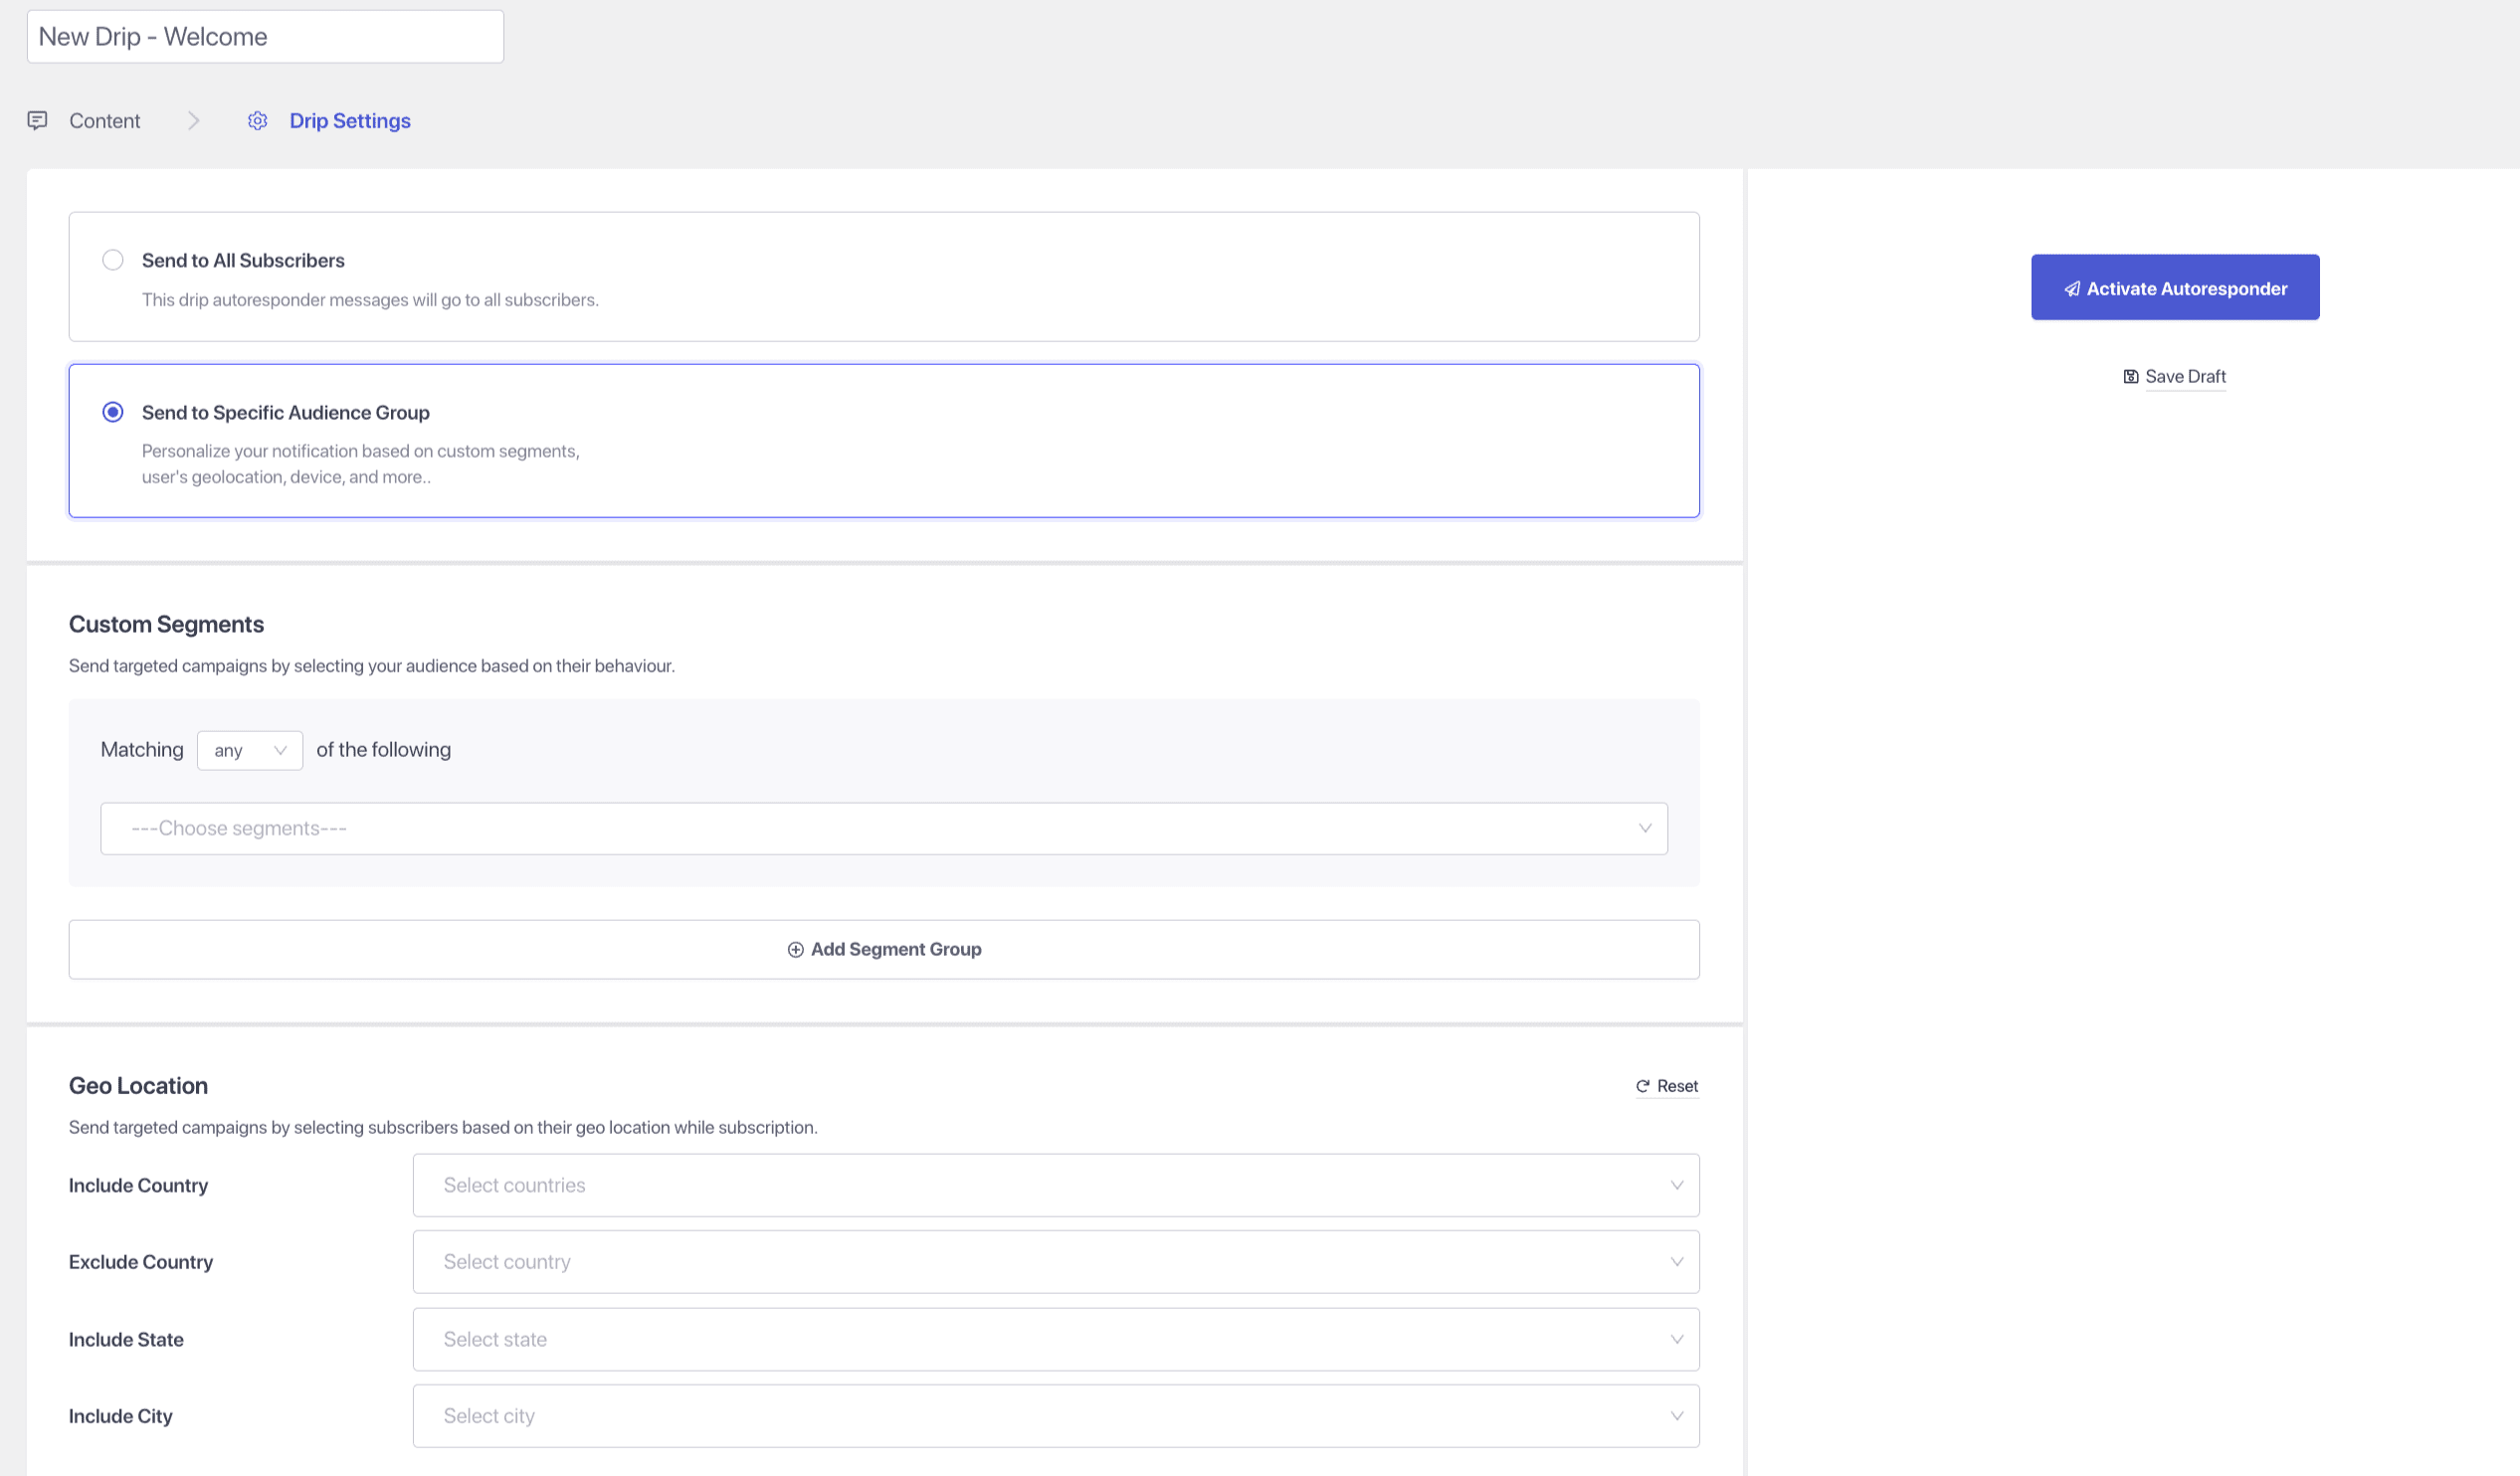
To personalize the drip or if you wish to send it to a particular group of people/segment or to geolocation, you can select the relevant segment name or the geolocation you wish to notify from the dropdown
Further, Drip campaigns can be used to build Form abandonment, welcome series, and cross-sell campaigns, cookbook series.
في حال واجهت أي مشاكل، فلا تتردد في الاتصال بنا بالنقر هنا. سيكون فريق الدعم لدينا قادرًا على مساعدتك.


