
Looking for a way to start passing on credit card fees to customers in WordPress?
If you’re using Stripe to process payments on your site, then you already know that Stripe charges 2.8% + $0.30 per transaction.
And it’s not just a Stripe thing. Every payment gateway charges some percentage in transaction fees. This means that the bigger your transaction, the more fees you’ll end up paying.
In this article, we’re going to go over passing on credit card fees to customers in WordPress. And we’ll do it without any coding at all using a simple, easy to use plugin.
听起来不错?让我们开始吧。
Passing On Credit Card Fees to Customers
Before you start passing on credit card fees to customers, there’s something you should know. Passing on credit card fees in legal by Federal Law in the United States. However, different states have different legislation and not all of them allow you to pass on credit card fees to customers. So, make sure that you talk to a good lawyer before you start saving on credit card fees.
PushEngage是全球排名第一的推送通知插件。免费获取!
Also, for this tutorial, we’re going to use one of the best Stripe plugins in the world. If you’re using a different solution, check if they allow fee recovery. If not, you’ll need to switch to WP Simple Pay.
Step #1: Install WP Simple Pay Pro

WP Simple Pay 正如其名。它使在您的WordPress网站上进行在线支付变得简单。它易于使用,高度可靠,并且设置无需任何编码。
最棒的是什么?WP Simple Pay 帮助您专注于创建和销售产品,而无需担心接受来自世界各地的付款。
所有客户和付款信息都存储在您的 Stripe 帐户中,而不是存储在您的 WordPress 网站上。因此,该插件不会像其他替代方案那样使您的网站臃肿。WP Simple Pay 提供了一种最简单的方法,可以在您的 WordPress 网站上添加 Stripe 付款。
设置WP Simple Pay非常简单。
以下是WP Simple Pay Pro主要功能一览:
- 支付表单生成器
- Stripe Checkout支付页面生成器
- 自定义金额支付
- 自定义订阅选项
- 使用 优惠券代码 折扣
- 替代支付方式
- 自定义支付确认流程
And more! You can get a closer look at the features in our review of WP Simple Pay Pro. Or go ahead and install WP Simple Pay Pro. If you’re not sure how to install the plugin, check out this guide on how to install WordPress plugins.
Step #2: Connect Stripe to WordPress
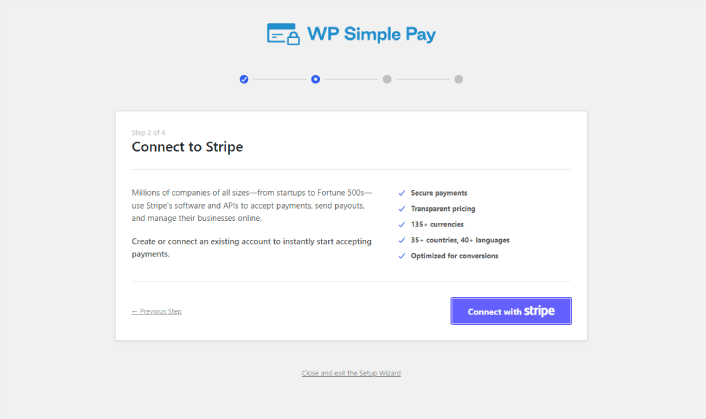
After you’ve installed and activated WP Simple Pay, you’ll need to connect your Stripe account to WordPress in order to begin accepting payments and configuring recovery fee options.
Simply click on the Connect with Stripe button in the setup wizard:
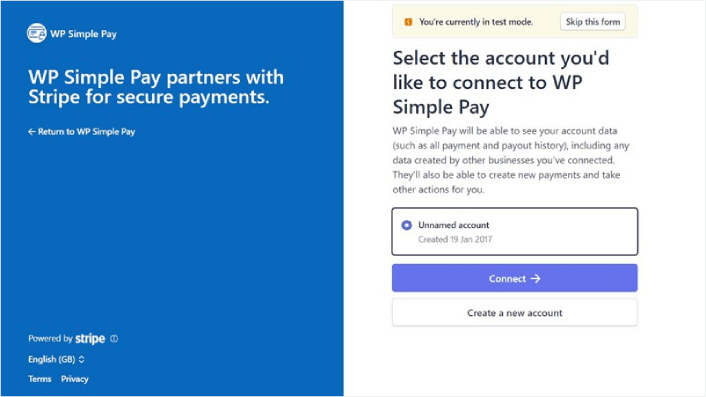
If you already have a Stripe account, all you need to do is go ahead and connect it to your site. And if you’re new to Stripe, you can click on the Create a new account button to get your Stripe account for free:
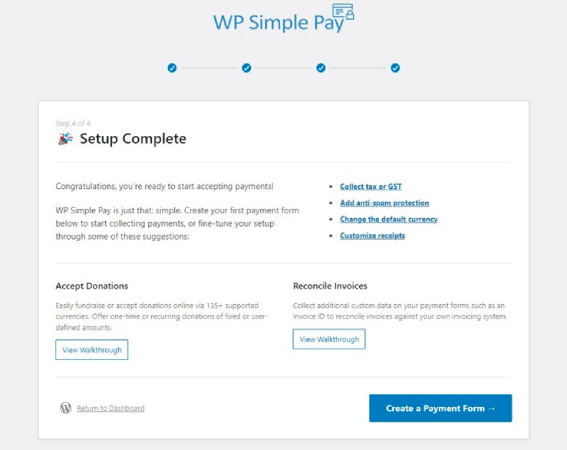
Once that’s done, you can set up your first payment form using WP Simple Pay.
Step #3: Create a Payment Form
To begin accepting payments on your site and passing on credit card fees to your customers, you’ll need to create a payment form. Click on the Create a Payment Form button on the success page.
You can select from a whole library of templates for your payment form.
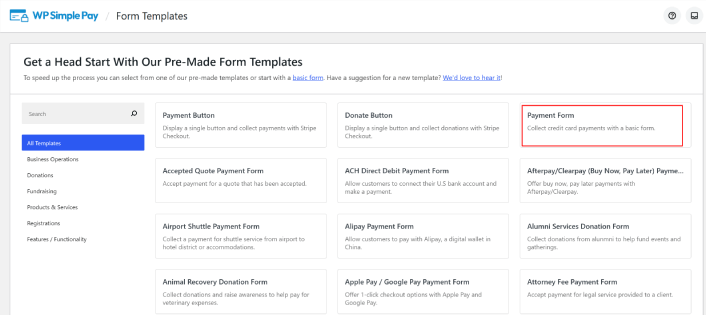
Just set up the payment form and you’re ready to accept payments.
Step #4: Configure the Form for Passing On Credit Card Fees to Customers
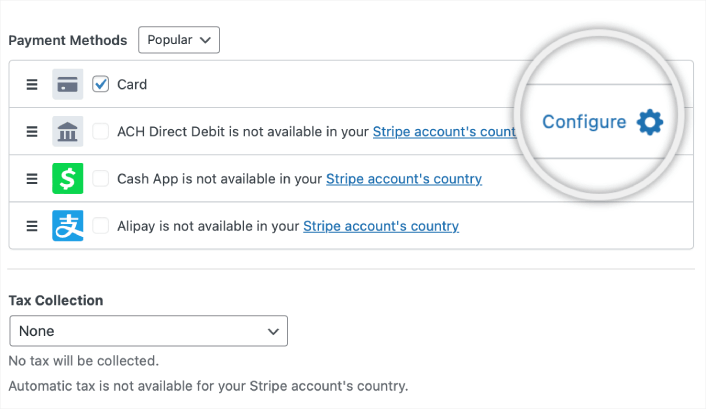
Head over to the Payment option on the left to customize the currency, amount, and also select between a one-time or subscription payment. Once that’s done, scroll down to Payment Methods. Here, you can see all the different payment methods that are available in your country and choose the ones you want to allow your users to use.
To add a recovery fee for credit cards, simply click on Configure.
A popup appears, allowing you to customize the Fee Recovery values.
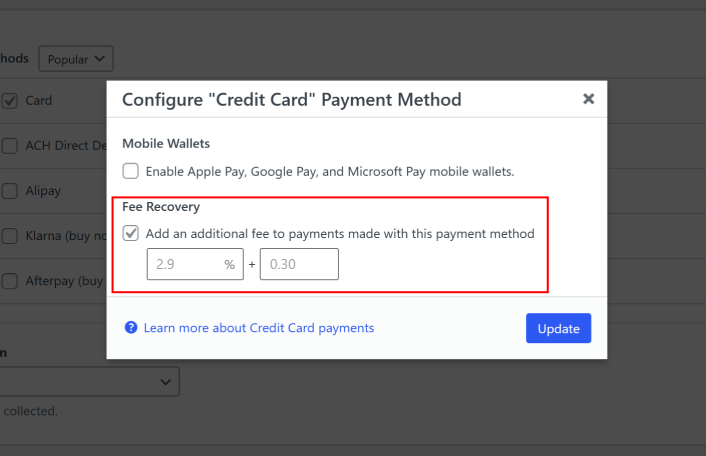
就是这样。
Step #5: Add Your Payment Form to a Page
The final step to begin accepting payments with the Stripe processing fee covered by your customers is to embed the form on your site. Simply go to the page or post where you want your payment form and click on the + icon to add the WP Simple Pay block.
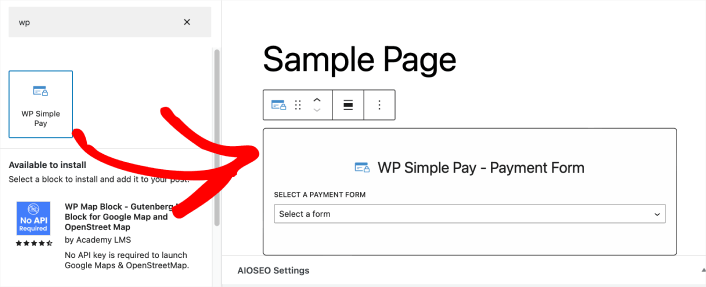
You can select your payment form from the dropdown list. And you’re done!
What to do After Passing On Credit Card Fees to Customers
Now that you can start passing on credit card fees to customers, you should see an increase in revenue. You need to make sure that this bump doesn’t become confusing for you when you’re tracking revenue for your site.
If you’re ready to accept payments on your site, the next thing you should focus on is bringing traffic, engagement, and sales to your site. Push notifications are a great way to do that.
Here, check out these epic resources to get started with push notifications right away:
PushEngage 是全球排名第一的推送通知软件。因此,我们建议使用 PushEngage 来创建您的推送通知并发展您的电子商务业务。


