
Want to make an online event registration form for your WordPress site?
A registration form is a great way to sell tickets to your event and skyrocket sales and attendance.
In this article, you’re going to see step-by-step how to make an online event registration form in WordPress. The beauty of it is that you’re not going to spend a single second on coding.
让我们开始吧。
Why You Need an Online Event Registration Form
An event registration form on your WordPress site allows you to manage attendees and save their information right within your WordPress dashboard. Most importantly, you can sell tickets to your events directly on your site.
Social media sites are great for promotions, but creating a signup flow can be really difficult. This is why we recommend that podcasters create a podcast landing page as well.
The coolest bit is that you can collect contact information for your fans directly on your site. Later, if you want to promote your official merchandise or info products, you have an email list ready that you can reach out to.
You can even use a WordPress calendar plugin to display your event dates on your site.
How to Create an Online Event Registration Form
为了创建我们的在线活动注册表单,我们将使用一个非常流行的WordPress表单构建器插件,名为WPForms。
The best part about using WPForms isn’t how easy it is to create a form. It’s the fact that you don’t need an eCommerce plugin such as WooCommerce or Easy Digital Downloads to sell tickets to your event online.
第1步:创建新的WordPress表单
您需要做的第一件事是安装并激活WPForms。

WPForms是全球排名第一的WordPress表单构建器插件。如果您不确定如何安装WPForms,您应该查看这篇关于如何安装WordPress插件的分步指南。
然后,前往您的WPForms仪表板,然后转到 下载 以获取您的插件:
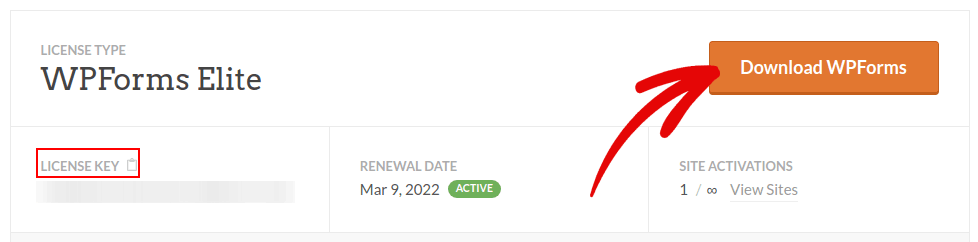
接下来,在您的网站上安装并激活该插件。并在同一选项卡中复制您的许可证密钥。
最后,转到您的WordPress仪表板,然后前往WPForms » 设置,然后粘贴您的许可证密钥:
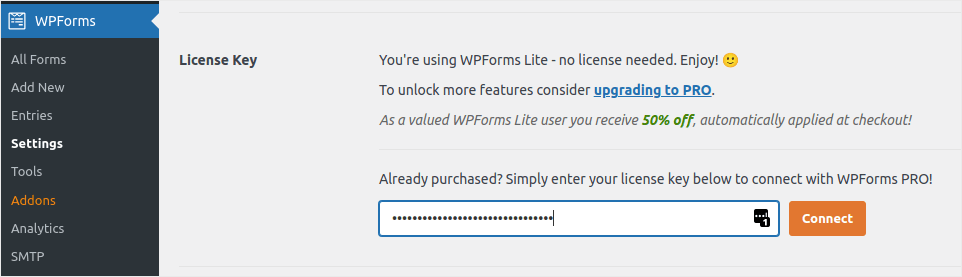
完成后,单击连接。
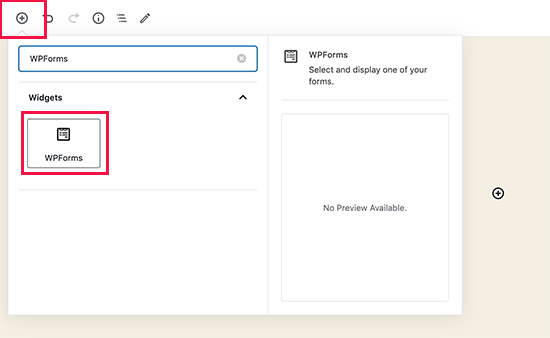
现在 WPForms 已安装并激活,是时候创建您的第一个表单了。前往 WPForms » 新建表单:

这将打开 WPForms 的拖放式表单构建器。
Step #2: Select WordPress Event Registration Form Template
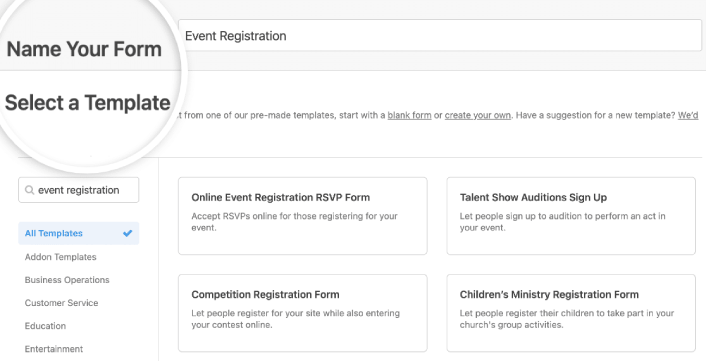
要创建新表单,请为其命名并选择您的表单模板:
使用 WPForms,您可以获得大量预设计的表单模板,只需单击一下即可导入,然后根据需要进行自定义。要更详细地了解所有功能,您应该查看我们对 WPForms 的评测。
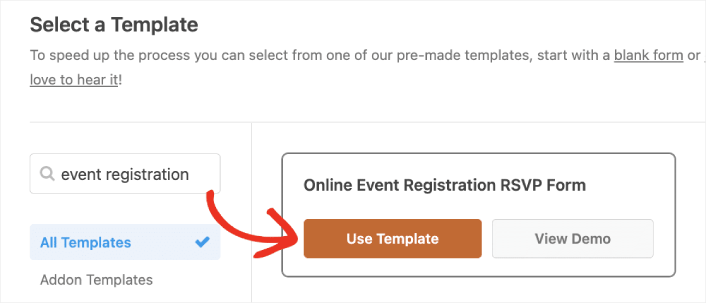
Type “event registration” into the search bar and you’ll see several options for all kinds of events. Click on Use Template to load one in the form builder:
Step #3: Customize Your Online Event Registration Form
By now, you should see the WPForms drag-and-drop form editor. Here, you can customize your online event registration form using design blocks:

To do this, delete the dropdown menu from your form in the right-hand panel of the form editor.

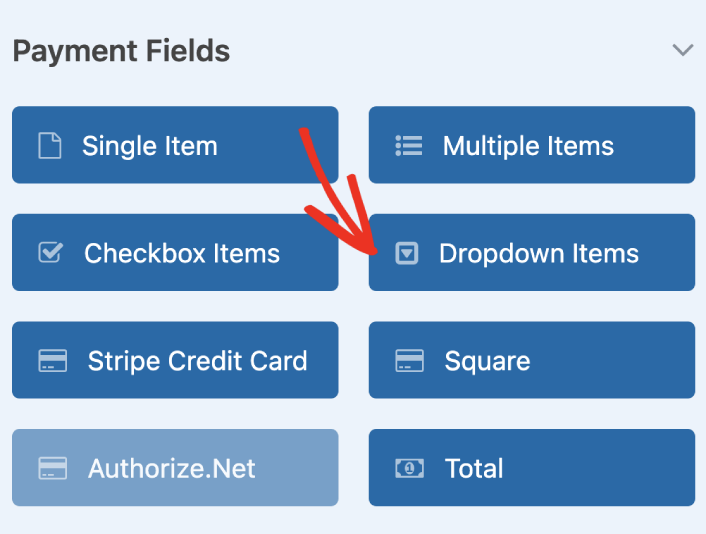
Then, scroll down to the Payment Fields and add a Dropdown Items form field to your form.
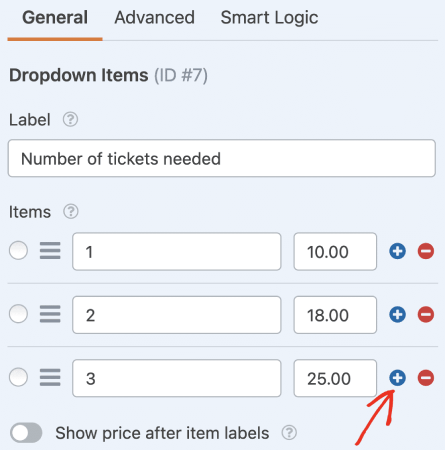
You can set custom payment options for multiple ticket purchases by clicking on the plus (+) option:
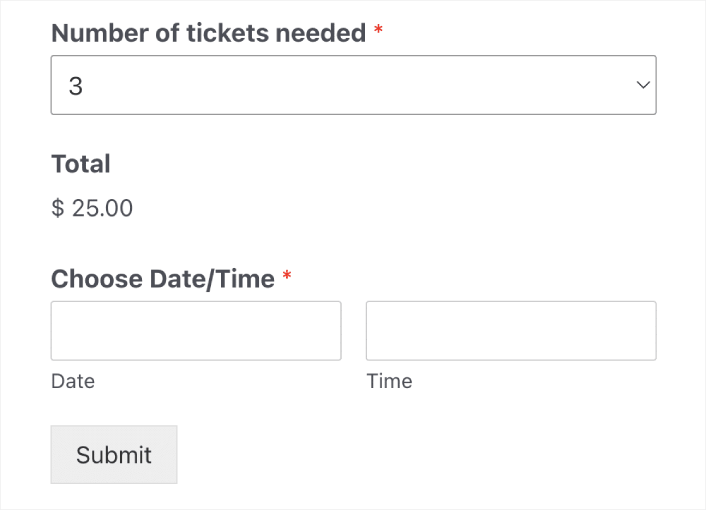
You can also add a Total field to show your visitors the total amount they have to pay:
When you’re done customizing your online event registration form, click Save.
Step #4: Configure Your Online Event Registration Form Settings
接下来,您需要设置通知和确认。
通知是有人填写表单时您收到的电子邮件。确认是为了提醒用户他们已成功填写表单。通常,这是一个“谢谢”消息,但您也可以将用户重定向到专用页面。
前往 设置 » 确认 以配置确认设置:

然后在同一菜单中,转到 通知 以配置您的通知消息:

默认情况下,通知会发送到 WordPress 管理员电子邮件。因此,如果您希望将电子邮件发送到其他地方,例如您的销售主管的电子邮件 ID,您可以在此处进行设置。
Step #5: Configure WordPress Event Registration Payment Settings
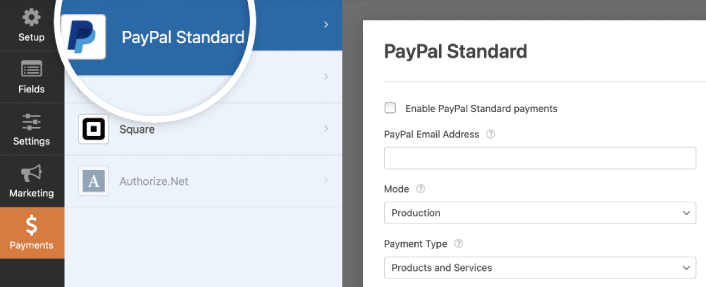
接下来,我们将帮助您通过在线活动表单接受付款。WPForms 与 PayPal、Authorize.Net、Square 和 Stripe 集成,用于接受信用卡付款。因此,您所要做的就是为 WPForms 安装一个付款插件。
然后,单击表单编辑器中的 付款 选项卡,然后选择您设置的集成。
完成付款设置的配置后,单击 保存 以存储您的更改。
Step #6: Add Event Registration Form to Your Site
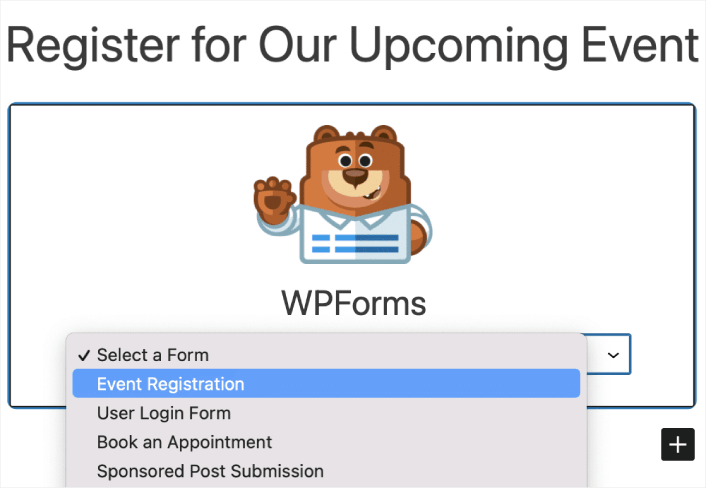
您可以使用 WPForms WordPress 块将在线活动注册表单添加到您网站的任何位置:
Select your Event Registration Form:
您就完成了!
How to Promote Your Online Event Registration Form in WordPress
好了,各位,本次分享就到这里!
By now, you’ve created a WordPress online event registration form. Next, you should set up form abandonment tracking to reduce your form abandonment rates.
之后,剩下要做的就是为您的网站吸引流量,以便您的联系表单可以开始工作。一种简单的方法是开始使用推送通知。发送推送通知是为您的网站吸引重复流量的好方法。如果您对此感兴趣,还应该查看以下文章:
我们建议使用PushEngage发送推送通知。PushEngage是全球排名第一的推送通知软件。因此,如果您还没有,请立即开始使用PushEngage。


