
Looking for a quick tutorial on how to make a one-product website in WooCommerce?
Don’t worry. We’ve got your back.
A single product site is perfect for solopreneurs, drop shippers, and other small businesses. You could sell both digital and physical goods from an online store.
So, if your business is trying to get a single product launched, follow the steps in this article. We’re going to help you launch your site in 5 simple steps. The cool part is that you don’t have to know how to code to launch a killer website.
让我们开始吧。
Step #1: Set Up Your Hosting Server
Before you create your single-product website, you need to get:
- A domain name
- Web hosting
- An SSL certificate
Most modern hosting services will offer all three things as a combo. But we recommend using one of these three hosting providers:
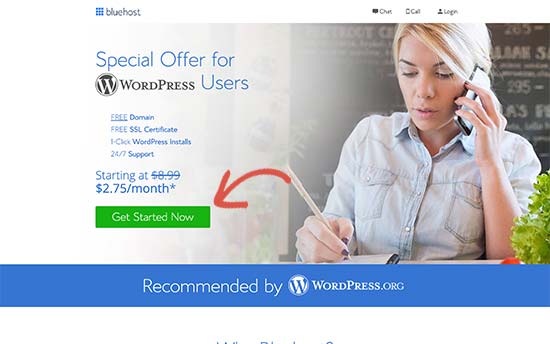
All three hosting services are completely optimized for WordPress. And you get a free domain name and SSL certificate when you buy web hosting. For this article, we will show you how to get started using Bluehost. But it’s a somewhat similar process for our other recommended hosting services.
Head over to Bluehost and click on Get Started:
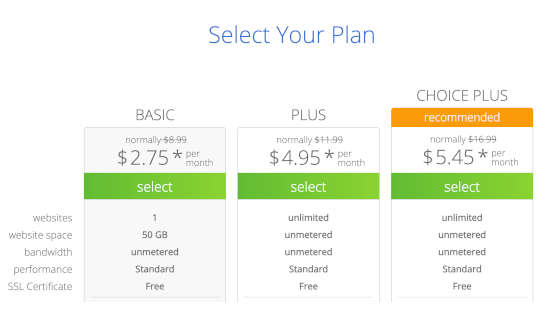
Then, choose your pricing plan on the next screen. We recommend getting the Plus plan if you’re looking to scale the business. But if you’re just looking to get started, even the Basic plan should be fine for you.
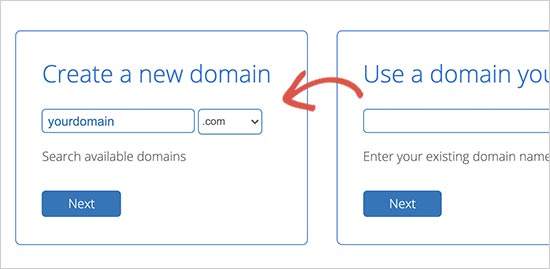
After that, you’ll choose the domain name for your website.
Finally, Bluehost will confirm your order and try to upsell you some added services such as Domain Privacy Protection. It’s entirely up to you whether you want to get this extra stuff. We don’t recommend it for small businesses, but if you think that the upsells are worth it, go ahead and add them to your cart.

After that, you complete the checkout process.
Step #2: Install WordPress on Your Server
Once you’re done with the checkout, Bluehost will send you an email to log in to your cPanel account. The cPanel is your web hosting control panel. From there, you can manage your email inboxes and FTP accounts, get support from Bluehost, and more.
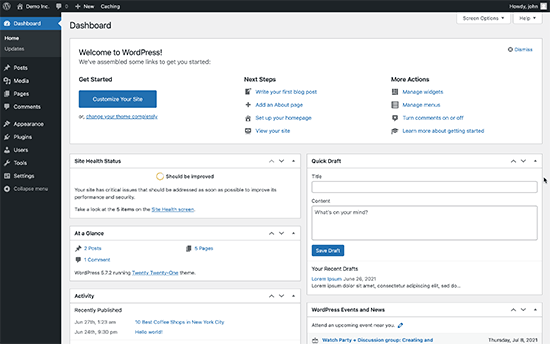
When you log in to cPanel, you’ll see that Bluehost has already installed WordPress for you. To get into your WordPress dashboard, all you have to do is click on the Log in to WordPress button:

Your WordPress dashboard will look something like this:
NOTE: The WordPress installation process is different for different hosting services. You may have to manually install WordPress if you’re not using Bluehost, depending on your hosting service. Mostly, you’ll need to locate a software installer inside your cPanel called Softaculous. Softaculous is a setup wizard that will help you install WordPress on your server.
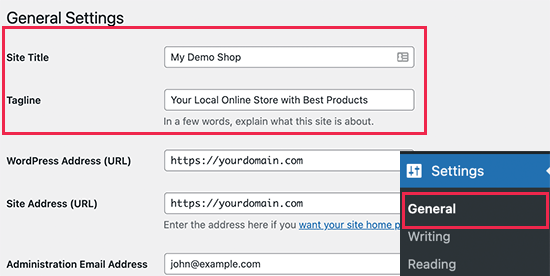
When you first log in to your WordPress dashboard, you’ll want to take care of a few small details before launching your product.
Head over to Settings » General to set the website title and description tags:
Then, change your WordPress Address and Site Address to their HTTPS versions to use SSL on your site:
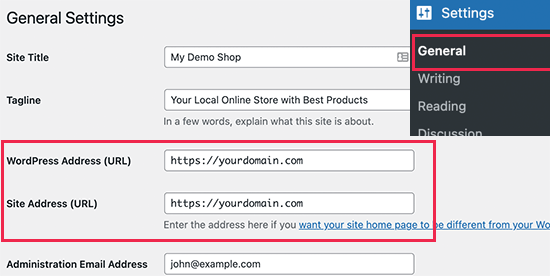
When you’re done, hit the Save Changes button at the bottom.
Step #3: Install WooCommerce
Now that you’ve installed and configured WordPress correctly, you have a basic website where you can upload and manage content. At this point, your site is no better than a very simple blog. To sell products online, we will install a plugin called WooCommerce.
WooCommerce essentially turns your site into an online store without having to custom code anything at all.
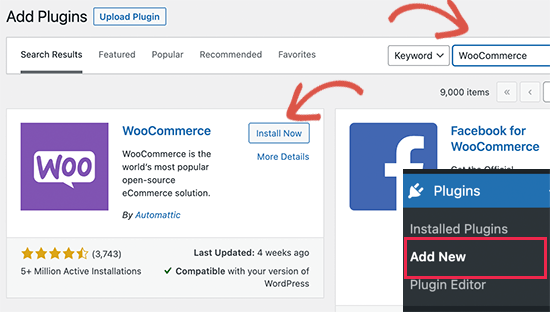
First, you need to install and activate the WooCommerce plugin.
Go to Plugins » Add New page and search for WooCommerce. Click on the Install Now button next to the WooCommerce listing in the search results.
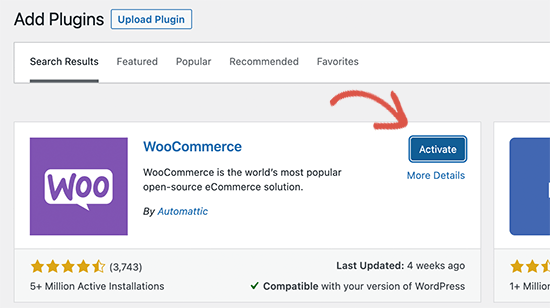
Wait for the plugin to finish downloading, and then click on the Activate button to continue.
Upon activation, WooCommerce will launch a setup wizard. After that, all you have to do is follow the steps. For more details, see this step-by-step guide on how to install a WordPress plugin.
NOTE: You’ll get to a point where WooCommerce will prompt you to install a theme. You can use a theme builder such as Divi. Or, you can continue with your default theme and install a landing page builder like SeedProd to create a custom product page.
Step #4: Setting up Payments for Your Online Store
Next, you need to set up payment methods to accept online payments in your store. WooCommerce provides a bunch of payment gateways that you can easily set up.
Head over to WooCommerce » Settings, and under the Payments tab, you can choose between different payment options:
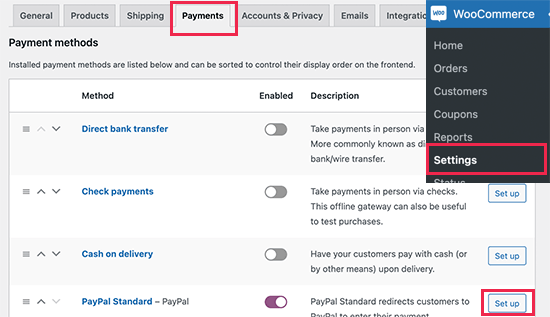
Scroll further down, and you get options to install Stripe and PayPal Standard plugins to process your payments. And if you need even more flexible payment options, you can install WP Simple Pay to get extra features for Stripe payments. If you’re curious about what added features you get from the plugin, check out our review of WP Simple Pay.
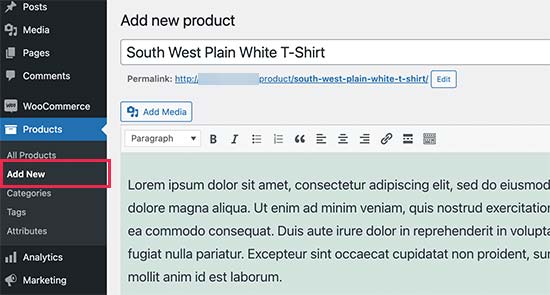
Step #5: Publish Your Product
You’ve set up a website with eCommerce capabilities, and you’ve also installed a payment processor. So, you have all the makings of an online store. Now, all you need is to create and publish your product.
Let’s start by adding the first product to your online store. Go to the Products » Add New page to add a new product. Let’s start things off by adding a product name and description.
Next, you’ll want to scroll down to the Product Data box:
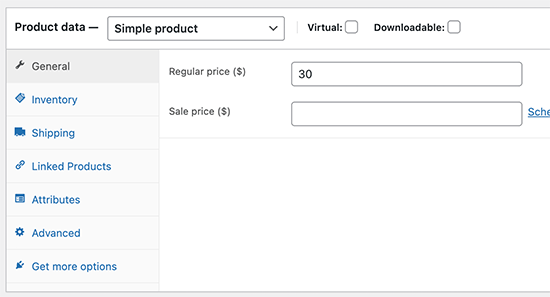
Here, you’ll want to update product details such as:
- Regular price
- Sale price
- Inventory for physical products or limited-edition digital products
- Shipping costs
- Similar products for upsells and cross-sells
And more. Take your time and fill out this form. Look at the sidebar and find the Product Image and Product Gallery fields when you’re done.
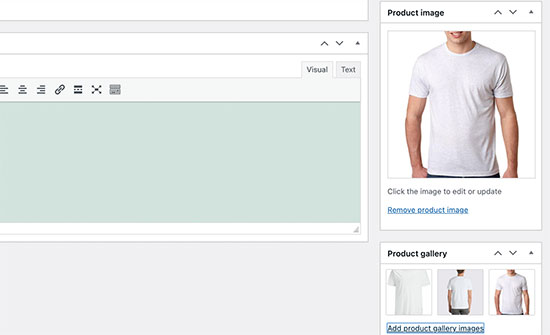
We highly recommend uploading as many images as possible. Good product images can inspire confidence in your site visitors to buy your products. When you’re done, hit the Publish button at the top.
Your one-product website is now fully built!
Bonus Step: Supercharge Your Store With Plugins
Once your store is live, you’ll want to extend your functionality to get better conversion rates on your site.
Here’s a quick list of essential plugins you can use to boost your growth instantly:
#1。PushEngage

PushEngage 是全球排名第一的推送通知插件。
Push notifications help you grow your website traffic and engagement on autopilot. And if you’re running an online store, PushEngage also enables you to increase your sales by helping you create automated eCommerce push notifications.
You can get started for free, but you should buy a paid plan if you’re serious about growing your business.
Here’s a glance at what you get with PushEngage:
- 高转化率的自动化营销活动
- 多种定位和营销活动调度选项
- 目标跟踪和高级分析
- 智能 A/B 测试
- 专属客户成功经理
You’ll see that PushEngage is hands down the best bet if you want to build traffic, engagement, and sales for your business. And if you’re on a budget, you can always get a little creative with your push notifications.
#2. OptinMonster
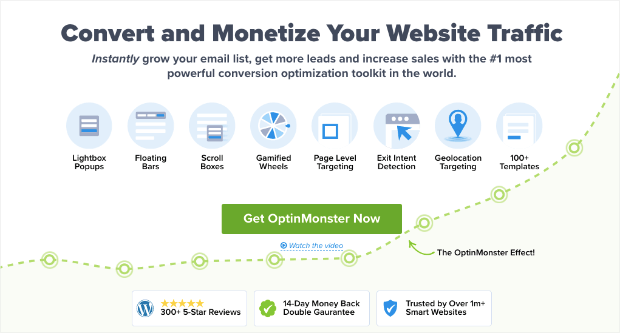
OptinMonster is the world’s most powerful conversion toolkit. This plugin has everything you need to start, grow, and scale your email lead generation process. You can create some incredibly high-converting campaigns such as:
- 灯箱弹出窗口
- Sticky headers and footers
- Video popups
- 倒计时器
- Spin to win welcome mats
- Popup contact forms
以及更多!
Check out our review of OptinMonster to get a closer look at what it can do to grow your business.
#3. AffiliateWP
AffiliateWP 是一个 WordPress 插件,可让您为产品和服务创建联盟计划。它易于使用,高度可靠,并且无需任何编码即可进行设置。
最棒的是什么?AffiliateWP允许您使用完全自动化的工具来发展您的联盟网络。
AffiliateWP has a whole host of great features, including:
- 联盟跟踪和管理
- 实时报告
- 用户友好的联盟入职
- 自动联盟付款
- 可自定义的电子邮件通知
- 与流行插件和服务的集成
- 一键导入/导出联盟数据
- 免费和专业插件
It’s super easy to use AffiliateWP, which separates the plugin from its alternatives. Get started right now and start growing your affiliate network. If you’re not 100% convinced, you can check out our review of AffiliateWP first.
#4. All in One SEO

All In One SEO 是世界上最好的WordPress SEO插件。
AIOSEO不仅功能强大,足以实施最新的SEO最佳实践,而且您还可以获得高级选项,开箱即用地解决特定的SEO问题。这包括:
- 面向本地受众的小型企业的本地SEO模块
- 在线商店的WooCommerce SEO
- WordPress编辑器内的SEO优化器
- 智能站点地图,可即时索引搜索引擎
- 一个Schema插件,可让您的内容在富摘要中排名
And a lot more! You can learn more about the features in our review of AIOSEO.
#5. MonsterInsights

MonsterInsights is a WordPress plugin that makes it easy to use Google Analytics. Google Analytics is too complicated to use for a beginner. But even worse, it’s easy to get lost in a sea of data without getting any actionable insights on growing your business.
MonsterInsights focuses on insights over volumes of data. You don’t need a single line of code to install Google Analytics on WordPress.
以下是MonsterInsights可以为您做什么的快速概览:
- 无需任何代码即可跟踪Google Analytics
- 兼容任何版本的Google Analytics
- 查找热门内容的报告
- Detailed Audience Insights
- 电子商务分析
- 表单注册分析
- 自定义维度的附加洞察
- 联盟链接点击跟踪
- GDPR合规
- 高级集成
If you need to look at the features, check out our review of MonsterInsights.
总结
好了,各位,本次分享就到这里!
Creating your online store is actually the easiest part of building an online business. The tricky part is to generate traffic on your site and get people to buy from you consistently.
Our recommendation is to start with push notifications. Push notifications are great tools to increase your engagement and conversions as well. We recommend using PushEngage to send your push notifications.
PushEngage 是全球排名第一的推送通知软件。所以,如果您还没有,请 立即开始使用 PushEngage!


