Looking for a way to add push notifications to your Drupal site?
这是一个非常棒的决定。
Push notifications can help you generate a lot of traffic, engagement, and sales on autopilot and with very little effort. And it’s easy to add push notifications to a Drupal site. So, it’s really a quick win.
In this article, we’ll show you how to add push notifications to a Drupal site even if you’ve never done it before.
For this article, we’re going to use PushEngage to set up push notifications on your Drupal site. PushEngage is the #1 push notification software in the world. So, your campaigns will be in good hands.
让我们开始吧。
How to Install Push Notifications on Drupal
Installing push notifications on Drupal is a really quick and easy process. Just follow these steps and by the end of this article, you should be able to send push notifications from your site like this one:

您不必像 Zomato 那样的大公司才能利用推送通知的力量。即使您经营的是一个流量非常小的中小型企业网站,您也可以非常有效地做到这一点。
让我们开始吧。
第 1 步:设置您的 PushEngage 帐户
访问 PushEngage 主页,然后点击 开始使用 按钮:

您可以选择免费套餐来试用 PushEngage,或者如果您想认真发展您的业务,可以选择付费套餐。付费套餐提供更多广告系列选项,并能够建立更大的订阅者列表。
注册账户后,请前往 PushEngage 仪表板并转到 设置 » 网站设置 » 安装设置:
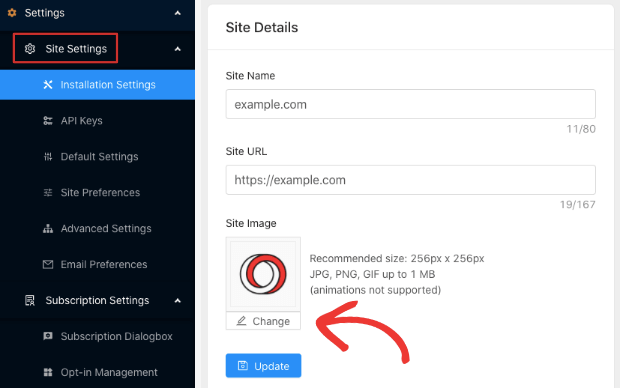
在这里你可以配置你的网站详细信息和品牌。请立即设置你的推送通知的徽标和网站 URL。你应该立即这样做,以便能够正确测试你的推送通知。
第 2 步:从 PushEngage 获取安装代码
接下来,您需要前往 PushEngage 仪表板并获取安装代码。转到 设置 » 网站设置 » 安装设置:
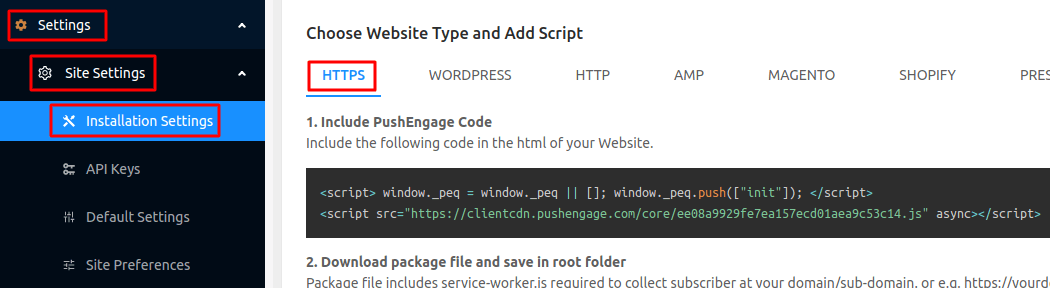
根据您的网站是否安装了 SSL 证书,选择 HTTP 标签或 HTTPS 标签以获取您的安装代码。
复制此代码。稍后您将需要它。
Step #3: Place the Installation Code in Your Drupal Site
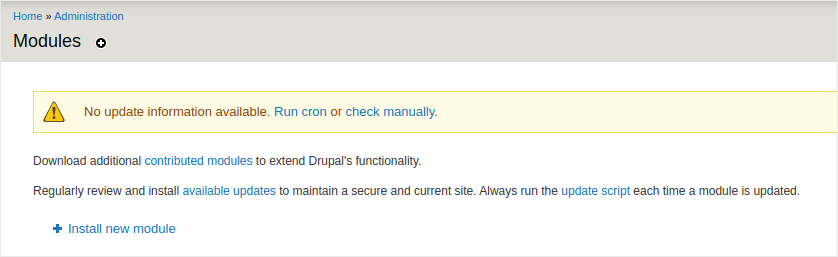
Log in to your Drupal Site Admin and click on Modules » Install new module:
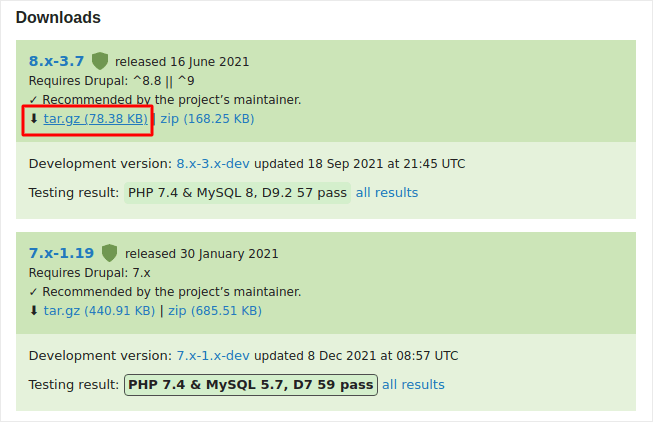
Here, we’re going to install two modules called Chaos Tools and JS injector. Adding these two modules to Drupal allows you to add Javascript code to your site even if you don’t have access to the theme files or if you’re simply not comfortable with coding. Head over to the two module pages and copy the link addresses for the modules under Downloads:
And then, in your Drupal module installer, paste in the link address and click on Install:

NOTE: You’ll need to install both modules, or this won’t work.
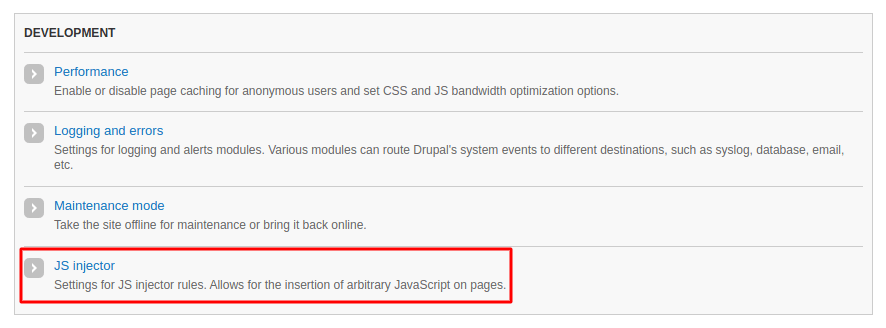
When you’re done, click on Configuration in the navigation menu and go to Development » JS injector:
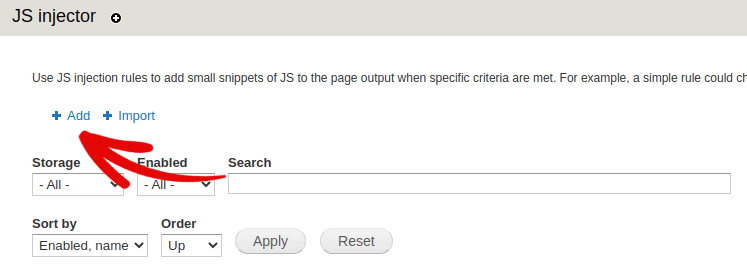
Then, click on Add:
And paste the PushEngage installation code into your JS code:
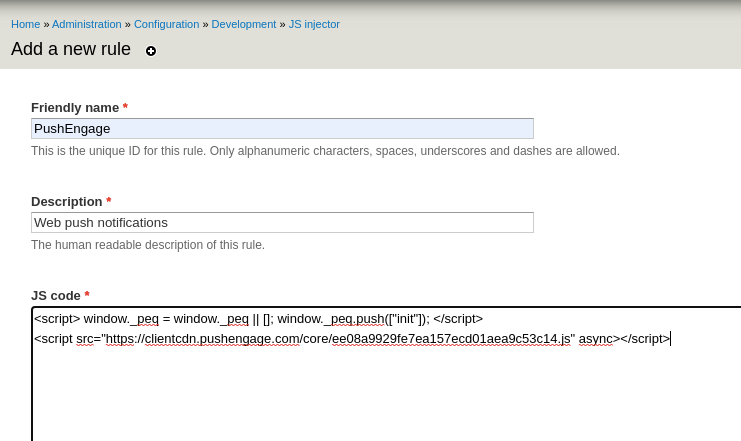
And set the code placement to Header:
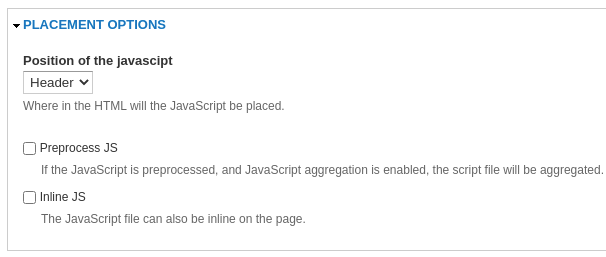
完成后,单击保存。
第 4 步:配置 PushEngage 选择加入
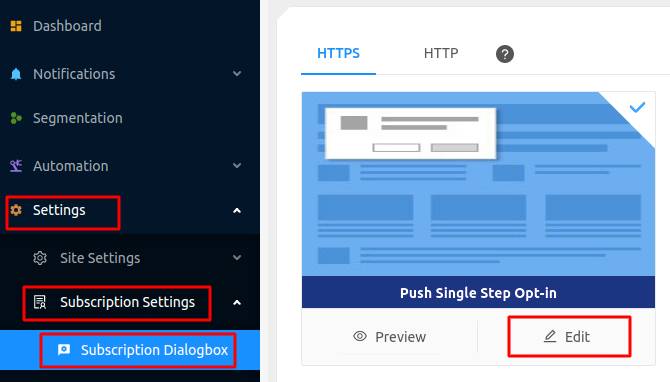
最后,在您的 PushEngage 仪表板中,转到 设置 » 订阅设置 » 订阅对话框 » 编辑:
您可以在此处自定义推送通知选择加入。如果您需要帮助,可以查看这篇关于如何创建自定义推送通知选择加入的文章。
如果您需要一些灵感,可以查看这篇关于高转化率的推送通知选择加入的文章。
第 5 步:创建欢迎通知
完成选择加入设置后,您的网站就可以收集订阅者了。
但是,您如何知道您的推送通知是否正常工作?
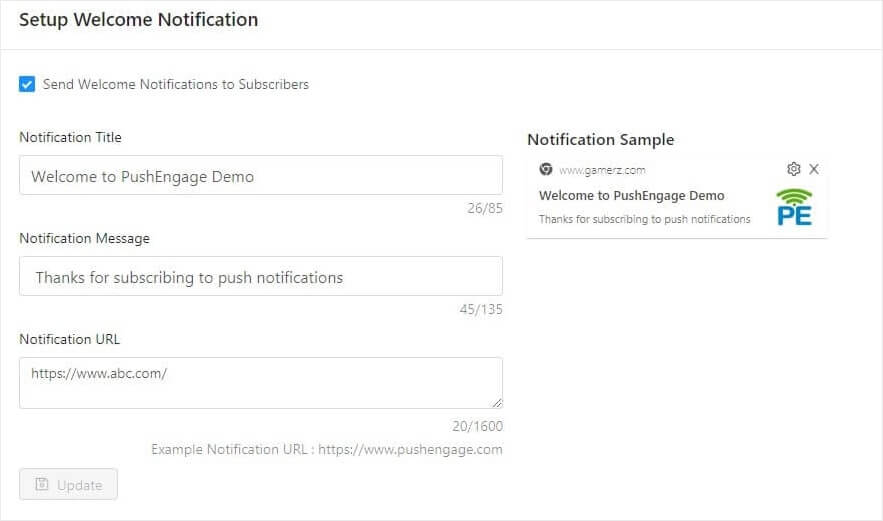
我们建议您 创建欢迎推送通知 来测试您的设置是否顺利。欢迎通知是您发送给新订阅者的推送通知,以确认他们的订阅并欢迎他们加入。
转到 设置 » 网站设置 » 安装设置 并配置您的欢迎消息:
最后,回到您的网站并选择您自己的推送通知,以测试一切是否顺利。
就这样!
You have successfully set up push notifications on your Drupal site. It’s time to head back to your PushEngage dashboard and start creating your push notification campaigns.
总结
好了,各位,本次分享就到这里!
如果您是推送通知新手,在上线之前,您应该遵循一个完整的 推送通知测试 流程。这将帮助您在访问者看到它们并开始抱怨糟糕的用户体验之前,排除常见问题。
如果您还没有尝试过PushEngage,现在就去试试吧。PushEngage是全球排名第一的推送通知服务。所以,如果您想认真发展您的业务,就应该投资PushEngage。


