Примечание: Устаревшая документация для этого элемента отсутствует, поэтому вы видите текущую документацию.
Are you looking to keep your customers informed with updates on their recent orders, give them a nudge to retry purchase requests, or boost your store’s reviews through web push notifications in your WooCommerce store?
If so, you’ve come to the right place! In this guide, we will walk you through the steps to set up and effectively manage web push notifications for your customers in your WooCommerce store.
Прежде чем начать
Ensure you have the PushEngage Plugin installed on your WooCommerce store. This guide assumes you already have the WooCommerce and PushEngage
There are multiple campaigns that you can send out to customers for many use cases –
- Default Campaigns
- Push Broadcasts & Templates
- Автоответчики Drip
- Trigger Campaigns & Automation
Managing Default Notifications Settings
Вы можете перейти в WooCommerce » Настройки
Затем перейдите на вкладку Push Notifications

На этой вкладке вы можете включить все типы уведомлений, которые хотите активировать на данный момент. Это поле также позволяет вам решить, хотите ли вы отправлять уведомления только администратору или клиентам.
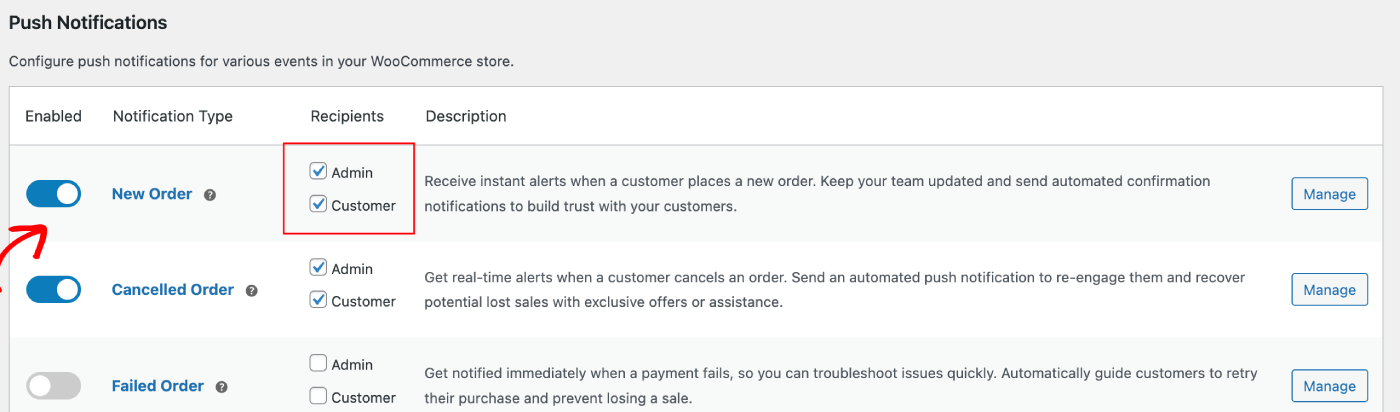
Вы можете выбрать кампанию, которую хотите отредактировать, и нажать кнопку Управление. Вы можете установить флажок, который включает отправку кампаний клиентам. Например, здесь мы настраиваем push-уведомления для запроса повторной покупки.
Вы можете настроить заголовок и сообщение уведомления вместе с URL страницы оформления заказа.
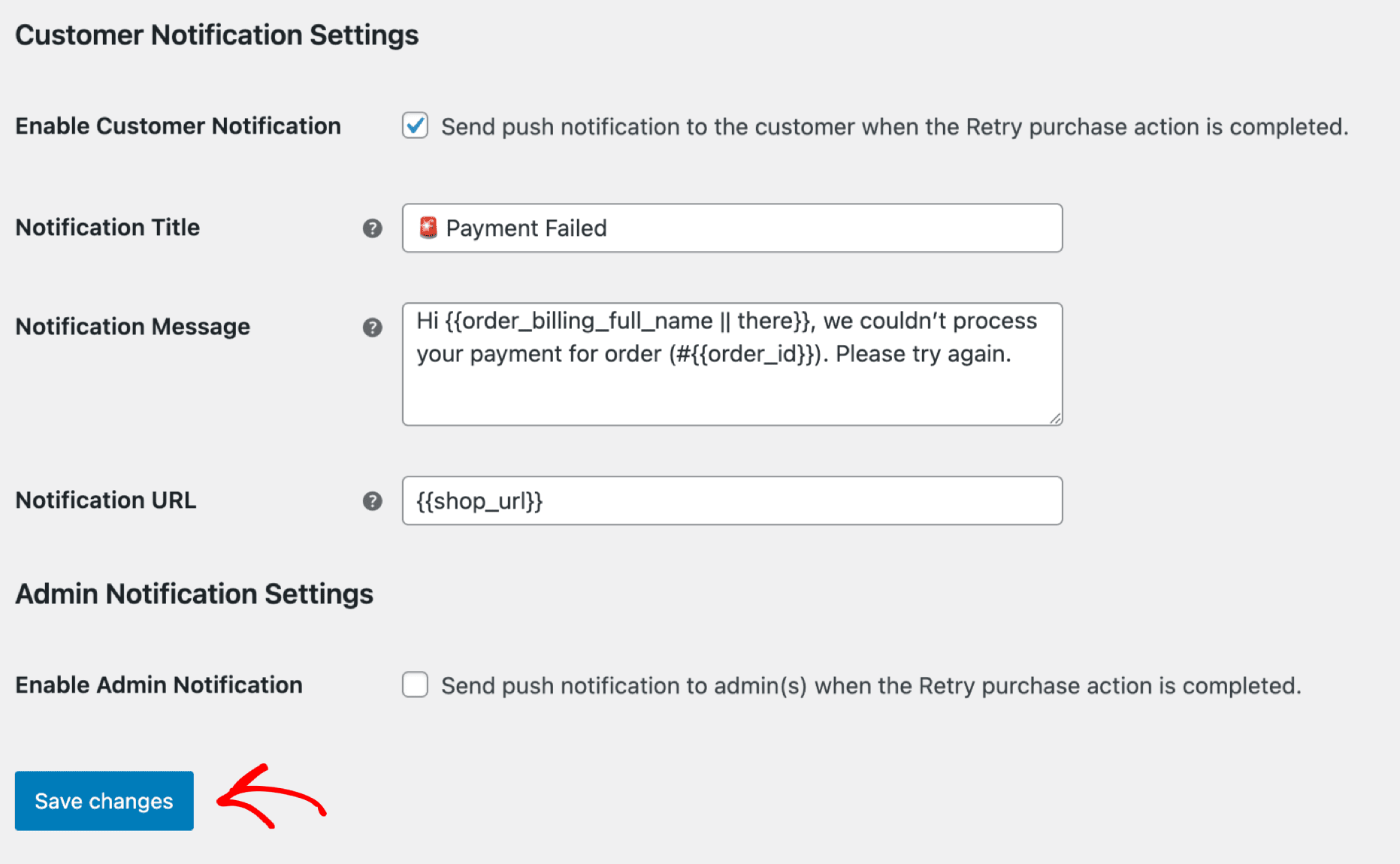
После обновления деталей нажмите кнопку Сохранить изменения.
Push Broadcasts & Templates
You can send out Push Broadcasts for Flash sale, seasonal offers or upselling the products.
You can log in to PushEngage Dashboard and then move to Push Broadcasts. It will help you to choose from variety of templates & categories and you can customize the Audience & Send/Scheduling options.

Here is the guide you can refer to creating the push campaigns within WordPress dashboard.
Автоответчики Drip
You can enable a Web Push Notification Autoresponder campaign and send it to all subscribed users or to a list/segment of users in PushEngage. Segment your users into specific lists, which can happen on specific pages, or when the user subscribes to a curriculum of notifications.
This is perfect to send out a Welcome Drip with discount coupon, or send out cross-selling campaigns, review requests and seasonal offers.
Here is the guide that will help you build a drip campaign.
Trigger Automation Campaigns
We have Triggered Campaigns, which are event specific campaigns. It is specific to goals, some examples are – Cart & Browse Abandonment Campaigns. These campaigns are pre-created for your store. You only need to ensure that the campaigns are enabled once your store is connected.
Включение настроек "Брошенная корзина" и "Брошенный просмотр"
We have an automated Cart & Browse Abandonment Campaign, which is directly integrated with your store’s product feed. We have a start event and a stop event to prevent further notifications from being sent after the intended goal is completed.
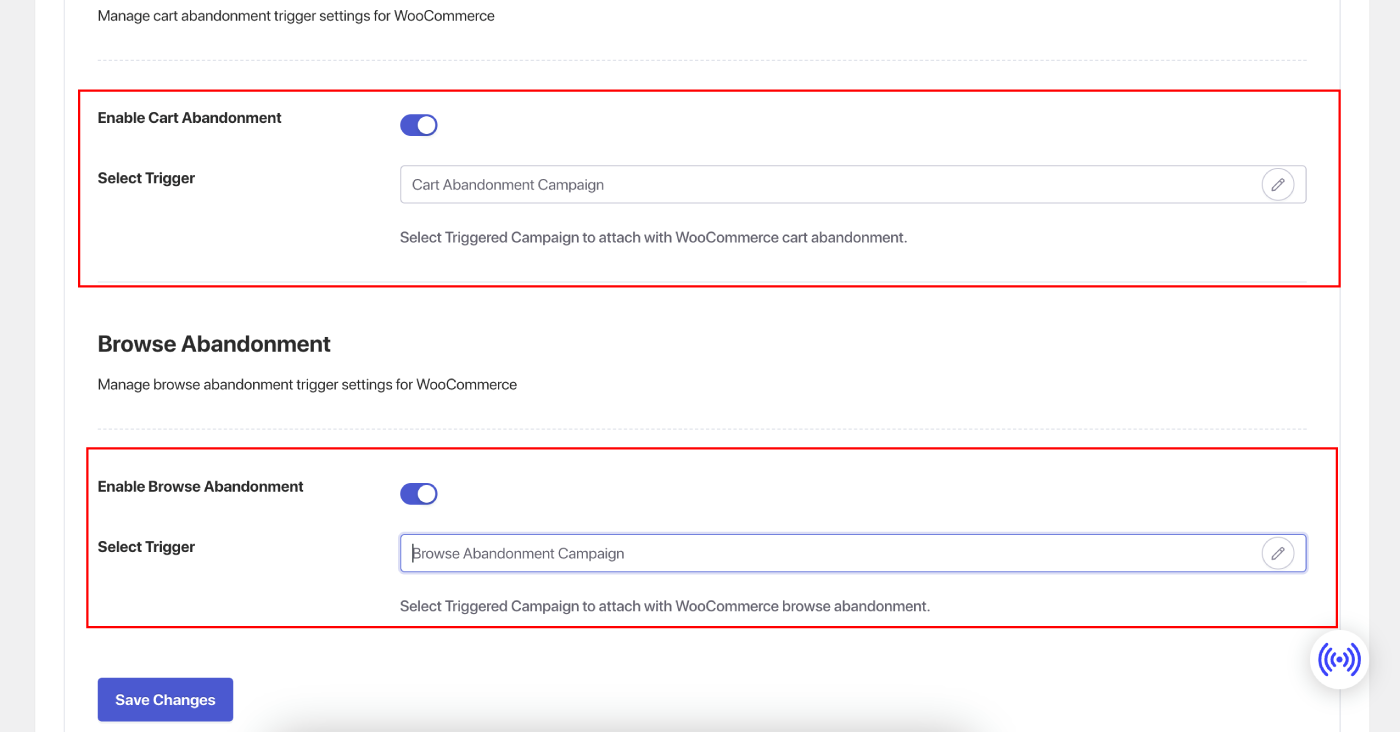
После завершения интеграции вы можете управлять настройками брошенной корзины и брошенного просмотра для вашего магазина WooCommerce.
Перейдите в раздел Настройки » вкладка Интеграции и в раздел WooCommerce.
Включите "Брошенная корзина" и "Брошенный просмотр", переключив соответствующий переключатель.
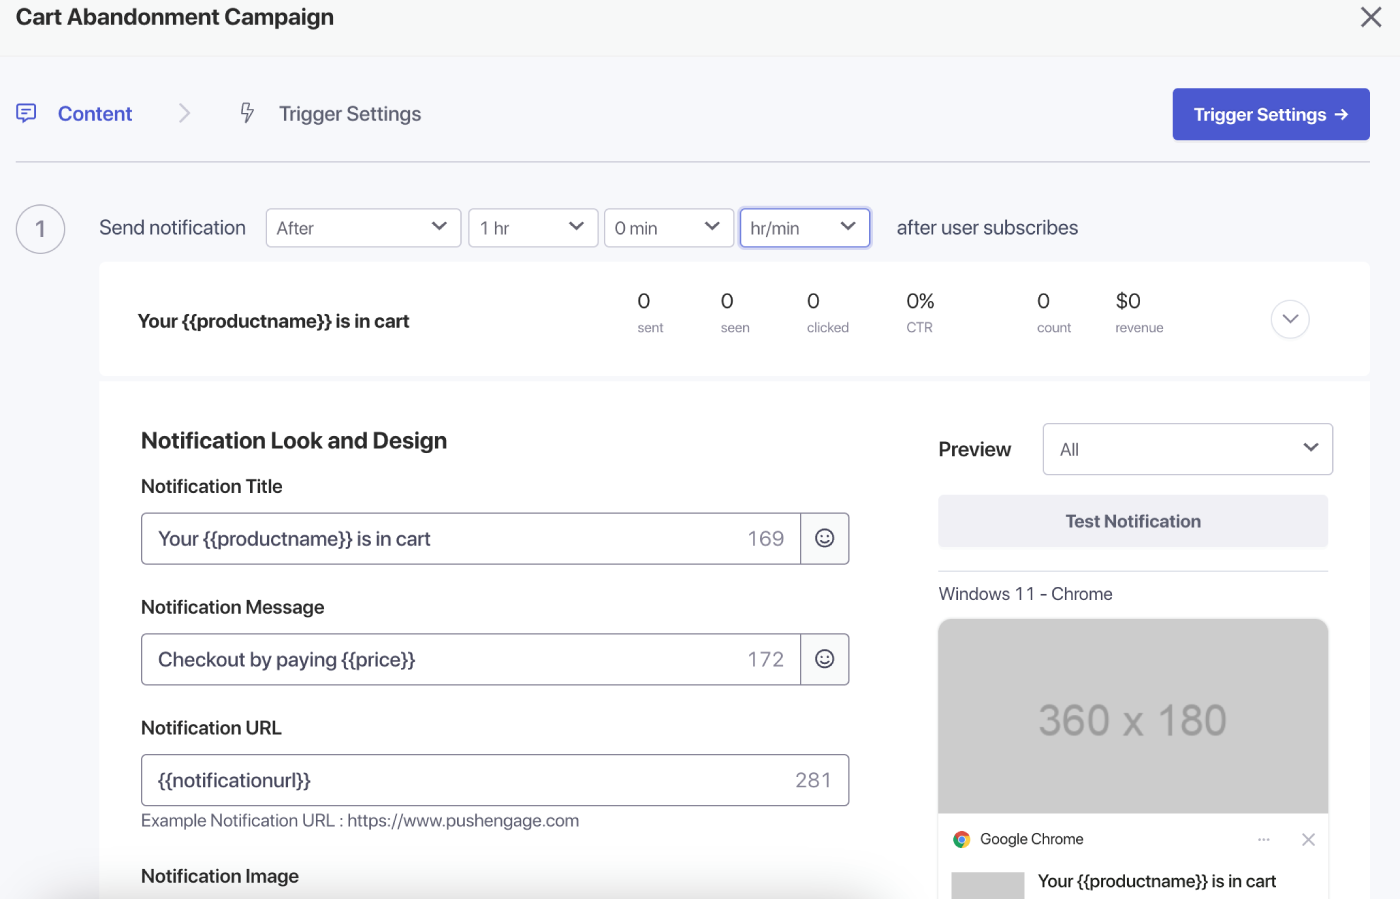
Настройка кампаний
Перейдите в раздел "Триггерные кампании" и добавьте несколько уведомлений в свою кампанию.
Укажите задержку и условия для каждого уведомления, а также добавьте резервные переменные.
Trigger Settings
В разделе "Настройки триггеров" ограничьте частоту уведомлений, чтобы не отправлять спам вашим клиентам. Здесь вы можете выбрать ежедневный или еженедельный лимит. Например, если у вас есть 2 уведомления для ежедневного лимита, добавьте 14 для еженедельного лимита, чтобы даже если люди бросают более 2 товаров в день, они не получали спам со всеми push-уведомлениями.
Вы также можете добавить UTM-параметры для этих кампаний, чтобы их было легче отслеживать в Google Analytics.
После настройки триггеров сохраните изменения и активируйте кампании. Если они включены, вы можете просмотреть аналитику кампании и увидеть конверсию дохода по целям.
That’s it, you have created some powerful campaigns for your WooCommerce Store.
Если у вас возникнут какие-либо проблемы, пожалуйста, не стесняйтесь связаться с нами, нажав здесь. Наша служба поддержки сможет


