Примечание: Устаревшая документация для этого элемента отсутствует, поэтому вы видите текущую документацию.
PushEngage позволяет вам превращать посетителей вашего сайта в подписчиков веб-push. Подписчик — это любой, кто нажмет «Разрешить» во всплывающем окне подписки, которое вы настраиваете на своем сайте. Кампания веб-push не собирает личную информацию, такую как адрес электронной почты или номер телефона. Однако вы можете обращаться к своим подписчикам, даже когда они не находятся на вашем сайте.
Install PushEngage On Your Site
Add Site Details
1. Чтобы завершить установку PushEngage, перейдите в раздел Настройки сайта » Сведения о сайте.

2. Вам необходимо ввести информацию о сайте – название сайта, логотип вашего бренда и убедиться, что URL сайта указан правильно.
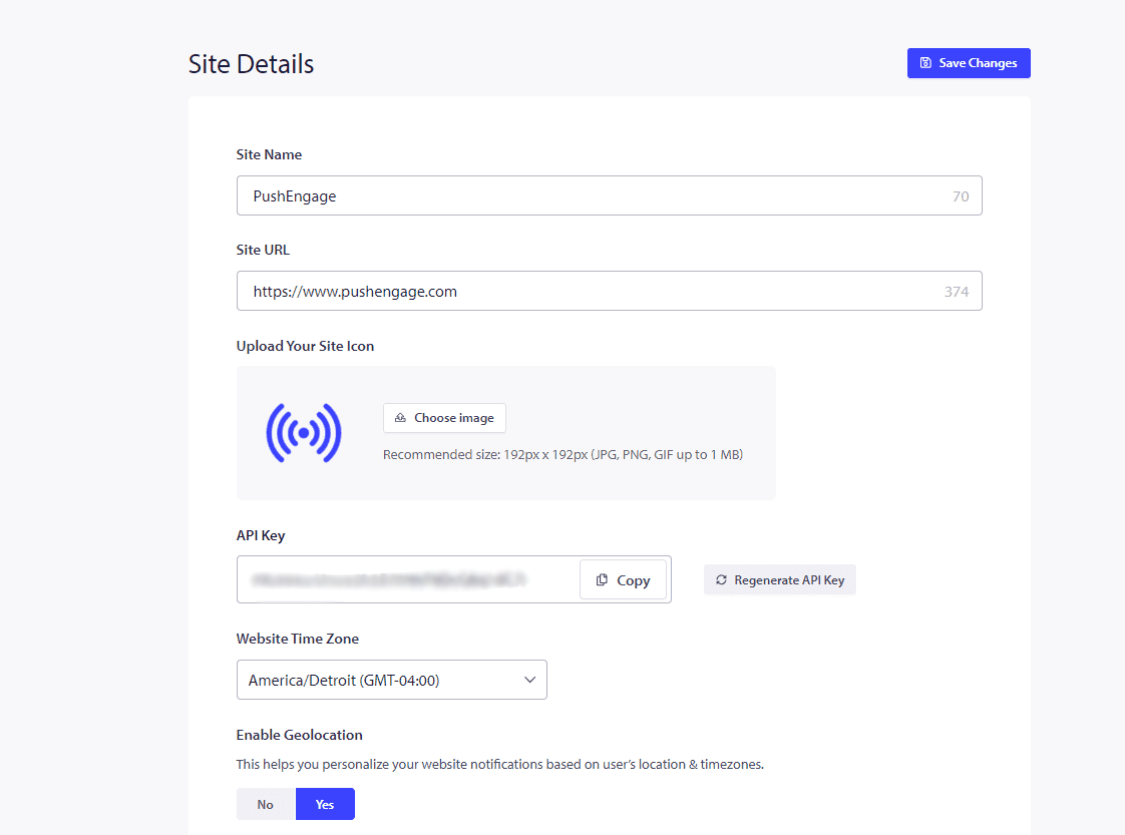
3. Если у вас есть платные тарифы, убедитесь, что вы удалили Брендинг PushEngage. Вы можете установить этот флажок и сохранить изменения.
Once done, click on Click Here For Setup Instructions.
4. Выберите тип вашего сайта из предложенных вариантов и следуйте приведенным инструкциям, чтобы завершить установку.
If the platform on where your site is hosted is not mentioned, then copy the installation code and add it to the HTML of your website. If you have access to your root directory, then please download the service-worker.js file and add it to the root directory such that it is publically accessible.
If you don’t have access to the root directory you can skip the step of adding the service-worker.js file. You can just add the code and use any double-step optin to collect subscribers.
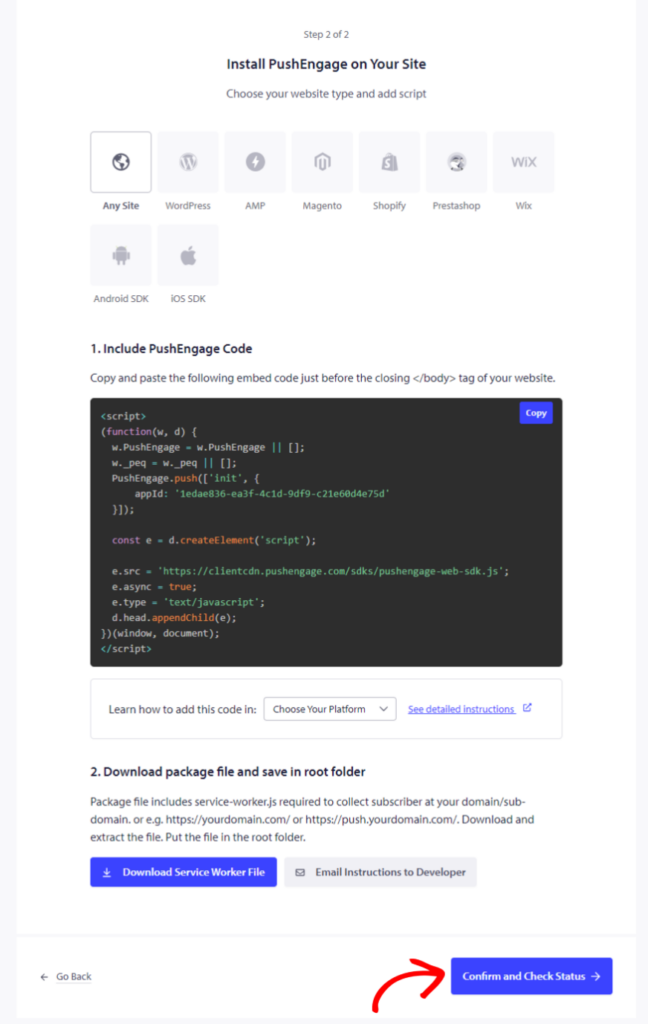
Once this is done, click on Confirm and Check Status and save the settings.
Выбор опции подписки
Теперь, когда вы закончили добавление кода, вы можете настроить опцию подписки.
Вы можете перейти в раздел Дизайн » Модальные окна.
You can choose either of the Subscription Dialog box styles by switching on the Toggle button.
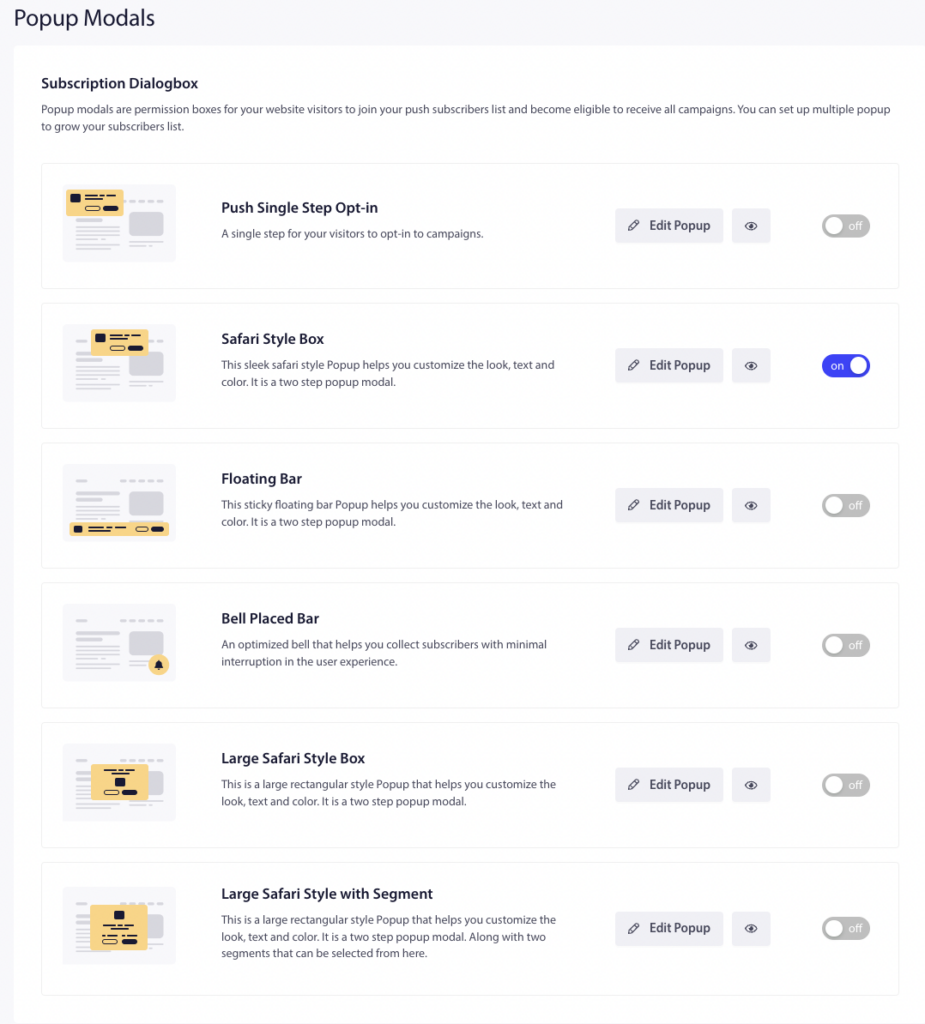
Затем вы можете настроить стили Opt-in в соответствии с требованиями вашего бизнеса. Одноэтапный выбор Push — это подписка в один шаг; остальные — двухэтапный выбор, который позволяет посетителям настраивать параметры, но требует двух шагов для становления подписчиками.
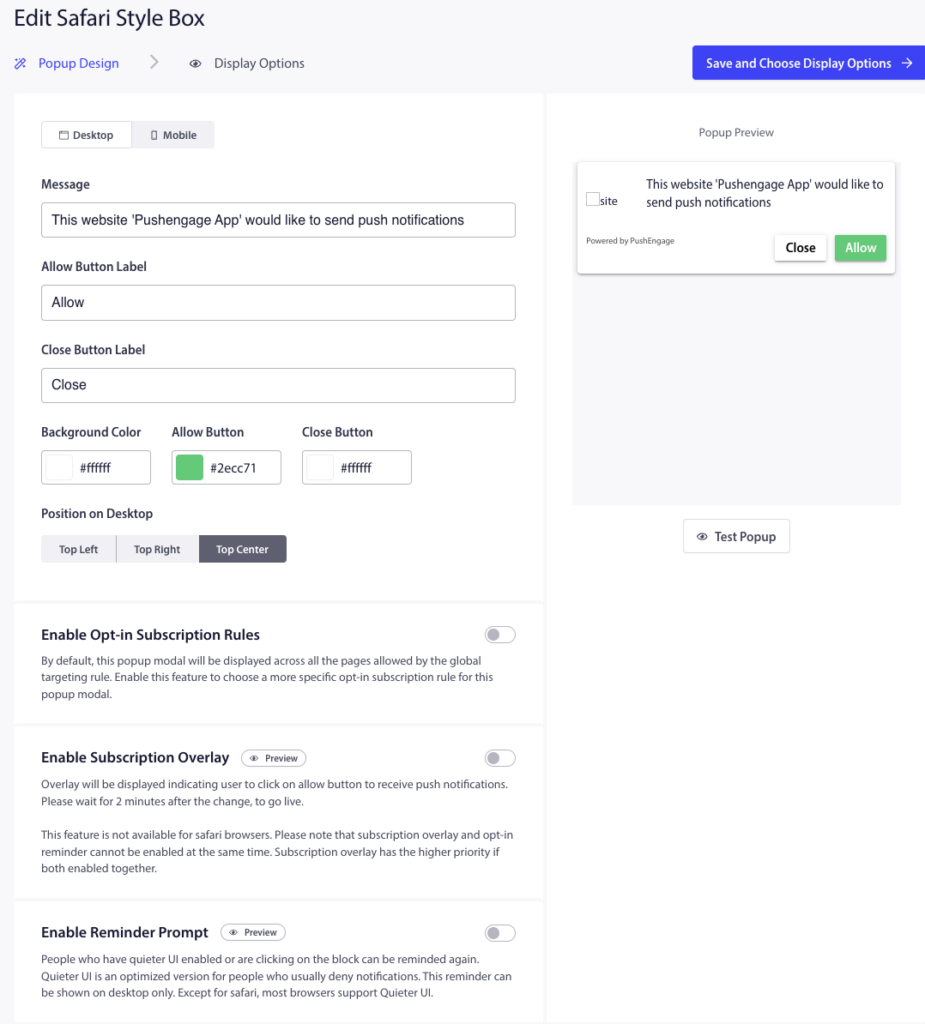
Once you have completed the editing click on Save and Choose Display Options » Save and Enable Popup.
Setup Welcome Drip Campaign
To create the welcome campaign, navigate to Campaigns » Drip Autoresponders. You will see a template of a Welcome Drip, which you can activate by clicking on the Play Button.
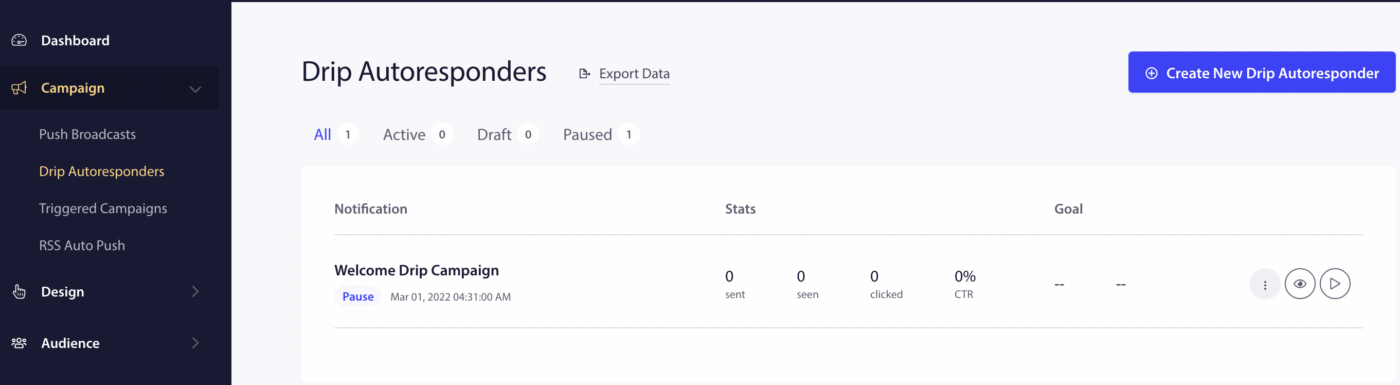
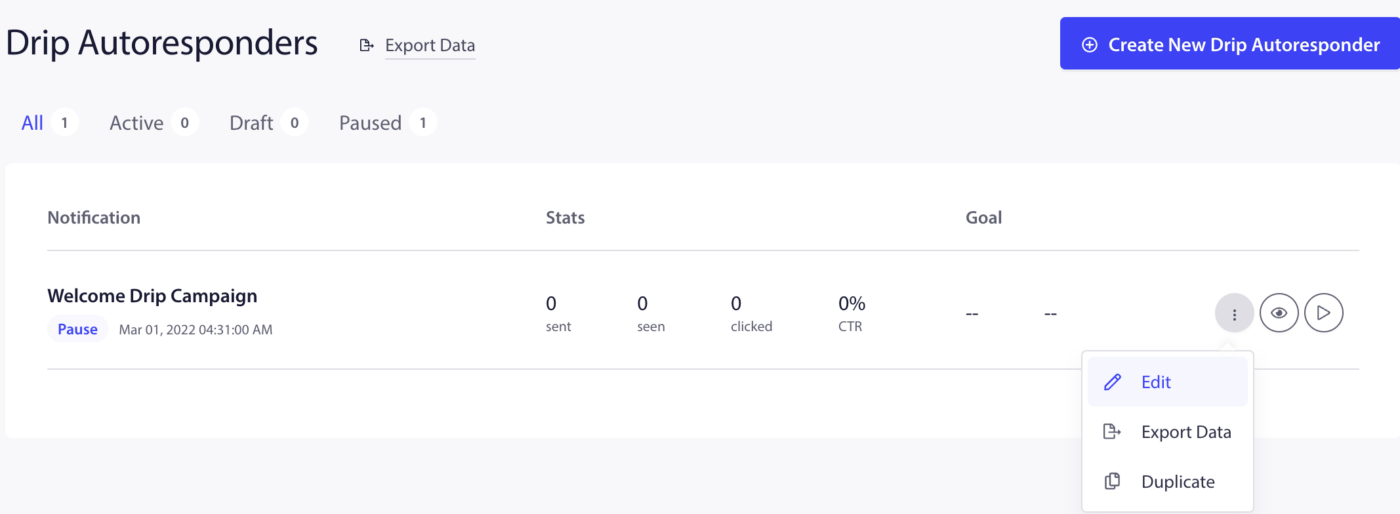
You can also edit the same campaign if you like, by clicking on the more option and then selecting Edit.
You can either send the welcome notifications to your subscribers immediately or x hours/mins after completing the subscription. Instead of sending one notification, you can create a series of 2-3 notifications as well.
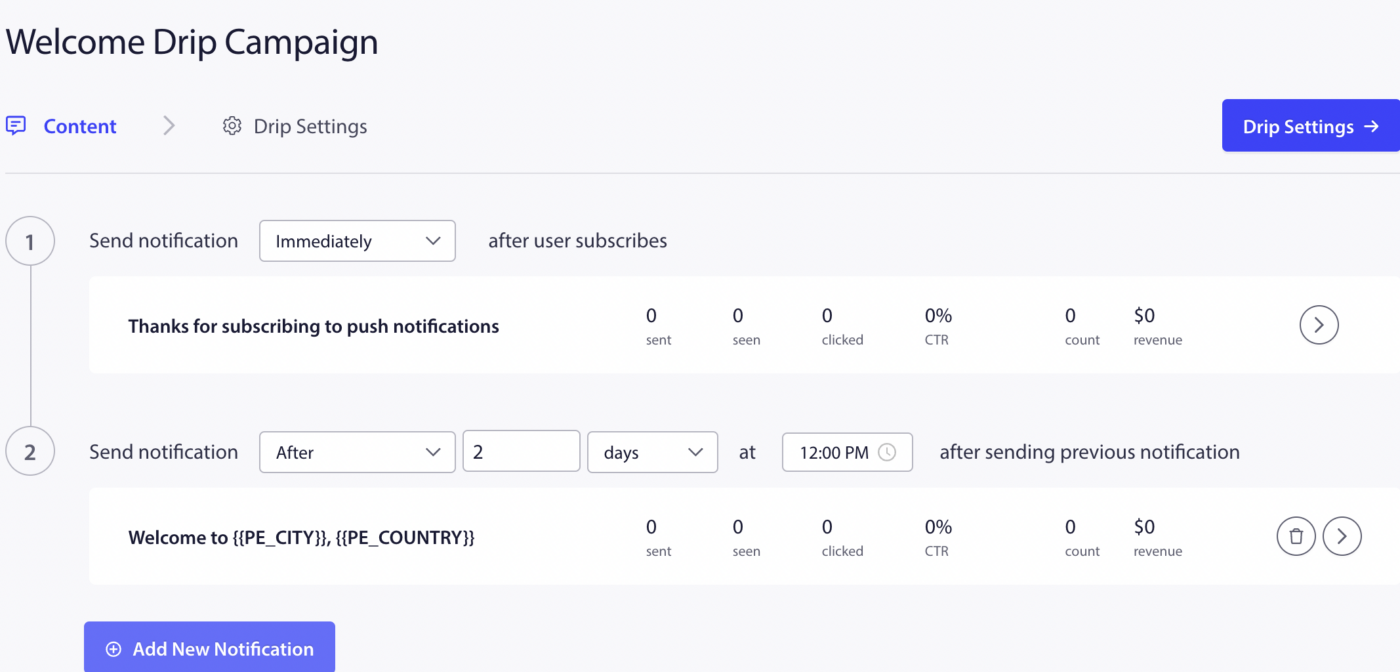
Once done, click on Activate Autoresponder.
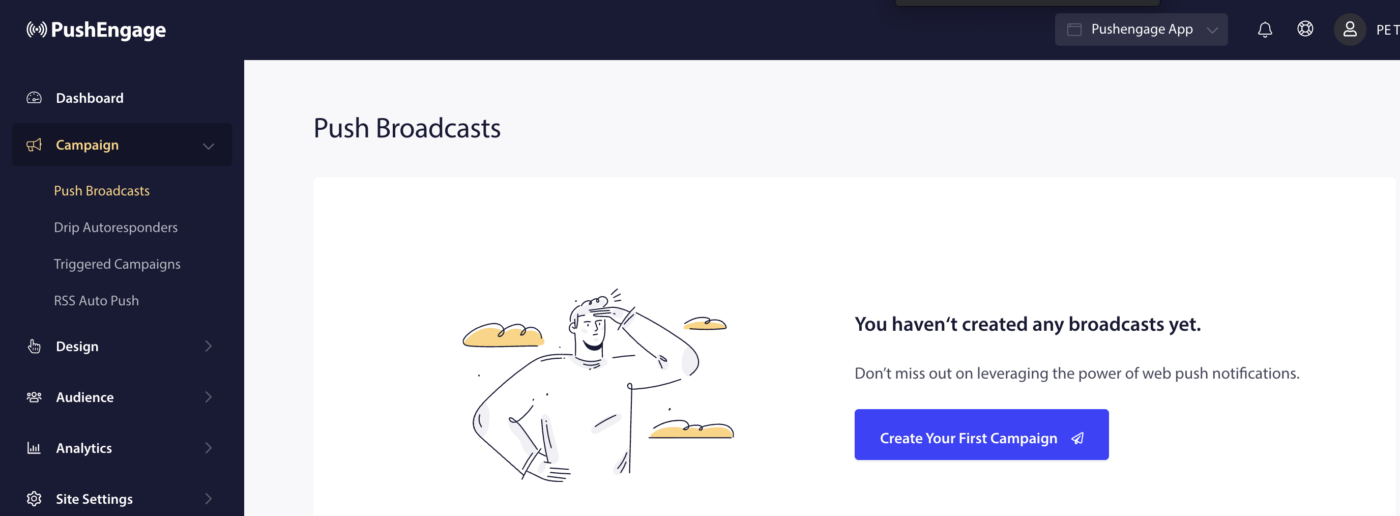
Create Your First Campaign
To create the first push broadcast, navigate to Campaign » Push Broadcasts » Create Your First Campaign.
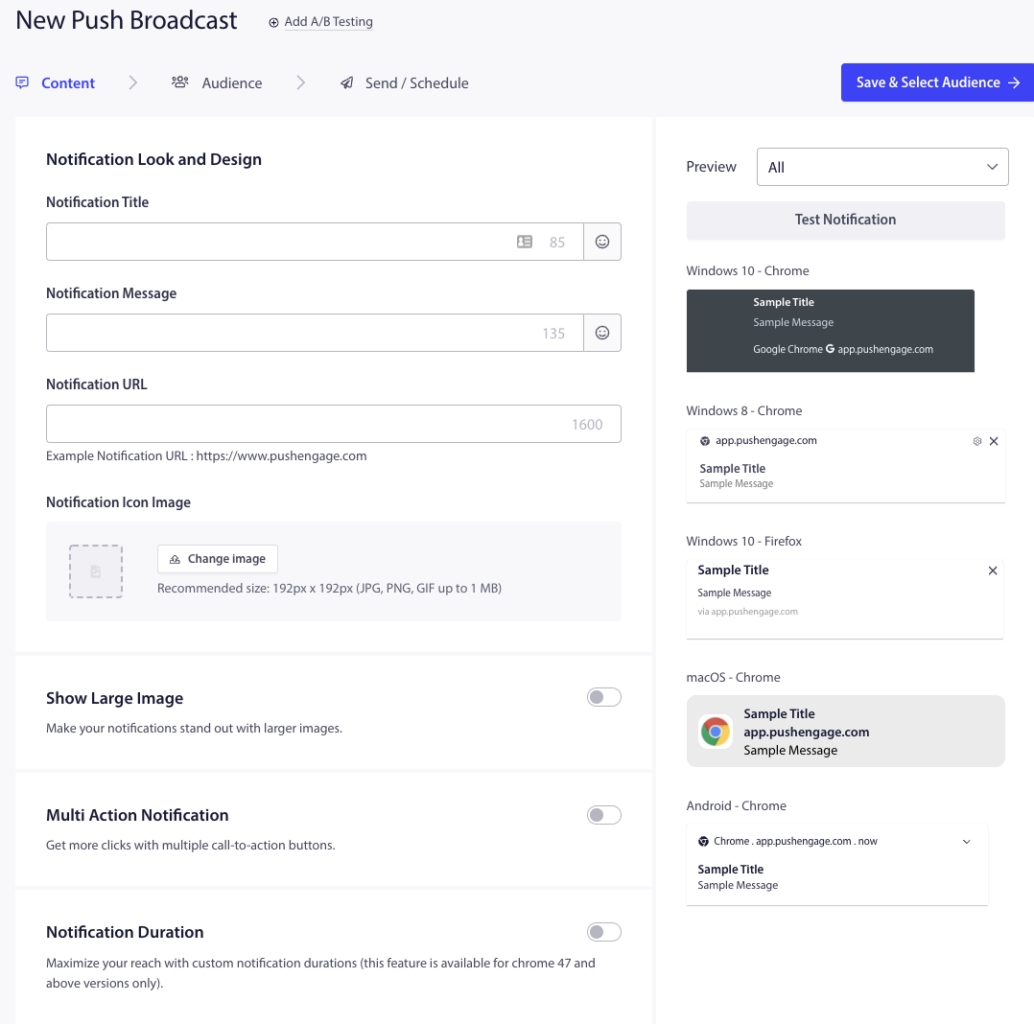
Enter the notification title, message, URL and an image under New Push Broadcast. Keep a check of the character limit and image size while creating the campaign.
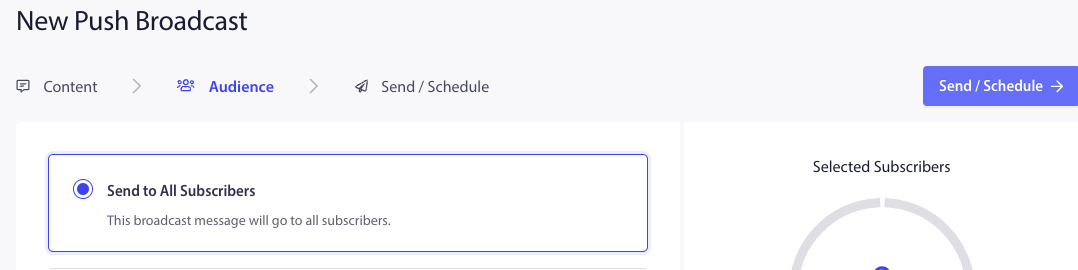
Then select Save and Select Audience band on the next tab select Send to All Subscribers » Send.
You have now reached the end of the challenge and you are all set to use PushEngage.
Если у вас возникнут какие-либо проблемы, пожалуйста, свяжитесь с нами, нажав здесь. Наша служба поддержки сможет вам помочь.


