通知:この項目にはレガシー ドキュメントがありません。そのため、現在のドキュメントが表示されています。
Are you looking to keep your customers informed with updates on their recent orders, give them a nudge to retry purchase requests, or boost your store’s reviews through web push notifications in your WooCommerce store?
If so, you’ve come to the right place! In this guide, we will walk you through the steps to set up and effectively manage web push notifications for your customers in your WooCommerce store.
開始する前に
WooCommerceストアにPushEngageプラグインがインストールされていることを確認してください。このガイドでは、すでにWooCommerceとPushEngageがインストールされていることを前提としています。
There are multiple campaigns that you can send out to customers for many use cases –
- Default Campaigns
- Push Broadcasts & Templates
- ドリップ自動応答
- Trigger Campaigns & Automation
Managing Default Notifications Settings
WooCommerce » 設定に移動します。
次に、プッシュ通知タブに移動します。

このタブの下で、現在有効にしたいすべての通知タイプをオンにすることができます。このフィールドでは、管理者のみに送信するか、顧客に送信するかを決定することもできます。
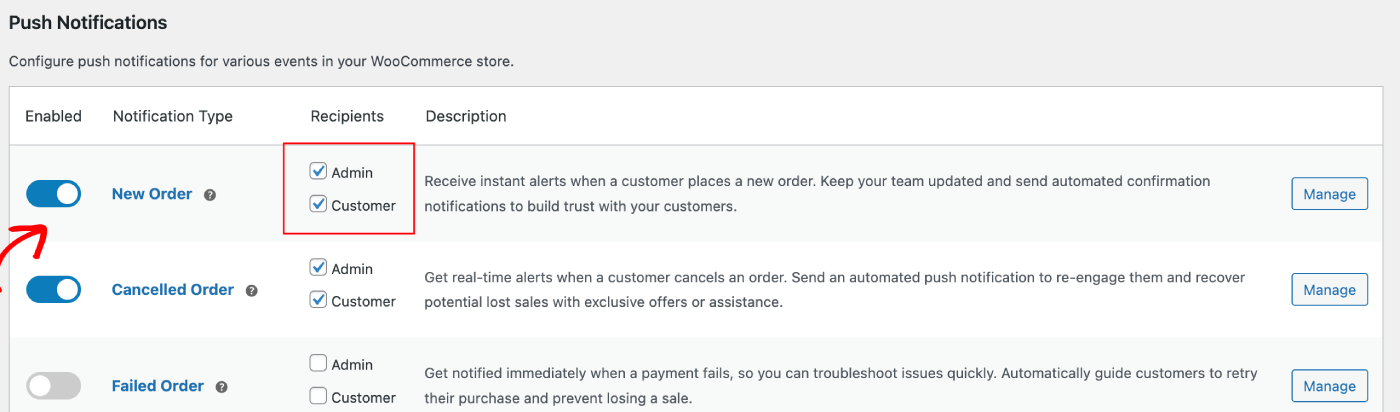
編集したいキャンペーンを選択し、管理ボタンをクリックします。顧客にキャンペーンを送信できるようにするチェックボックスをオンにできます。たとえば、ここでは購入再試行リクエストのプッシュ通知を設定しています。
通知タイトルとメッセージ、およびチェックアウトページのURLを設定できます。
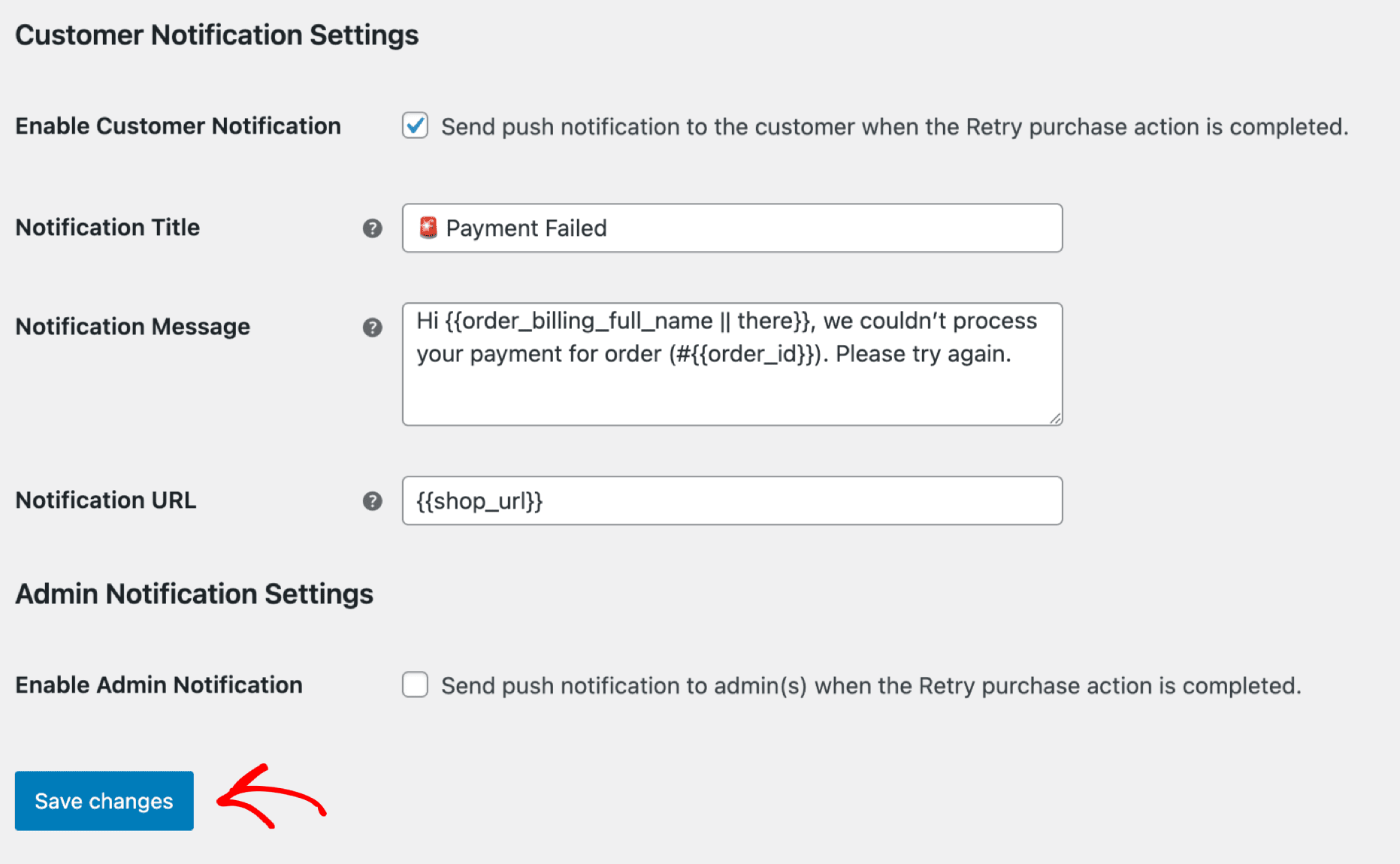
詳細を更新したら、変更を保存ボタンをクリックします。
Push Broadcasts & Templates
You can send out Push Broadcasts for Flash sale, seasonal offers or upselling the products.
You can log in to PushEngage Dashboard and then move to Push Broadcasts. It will help you to choose from variety of templates & categories and you can customize the Audience & Send/Scheduling options.

Here is the guide you can refer to creating the push campaigns within WordPress dashboard.
ドリップ自動応答
ウェブプッシュ通知の自動応答キャンペーンを有効にし、購読しているすべてのユーザーまたはPushEngageのユーザーリスト/セグメントに送信できます。ユーザーを特定のリストにセグメント化します。これは特定のページで発生したり、ユーザーが通知カリキュラムに購読したときに発生したりします。
This is perfect to send out a Welcome Drip with discount coupon, or send out cross-selling campaigns, review requests and seasonal offers.
Here is the guide that will help you build a drip campaign.
Trigger Automation Campaigns
We have Triggered Campaigns, which are event specific campaigns. It is specific to goals, some examples are – Cart & Browse Abandonment Campaigns. These campaigns are pre-created for your store. You only need to ensure that the campaigns are enabled once your store is connected.
カート放棄および閲覧放棄設定の有効化
We have an automated Cart & Browse Abandonment Campaign, which is directly integrated with your store’s product feed. We have a start event and a stop event to prevent further notifications from being sent after the intended goal is completed.
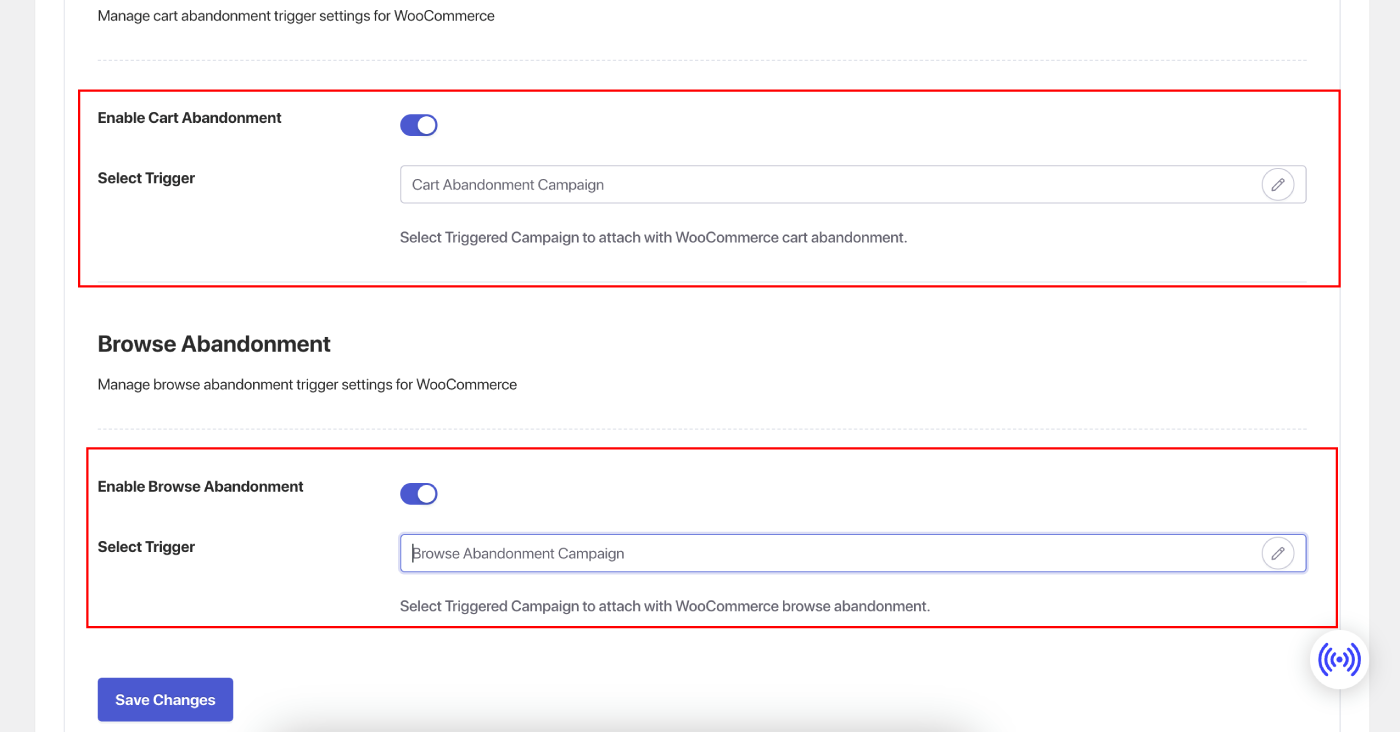
連携が完了したら、WooCommerceストアのカート放棄および閲覧放棄設定を管理できます。
設定 » 連携タブのWooCommerceセクションに移動します。
スイッチをオンにして、「カート放棄」および「閲覧放棄」を有効にします。
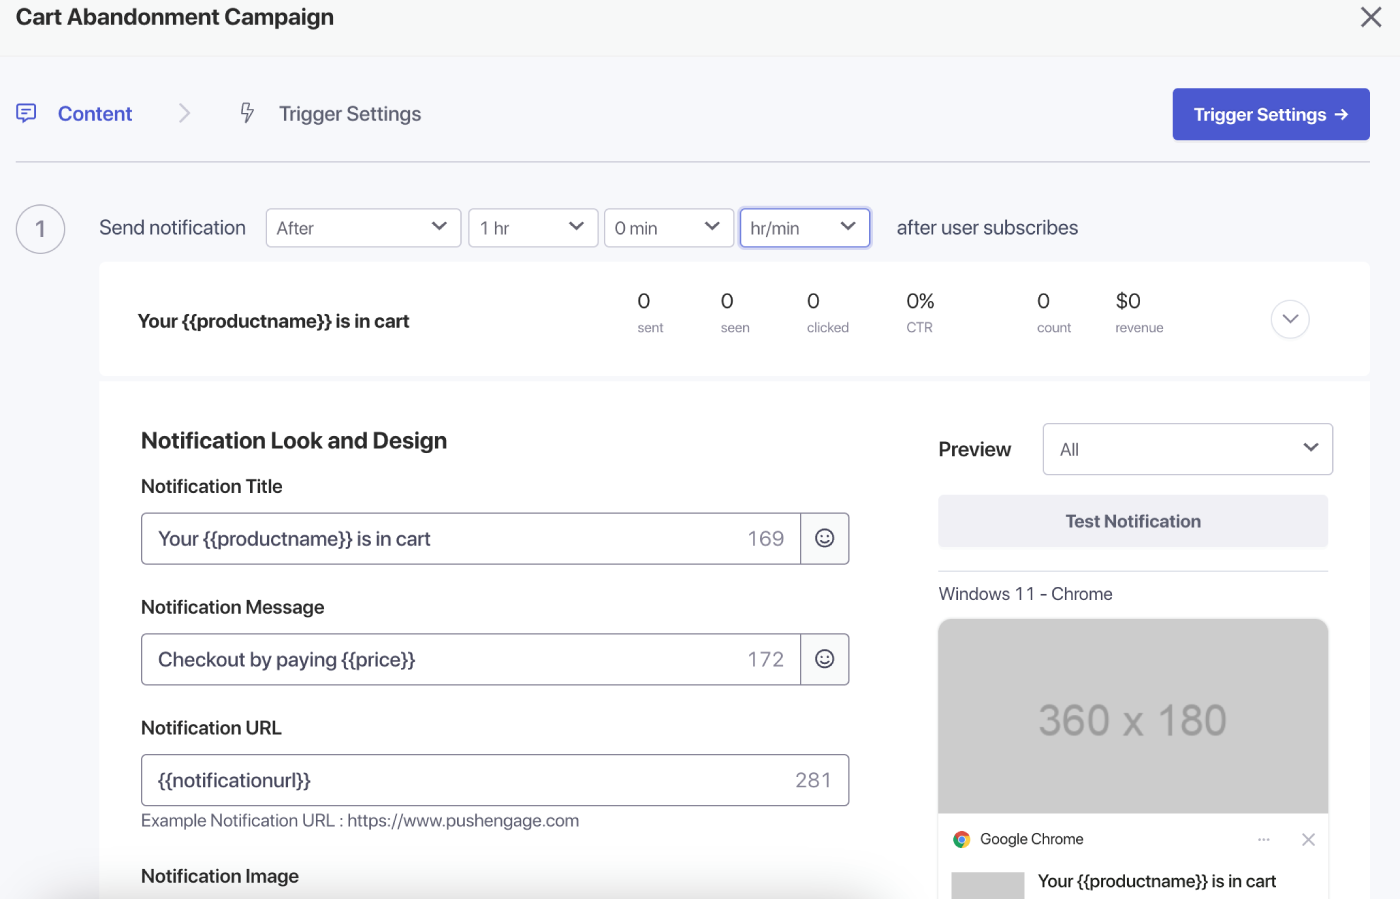
キャンペーンのカスタマイズ
「トリガーキャンペーン」に移動し、キャンペーンに複数の通知を追加します。
各通知の遅延と条件を指定し、フォールバック変数(代替変数)を追加します。
Trigger Settings
「トリガー設定」で、顧客にスパム送信を防ぐために通知の頻度を制限します。ここでは、1日あたりの制限または1週間あたりの制限を選択できます。たとえば、1日あたりの通知が2件の場合、1週間あたりの制限を14件に設定すると、人々が1日に2つ以上の商品を放棄した場合でも、すべてのプッシュ通知でスパム扱いされることはありません。
これらのキャンペーンにUTMパラメータを追加することもできるため、Googleアナリティクスでの追跡が容易になります。
トリガーを設定したら、変更を保存してキャンペーンをアクティブにします。有効になっている場合は、キャンペーン分析を表示して、目標収益のコンバージョンを確認できます。
That’s it, you have created some powerful campaigns for your WooCommerce Store.
問題が発生した場合は、こちらをクリックしてお気軽にお問い合わせください。サポートチームがお手伝いします。


