通知:この項目にはレガシー ドキュメントがありません。そのため、現在のドキュメントが表示されています。
PushEngage Flutter SDKを使用すると、プッシュ通知をFlutterアプリケーションに簡単に統合でき、AndroidとiOSの両方のプラットフォームでシームレスな互換性を提供します。
このガイドでは、PushEngage Flutter SDKを設定し、AndroidおよびiOSアプリでプッシュ通知を有効にする手順を説明します。
開始する前に
必要なもののリストはこちらです
- FlutterプロジェクトとPushEngageアカウント。アカウントをお持ちでない場合は、こちらからサインアップできます。
- Android用にFirebase Cloud Messaging(FCM)が設定されたFirebaseアカウント。
- iOSでApple Push Notification(APN)サービスを設定するためのApple Developerアカウント。
インストール
1.コードエディタでFlutterプロジェクトを開きます。
2.pubspec.yamlファイルに次の依存関係を追加します。
dependencies:
	pushengage_flutter_sdk: ^0.0.1
3.次のコマンドを実行してパッケージをインストールします。
dependencies:
flutter pub get
Androidの設定
Firebase Cloud Messaging(FCM)の設定
Androidでプッシュ通知を有効にするには、Firebase Cloud Messaging(FCM)を設定する必要があります。
1.Googleアカウントを使用してFirebaseコンソールにアクセスします。
2.新しいプロジェクトを作成または既存のプロジェクトを選択します:「プロジェクトを追加」をクリックして新しいプロジェクトを作成するか、リストから既存のプロジェクトを選択します。既存のプロジェクトを使用している場合は、手順4に直接進んでください。

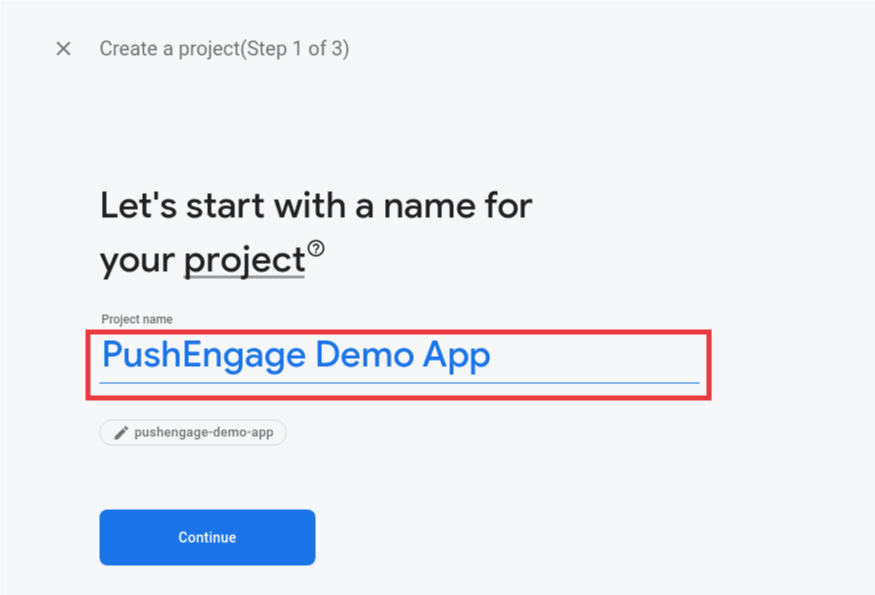
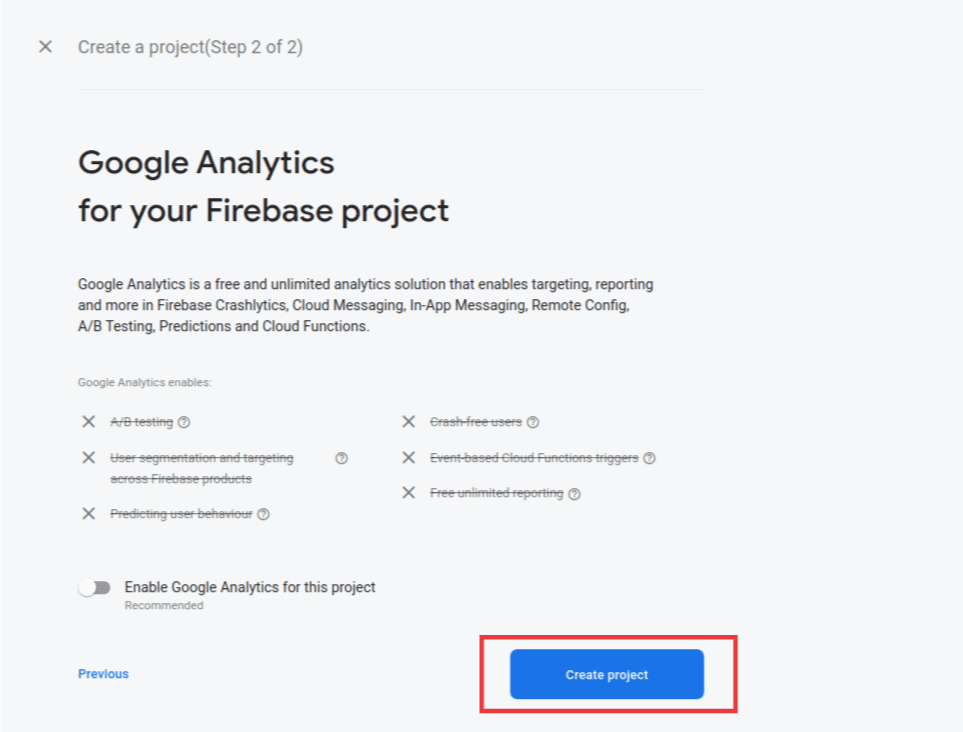
3.プロジェクトの詳細を入力します:プロジェクトの名前を追加し、続行をクリックします。最終画面で「プロジェクトを作成」をクリックしてセットアッププロセスを完了します。
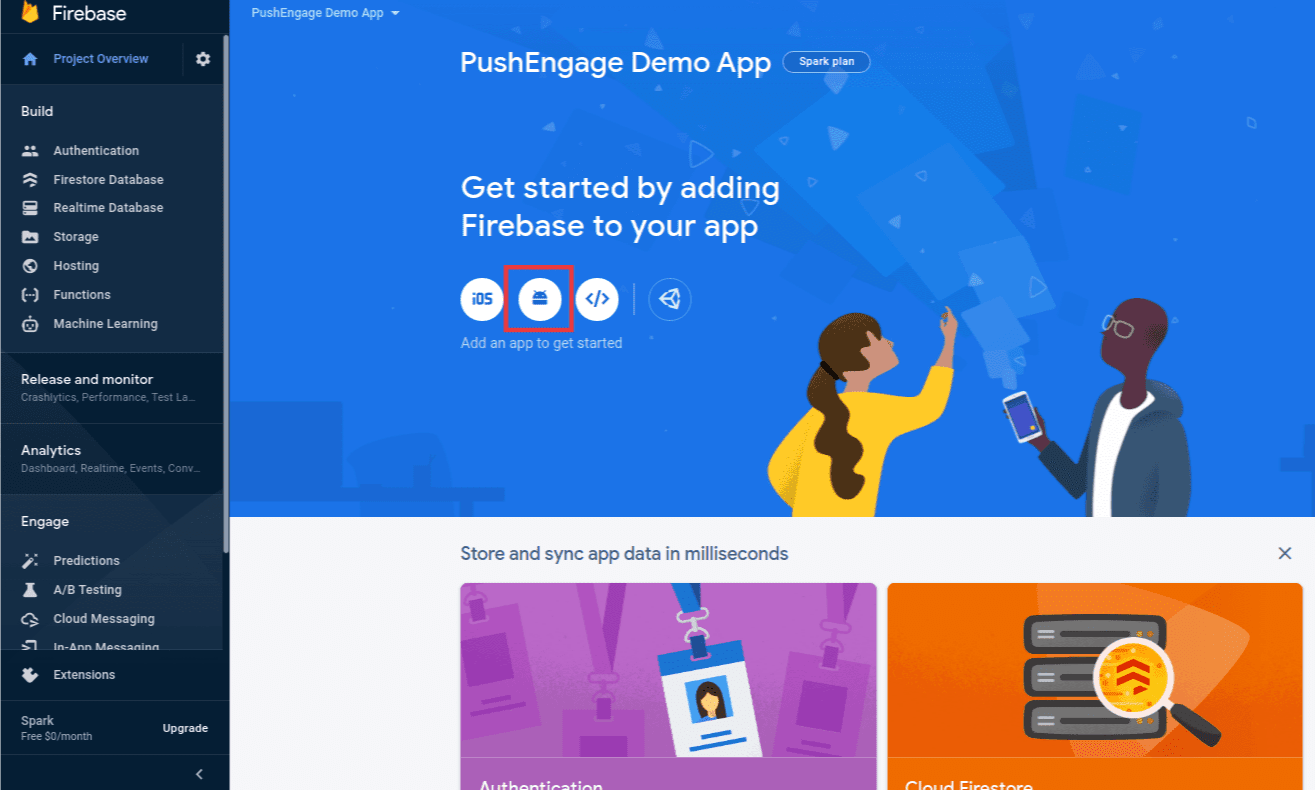
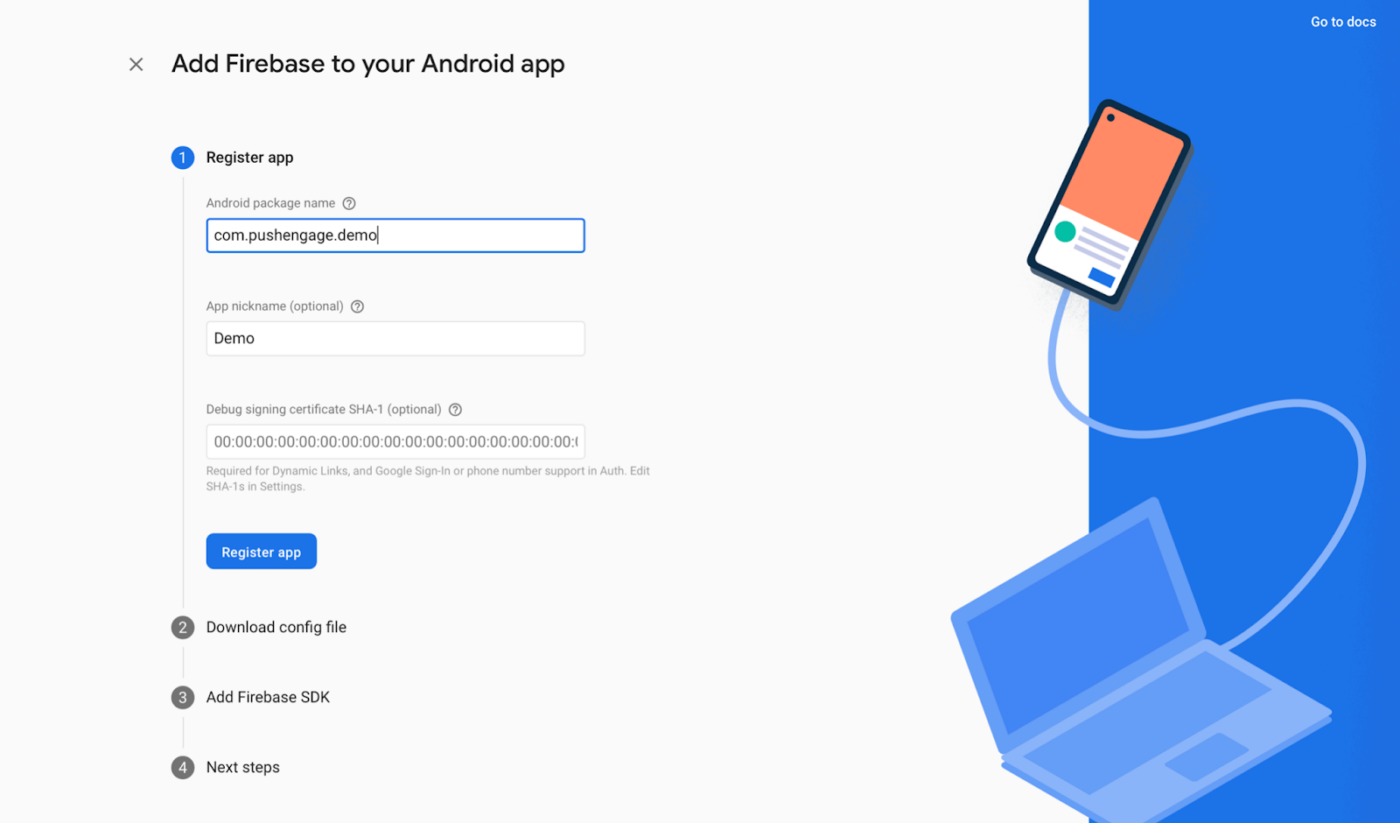
4.プロジェクトにAndroidアプリを追加します:Firebaseプロジェクトダッシュボードで、AndroidアイコンをクリックしてAndroidアプリを追加します。
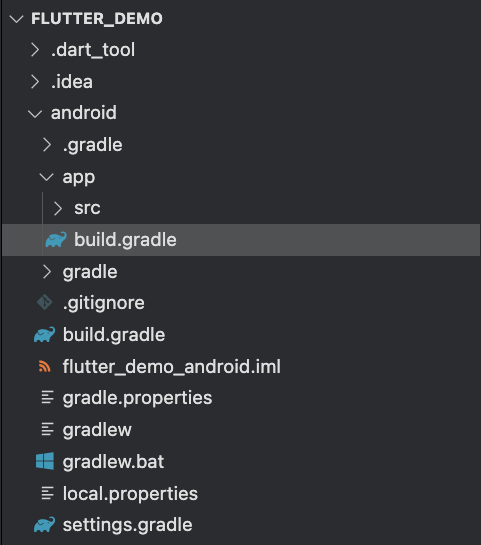
5.Androidアプリを設定します:Androidアプリのパッケージ名(android/app/build.gradleのandroidブロックの下にあります)を入力し、アプリ名を提供します。完了したら、登録をクリックします。
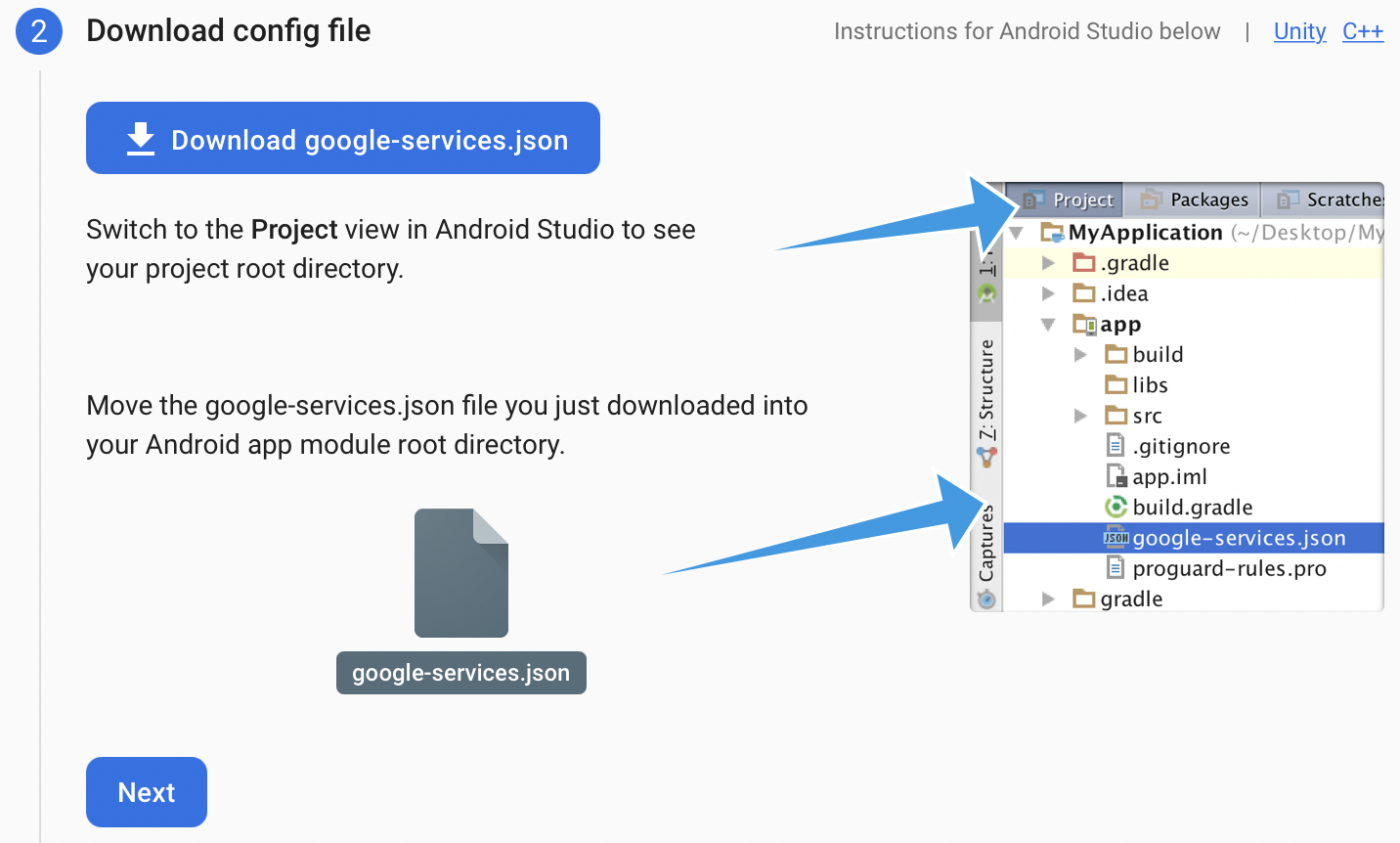
6.設定ファイルをダウンロードします:google-services.jsonファイルをダウンロードし、Androidアプリモジュールのルート(android/app/)に配置します。
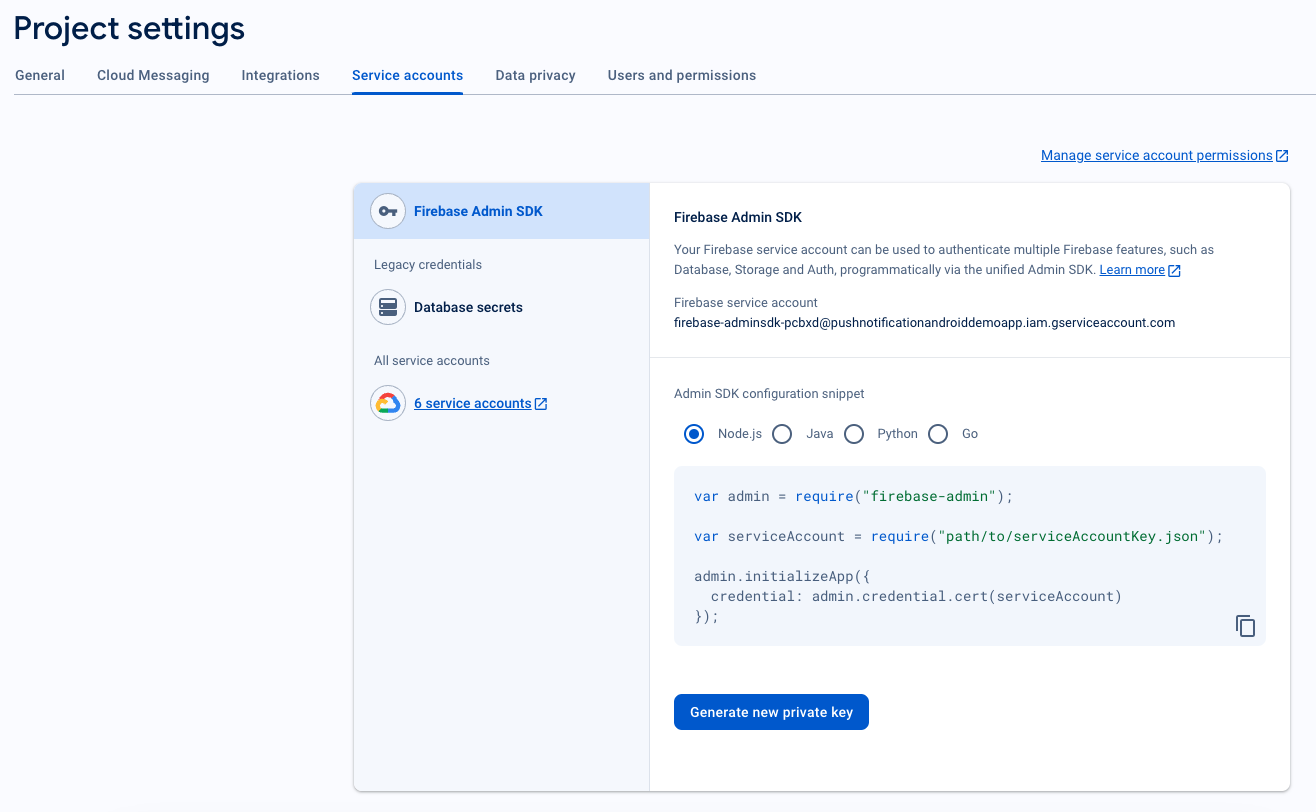
7.サービスアカウントJSONを生成します
- Firebaseコンソールで、左上の「プロジェクトの概要」の横にある設定アイコンをクリックし、プロジェクトの設定を選択します。
- サービスアカウントタブに移動します。
- 新しい秘密鍵を生成をクリックし、.jsonファイルをダウンロードします。
- このファイルはPushEngageダッシュボードの設定で必要になるため、安全に保管してください。
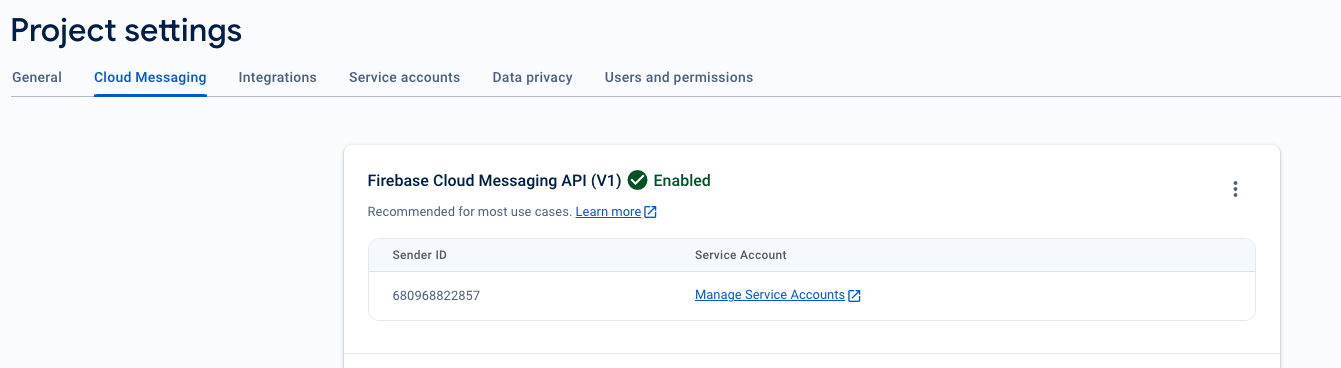
8.送信者IDを取得します
- Firebaseコンソールで、左上のプロジェクトの概要の横にある設定アイコンをクリックし、「プロジェクトの設定」を選択します。
- Cloud Messagingタブを選択します。ここに、PushEngage SDKの初期化に必要な送信者IDがあります。
FCMをPushEngageダッシュボードに統合する
FCMの詳細をPushEngageダッシュボードにシームレスに統合するには、以下の手順に従ってください。
- 資格情報を使用してログインすることにより、PushEngageアカウントにアクセスします。
- 設定 » インストールに移動し、Android SDKタブを選択します
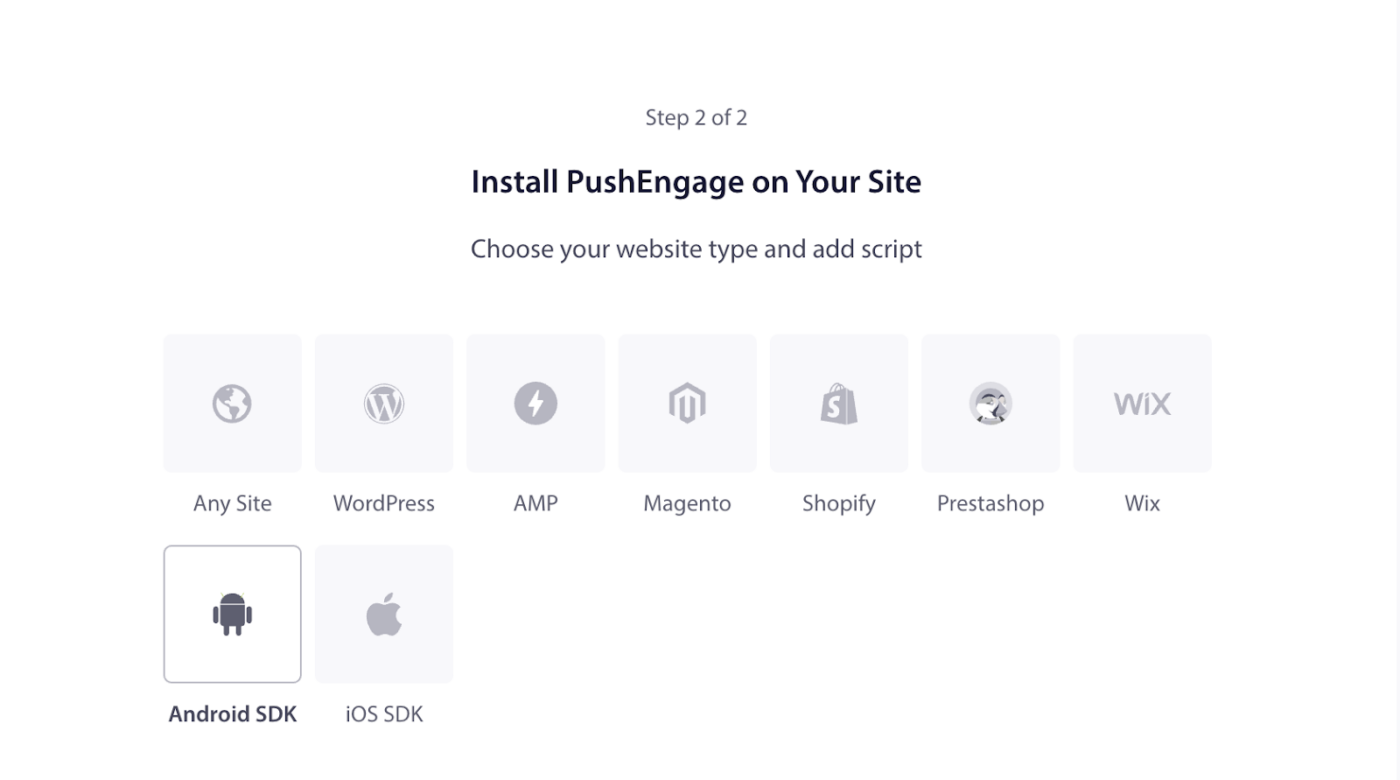
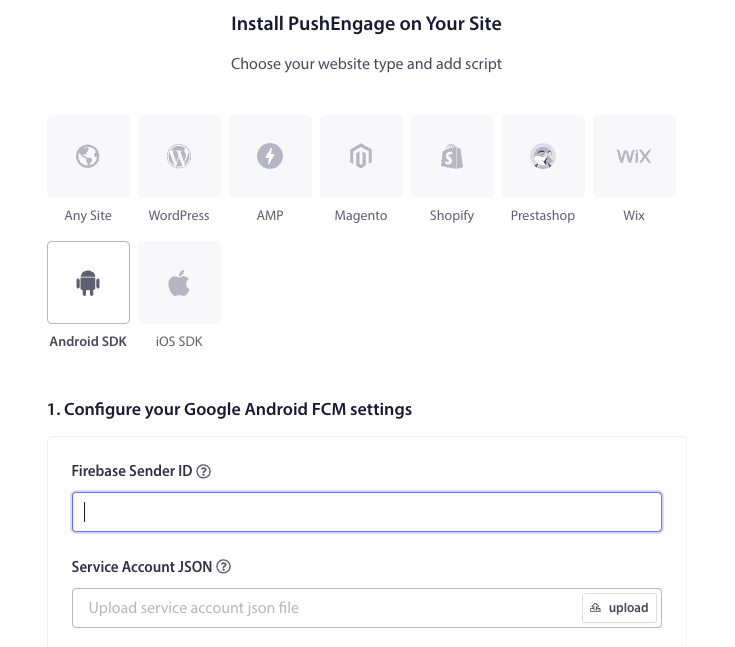
- 次に、FCM設定を構成します
- Firebase Sender ID(Firebaseコンソールから取得)を入力します。
- Service Account JSONファイル(Firebaseからダウンロード)をアップロードします。
- 更新ボタンをクリックして、これらの設定を保存します。
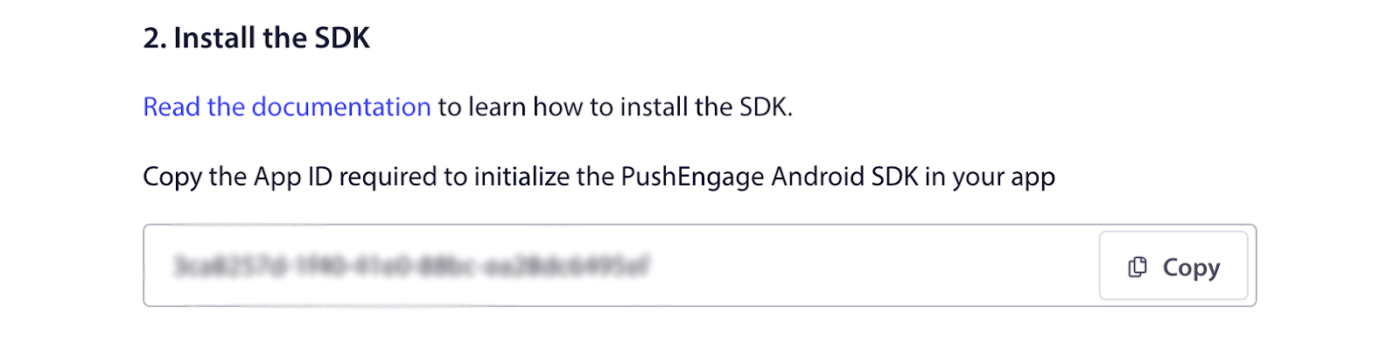
5. アプリIDをコピー: FCM設定を構成した後、アプリIDが提供されます。このアプリIDは、FlutterアプリでPushEngage Android SDKを初期化するために必要なのでコピーしてください。
iOSの設定
プロジェクトの設定
プロジェクトを開いた後、以下の手順に従ってください。
プロジェクトを開く方法は次のとおりです: your_project_name » iOS » Runner.xcworkspace。
1. リモート通知を有効にする
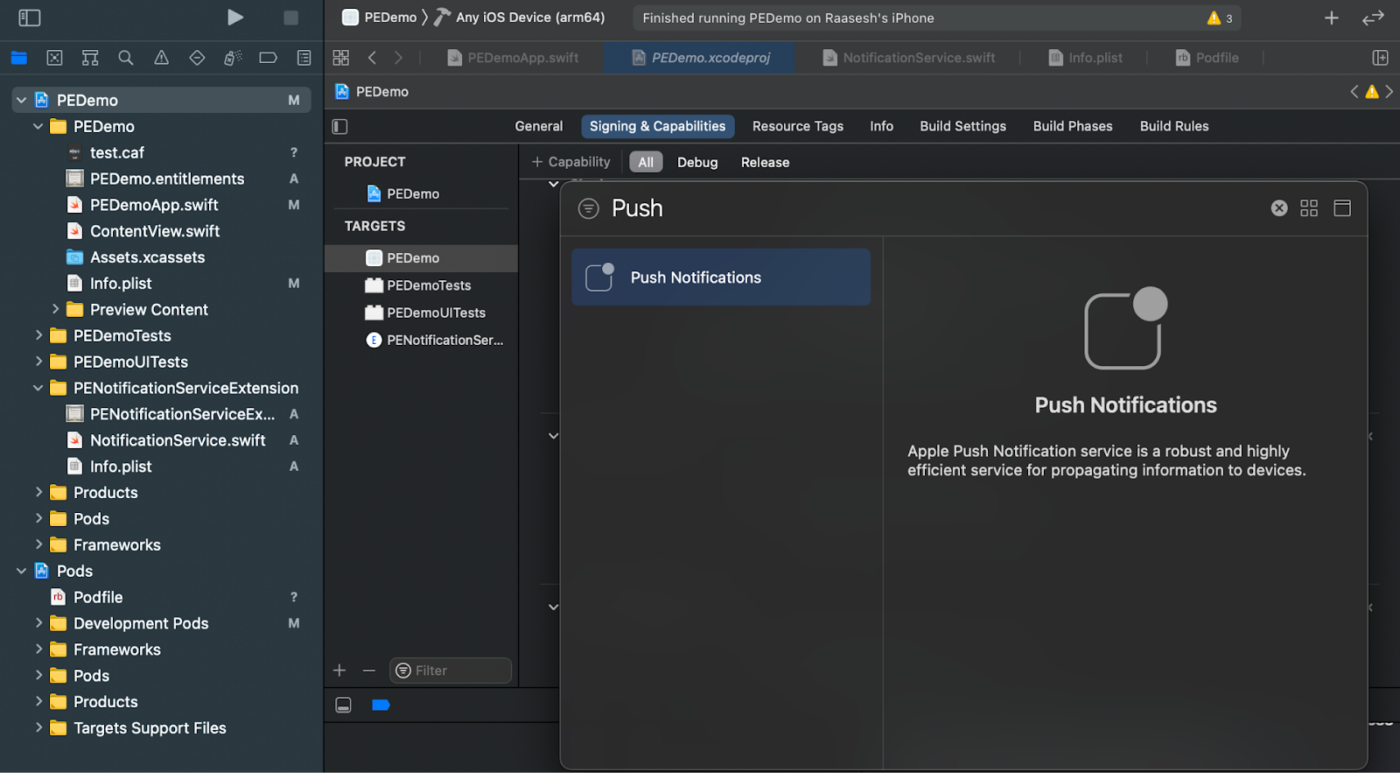
- Xcodeプロジェクトを開き、プロジェクトナビゲーターでルートプロジェクトを選択します。
- メインアプリターゲットを選択します。
- 「署名と機能」に移動します。
- バックグラウンドモード機能が追加されていることを確認します。追加されていない場合は、「機能を追加」ボタンをクリックして追加します。
- 同様に、プッシュ通知機能が追加されていることを確認します。「機能を追加」ボタンを使用して追加します。

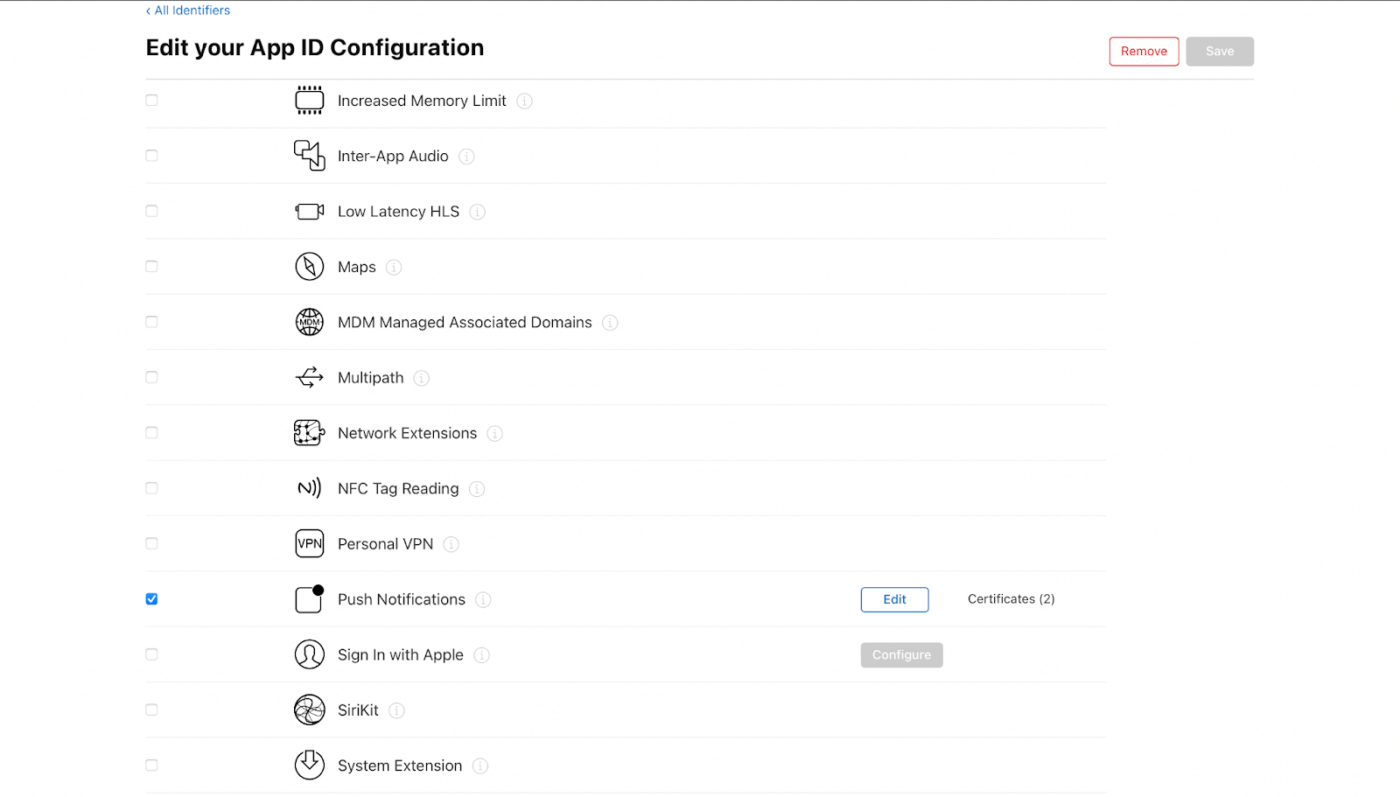
Xcodeで「プッシュ通知」機能が表示されない場合:
- Apple Developerアカウントに移動します。
- 「証明書、ID、プロファイル」に移動します。アプリIDを選択します。
- アプリIDの設定を編集し、プッシュ通知が有効になっていることを確認します。
- Xcodeに戻り、「プッシュ通知」機能の追加を再度試してください。
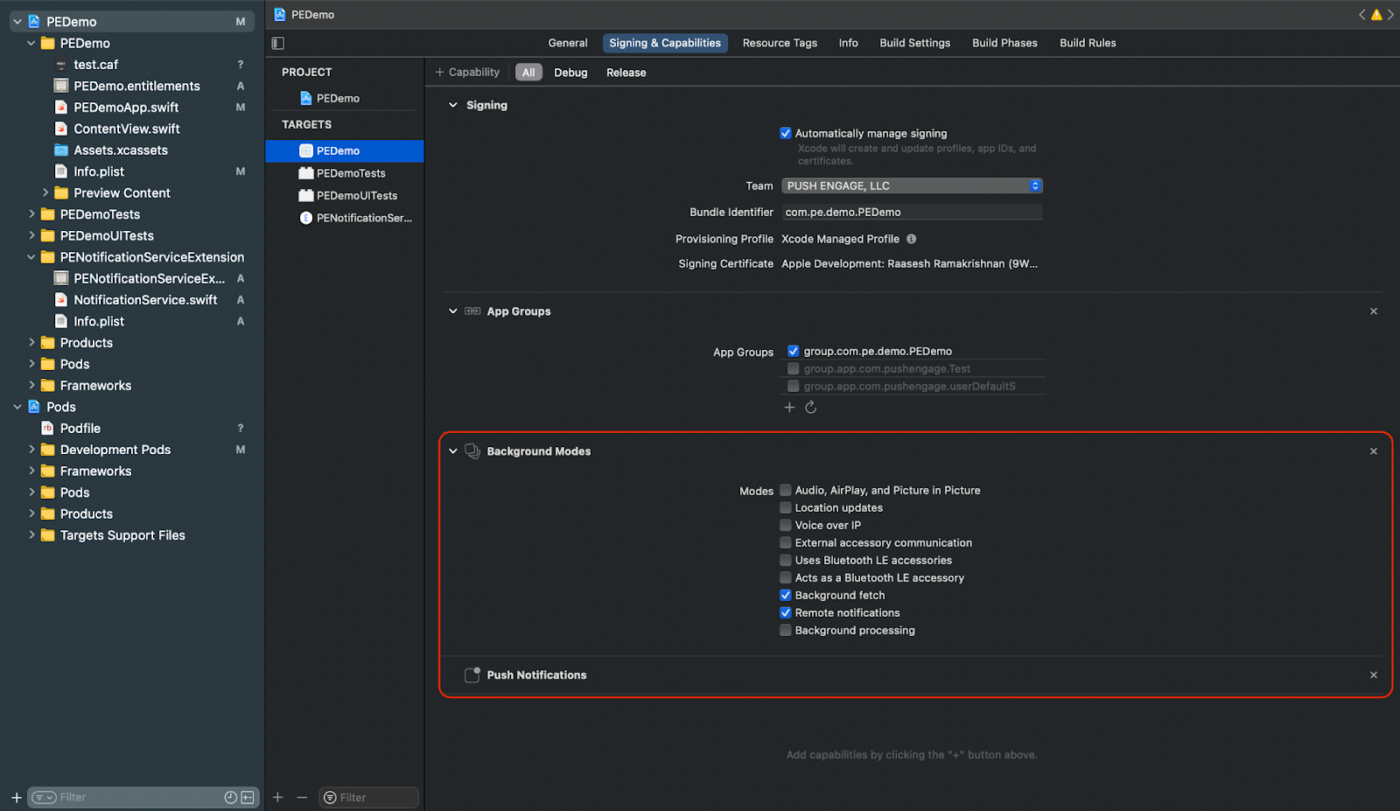
2. バックグラウンドモードを有効にする
- Xcodeプロジェクトで、「署名と機能」に移動します。
- 「バックグラウンドモード」内で、「リモート通知」と「バックグラウンド取得」の両方を有効にします。
- この手順により、アプリがリモート通知とバックグラウンド取得を効率的に処理できるようになります。
iOS用のAPN証明書をお持ちでない場合は、こちらのガイドを使用して作成できます。
次に、iOSのみにNotification Service拡張機能とNotification Content拡張機能を追加する必要があります。
通知サービス拡張機能の作成
通知サービス拡張機能は、iOSアプリが通知を受信する機能を強化します。これは、通知を受信したときに通知の内容を変更したり、データを取得/処理するために使用されます。通知サービス拡張機能を作成するには、次の手順に従ってください。
- Xcodeを開き、プロジェクトに移動します。
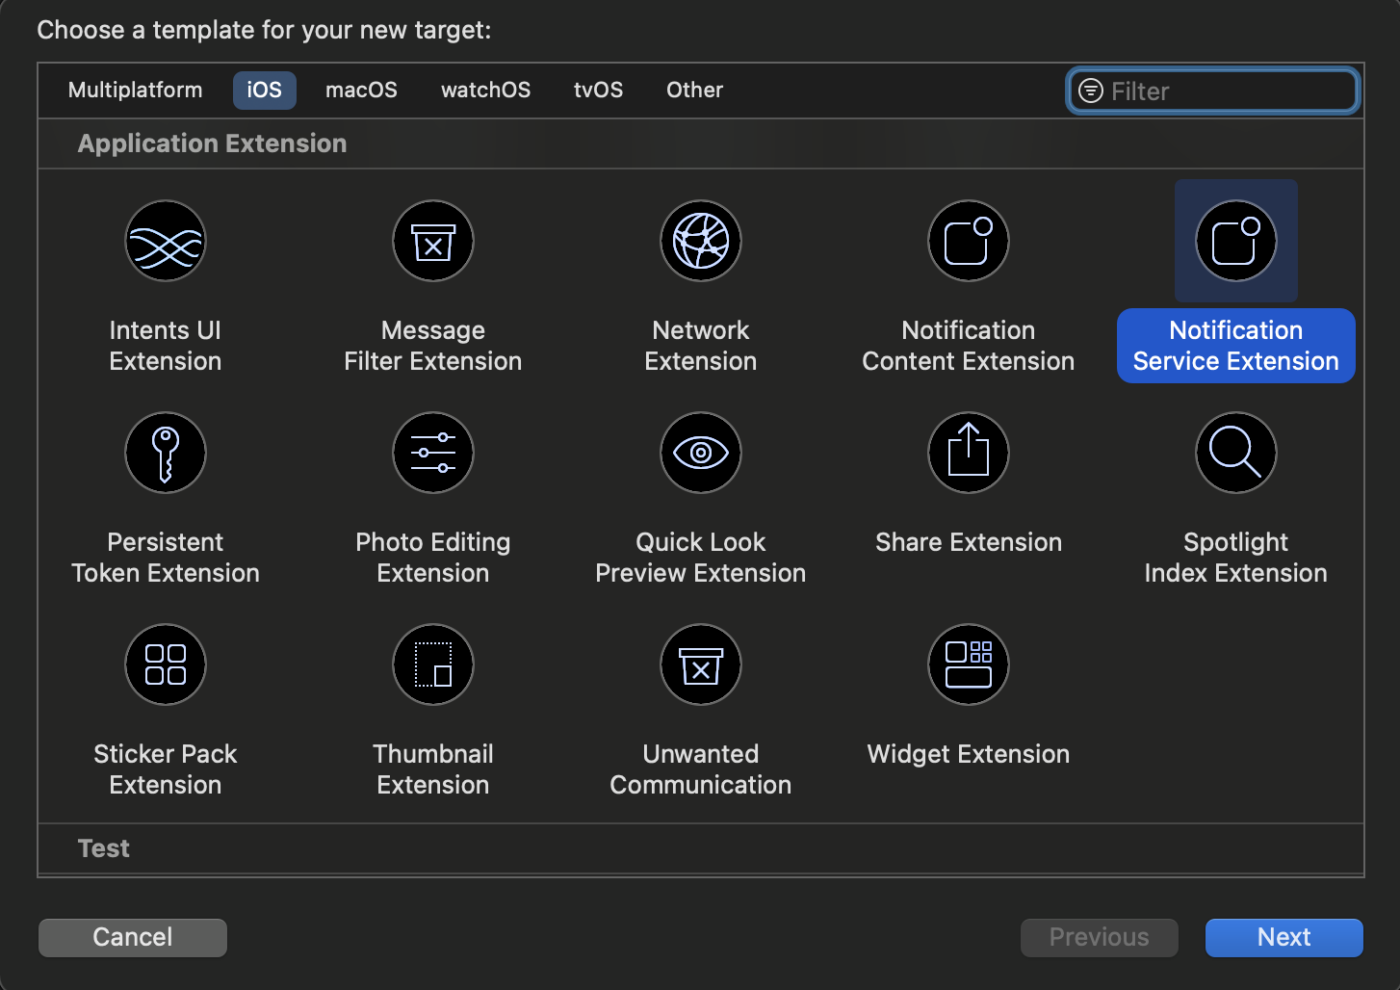
- メニューからFile » New » Targetを選択します。
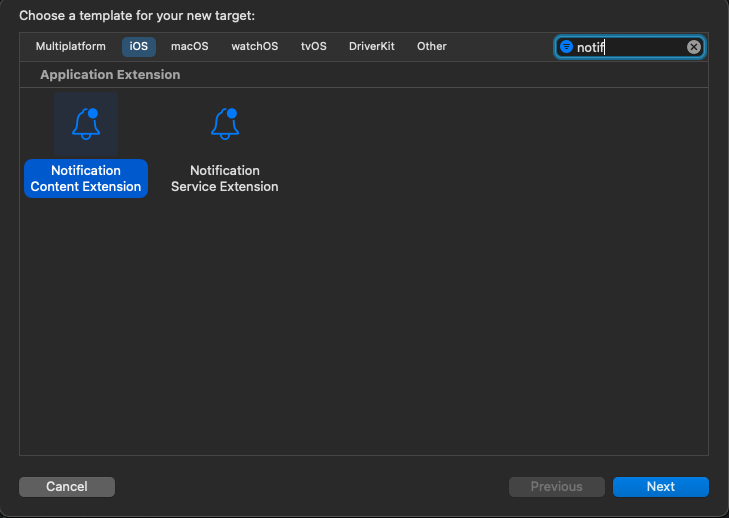
- テンプレート選択ウィンドウで、Notification Service Extensionを選択し、Nextをクリックします。
4. 拡張機能の名前を入力します。例: PushEngageNotificationServiceExtension。その後、Finishをクリックします。
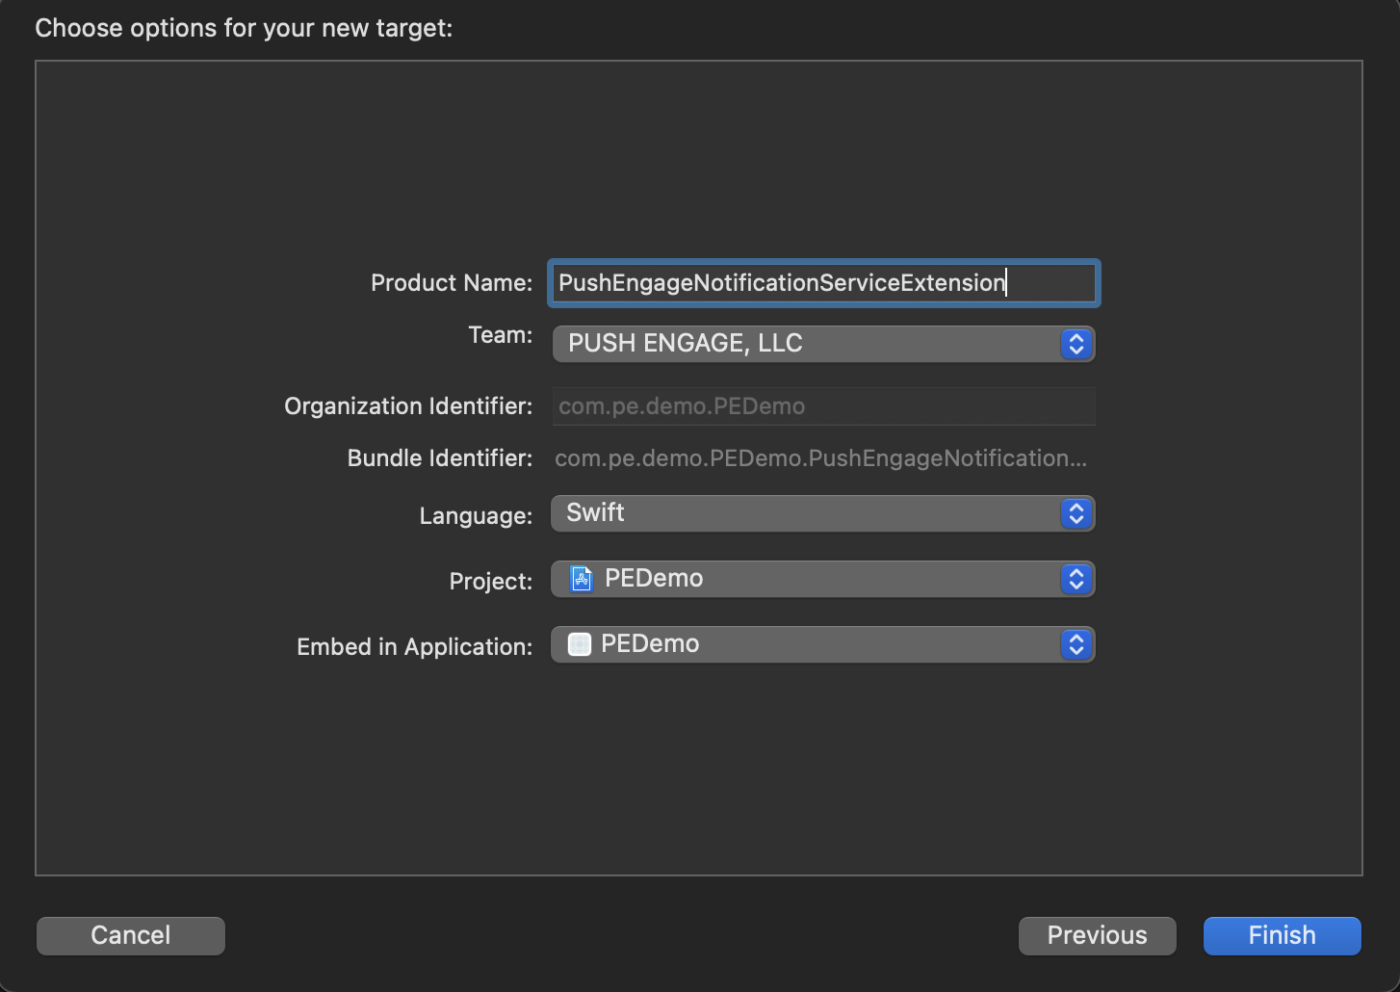
4. 拡張機能の名前を入力します。例: PushEngageNotificationServiceExtension。その後、Finishをクリックします。
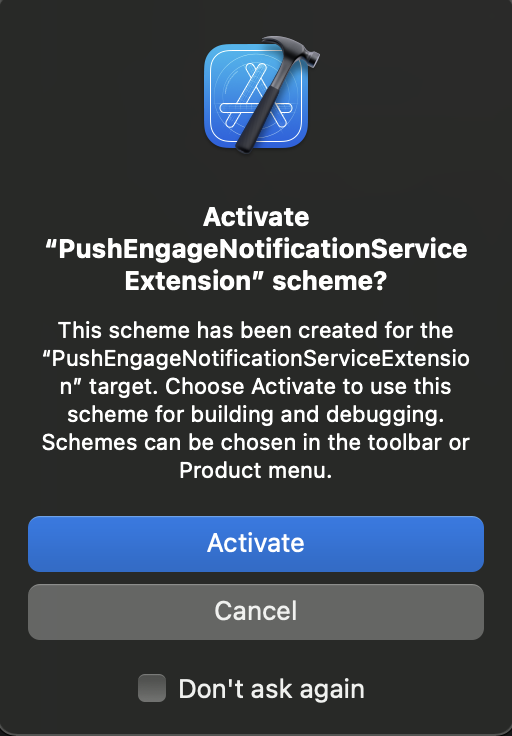
5. Notification Service Extensionの作成が完了したら、アクティベートを促される場合があります。すぐにアクティベートしないでください。拡張機能をアクティベートすると、Xcodeのデバッグフォーカスがアプリから拡張機能に切り替わるためです。誤ってアクティベートしてしまった場合は、心配いりません。Xcode内でアプリのデバッグに切り替えることができます。
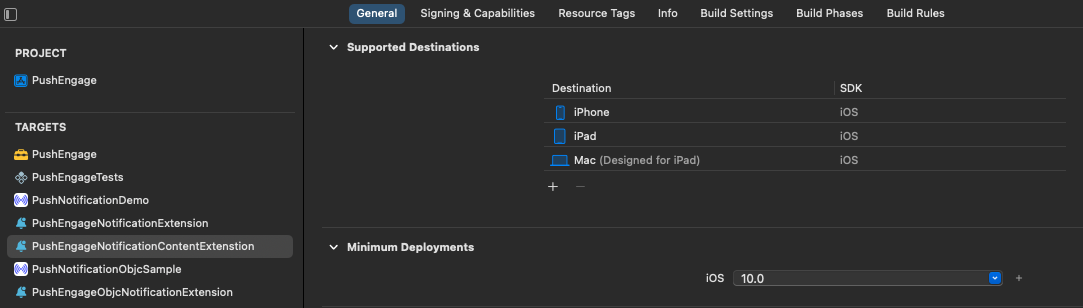
6. プロジェクトナビゲーターで、最上位のプロジェクトディレクトリを選択し、ステップ4で作成したターゲットリストからプロジェクト内のNotificationServiceExtensionターゲットを選択します。
7. Deployment TargetをiOS 10以上に設定します。これは、Appleがこの拡張機能のサポートをリリースしたiOSのバージョンです。

Notification Service ExtensionのPushEngage SDKの初期化
iOS Notification Service ExtensionでPushEngage SDKが正しく機能することを確認するには、以下の手順に従ってください。
- your_project_name » ios » Podfileを開きます。
- Podfileの末尾に以下を追加します:
post_install do |installer|

  installer.pods_project.targets.each do |target|

    flutter_additional_ios_build_settings(target)

    target.build_configurations.each do |config|

      config.build_settings['APPLICATION_EXTENSION_API_ONLY'] = 'No'

     end

  end

end

target 'Your_Notification_Service_Extension_Name' do

  use_frameworks!

  pod 'PushEngage', '~>0.0.4'

end
- 依存関係をインストールします:
次に、プロジェクトのiOSディレクトリにコマンドを入力し、以下のコマンドを実行する必要があります:
pod repo update

pod install
- Notification Service Extensionターゲットで、PushEngageフレームワークをインポートし、必要な初期化コードを追加していることを確認してください。Swiftを使用して行う方法は次のとおりです。
import UserNotifications
import PushEngage

@available(iOSApplicationExtension 10.0, *)
class PushEngageNotificationServiceExtension: UNNotificationServiceExtension {

    var contentHandler: ((UNNotificationContent) -> Void)?
    var bestAttemptContent: UNMutableNotificationContent?
    var request : UNNotificationRequest?

    override func didReceive(_ request: UNNotificationRequest, withContentHandler contentHandler: @escaping (UNNotificationContent) -> Void) {
        self.request = request
        self.contentHandler = contentHandler
        self.bestAttemptContent = (request.content.mutableCopy() as? UNMutableNotificationContent)

        if let bestContent = bestAttemptContent {
            PushEngage.didReceiveNotificationExtensionRequest(request, bestContentHandler: bestContent)
            contentHandler(bestContent)
        }
    }

    override func serviceExtensionTimeWillExpire() {
        // Called just before the extension will be terminated by the system.
        // Use this as an opportunity to deliver your "best attempt" at modified content, otherwise the original push payload will be used.
        if let contentHandler = contentHandler, let request = request ,let bestAttemptContent =  bestAttemptContent {
            guard let content = PushEngage.serviceExtensionTimeWillExpire(request, content: bestAttemptContent) else {
                contentHandler(bestAttemptContent)
                return
            }
            contentHandler(content)
        }
    }

}
通知コンテンツ拡張機能の作成
カスタムUIを追加して表示方法を改善するには、通知コンテンツ拡張機能を作成する必要があります。拡張機能を設定するには、以下の手順に従ってください:
- Xcodeで、File » New » Targetに移動します。
- Notification Content Extensionを選択し、Nextをクリックします。
3. Finishをクリックした後に表示されるダイアログで「Activate」を選択しないでください。キャンセルすると、Xcodeは拡張機能ではなくアプリのデバッグを続行します。誤ってアクティベートした場合は、Xcode内でアプリのデバッグに切り替えてください(実行ボタンの隣)。
4. プロジェクトナビゲーターで、最上位のプロジェクトディレクトリを選択し、ステップ2で作成したターゲットリストからプロジェクト内のNotificationContentExtensionターゲットを選択します。
5. Deployment TargetをiOS 10以上に設定します。これは、Appleがこの拡張機能のサポートをリリースしたiOSのバージョンです。
Notification Content ExtensionのPushEngage SDKの初期化
iOS Notification Content ExtensionでPushEngage SDKが正しく機能することを確認するには、次の手順に従ってください:
your_project_name » iOS » Podfileを開きます。
Podfileの末尾に以下を追加します:
target 'Your_Notification_Content_Extension_Name' do
  use_frameworks!
  pod 'PushEngage', '0.0.4'
end
- 依存関係をインストールします: コマンドラインで実行する必要があるコードは次のとおりです。
e
pod repo update
pod install
- In your Notification Content Extension target, make sure to import the PushEngage framework and add the necessary initialization code. Here’s how you can do it with some example of UI elements using Swift.
import UIKit
import UserNotifications
import UserNotificationsUI
import PushEngage

@available(iOSApplicationExtension 10.0, *)

class NotificationViewController: UIViewController, UNNotificationContentExtension {
    fileprivate var hostingView: UIHostingController<ContentView>?
    override func viewDidLoad() {
        super.viewDidLoad()
        self.view.backgroundColor = .white
    }

    func didReceive(_ notification: UNNotification) {
        if(notification.request.content.categoryIdentifier == "your_identifier"){
            let payLoad = PushEngage.getCustomUIPayLoad(for: notification.request)
  //pass the payload to your custom View
            let view = CustomView(payLoadInfo: payLoad)
            hostingView = UIHostingController(rootView: view)
If let customView = self.hostingView {
            addChild(hostingView!)
}
        }
    }
}
Add App Groups
App Groups are essential for enabling communication between the main app, notification service extension, and notification content extension. Follow these steps to add App Groups to your iOS project:
If you have an existing app group and want to use that only, skip to step no. 4.
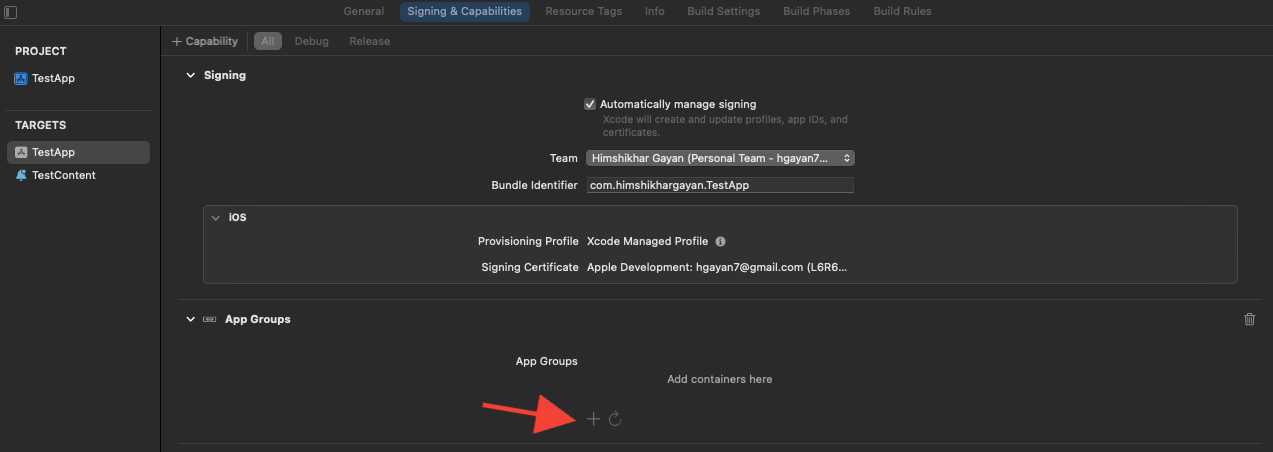
- In your Xcode project, in the project navigator, select the top-level project directory and select the main target of the app.
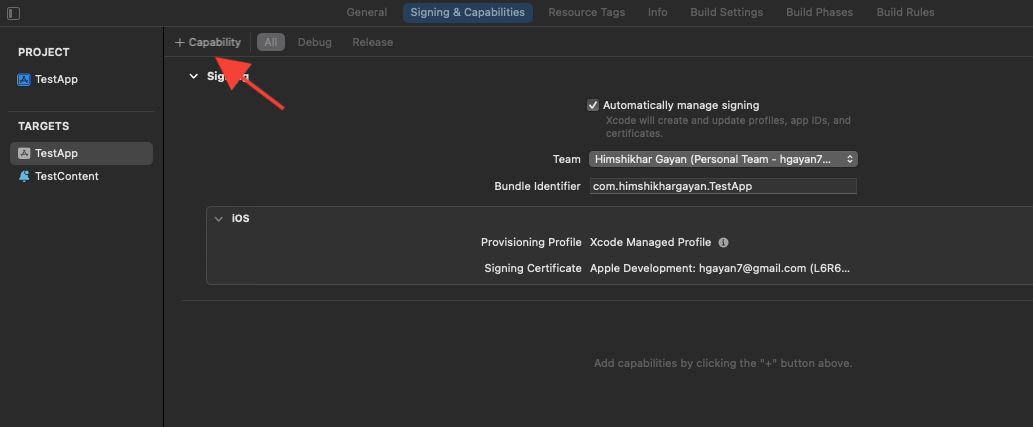
- Navigate to the Signing & Capabilities tab.
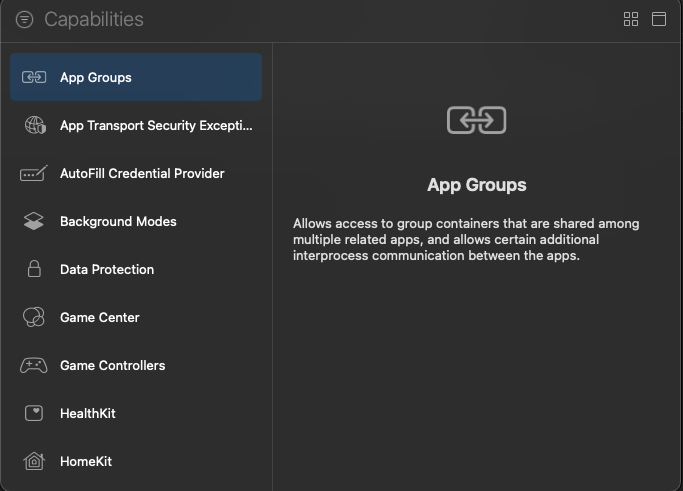
- Click the “+ Capability” button and select App Groups from the list.
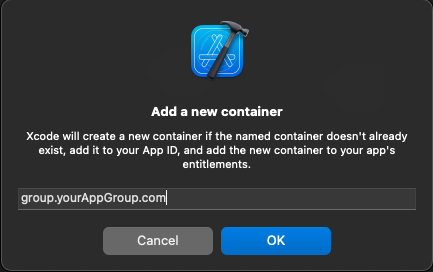
4. Click on the + button to add an App Group.
5. Add a unique name to your App Group and click on OK.
6. In the main editor area, select the main target of your app. created an app group please provide the name of the group in your application Info.plist with key PushEngage_App_Group_Key.
7. Add the same key and value in the Notification Service Extension’s Info.plist file.
8. Make sure you select the same app group in both Main Application Target and the Your_Notification_Service_Extension.
Initialize PushEngage SDK
In your main.dart, initialize the PushEngage SDK.
void main() {
  runApp(const MyApp());
}

class MyApp extends StatefulWidget {
  const MyApp({super.key});
  @override
  State<MyApp> createState() => _MyAppState();
}

class _MyAppState extends State<MyApp> {
  @override
  void initState() {
    super.initState();
    initPlatformState();
  }

  Future<void> initPlatformState() async {
    PushEngage.setAppId("your_pushengage_app_id");
  }
  @override
  Widget build(BuildContext context) {
    return const MaterialApp(
      title: 'PushEngage',
      debugShowCheckedModeBanner: false,
      home: Home(),
    );
  }
}
In your AppDelegate.swift of iOS app
import Flutter
import UIKit
import PushEngage

@UIApplicationMain
@objc class AppDelegate: FlutterAppDelegate {

    override init() {
        super.init()
        PushEngage.swizzleInjection(isEnabled: true)
    }

    override func application(
        _ application: UIApplication,
        didFinishLaunchingWithOptions launchOptions: [UIApplication.LaunchOptionsKey: Any]?
    ) -> Bool {
        if #available(iOSApplicationExtension 10.0, *) {
            UNUserNotificationCenter.current().delegate = self
        }
        GeneratedPluginRegistrant.register(with: self)
        PushEngage.setBadgeCount(count: 0)
        PushEngage.setNotificationWillShowInForegroundHandler { notification, completion in
            if notification.contentAvailable == 1 {
                // in case developer failed to set completion handler. After 25 sec handler will call.
                completion(nil)
            } else {
                completion(notification)
            }
        }
        return super.application(application, didFinishLaunchingWithOptions: launchOptions)
    }
}
Handling deepLink
A deepLinkStream is something that emits deep link data.
class Home extends StatefulWidget {
  const Home({super.key});

  @override
  _HomeState createState() => _HomeState();
}

class _HomeState extends State<Home> {
  late StreamSubscription _deepLinkSubscription;

  @override
  void initState() {
    super.initState();
    PushEngage.deepLinkStream.listen((data) {
      _handleDeepLink(data);
    });
  }

  void _handleDeepLink(Map<String, dynamic>? data) {
    // Parse the deep link and navigate accordingly
    Uri uri = Uri.parse(data?['deepLink']);
    print('Path: ${uri.path}');
    updateResponseText(data.toString());
    switch (uri.path) {
      case 'trigger':
      case '/trigger':
        print(‘your_implementation’)
        break;
    }
  }
c
i
That is all, you have now successfully integrated the Flutter SDK for Android & iOS App.
問題が発生した場合は、ここをクリックして お問い合わせ ください。サポートチームがお手伝いします。


