通知:この項目にはレガシー ドキュメントがありません。そのため、現在のドキュメントが表示されています。
PushEngageを使用すると、ウェブサイトの訪問者をウェブプッシュサブスクライバーに変換できます。サブスクライバーとは、ウェブサイトに設定したサブスクリプションポップアップで「許可」をクリックした人のことです。ウェブプッシュキャンペーンでは、メールアドレスや電話番号などの個人情報は取得しません。ただし、訪問者がウェブサイトにアクセスしていない場合でも、サブスクライバーにリーチできます。
Install PushEngage On Your Site
Add Site Details
1. PushEngageのインストールを完了するには、サイト設定 » サイト詳細に移動します。

2. サイト情報(サイト名、ブランドロゴ)を入力し、サイトURLが正しいことを確認する必要があります。
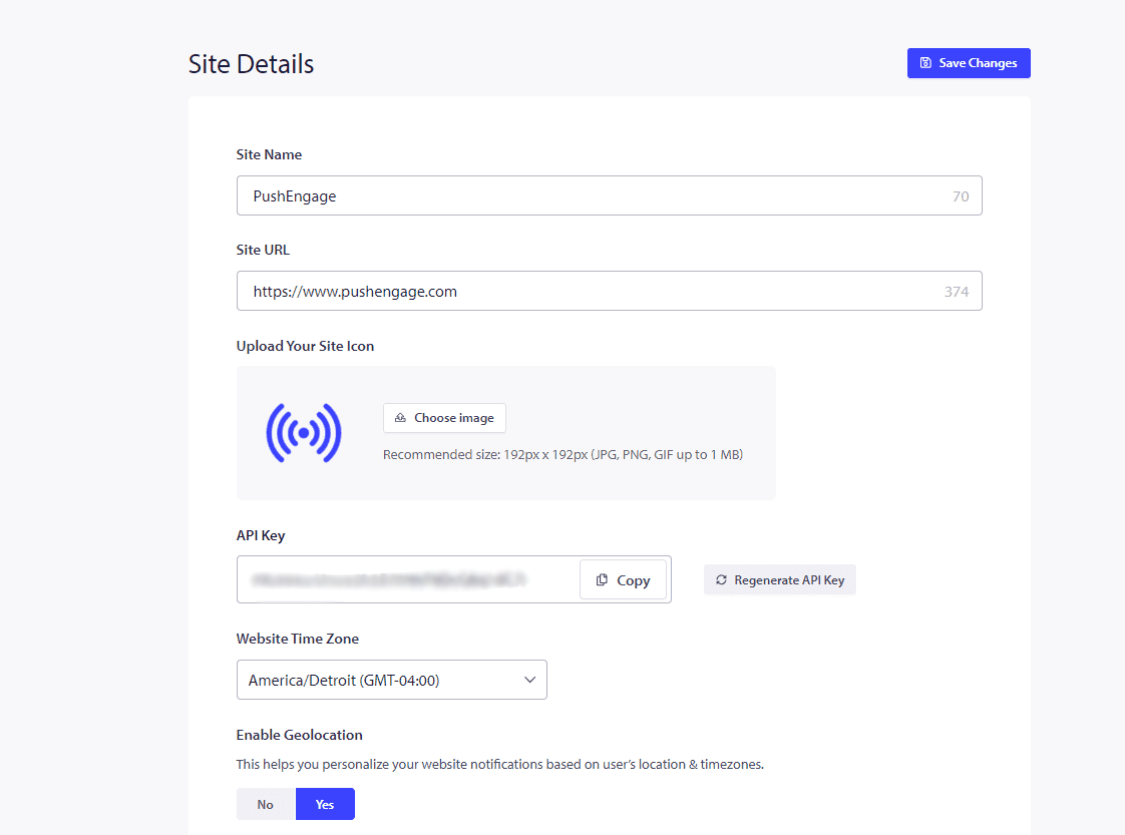
3. 有料プランをご利用の場合は、PushEngageブランディングを削除してください。このチェックボックスをオンにして変更を保存できます。
Once done, click on Click Here For Setup Instructions.
4. 表示されているオプションからサイトタイプを選択し、共有された手順に従ってインストールを完了します。
If the platform on where your site is hosted is not mentioned, then copy the installation code and add it to the HTML of your website. If you have access to your root directory, then please download the service-worker.js file and add it to the root directory such that it is publically accessible.
If you don’t have access to the root directory you can skip the step of adding the service-worker.js file. You can just add the code and use any double-step optin to collect subscribers.
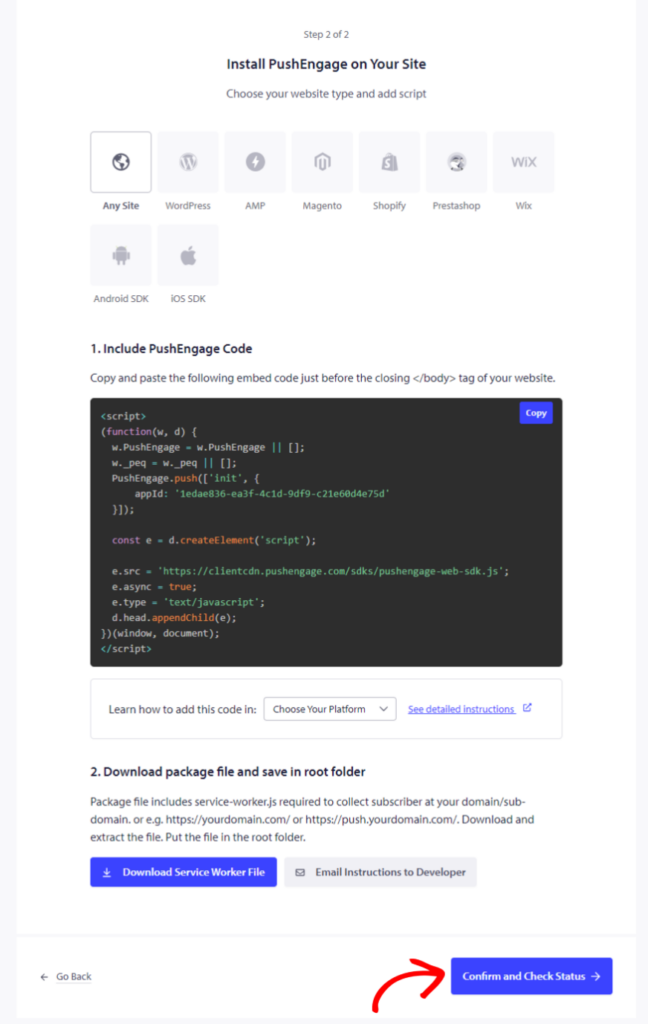
Once this is done, click on Confirm and Check Status and save the settings.
サブスクリプションオプトインの選択
コードの追加が完了しました。サブスクリプションオプトインを設定できます。
デザイン » ポップアップモーダルに移動します。
You can choose either of the Subscription Dialog box styles by switching on the Toggle button.
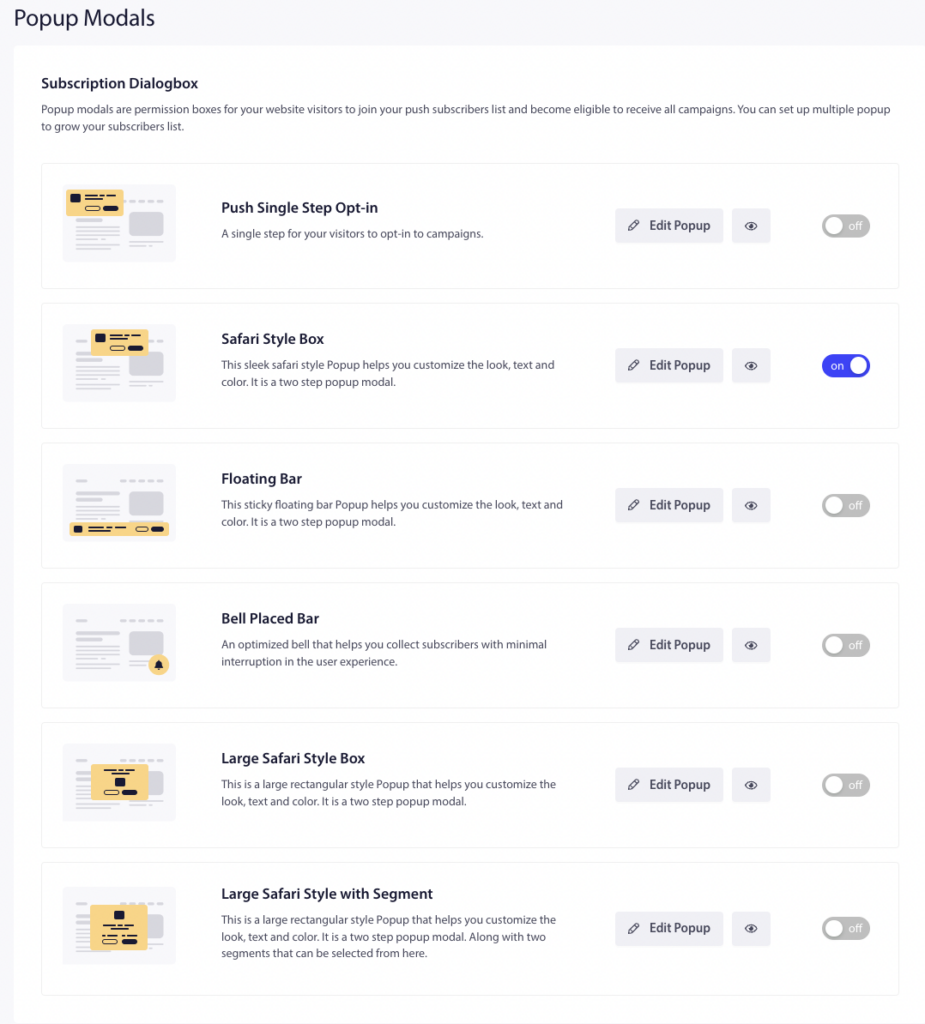
次に、オプトインスタイルをデザインして、ビジネス要件に合わせることができます。Pushシングルステップオプトインは1回のサブスクリプションです。その他はダブルステップオプトインで、訪問者はカスタマイズできますが、サブスクライバーになるには2つのステップが必要です。
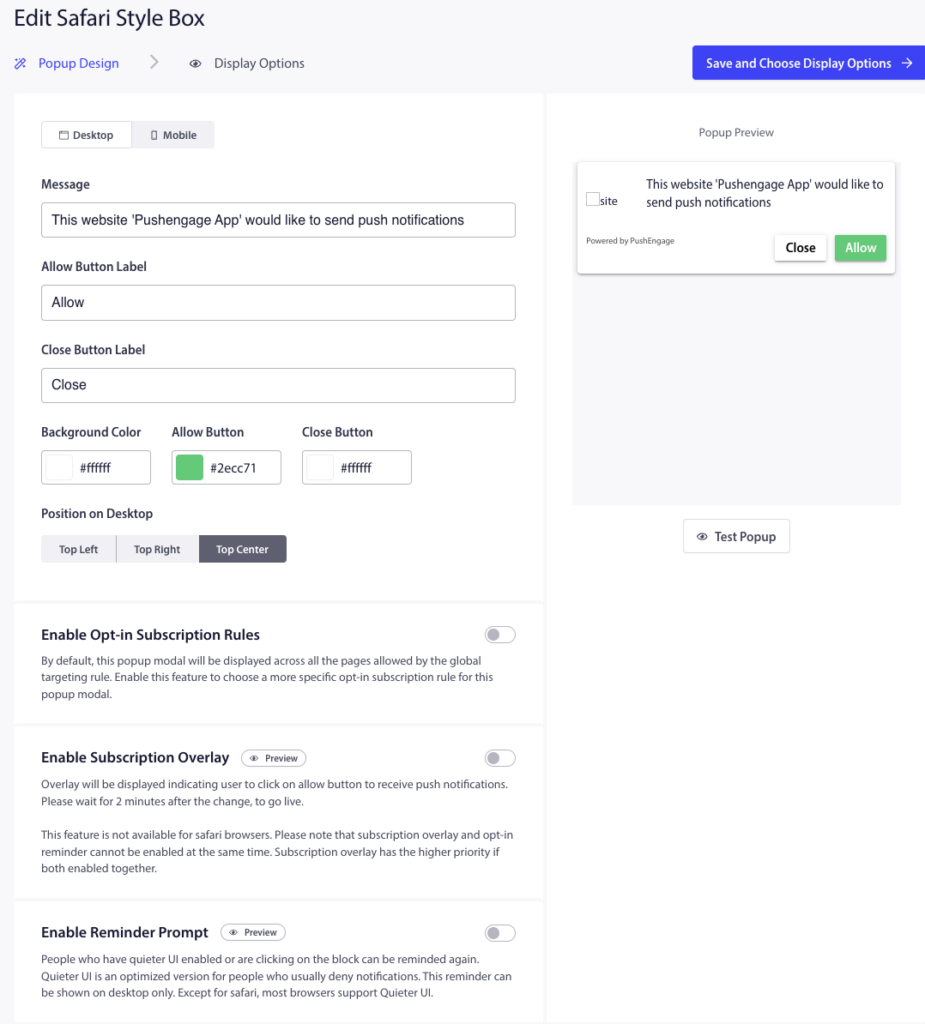
Once you have completed the editing click on Save and Choose Display Options » Save and Enable Popup.
Setup Welcome Drip Campaign
To create the welcome campaign, navigate to Campaigns » Drip Autoresponders. You will see a template of a Welcome Drip, which you can activate by clicking on the Play Button.
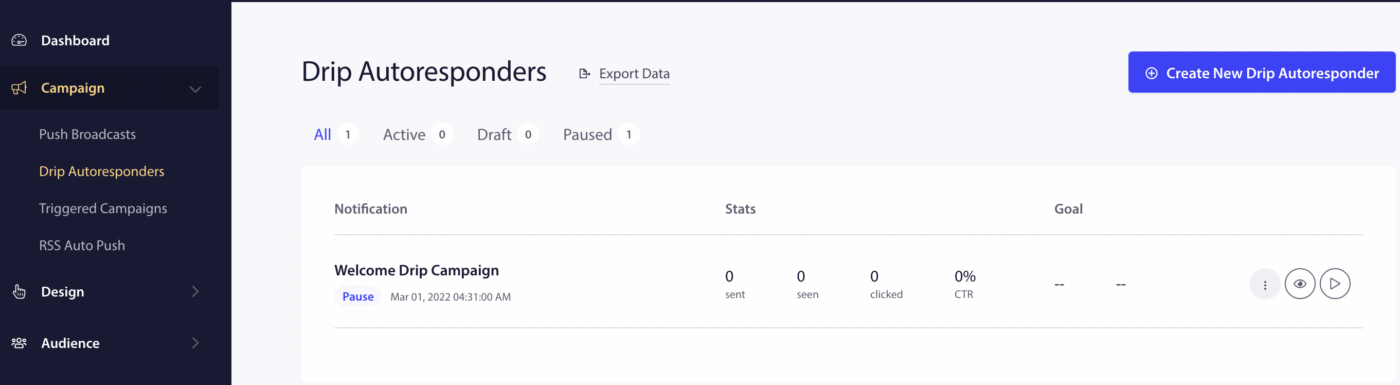
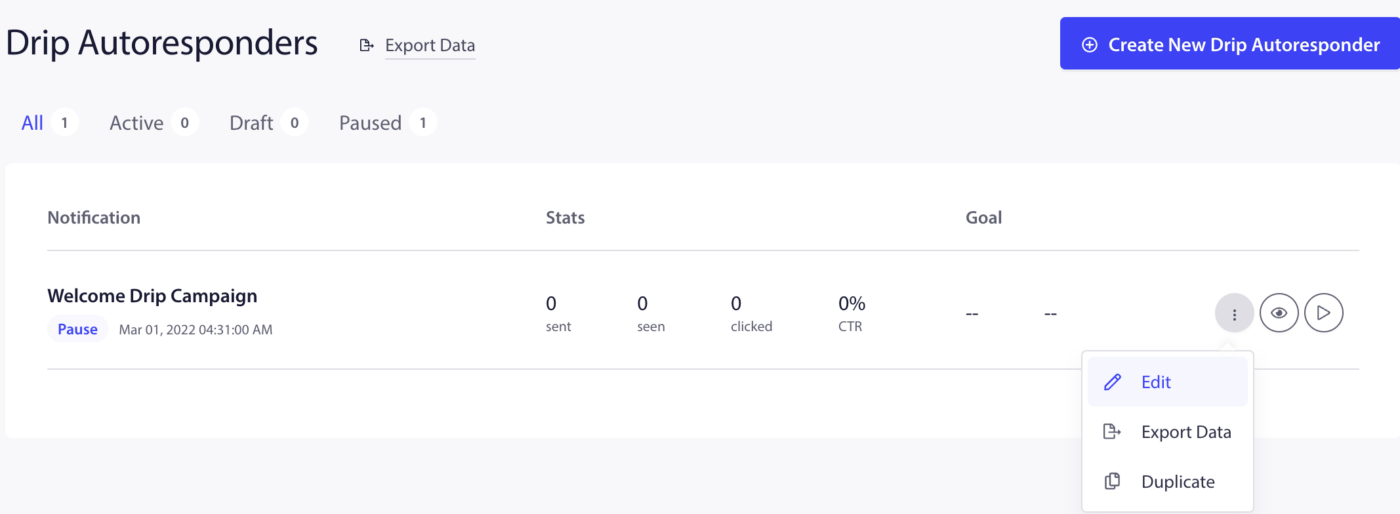
You can also edit the same campaign if you like, by clicking on the more option and then selecting Edit.
You can either send the welcome notifications to your subscribers immediately or x hours/mins after completing the subscription. Instead of sending one notification, you can create a series of 2-3 notifications as well.
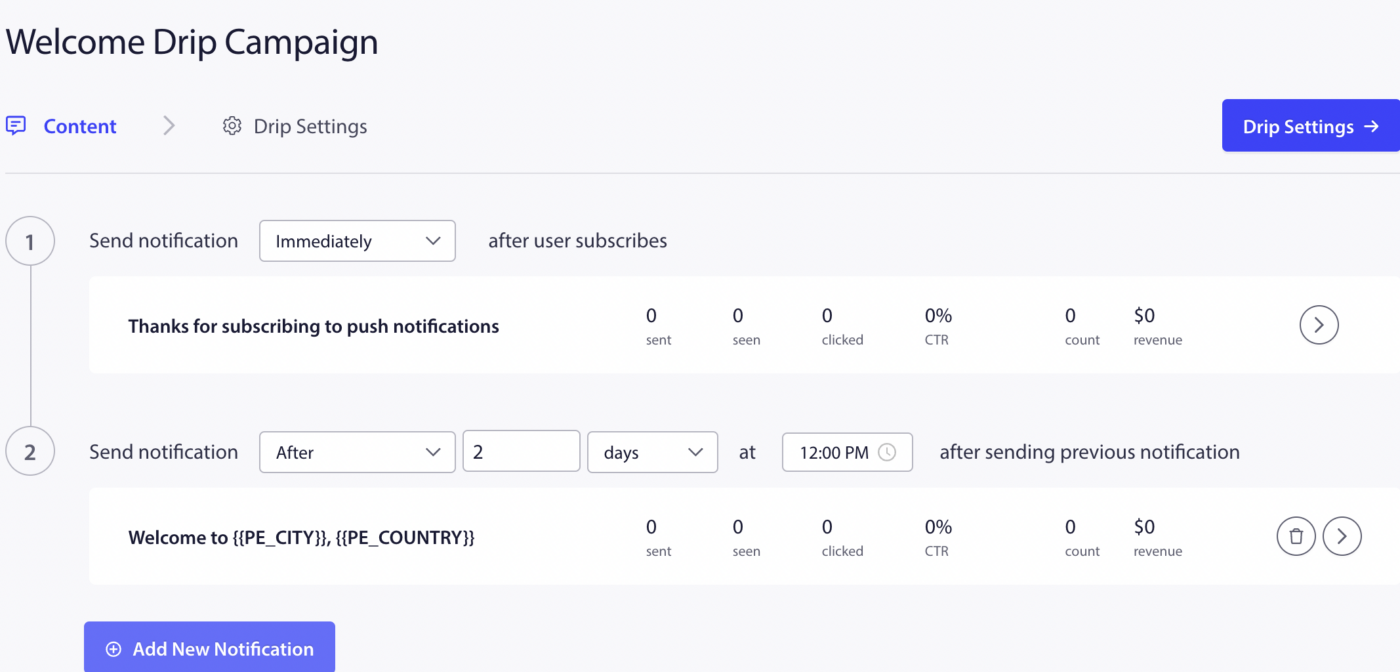
Once done, click on Activate Autoresponder.
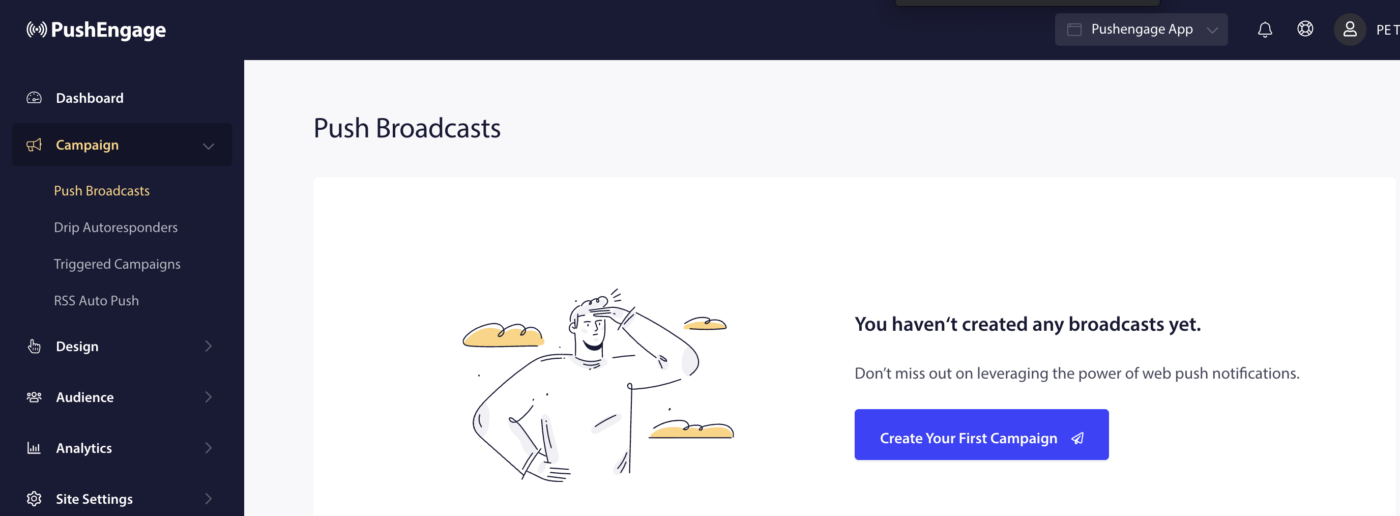
Create Your First Campaign
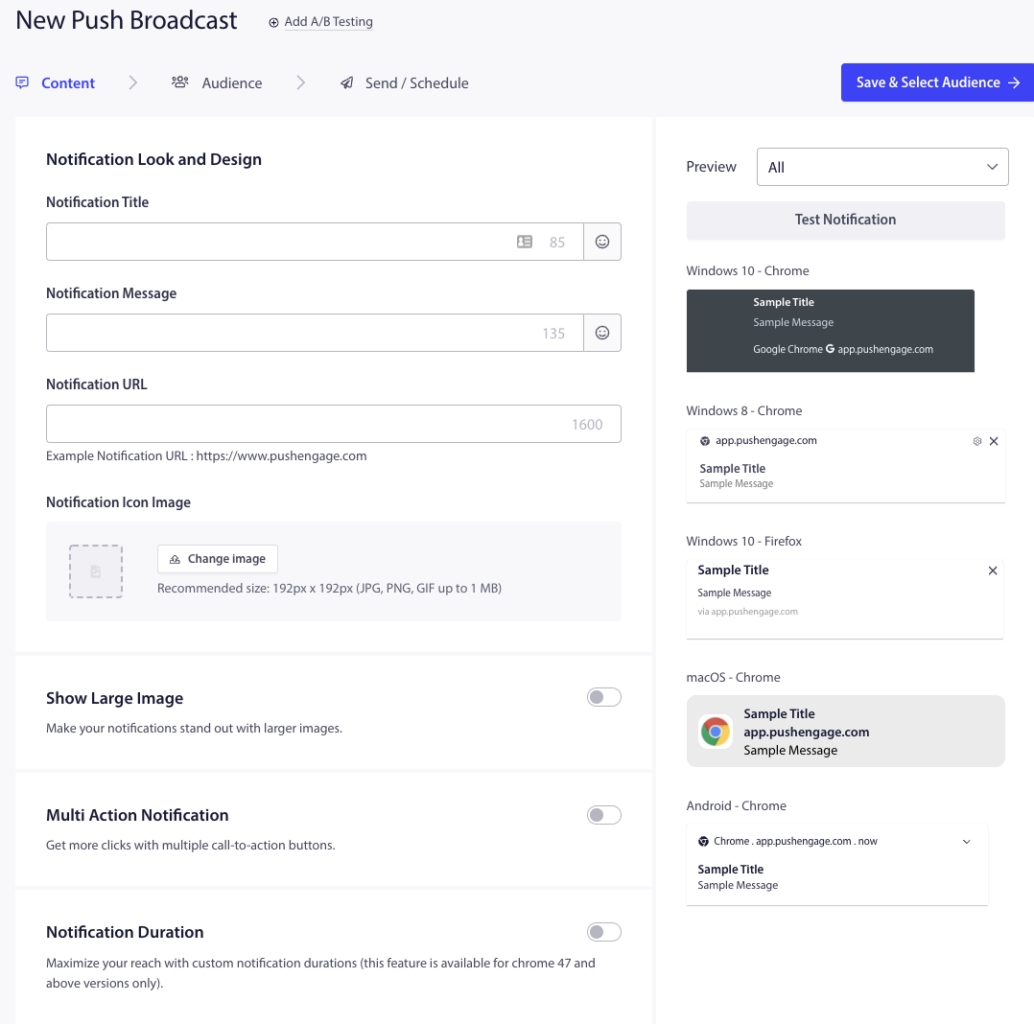
To create the first push broadcast, navigate to Campaign » Push Broadcasts » Create Your First Campaign.
Enter the notification title, message, URL and an image under New Push Broadcast. Keep a check of the character limit and image size while creating the campaign.
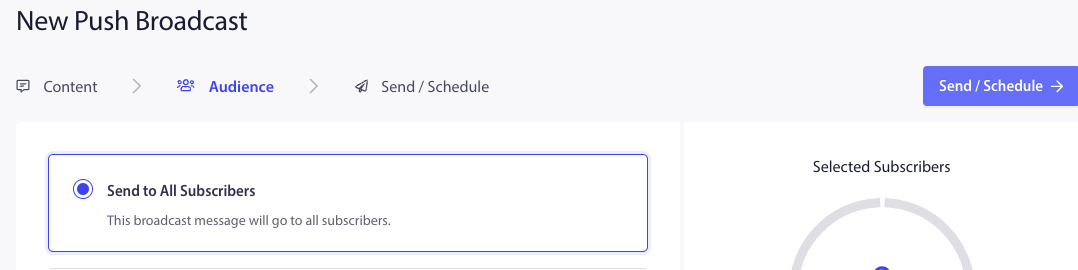
Then select Save and Select Audience band on the next tab select Send to All Subscribers » Send.
You have now reached the end of the challenge and you are all set to use PushEngage.
万が一問題が発生した場合は、ここをクリックしてお問い合わせください。サポートチームがお手伝いします。


