通知:この項目にはレガシー ドキュメントがありません。そのため、現在のドキュメントが表示されています。
Easy Digital Downloads is a versatile and user-friendly e-commerce plugin designed specifically for WordPress websites. Any e-commerce store faces challenges like Cart & Browse Abandonment. PushEngage offers an innovative solution, enabling campaigns that directly engage with your product feed and turning potential losses into conversions with the help of WPCode.
Your customers can receive push notification reminders after their abandonment, and it can encourage them to complete the checkout.
開始する前に
開始する前に知っておくべきこと:
- 当社のWooCommerce連携では、プッシュ通知の「成長」サブスクリプションが必要です。これにより、トリガーキャンペーン機能を使用して、カート放棄および閲覧放棄キャンペーンを作成できます。
- This guide assumes you already have the WooCommerce and WPCode plugins installed on your WordPress website.
Creating Trigger Campaign in PushEngage Dashboard
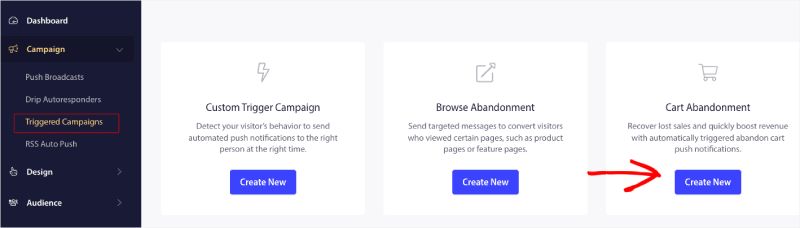
You need to log in to your dashboard and navigate to Campaign » Triggered Campaigns.
Select Cart/Browse Abandonment Campaign, and click on Create New.
You can now enter the Campaign Name.
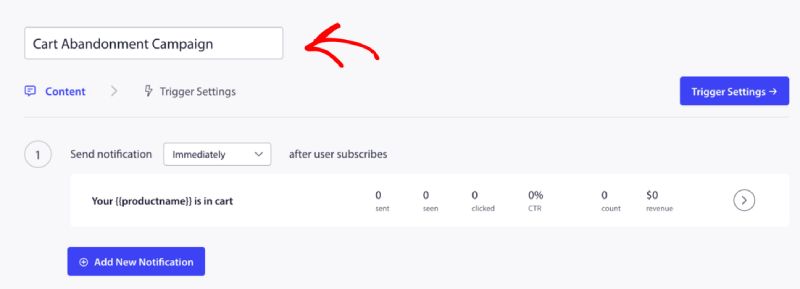
Adding Campaign Content
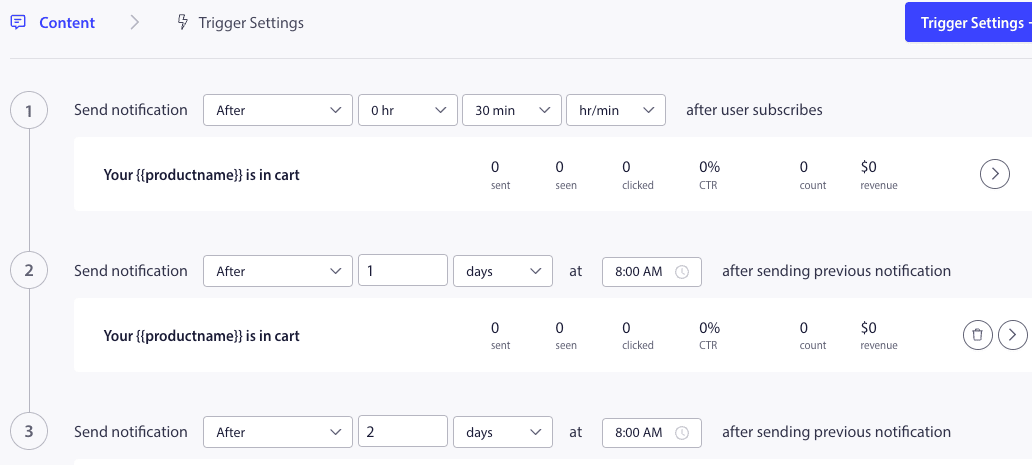
The next step is to configure the journey schedule – You can select either of the options immediately, after n hours and minutes, or after a particular day.
Usually, we do not recommend having the time scheduled for immediately. You should have at least a 15 or 30-minute gap for the first campaign in the series.
When setting up a series, you can have at least three campaigns. You can customize the title and message for every campaign in the series. Please ensure that you are not changing variables if you are willing to use these variables in the campaign.
キャンペーンごとにコードに追加されるデフォルトの変数は、{{productname}}、{{price}}、{{notificationurl}}です。
トリガー設定の管理
Once you have added notification content, you can move to Trigger Settings.
ここではトリガーが事前定義されています。人が商品をカートに追加してチェックアウトを完了しなかった場合、キャンペーンが開始されます。チェックアウトを完了した場合、カート放棄通知は受信しません。ただし、これらは定義されたイベントにすぎず、ウェブサイトに配置されない限り実行されません。
ここでのトリガーは、開始キャンペーン条件が「カートに追加」、停止キャンペーン条件が「チェックアウト」です。
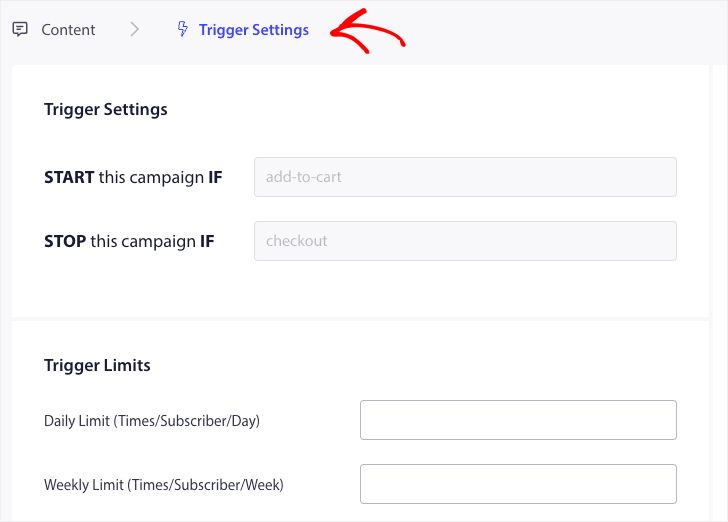
The next step is to add the daily and weekly trigger limits. This will define the total number of notifications a subscriber may receive daily and weekly. For example – If two notifications are daily, then it should be 14 weekly; this way, the frequency will be capped even if more than two products are abandoned.
WPCode でスニペットを編集してアクティブ化する
開始するには、WordPress ダッシュボードの **Code Snippets** タブにアクセスしてください。
Here, you would need two snippets to edit based on your campaign.
- For Cart Abandonment Campaign – On Add to Cart Event in EDD and After Checkout Event in EDD.
- For Browse Abandonment Campaign – On Browsing EDD Products and On Add to Cart Event in EDD.
Choose based on your campaign and click on Use Snippet once you have the snippet open in Editor.
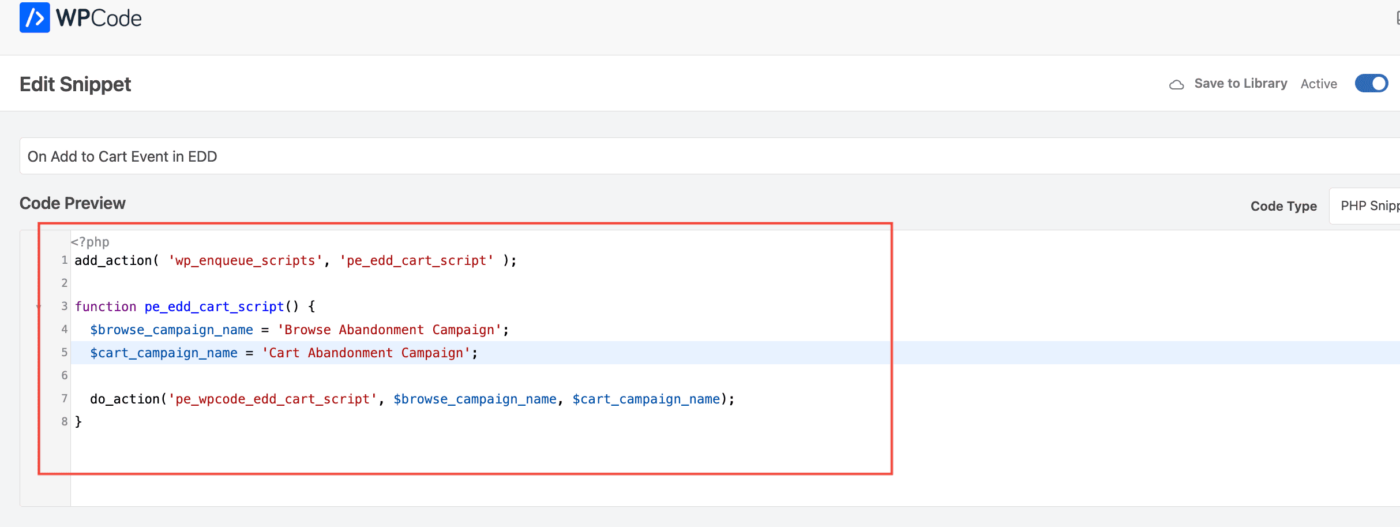
Adding the Campaign Name
Please ensure that the correct campaign name is added for both events. You do not need to change the Location; let the snippet be added site-wide.
After the snippet is finalized, you can activate it. Without activating, the snippet will not be functional.
Troubleshooting Trigger Campaigns
- キャンペーン名は、コードとPushEngageダッシュボードで同じである必要があります。
- PushEngage installation code should be present where the cart abandonment campaign code is present else. The campaigns will not be fired without it.
- コードをウェブサイトに配置した後、キャンペーンがダッシュボードでアクティブであることを確認してください。
- カート放棄キャンペーンをシステムで受信しているかどうかをテストするには、ご自身のウェブサイトのウェブプッシュ購読者である必要があります。そうでない場合はテストできません。
That’s all! You’ve now activated a Cart/Browse Abandonment campaign on your WooCommerce Store using WPCode.
If you run into any issues, please feel free to contact us by clicking here. Our support team would be able to help you


