Observera: Det finns ingen äldre dokumentation tillgänglig för det här objektet, så du ser den aktuella dokumentationen.
PushEngage is a tool that helps you send push notifications to users of their website. Push campaigns are brief messages that can be sent to a user’s device regardless of whether or not they are on your website. Suppose you have a WordPress website and want to use push notifications to inform your users about new content, promotions, or other updates. In that case, you can download the PushEngage Plugin and get started in four simple steps.
As soon as you have finished the installation, the subscription collection should start as the plugin automatically adds the javascript code and service worker to your website.
1. Setup Auto Sending
Select the PushEngage Plugin from your WordPress Dashboard and navigate to Settings > Auto Push Settings
- Activate the toggle button to automatically send a push notification to your subscribers every time you publish a new post and select the type of notification image you want for your campaigns
- Once this is done, select Save Changes
2. Configure Subscription Popup
The subscription opt-in or popup modal is the first thing a website visitor sees when they visit your site. You can customize the subscription popup’s appearance to match your website’s theme. Several different styles are available for the subscription popup, which are as follows –
- Safari Style Box
- Floating Bar
- Bell Placed Bar
- Large Safari-Style Box
- Stor Safari-stil med segment
- Single Step Opt-in.
Before implementing any changes, it’s essential to consider which style will be most effective for your website and its visitors.
To access the Popup Modals design options, go to the Design tab > Popup Modals. From there, you can choose the desired style and click Edit Popup to customize its appearance.
In the Popup Design section, you can alter the placement of the opt-in, the background color, and the appearance of the allow and block buttons. To make the popup more consistent with your brand or website theme, you can customize these design elements to match your desired aesthetic.
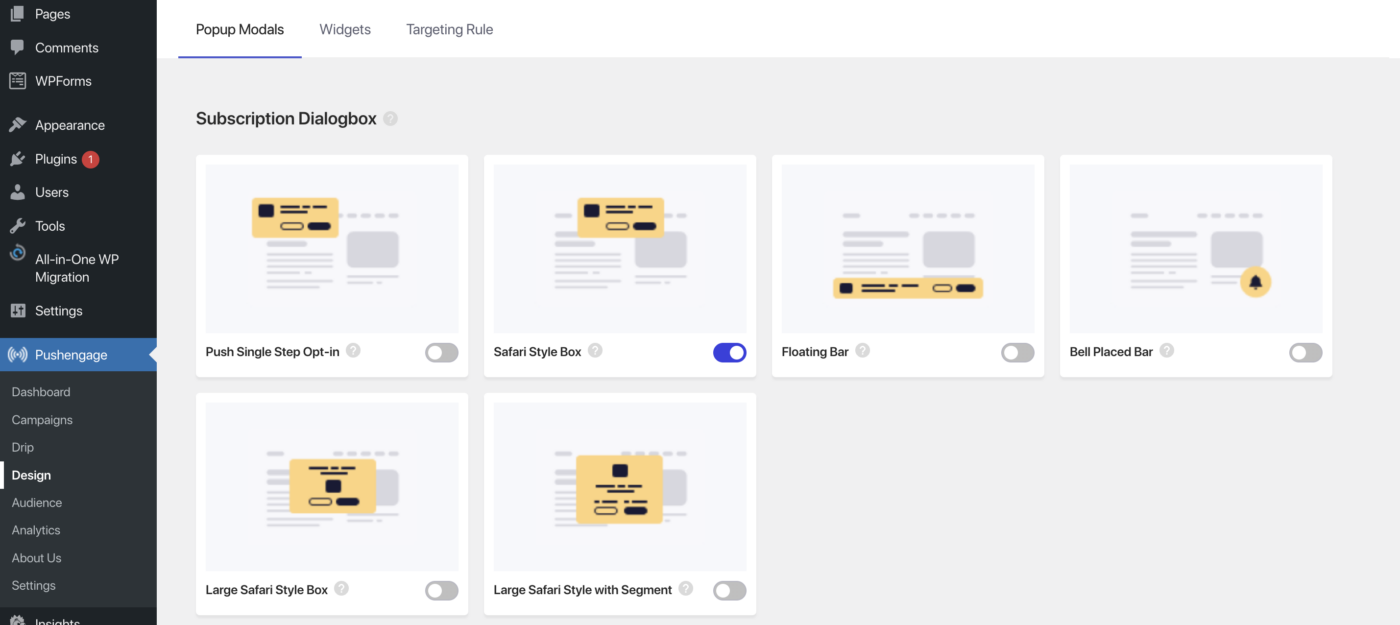
Activate the Toggle button of the popup modal and start collecting subscribers.
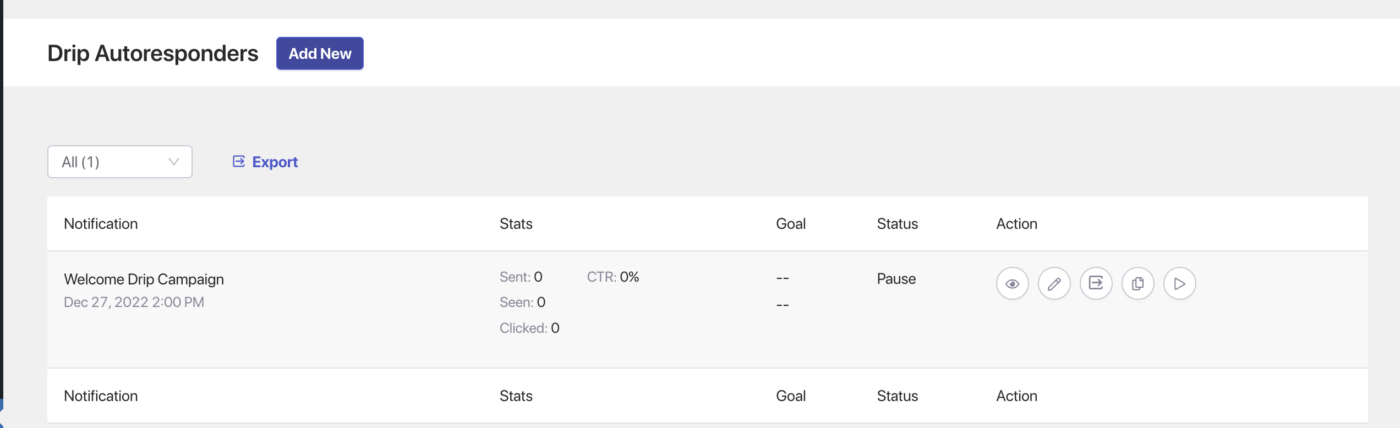
3. Enable Welcome Drip
- Navigate to Drip and activate the Welcome Drip Campaign by clicking on the Play button.
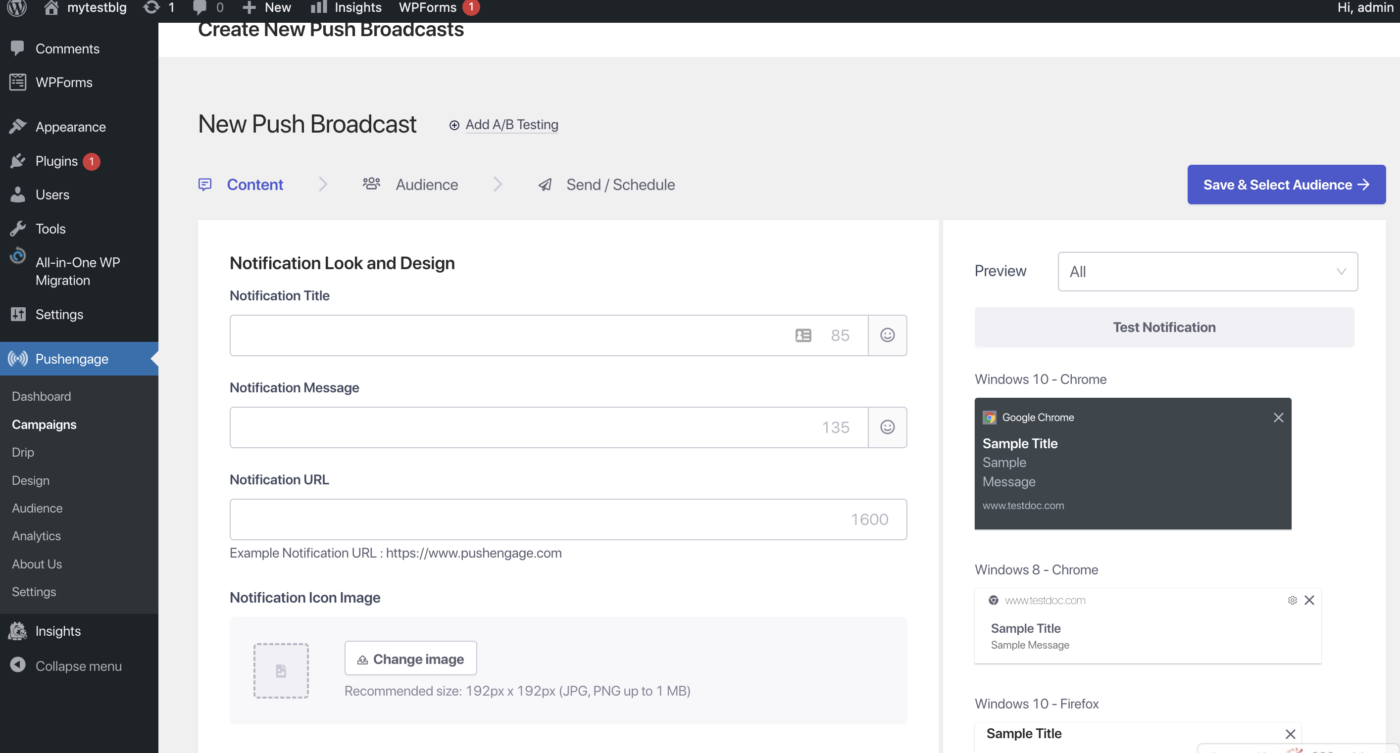
4. Create Your First Campaign
Navigate to Campaigns > Add new, and now you can start creating your first Push Campaign
When creating a broadcast message, you can include a message of up to 135 characters, including emojis, and a title of up to 85 characters. You can also have an image of up to 1MB and specify a landing URL to be opened when the message is clicked.
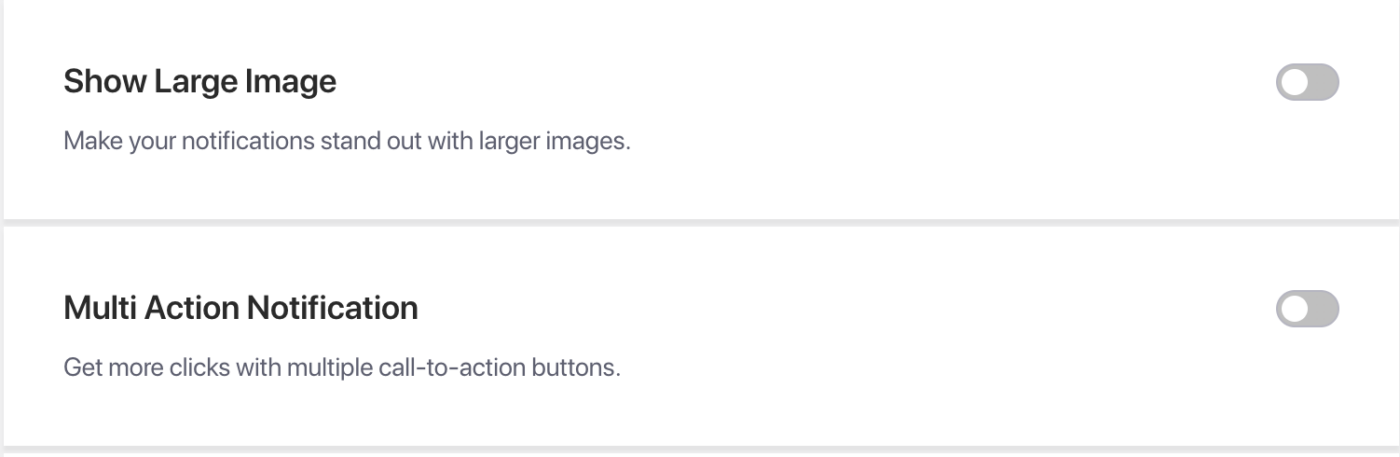
Multi-Action Campaign – In the campaign design process, you can add multi-action notification buttons, which provide additional call-to-action options for your campaigns. It is generally recommended to include additional call-to-action buttons as they can increase engagement with your campaigns.
Stor bild – Att använda en stor bild i dina aviseringar kan hjälpa till att fånga din målgrupps uppmärksamhet och öka klickfrekvensen. När du lägger till en stor bild i dina aviseringar kan du ladda upp en bild med en maximal storlek på 360×180 pixlar för stationära enheter och 360×80 pixlar för mobila enheter.
I inställningarna för Kampanjbeteende, spårning och målgrupp kan du ange varaktigheten för dina kampanjer för att undvika att överväldiga dina prenumeranter. Den maximala varaktigheten för att aviseringar ska upphöra är 28 dagar, men bästa praxis är att ha den kortare baserat på nästa kampanj du planerar att skicka.
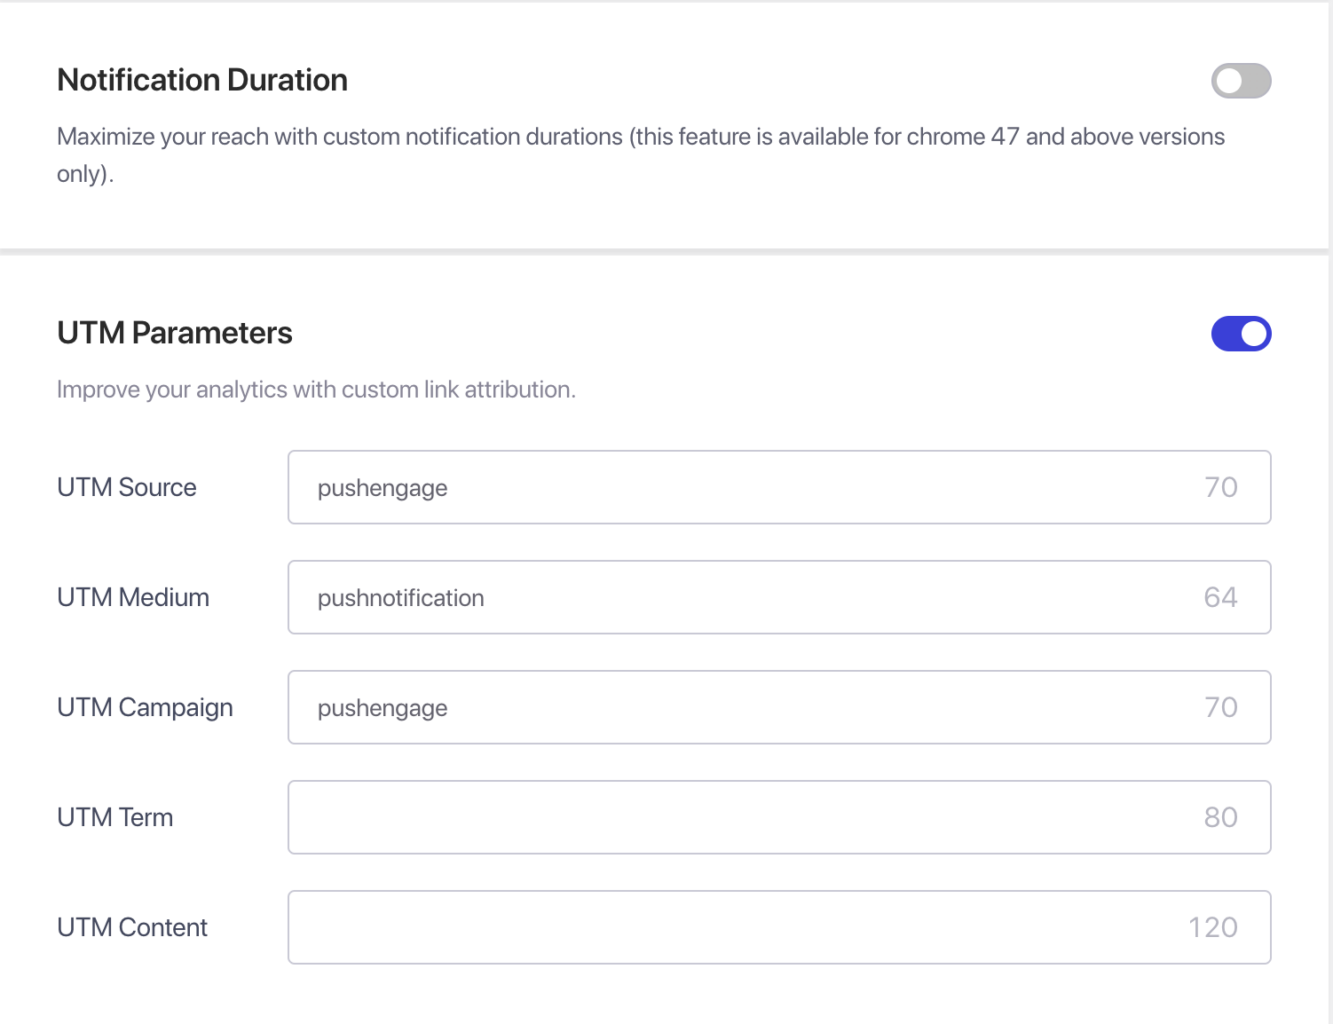
Du kan också använda UTM-parametrar för att spåra data i Google Analytics och skicka riktade aviseringar till specifika målgrupper, vilket ökar visningarna och klickningarna för de aviseringar du skickar. Den här funktionen är endast tillgänglig i Business-planen och högre.
Schemaläggning – Med schemaläggningsfunktionen kan du ställa in dina aviseringar så att de skickas vid ett senare tillfälle, även när du inte är tillgänglig eller är på semester. Du kan också upprepa schemaläggningen på specifika veckodagar och ställa in tidpunkten för när aviseringarna ska skickas. Två filter är tillgängliga för schemaläggning: möjligheten att schemalägga för en viss dag och tid samt alternativet att schemalägga en återkommande kampanj.
När du har skapat kampanjen, välj fliken Spara och schemalägg, och sedan kan du skicka kampanjen till dina prenumeranter.
Du har nu installerat PushEngage-pluginet framgångsrikt. Du kan börja samla prenumeranter och skicka push-kampanjer.
Om du stöter på några problem, tveka inte att kontakta oss genom att klicka här. Vårt supportteam kan hjälpa dig.


