Bemærk: Der findes ingen ældre dokumentation tilgængelig for dette element, så du ser den aktuelle dokumentation.
PushEngage giver dig mulighed for at konvertere dine hjemmesidebesøgende til web push-abonnenter. En abonnent er enhver, der klikker på tillad på abonnementspopup'en, du konfigurerer på din hjemmeside. En web push-kampagne indsamler ikke personlige oplysninger som e-mail eller telefonnummer. Du kan dog kontakte dine abonnenter, selv når de ikke er på din hjemmeside.
Install PushEngage On Your Site
Add Site Details
1. For at fuldføre PushEngage-installationen skal du navigere til Sideindstillinger » Sideoplysninger.

2. Du skal indtaste sideoplysningerne – sidenavn, dit brands logo, og sikre, at websteds-URL'en er korrekt.
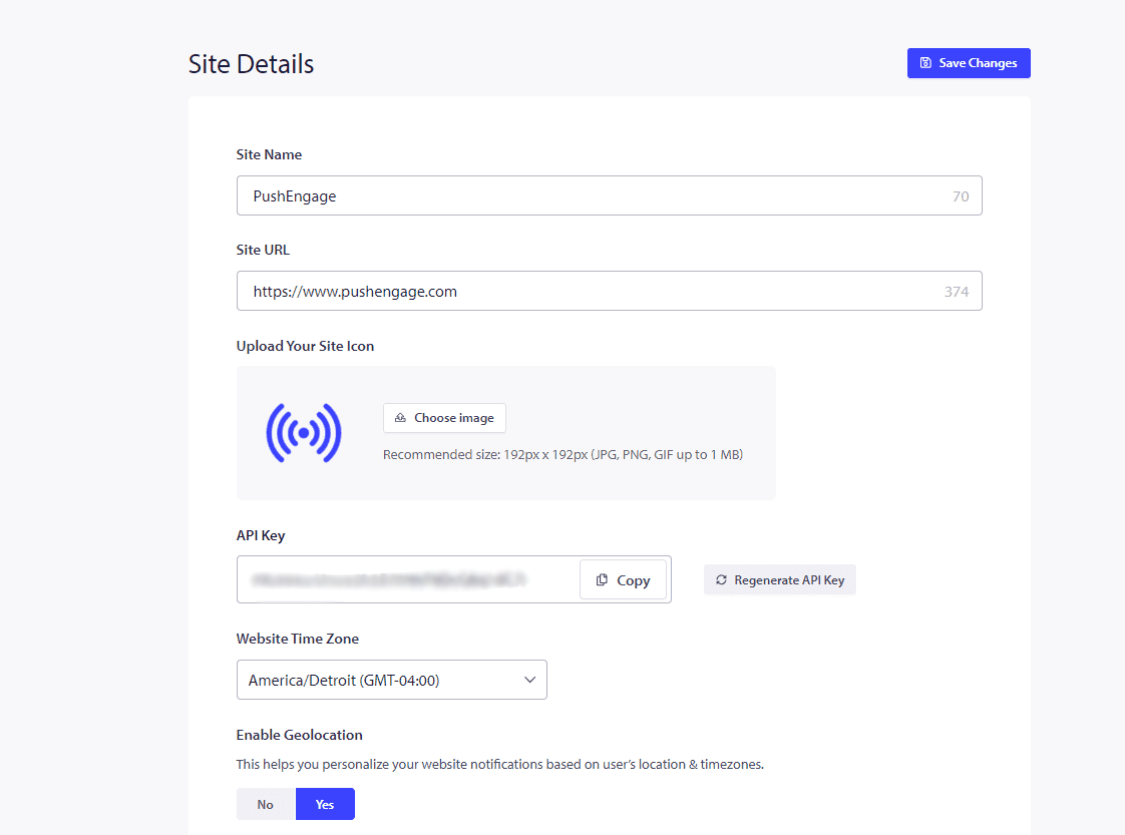
3. Hvis du har betalte planer, skal du sørge for at fjerne PushEngage Branding. Du kan markere dette felt og gemme ændringer.
Once done, click on Click Here For Setup Instructions.
4. Vælg din sidtype fra de nævnte muligheder, og følg de delte trin for at fuldføre installationen.
If the platform on where your site is hosted is not mentioned, then copy the installation code and add it to the HTML of your website. If you have access to your root directory, then please download the service-worker.js file and add it to the root directory such that it is publically accessible.
If you don’t have access to the root directory you can skip the step of adding the service-worker.js file. You can just add the code and use any double-step optin to collect subscribers.
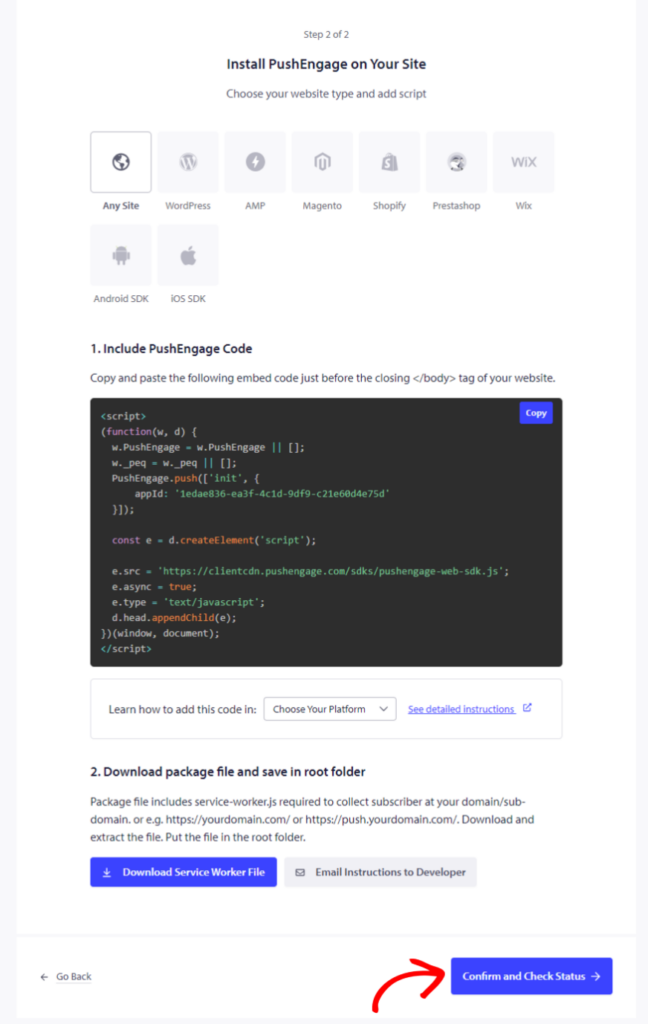
Once this is done, click on Confirm and Check Status and save the settings.
Valg af abonnements-opt-in
Nu hvor du har fuldført tilføjelsen af koden. Du kan konfigurere abonnements-opt-in.
Du kan navigere til Design » Popup-modaler.
You can choose either of the Subscription Dialog box styles by switching on the Toggle button.
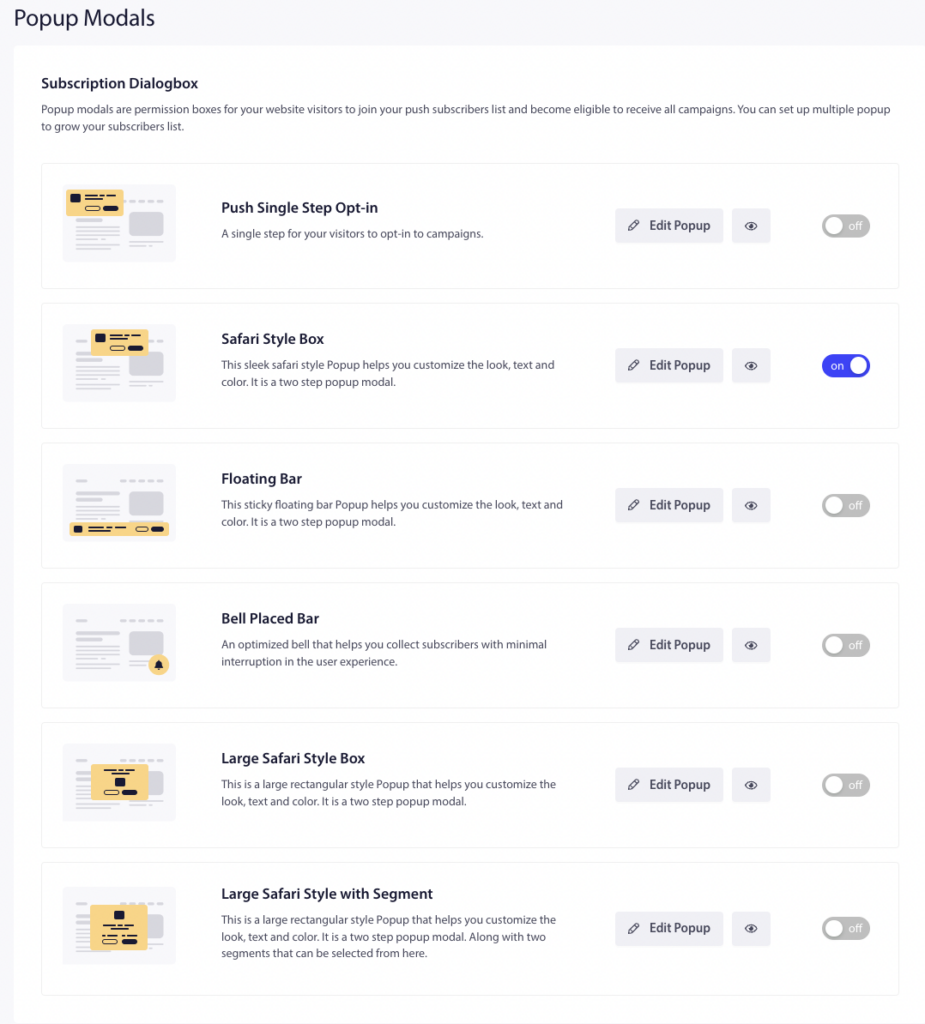
Du kan derefter designe Opt-in-stilarterne, så de passer til dine forretningskrav. Push Single Step Opt-in er et et-trins abonnement; de andre er Double Step Opt-in, som giver besøgende mulighed for at tilpasse, men kræver to trin for at blive abonnenter.
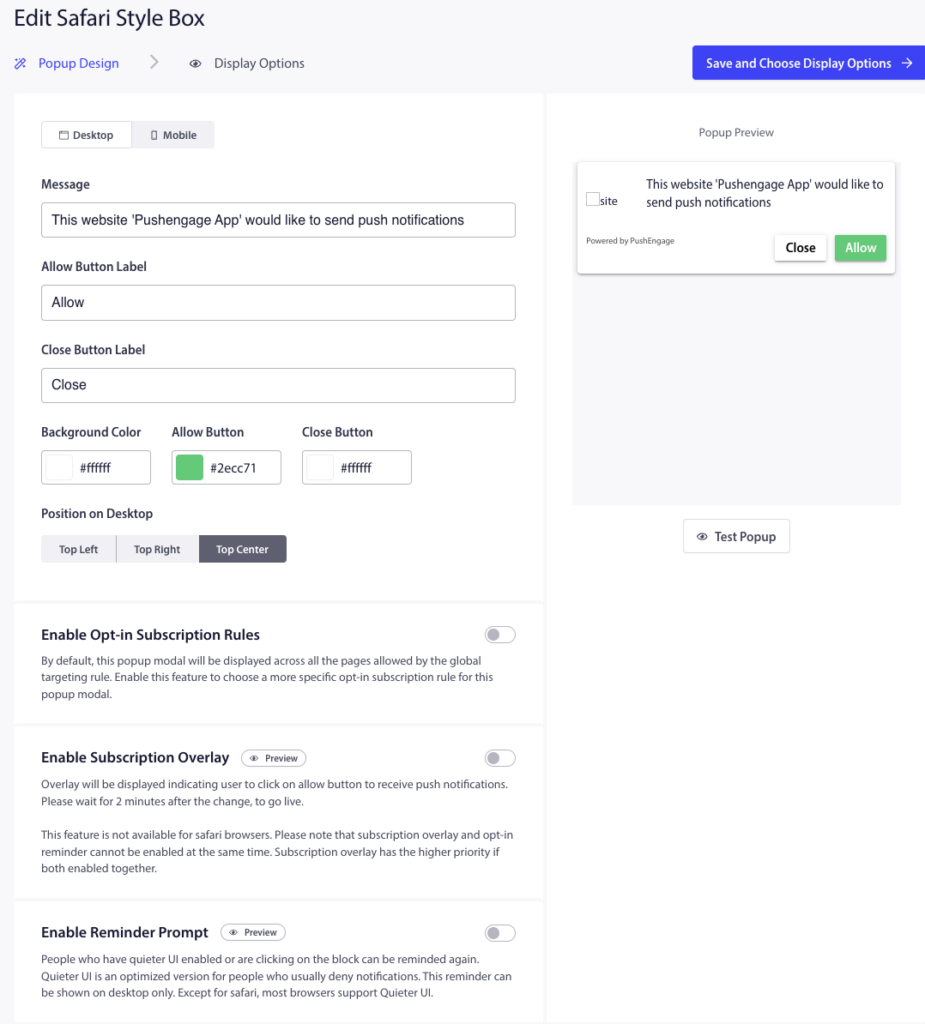
Once you have completed the editing click on Save and Choose Display Options » Save and Enable Popup.
Setup Welcome Drip Campaign
To create the welcome campaign, navigate to Campaigns » Drip Autoresponders. You will see a template of a Welcome Drip, which you can activate by clicking on the Play Button.
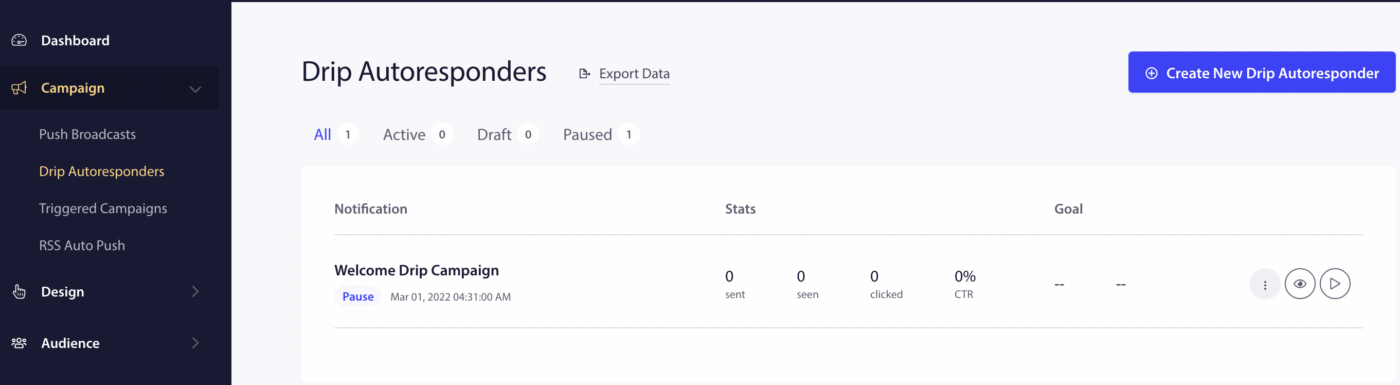
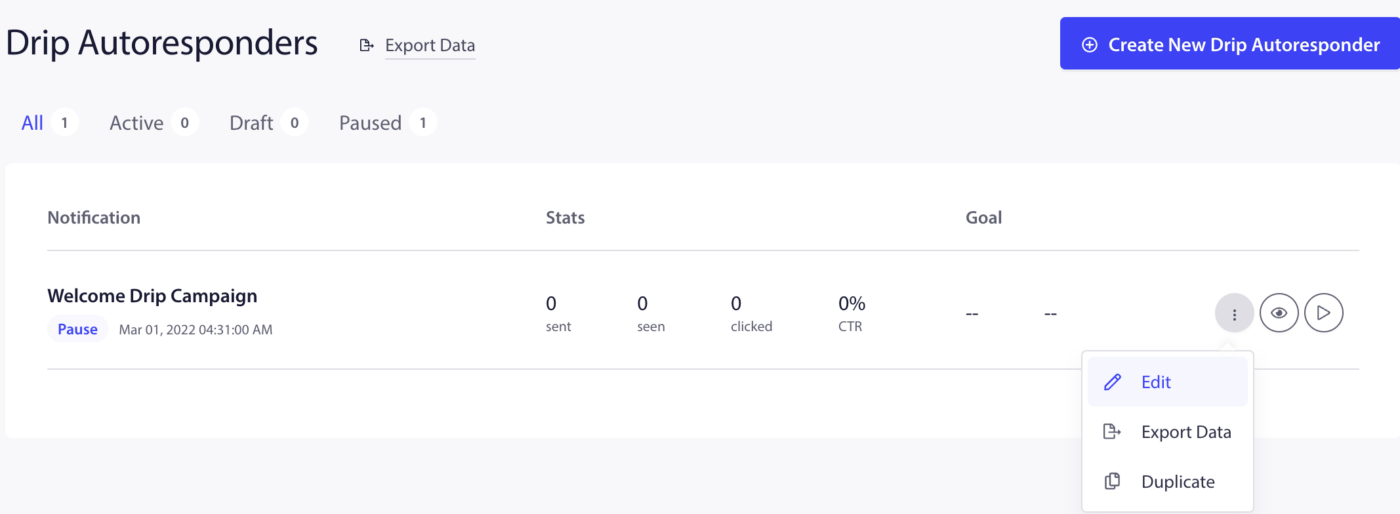
You can also edit the same campaign if you like, by clicking on the more option and then selecting Edit.
You can either send the welcome notifications to your subscribers immediately or x hours/mins after completing the subscription. Instead of sending one notification, you can create a series of 2-3 notifications as well.
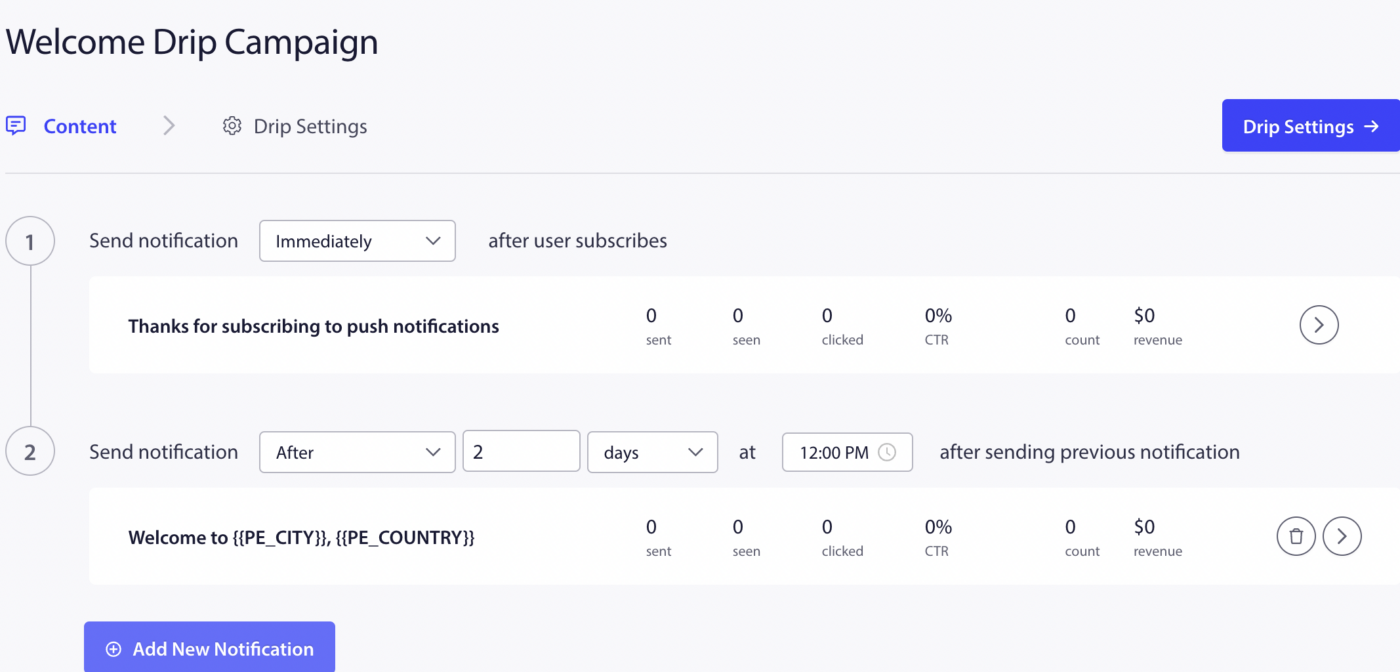
Once done, click on Activate Autoresponder.
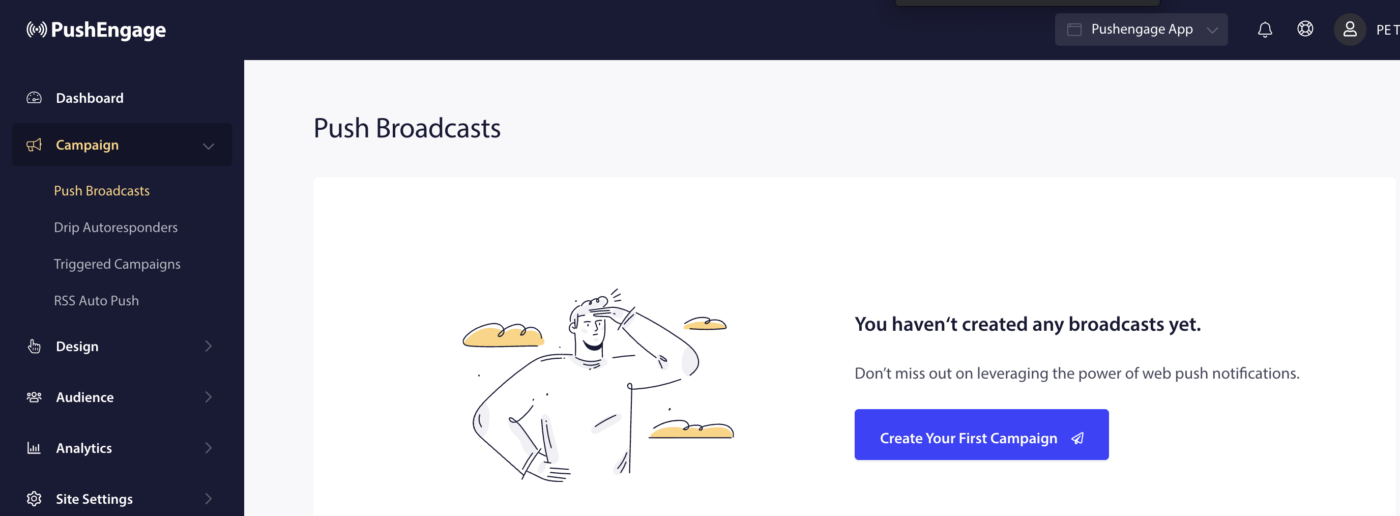
Create Your First Campaign
To create the first push broadcast, navigate to Campaign » Push Broadcasts » Create Your First Campaign.
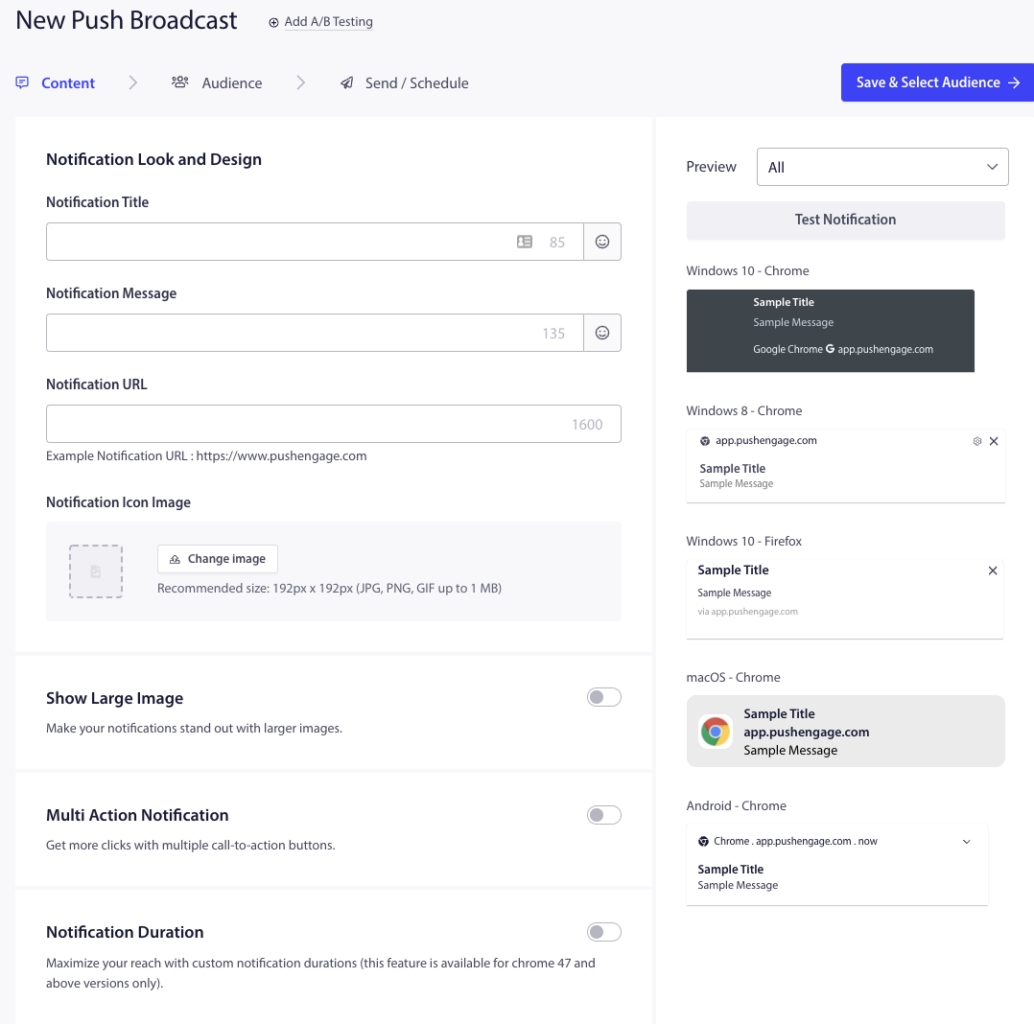
Enter the notification title, message, URL and an image under New Push Broadcast. Keep a check of the character limit and image size while creating the campaign.
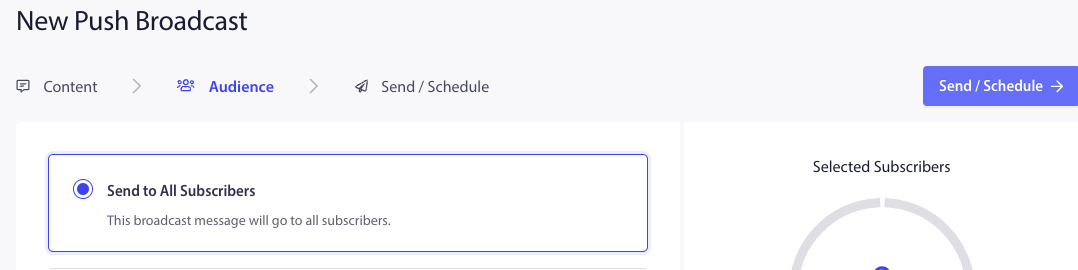
Then select Save and Select Audience band on the next tab select Send to All Subscribers » Send.
You have now reached the end of the challenge and you are all set to use PushEngage.
Hvis du støder på problemer, er du velkommen til at kontakte os ved at klikke her. Vores supportteam vil kunne hjælpe dig.


