注意:此项目没有可用的旧版文档,因此您看到的是当前文档。
PushEngage Flutter SDK 可轻松将推送通知集成到您的 Flutter 应用中,并与 Android 和 iOS 平台无缝兼容。
本指南将引导您完成设置 PushEngage Flutter SDK 并为您的 Android 和 iOS 应用启用推送通知的步骤。
开始之前
以下是您需要准备的清单
- 一个 Flutter 项目和 PushEngage 账户。如果您没有账户,可以在此处注册。
- 一个已为 Android 设置 Firebase Cloud Messaging (FCM) 的 Firebase 账户。
- 一个 Apple Developer 账户,用于配置 iOS 的 Apple Push Notification (APN) 服务。
安装
1. 在您的代码编辑器中打开您的 Flutter 项目。
2. 在您的 pubspec.yaml 文件中添加以下依赖项:
dependencies:
	pushengage_flutter_sdk: ^0.0.1
3. 运行以下命令来安装该软件包。
dependencies:
flutter pub get
设置 Android
Firebase Cloud Messaging (FCM) 设置
要为 Android 启用推送通知,您需要配置 Firebase Cloud Messaging (FCM):
1. 使用您的 Google 账户访问 Firebase 控制台。
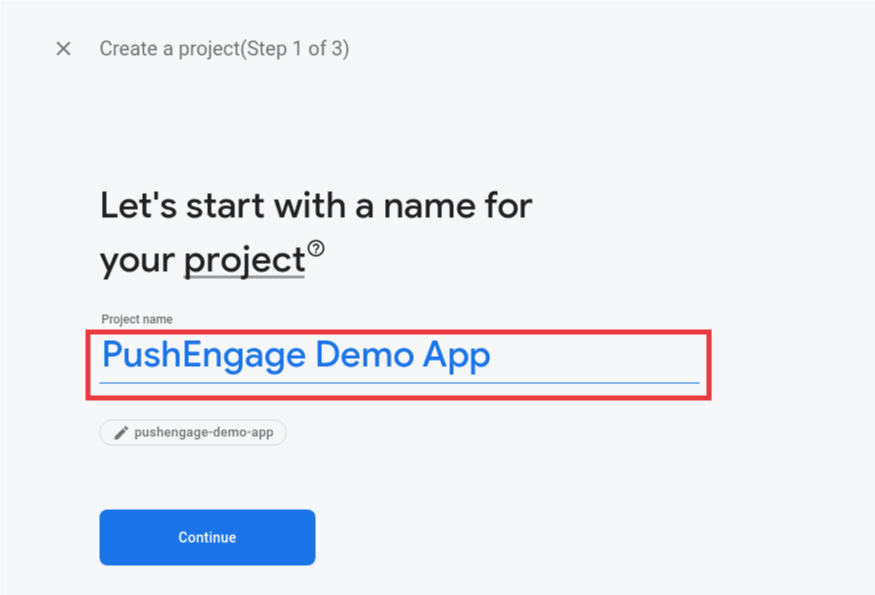
2. 创建新项目或选择现有项目: 点击“添加项目”以创建新项目,或从列表中选择一个现有项目。如果您使用的是现有项目,请直接进入第 4 步。

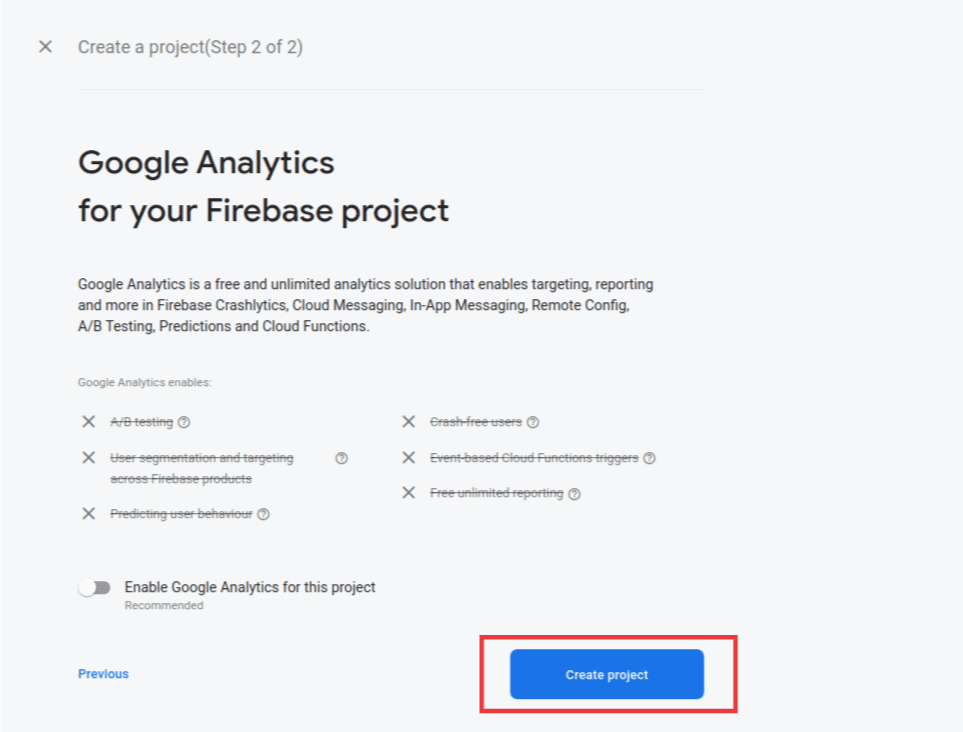
3. 输入项目详细信息: 为您的项目添加一个名称,然后点击 继续。在最终屏幕上点击“创建项目”以完成设置过程。
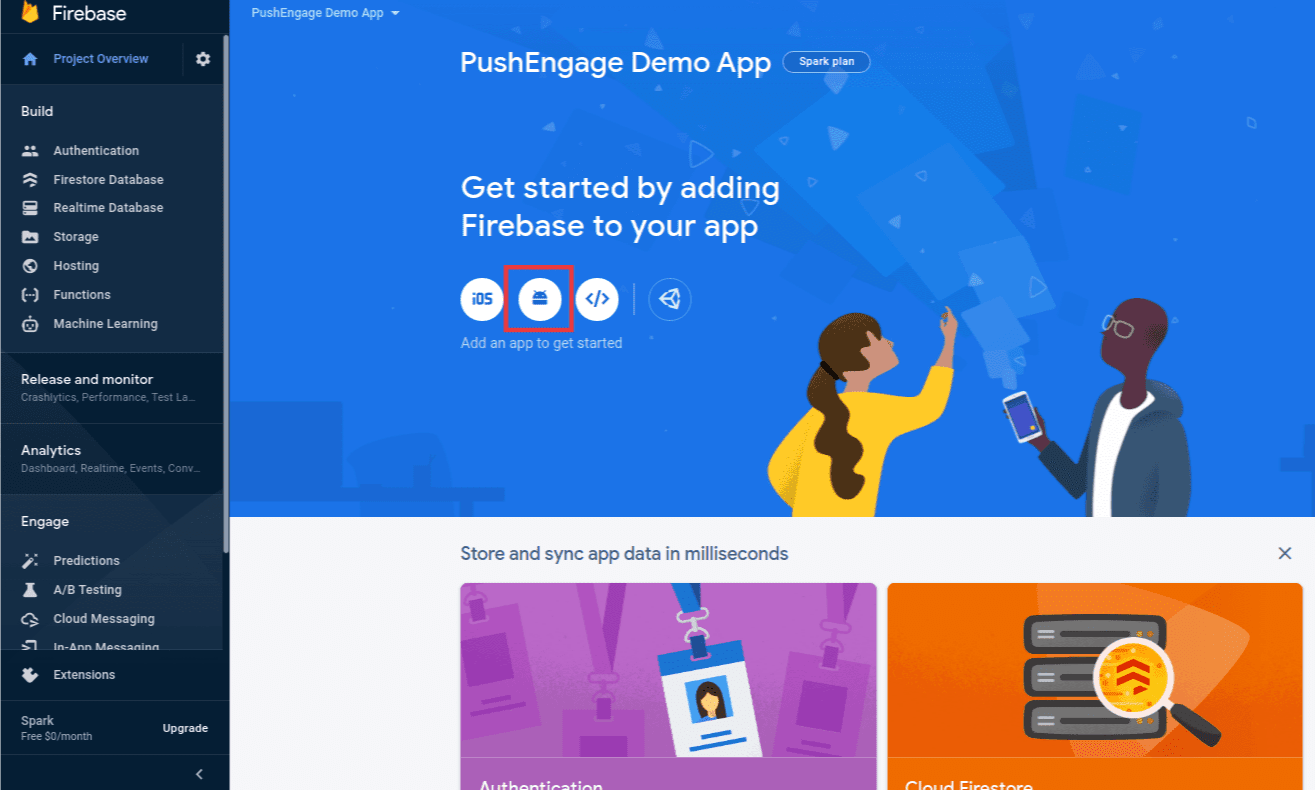
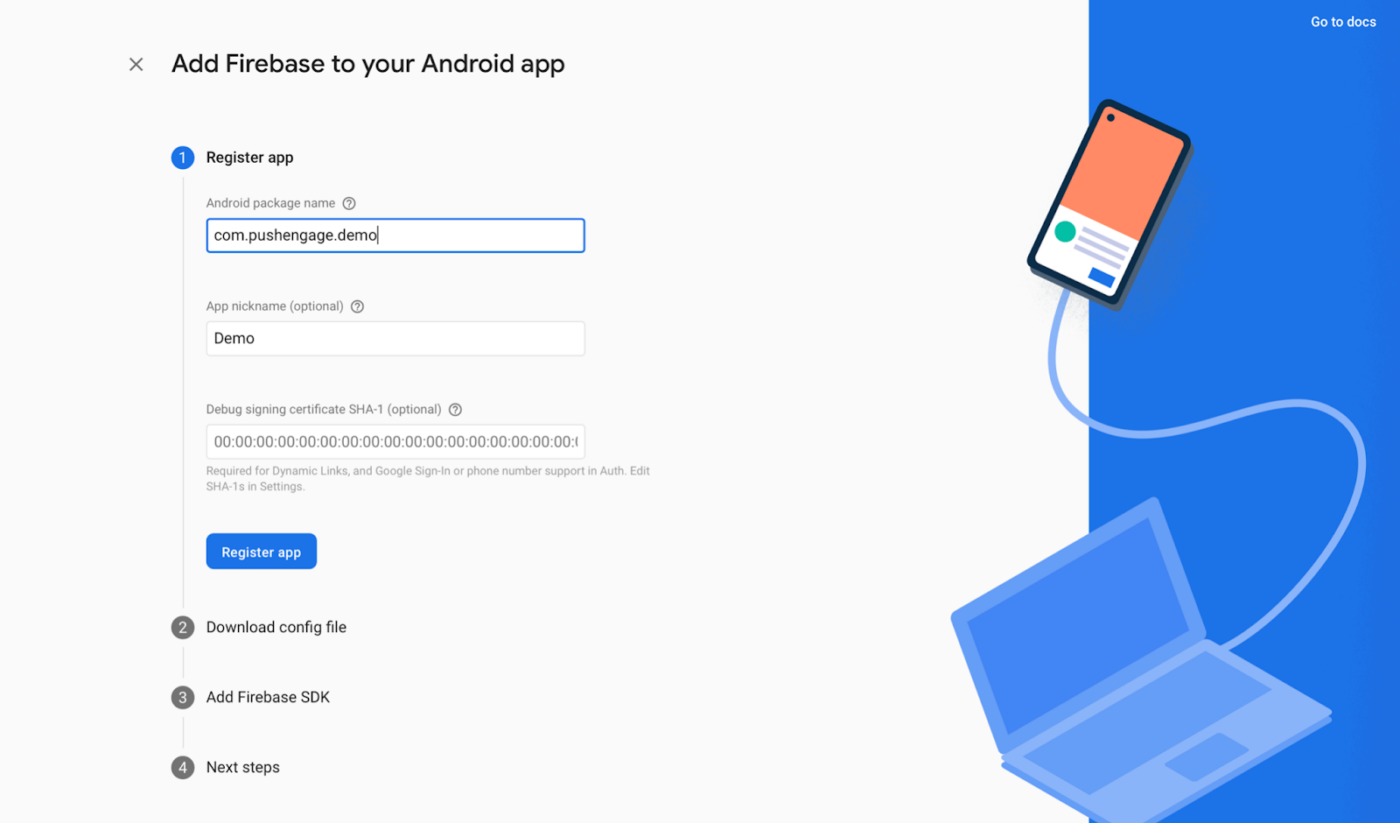
4. 向项目中添加 Android 应用: 在您的 Firebase 项目信息中心,点击 Android 图标以添加一个 Android 应用。
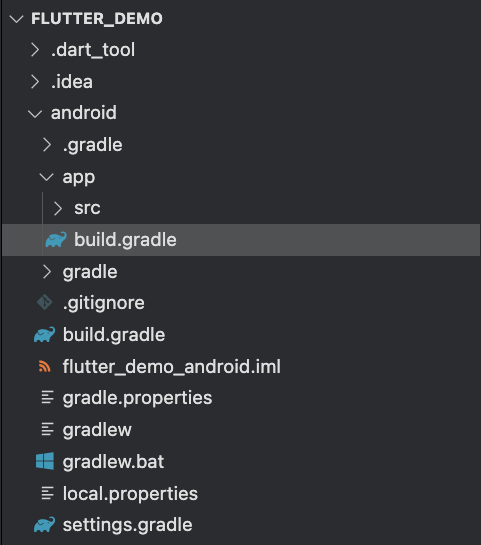
5. 配置 Android 应用: 输入您的 Android 应用的程序包名称(可在 android/app/build.gradle 的 android 块中找到)并提供应用名称。完成后点击注册。
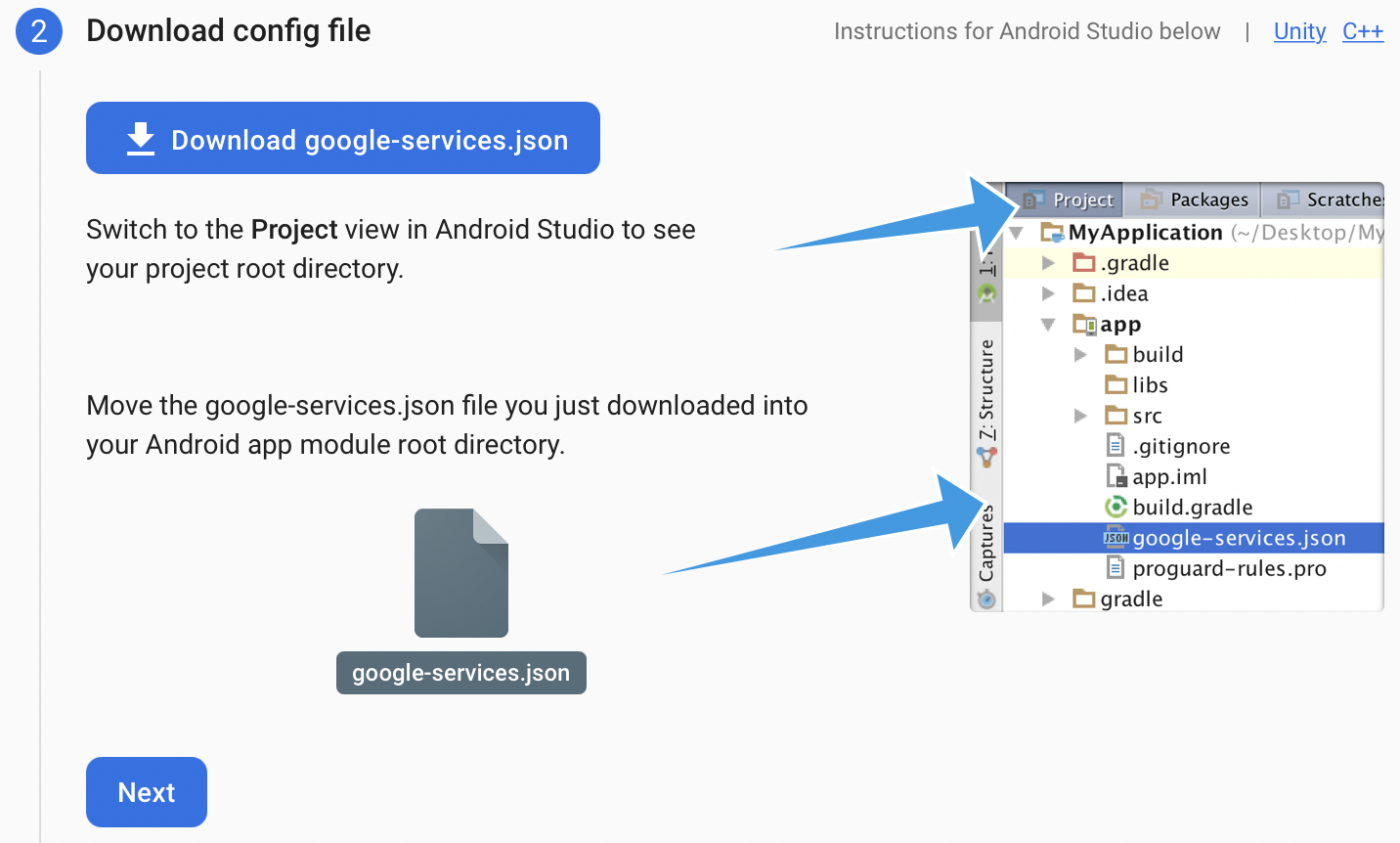
6. 下载配置文件: 下载 google-services.json 文件,并将其放置在您的 Android 应用模块根目录下的 android/app/ 中。
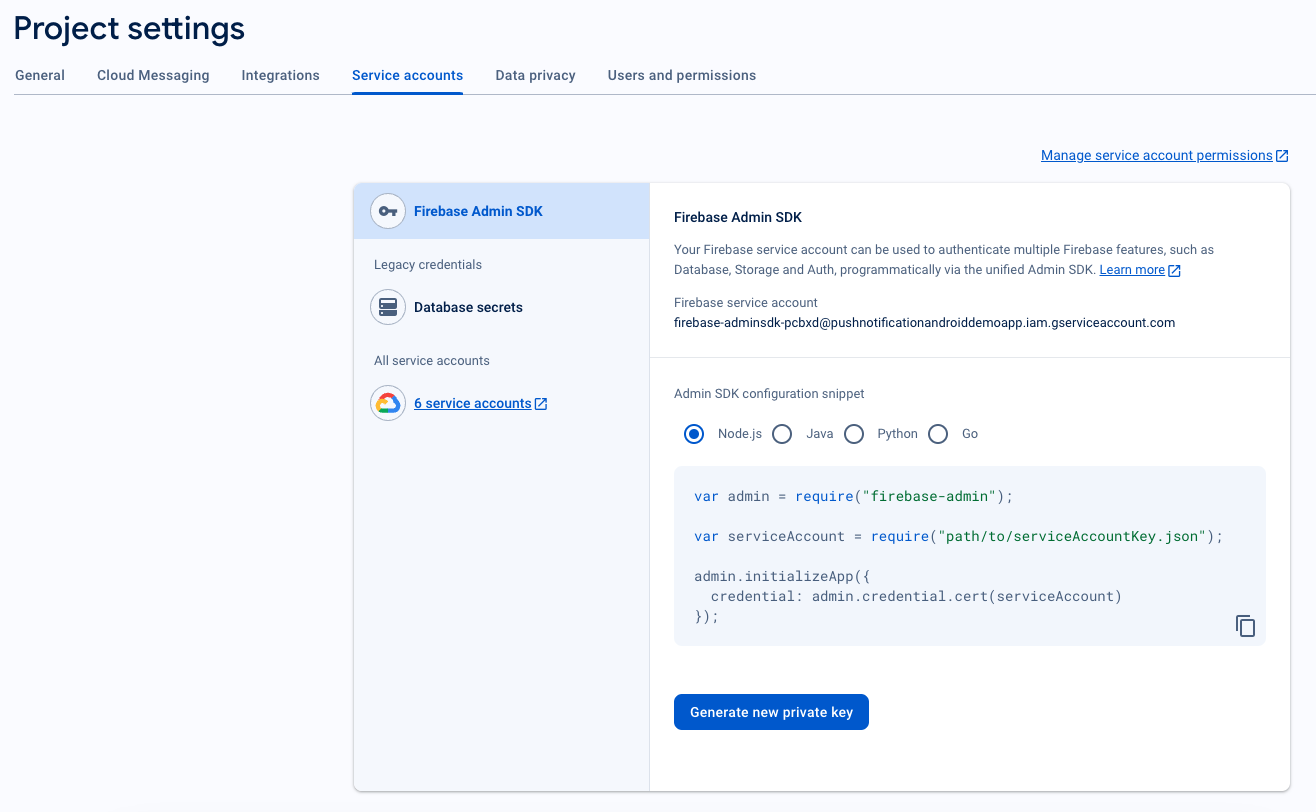
7. 生成服务账户 JSON
- 在 Firebase 控制台中,点击左上角“项目概览”旁边的设置图标,然后选择项目设置。
- 导航到服务账户选项卡。
- 点击生成新的私钥,然后下载 .json 文件。
- 妥善保管此文件,因为您将在 PushEngage 信息中心设置中使用它。
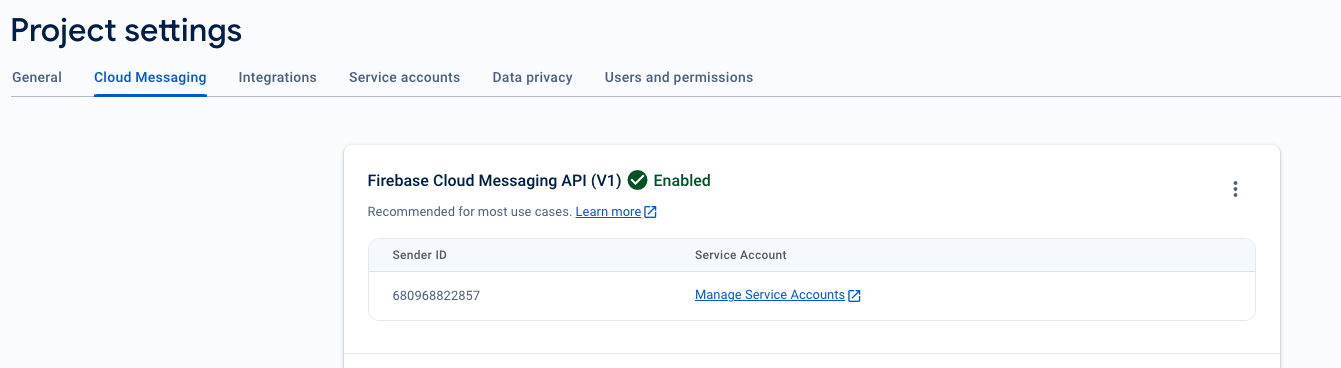
8. 检索发送方 ID
- 在 Firebase 控制台中,点击左上角项目概览旁边的设置图标,然后选择“项目设置”。
- 选择Cloud Messaging选项卡,您可以在此处找到发送方 ID,这是 PushEngage SDK 初始化所必需的。
将 FCM 与 PushEngage 信息中心集成
要将 FCM 详细信息与 PushEngage 信息中心无缝集成,请按照以下步骤操作:
- Access your PushEngage account by logging in with your credentials.
- Navigate to Settings » Installation now choose the tab Android SDK
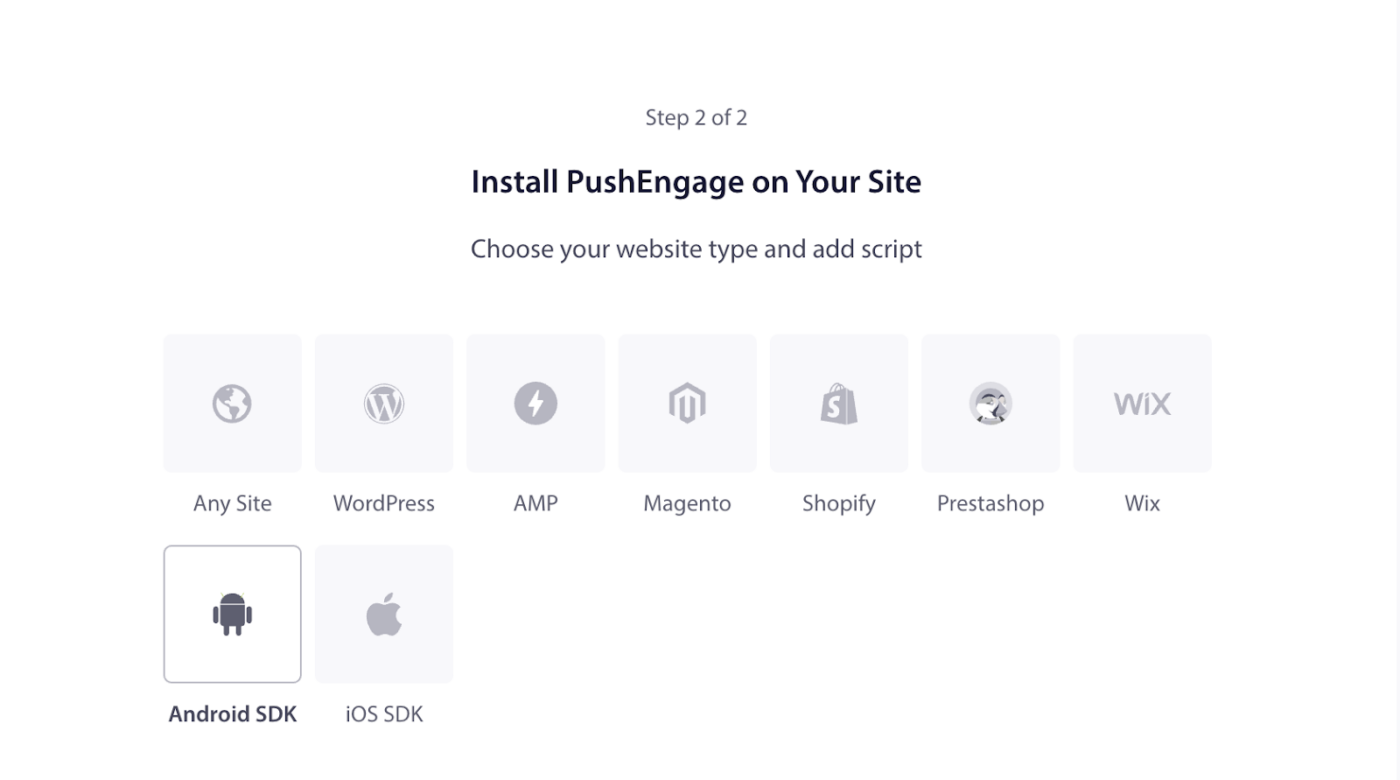
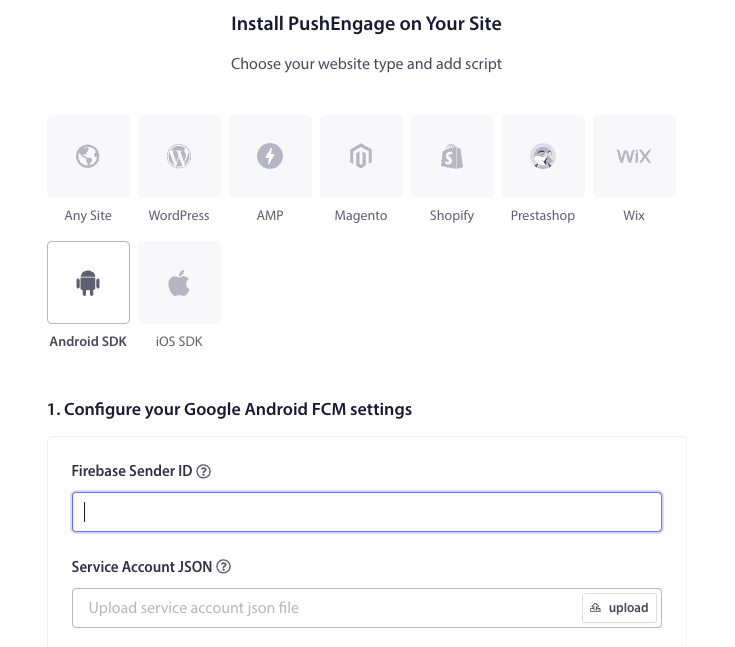
- Now, Configure FCM Settings
- Enter your Firebase Sender ID (retrieved from the Firebase Console).
- Upload the Service Account JSON file (downloaded from Firebase).
- Click the Update button to save these settings.
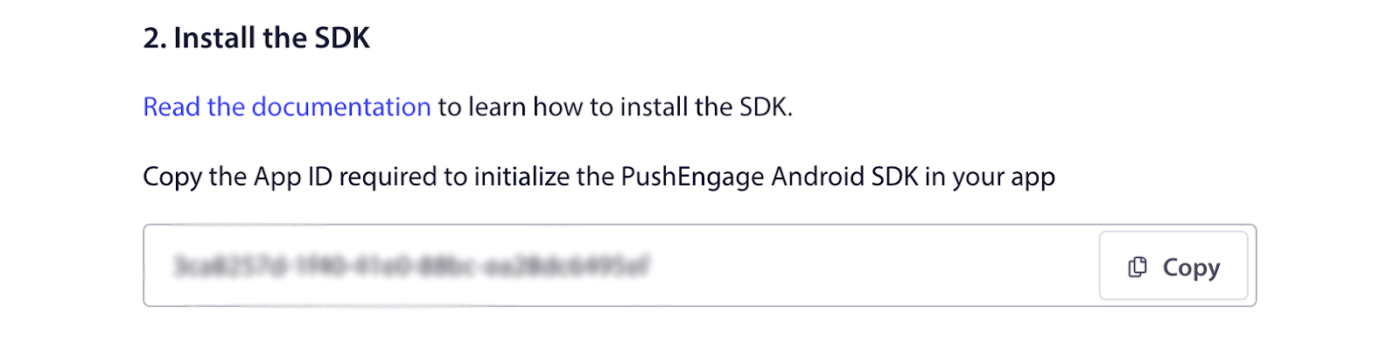
5. Copy App ID: After configuring the FCM settings, you’ll be provided with an App ID. Copy this App ID as it is required to initialize the PushEngage Android SDK in your Flutter app.
Setting Up iOS
Setting Up project
We request you to follow the below the steps after opening your project.
Here is how you can open a project : your_project_name » iOS » Runner.xcworkspace.
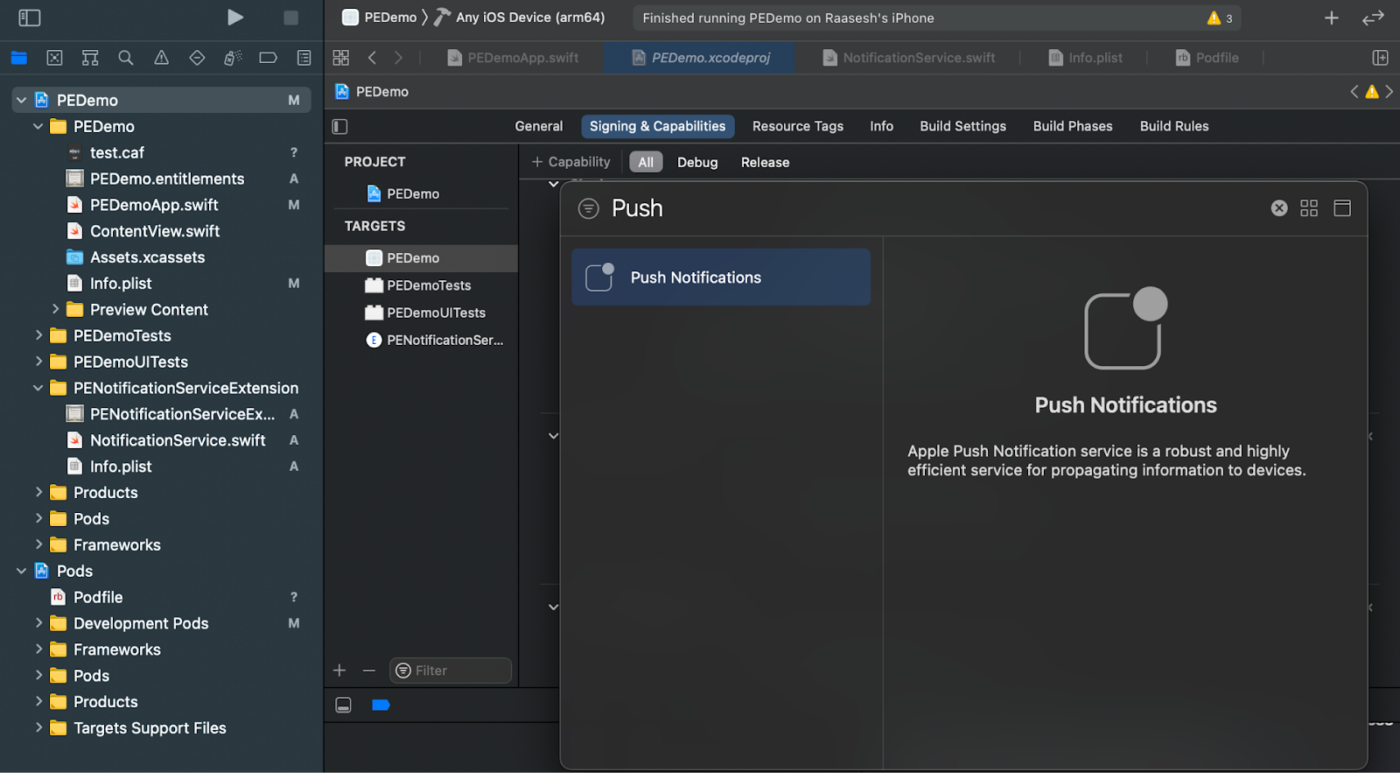
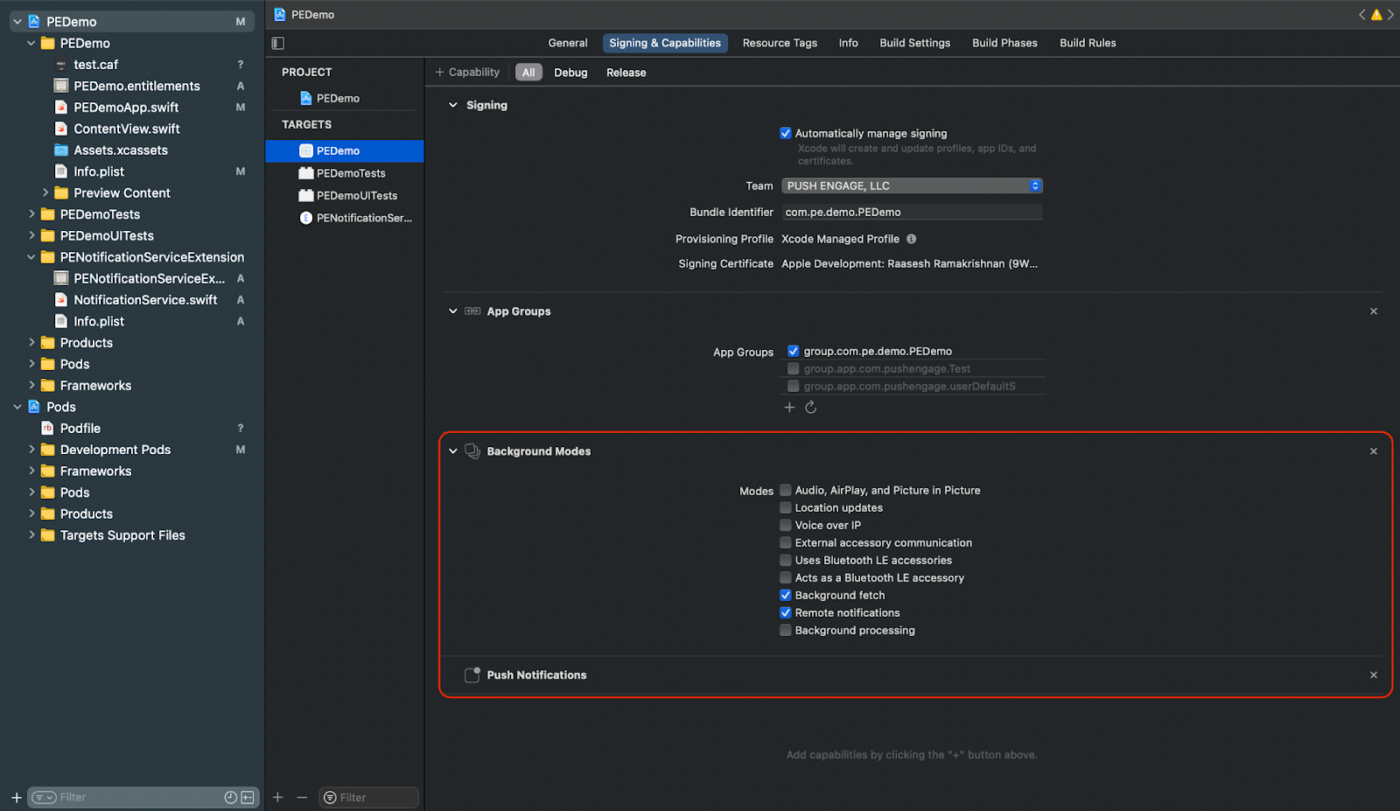
1. Enable Remote Notifications
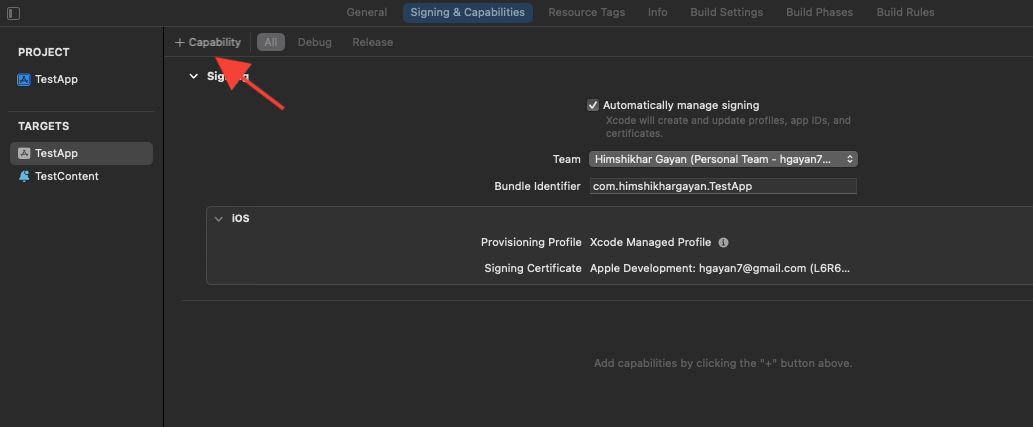
- Open your Xcode project and select the root project in the Project Navigator.
- Choose your main app target.
- Navigate to “Signing & Capabilities.“
- Ensure that Background Modes capability is added. If not, add it by clicking the “+ Capability” button.
- Similarly, ensure that the Push Notifications capability is added. If not, add it using the “+ Capability” button.

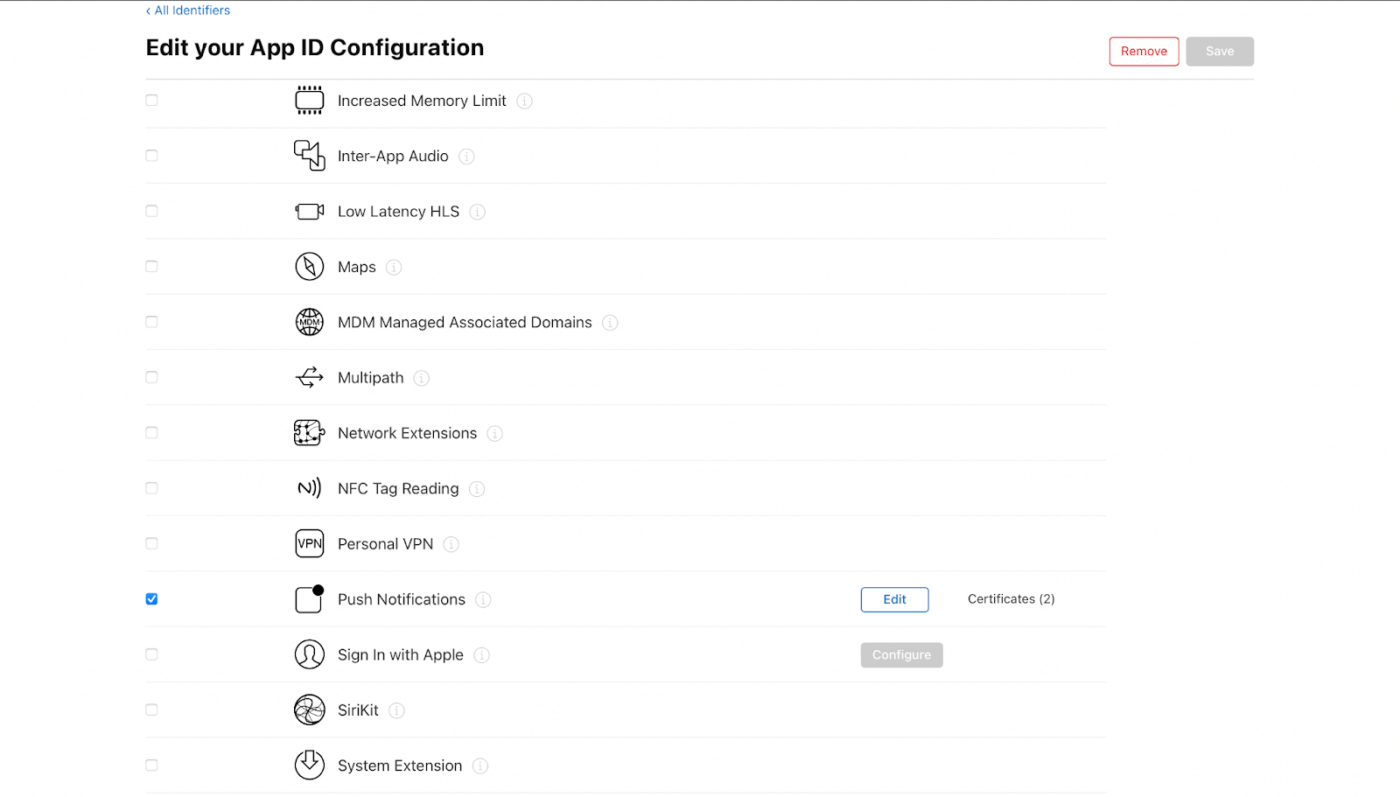
If the “Push Notifications” capability is not visible in Xcode:
- Go to your Apple Developer account.
- Navigate to “Certificates, Identifiers & Profiles.” Select your app identifier.
- Edit the configuration of your App ID and ensure that Push Notifications is enabled.
- Return to Xcode and attempt to add the Push Notifications capability again.
2. Enable Background Modes
- In your Xcode project, navigate to “Signing & Capabilities.“
- Inside “Background Modes“, enable both “Remote notifications” and “Background fetch.“
- This step ensures that your app can handle remote notifications and background fetches efficiently.
If you do not have an APN’s certificate for iOS, you can create one using the guide here.
Next, you need to add Notification Service extension and Notification Content Extension only for iOS.
Creating Notification Service Extension
The Notification Service Extension enhances your iOS app’s capability to receive notifications. This is used to modify the notification’s content or fetch/process any data on receiving the notification. Follow these steps to create a Notification Service Extension:
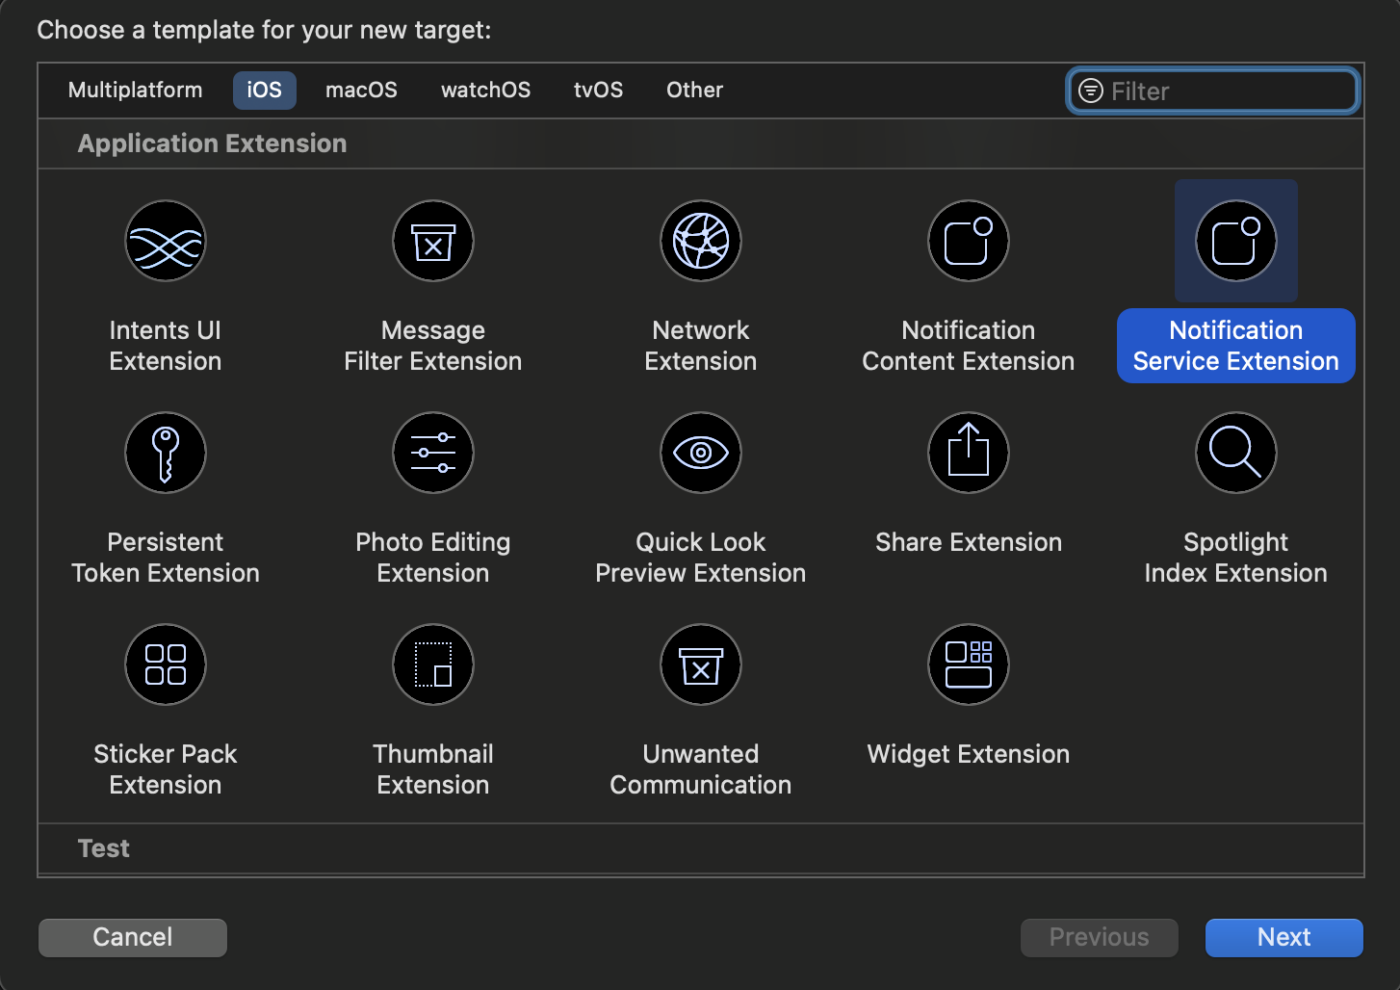
- 打开 Xcode 并导航到您的项目。
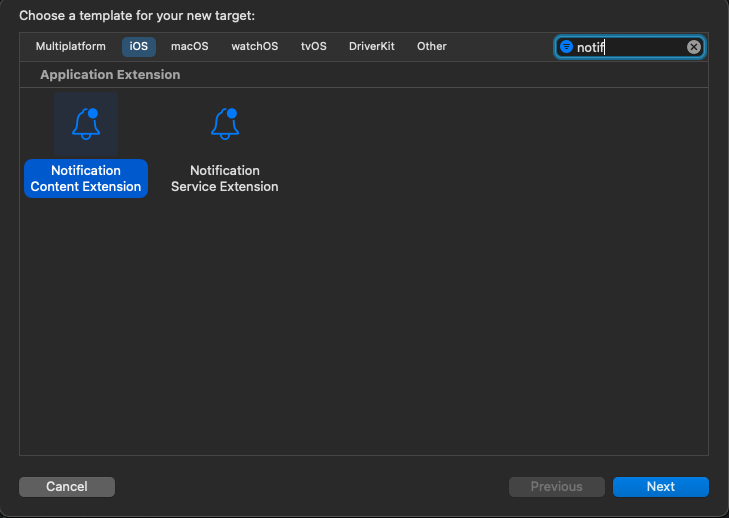
- 从菜单中选择 文件 » 新建 » 目标。
- 在模板选择窗口中,选择 通知服务扩展,然后点击 下一步。
4. 为您的扩展名提供一个名称,例如 PushEngageNotificationServiceExtension,然后点击 完成。
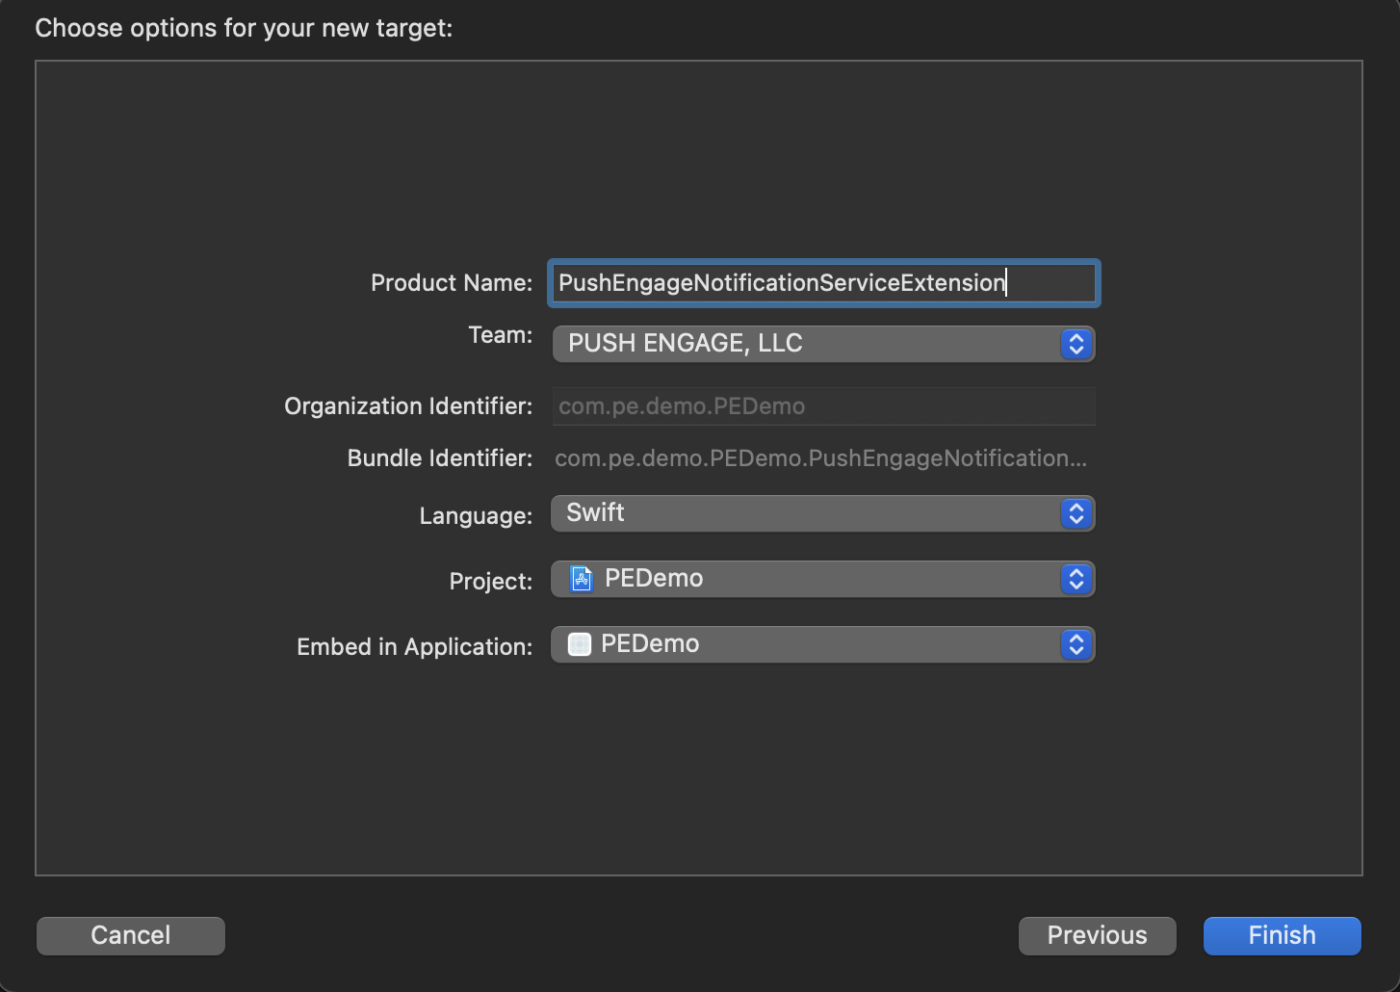
4. 为您的扩展名提供一个名称,例如 PushEngageNotificationServiceExtension,然后点击完成。
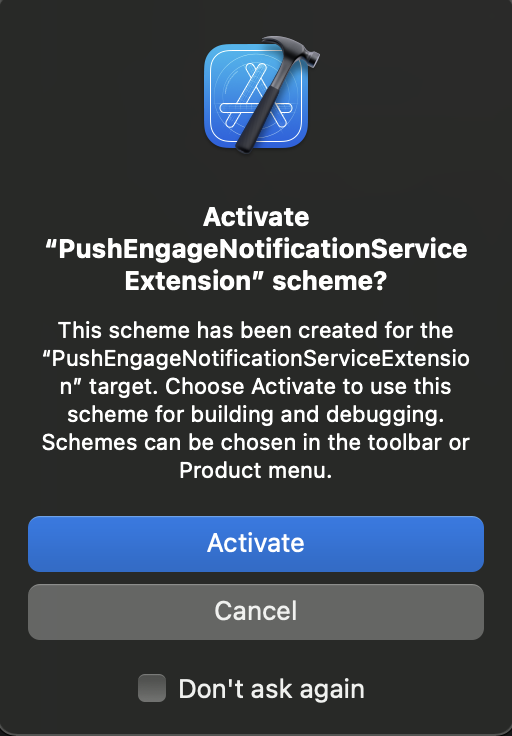
5. 完成创建通知服务扩展后,系统可能会提示您激活它。请勿立即激活。激活扩展程序会将 Xcode 的调试焦点从您的应用转移到扩展程序。如果您不小心激活了它,请不要担心;您可以在 Xcode 中切换回调试您的应用。
6. 在项目导航器中,选择顶级项目目录,然后在目标列表中选择在第 4 步中创建的 NotificationServiceExtension 目标。
7. 将部署目标设置为 iOS 10 或更高版本,这是 Apple 发布此扩展程序支持的版本。

初始化通知服务扩展的 PushEngage SDK
为确保 PushEngage SDK 在您的 iOS 通知服务扩展中正常运行,请按照以下步骤操作
- 打开 your_project_name » ios » Podfile。
- 将以下内容添加到您的 Podfile 底部:
post_install do |installer|

  installer.pods_project.targets.each do |target|

    flutter_additional_ios_build_settings(target)

    target.build_configurations.each do |config|

      config.build_settings['APPLICATION_EXTENSION_API_ONLY'] = 'No'

     end

  end

end

target 'Your_Notification_Service_Extension_Name' do

  use_frameworks!

  pod 'PushEngage', '~>0.0.4'

end
- 安装依赖项:
现在您需要进入项目中的 iOS 目录并执行以下命令:
pod repo update

pod install
- 在您的通知服务扩展目标中,请确保导入 PushEngage 框架并添加必要的初始化代码。您可以使用 Swift 进行操作,如下所示。
import UserNotifications
import PushEngage

@available(iOSApplicationExtension 10.0, *)
class PushEngageNotificationServiceExtension: UNNotificationServiceExtension {

    var contentHandler: ((UNNotificationContent) -> Void)?
    var bestAttemptContent: UNMutableNotificationContent?
    var request : UNNotificationRequest?

    override func didReceive(_ request: UNNotificationRequest, withContentHandler contentHandler: @escaping (UNNotificationContent) -> Void) {
        self.request = request
        self.contentHandler = contentHandler
        self.bestAttemptContent = (request.content.mutableCopy() as? UNMutableNotificationContent)

        if let bestContent = bestAttemptContent {
            PushEngage.didReceiveNotificationExtensionRequest(request, bestContentHandler: bestContent)
            contentHandler(bestContent)
        }
    }

    override func serviceExtensionTimeWillExpire() {
        // Called just before the extension will be terminated by the system.
        // Use this as an opportunity to deliver your "best attempt" at modified content, otherwise the original push payload will be used.
        if let contentHandler = contentHandler, let request = request ,let bestAttemptContent =  bestAttemptContent {
            guard let content = PushEngage.serviceExtensionTimeWillExpire(request, content: bestAttemptContent) else {
                contentHandler(bestAttemptContent)
                return
            }
            contentHandler(content)
        }
    }

}
创建通知内容扩展
为了通过添加自定义 UI 来改进显示方式,您需要创建一个通知内容扩展。请按照以下步骤进行设置:
- 在 Xcode 中,转到 文件 » 新建 » 目标。
- 选择通知内容扩展,然后点击下一步。
3. 点击完成后的对话框中,不要选择“激活”。取消会使 Xcode 继续调试您的应用而不是扩展。如果您不小心激活了它,请在 Xcode 中切换回调试您的应用(位于运行按钮旁边)。
4. 在项目导航器中,选择顶级项目目录,然后在目标列表中选择在第 2 步中创建的 NotificationContentExtension 目标。
5. 将部署目标设置为 iOS 10 或更高版本,这是 Apple 发布此扩展程序支持的版本。
初始化通知内容扩展的 PushEngage SDK
为确保 PushEngage SDK 在您的 iOS 通知内容扩展中正常运行,请按照以下步骤操作:
打开 your_project_name » iOS » Podfile。
将以下内容添加到您的 Podfile 底部:
target 'Your_Notification_Content_Extension_Name' do
  use_frameworks!
  pod 'PushEngage', '0.0.4'
end
- 安装依赖项:这是您需要在命令行中运行的代码。
e
pod repo update
pod install
- 在您的通知内容扩展目标中,请确保导入 PushEngage 框架并添加必要的初始化代码。以下是使用 Swift 进行操作的方法,并附带一些 UI 元素示例。
import UIKit
import UserNotifications
import UserNotificationsUI
import PushEngage

@available(iOSApplicationExtension 10.0, *)

class NotificationViewController: UIViewController, UNNotificationContentExtension {
    fileprivate var hostingView: UIHostingController<ContentView>?
    override func viewDidLoad() {
        super.viewDidLoad()
        self.view.backgroundColor = .white
    }

    func didReceive(_ notification: UNNotification) {
        if(notification.request.content.categoryIdentifier == "your_identifier"){
            let payLoad = PushEngage.getCustomUIPayLoad(for: notification.request)
  //pass the payload to your custom View
            let view = CustomView(payLoadInfo: payLoad)
            hostingView = UIHostingController(rootView: view)
If let customView = self.hostingView {
            addChild(hostingView!)
}
        }
    }
}
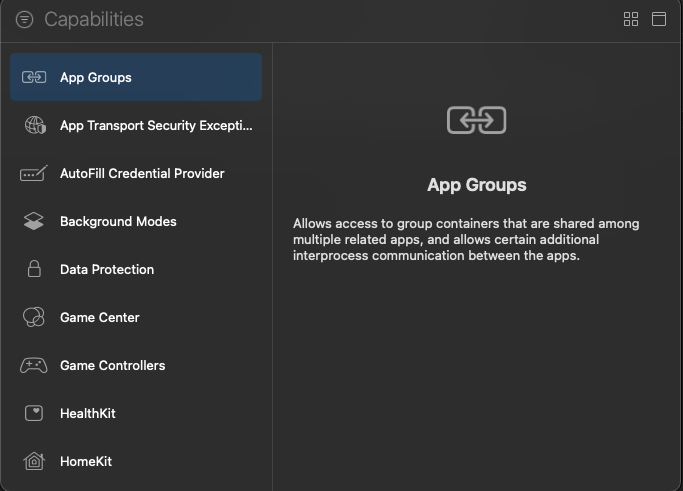
添加应用组
应用组对于实现主应用、通知服务扩展和通知内容扩展之间的通信至关重要。请按照以下步骤将应用组添加到您的 iOS 项目中:
如果您已有应用组并只想使用该应用组,请跳至第 4 步。
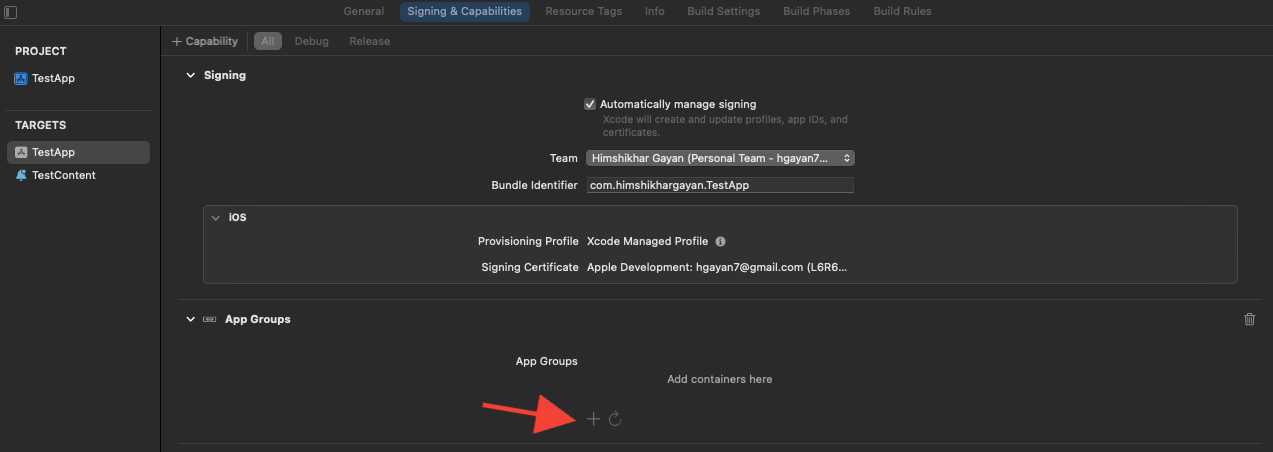
- 在 Xcode 项目中,于项目导航器中,选择应用的顶层项目目录并选择应用的主目标。
- 导航至“签名与功能”选项卡。
- 点击“+ 功能”按钮,然后从列表中选择“应用组”。
4. 点击“+”按钮添加一个应用组。
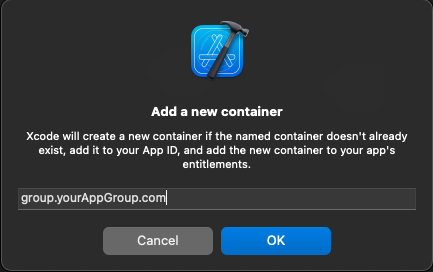
5. 为您的应用组添加一个唯一的名称,然后点击“确定”。
6. 在主编辑器区域,选择您应用的主目标。创建应用组后,请在您的应用 Info.plist 文件中提供该组的名称,键为 PushEngage_App_Group_Key。
7. 在通知服务扩展的 Info.plist 文件中添加相同的键和值。
8. 确保在主应用目标和您的通知服务扩展中都选择了相同的应用组。
初始化 PushEngage SDK
在您的 main.dart 文件中,初始化 PushEngage SDK。
void main() {
  runApp(const MyApp());
}

class MyApp extends StatefulWidget {
  const MyApp({super.key});
  @override
  State<MyApp> createState() => _MyAppState();
}

class _MyAppState extends State<MyApp> {
  @override
  void initState() {
    super.initState();
    initPlatformState();
  }

  Future<void> initPlatformState() async {
    PushEngage.setAppId("your_pushengage_app_id");
  }
  @override
  Widget build(BuildContext context) {
    return const MaterialApp(
      title: 'PushEngage',
      debugShowCheckedModeBanner: false,
      home: Home(),
    );
  }
}
在 iOS 应用的 AppDelegate.swift 文件中
import Flutter
import UIKit
import PushEngage

@UIApplicationMain
@objc class AppDelegate: FlutterAppDelegate {

    override init() {
        super.init()
        PushEngage.swizzleInjection(isEnabled: true)
    }

    override func application(
        _ application: UIApplication,
        didFinishLaunchingWithOptions launchOptions: [UIApplication.LaunchOptionsKey: Any]?
    ) -> Bool {
        if #available(iOSApplicationExtension 10.0, *) {
            UNUserNotificationCenter.current().delegate = self
        }
        GeneratedPluginRegistrant.register(with: self)
        PushEngage.setBadgeCount(count: 0)
        PushEngage.setNotificationWillShowInForegroundHandler { notification, completion in
            if notification.contentAvailable == 1 {
                // in case developer failed to set completion handler. After 25 sec handler will call.
                completion(nil)
            } else {
                completion(notification)
            }
        }
        return super.application(application, didFinishLaunchingWithOptions: launchOptions)
    }
}
处理 deepLink
deepLinkStream 是一个发出 deep link 数据的流。
class Home extends StatefulWidget {
  const Home({super.key});

  @override
  _HomeState createState() => _HomeState();
}

class _HomeState extends State<Home> {
  late StreamSubscription _deepLinkSubscription;

  @override
  void initState() {
    super.initState();
    PushEngage.deepLinkStream.listen((data) {
      _handleDeepLink(data);
    });
  }

  void _handleDeepLink(Map<String, dynamic>? data) {
    // Parse the deep link and navigate accordingly
    Uri uri = Uri.parse(data?['deepLink']);
    print('Path: ${uri.path}');
    updateResponseText(data.toString());
    switch (uri.path) {
      case 'trigger':
      case '/trigger':
        print(‘your_implementation’)
        break;
    }
  }
c
i
就是这样,您已成功为 Android 和 iOS 应用集成了 Flutter SDK。
如果您遇到任何问题,请 联系我们 。我们的支持团队将能够帮助您。


