Notice: There is no legacy documentation available for this item, so you are seeing the current documentation.
Would you like to enhance customer engagement through web push notifications in your WooCommerce store? One effective way to do this is by setting up push notifications using PushEngage. In this guide, we’ll walk you through the process of setting up and managing push notifications in your WooCommerce store. PushEngage will serve both admin & customers.
Before You Start
Ensure you have the PushEngage Plugin installed on your WooCommerce store. This guide assumes you already have the WooCommerce and PushEngage Plugin.
Connecting PushEngage with WooCommerce Store
It only takes a few clicks in setting up or connecting the PushEngage Account to your WooCommerce Store.You can go ahead and connect your existing PushEngage account with WooCommerce store, or you can also sign up with a new account.
If you already have the WooCommerce Store connected to PushEngage Account, you can skip this and move to Managing Push Notification Settings.

Once you have created account/connected existing account. Please set up your Popup so you can start with building your web push subscriber list.
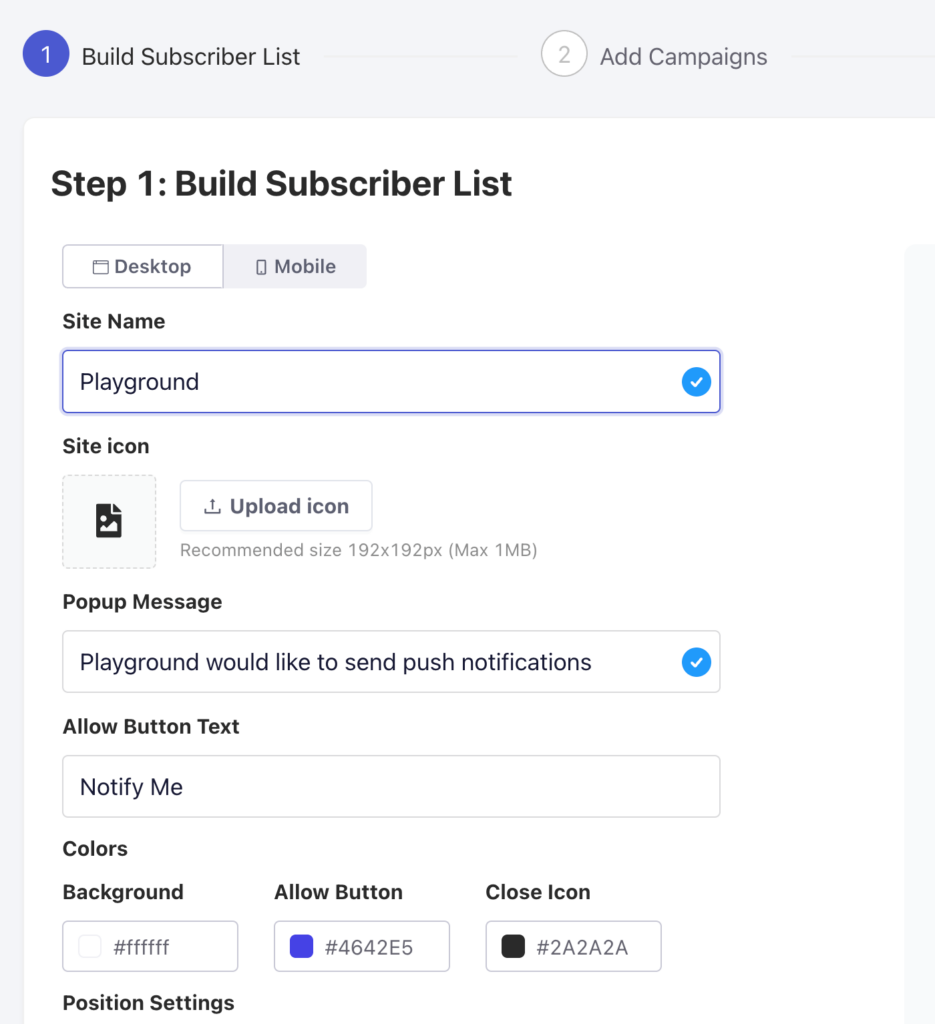
Once your Popup Modal/Subscription Opt-in is customized as per your brand color and message, you can click on Next Button.
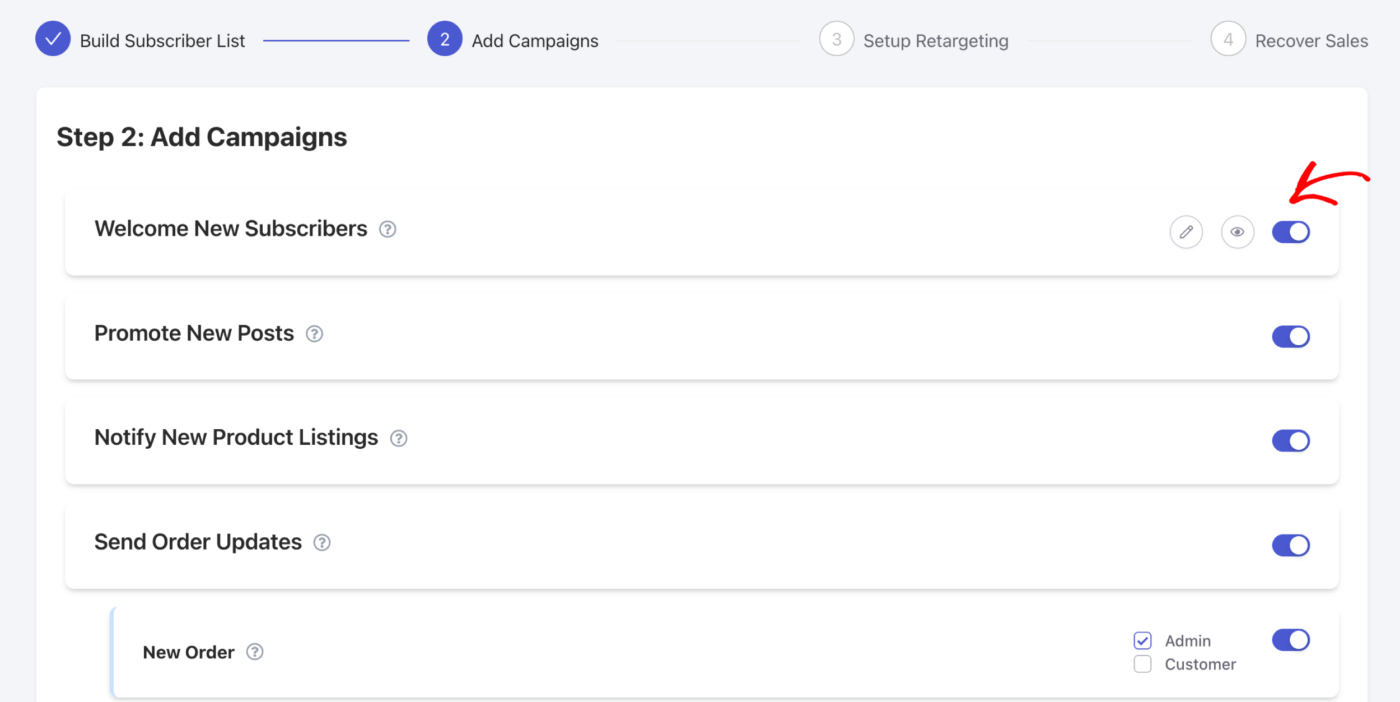
You can choose the initial campaigns you want to enable and even check the preview of these campaigns. You can decide the Audience and choose to send to either Admin Users or Customers. There is also an option, to edit the campaigns here as well. If you are unsure, you can move forward to next step and edit later.
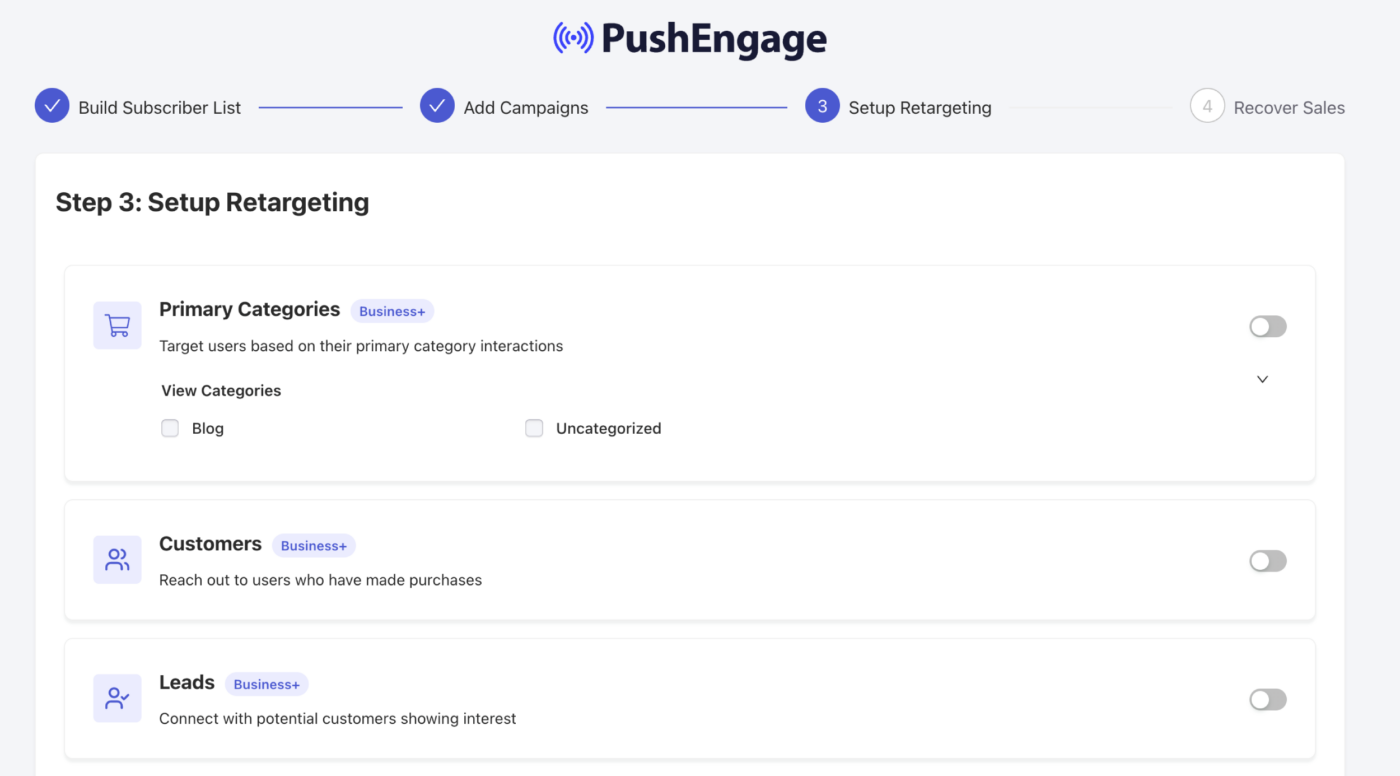
You can choose the retargeting strategy in beginning, this will ensure to help you in creating of segment. So if you have existing segments, they will be shown here. The Primary Categories can also be converted into segments. You can also use the default segments we have created, which is Customers & Leads.
Once you have selected, simply toggle the button on. Now you can click on Next Button.
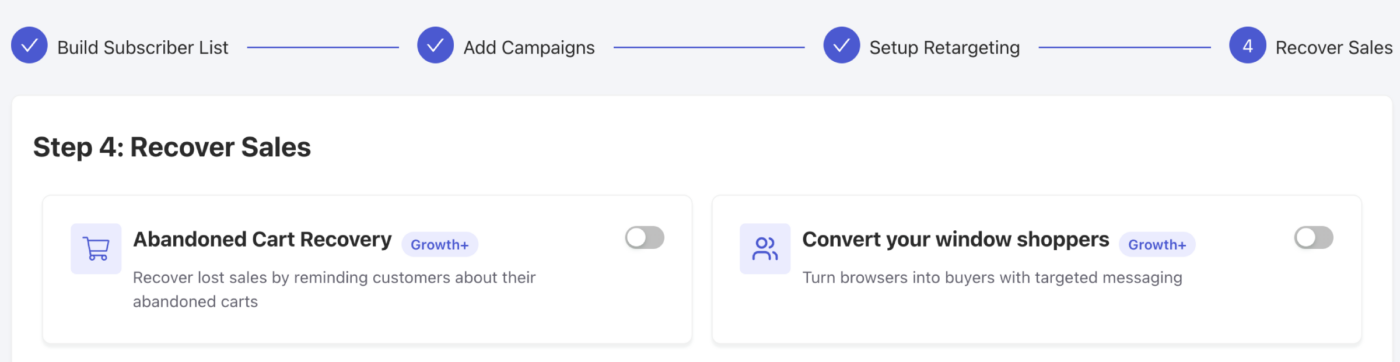
You can choose to automated journeys as these are goal oriented campaigns. You can easily Recover Sales using these strategies of Cart & Browse Abandonment. Once this is enabled, you can continue to Dashboard.
That’s it, in a few clicks you have the WooCommerce Store connected to engage with Push Notifications. Now we can help you understand in managing & editing the campaigns.
Managing Push Notifications Settings
You can navigate to WooCommerce » Settings
Then navigate to Push Notifications Tab

Under this tab, you can go ahead and toggle all the notification type which you want to enable for now. This field also lets you decide that if you want to send to admin only or customers.
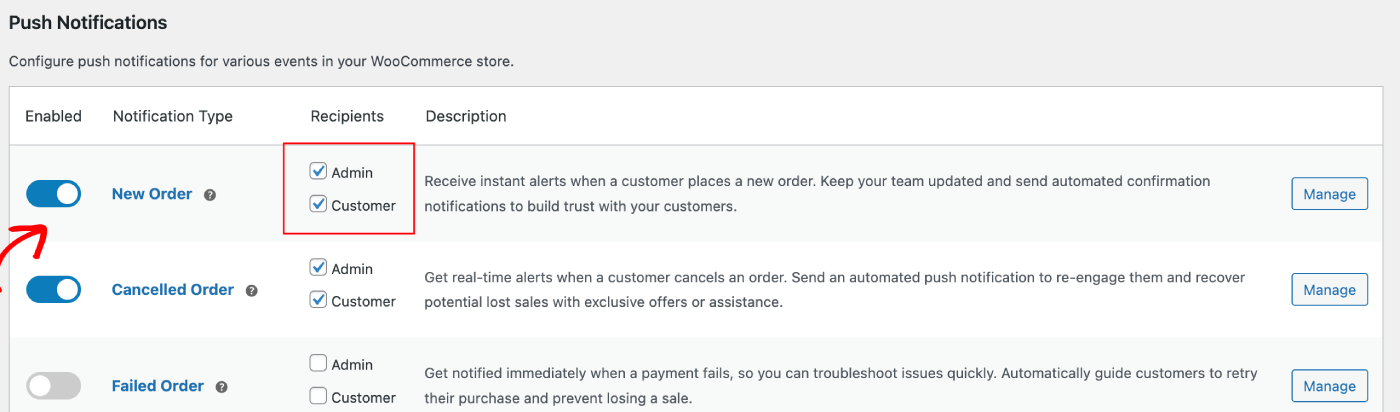
在这两种情况下,商店访客或管理员只有在订阅或选择接收营销活动后,才会收到推送通知。
您可以选择营销活动的目标接收者是管理员还是客户。选择后,您可以继续管理这些营销活动。
设置管理员端推送通知
您可以选择要编辑的营销活动,然后点击管理按钮。

您可以向下滚动到复选框,该复选框允许您在操作完成后向管理员发送推送通知。

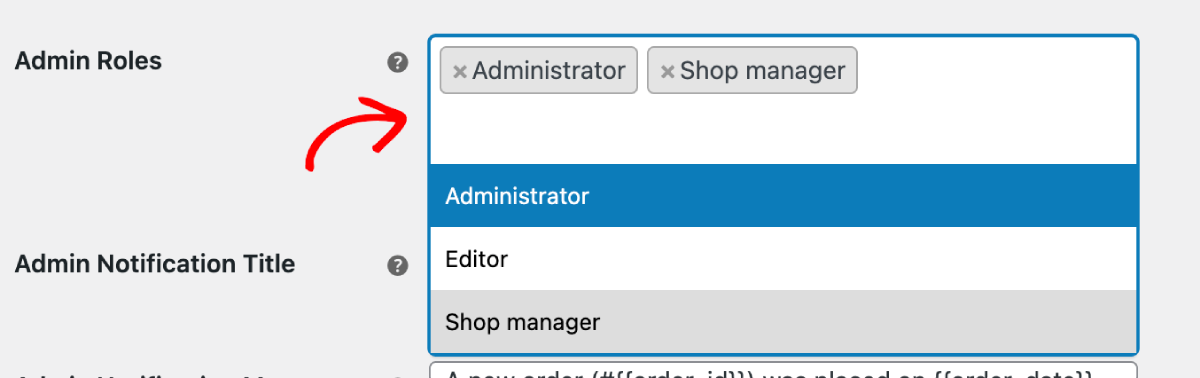
选择用户角色
您可以决定在订单下达或购买失败时,选择特定人员接收营销活动。您可以选择应接收营销活动的角色。
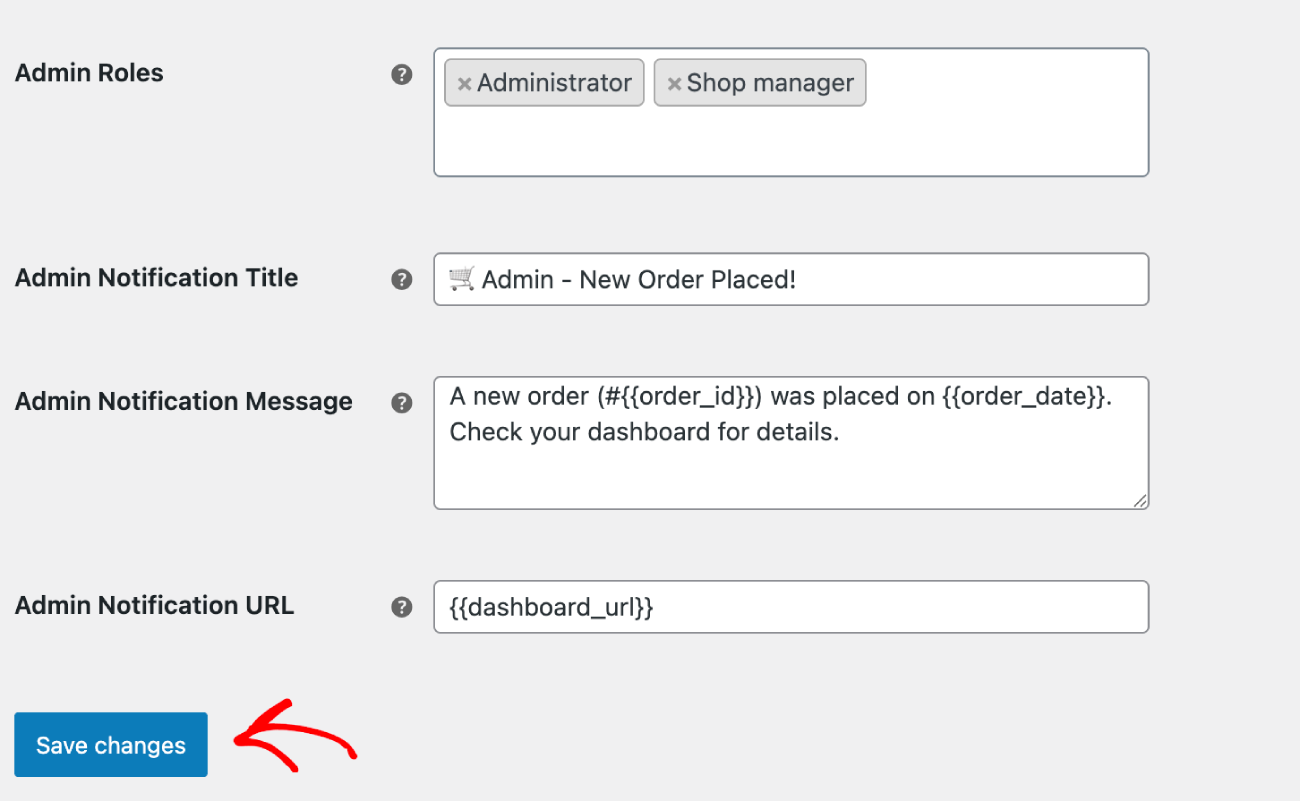
设置营销活动
您可以设置默认的营销活动标题和消息以及 URL。例如 – 在新订单下达营销活动中,您可以包含订单 ID 和订单日期等变量,以获取每个新订单的更具体详细信息。
设置客户侧推送通知
如果您想向网站访客或客户发送推送营销活动。您可以发送 WooCommerce 设置中提供的默认营销活动,也可以使用推送广播、邮件自动回复器设计自己的营销活动。我们还为您创建了一些目标导向的自动化营销活动。
默认推送营销活动
您可以选择要编辑的营销活动,然后点击管理按钮。您可以勾选将营销活动发送给客户的复选框。例如,我们在这里设置重试购买请求的推送通知。
您可以设置通知标题和消息以及结账页面 URL。
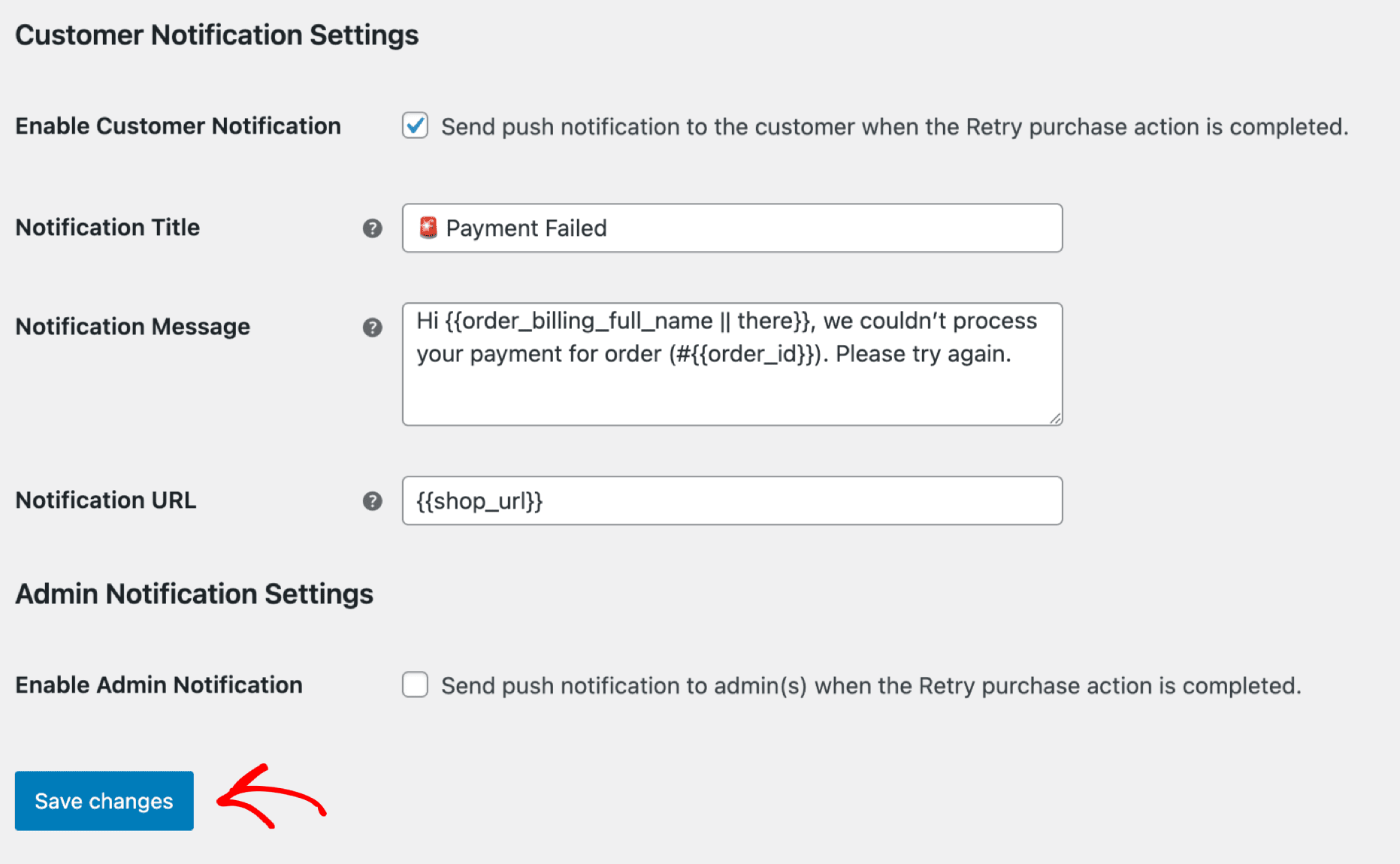
更新详细信息后,您可以点击保存更改按钮。
定制营销活动
您可以使用我们提供的各种模板发送推送广播。

自动化营销活动
我们有触发式营销活动,这些是特定于事件的营销活动。它们针对特定目标,例如 – 购物车和浏览放弃营销活动。这些营销活动是为您的商店预先创建的。您只需要确保在连接商店后启用这些营销活动。
这里是帮助您详细了解如何为您的商店启用和设置此营销活动的指南。
如果您遇到任何问题,请随时通过单击此处联系我们。我们的支持团队将能够帮助您。


