
Looking for a simple guide on how to install a WordPress Square plugin and accept online payments on your site?
Square allows you to accept credit card payments on any site. Whether you’re running a service site, an eCommerce store, or a membership platform, you need to allow credit card payments on your WordPress site. And Square is one of the most popular payment gateways to add multiple payment options on your site.
Integrating a payment gateway to your site can be a real hassle if you have to code it from scratch. So, what do you do when you don’t know how to code? Are Square plugins even worth looking into?
Short answer: Yes. Using a Square plugin can help you start accepting payments in a matter of minutes without a single line of code.
In this article, we’re going to go show you how to install a WordPress Square plugin and start accepting payment with writing a single line of code. And we’ll do it in less than 10 minutes.
Ακούγεται καλό; Ας βουτήξουμε.
Why Use a WordPress Square Plugin on Your Website?
Square allows credit card payments on your WordPress site. The best part is that the payment gateway allows multiple payment formats including recurring payments.
Credit cards are among the most popular modes of payment. If you’re planning to monetize your site without accepting credit card payments, you’re leaving money on the table.
Accepting credit card payments will improve your conversion rate. If you’re running an eCommerce site, this can reduce your cart abandonment rates as well.
Before you begin, you will need to enable HTTPS/SSL on your website so that you can securely accept credit card payments. If you’re not sure how to do that, you can follow this simple guide on how to get a free SSL certificate for your WordPress site.
How to Add a WordPress Square Plugin to Online Stores
Now that we understand why you should be using a WordPress Square plugin and the benefits of using Square, it’s time to add Square payments to your site. There are multiple WordPress plugins to integrate Stripe into your site.
We recommend using WPForms to accept Square payments on WordPress.

WPForms is the most powerful drag-and-drop WordPress form builder. It’s super easy to build a fully custom form for your WordPress site in a few minutes using the plugin. WPForms can help you create any type of contact form, payment form, survey form, registration form, and newsletter optin form you can think of.
They have over 300 templates in the Pro version that are proven to work. You can instantly import these templates and launch the form in minutes. WPForms is completely beginner-friendly. Anyone can use it to create powerful forms.
The plugin comes only with core essentials. So, if you need more functionality in your forms, you can always install an addon. This keeps the plugin lightweight and simple to use.
With WPForms, you get:
- A Beginner-Friendly Form Builder
- Order Forms
- Φόρμες Πολλαπλών Βημάτων
- Email Marketing Integrations
- Conditional Field Logic
- Εκστρατείες Εγκατάλειψης Φόρμας
- Σελίδες Προορισμού Φόρμας
- Popup Contact Forms
And more. The best part is that you can directly create WordPress payment forms that accept payments using Square. All you need is a Square account and the WPForms plugin to get started. Check out our WPForms review for more details or simply follow along.
Step #1: Install and Activate the WPForms Plugin
The first thing you need to do is install and activate the WPForms plugin. If you’ve never installed a WordPress plugin before, check out this guide on how to install a WordPress plugin.
Ξεκινήστε πηγαίνοντας στο WPForms και επιλέξτε ένα πλάνο:

Αφού εγκαταστήσετε το plugin, μεταβείτε στον πίνακα ελέγχου του WPForms και κατεβάστε το plugin:
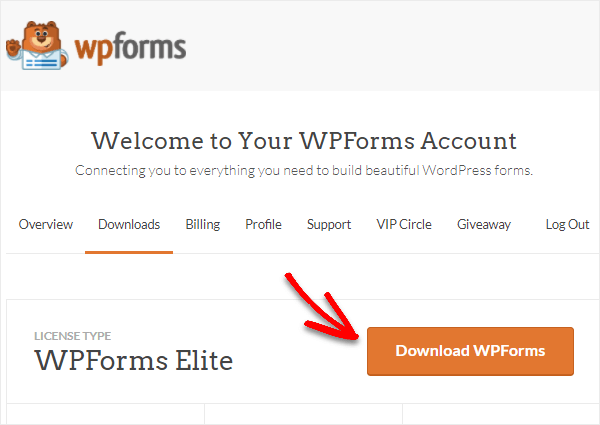
Στη συνέχεια, ανεβάστε το αρχείο zip στον ιστότοπό σας στο WordPress και είστε έτοιμοι να ξεκινήσετε!
Step #2: Install and Activate the WPForms Square Addon
Head over to your WordPress dashboard and click WPForms » Addons:
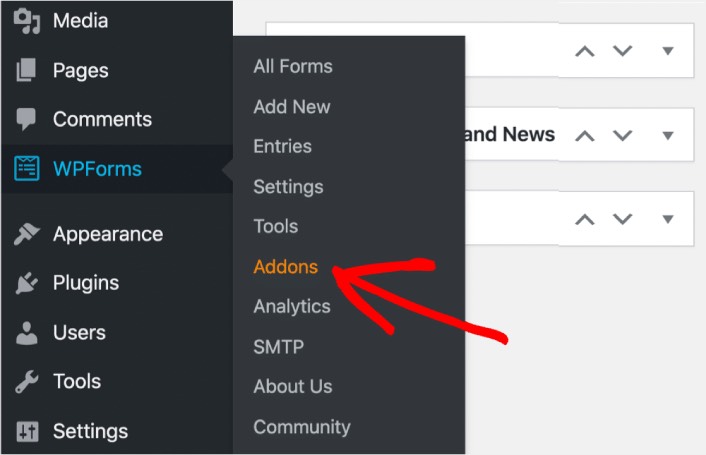
Scroll down to the Square addon and click on Install:

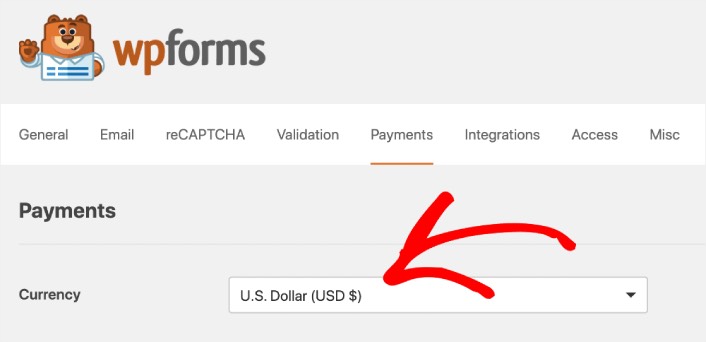
Once you’re done installing the addon, click on Activate. Next, we’re going to configure the payment settings. Go to your dashboard, click WPForms » Settings, then click the Payments tab. Under Currency, select your currency:
Next, we’re going to connect Square to WPForms.
Step #3: Connect Your Square Account to Your WordPress Site
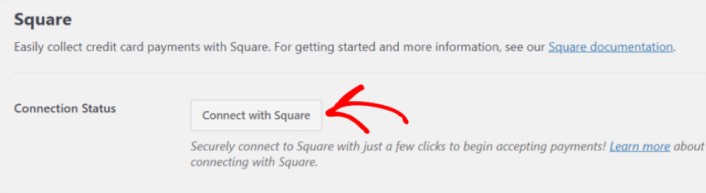
In the payment settings page, scroll down to the Square section and go to the Connection Status tab. Click the Connect with Square button:
Sign in to your Square account and allow WPForms access to the specific information that it requests:
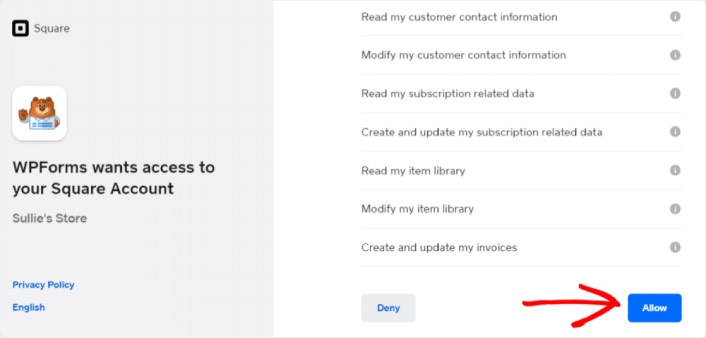
When it’s done, you will automatically get redirected back to the payment settings page and you should see the Connection Status as Active.

Step #4: Create a Square Payment Form
Now that WPForms is installed and activated, it’s time to create an order form. Head over to WPForms » Add New:

This will open the WPForms drag and drop form builder. To create a new form, give it a name and select your form template. To create an order form, we’re going to go ahead and select the Billing/Order Form template:

Next, you’ll want to modify what items are available to order. Scroll down to the Available Items section on the right that the template includes and click on it.
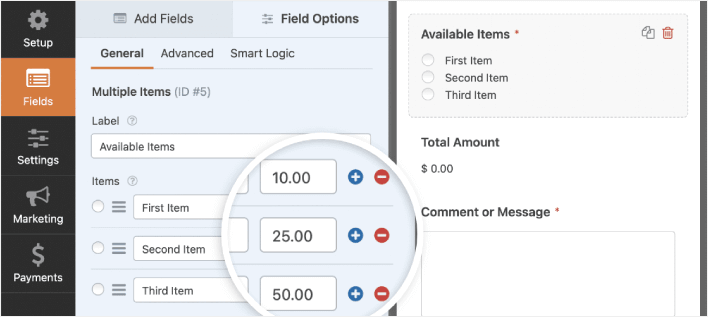
This will open up the Field Options in the left panel. Here you can rename the field, add or remove order items, and change the prices. When you’re done customizing your WordPress order form, click Save.
Μπορείτε επίσης να κάνετε τις φόρμες να φαίνονται υπέροχες ακολουθώντας τα βήματα στην ανάρτησή μας για το πώς να δημιουργήσετε μια φόρμα πολλαπλών βημάτων στο WordPress. Είναι ένας εξαιρετικός τρόπος για να βελτιώσετε την εμπειρία χρήστη και να μειώσετε τα ποσοστά εγκατάλειψης καλαθιού. Αλλά θα μείνουμε σε μία σελίδα για αυτό το σεμινάριο.
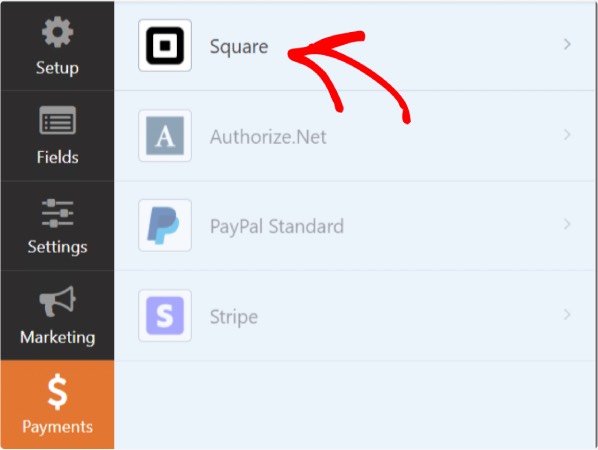
WPForms integrates with PayPal, Authorize.Net, Square, and Stripe for accepting credit card payments. We’ve already installed the Square addon. So, simply add a Square payment field:
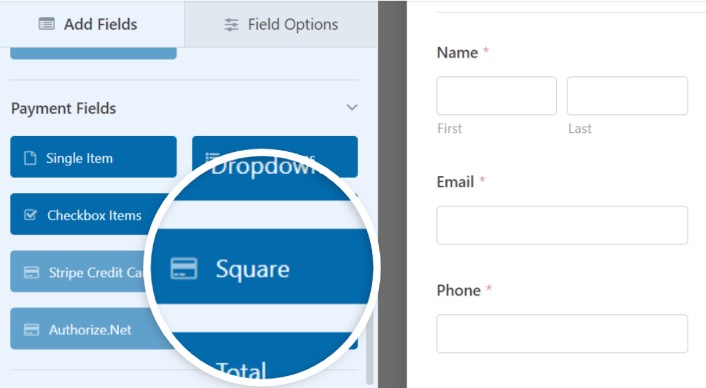
As soon as you add the Square filed, you will see a popup message to enable the Square Payments.
Click on the OK button to close the pop-up.
Step #5: Enable Square Payments
In your WPForms dashboard, click on Payments » Square:
Simply toggle on the Enable Square Payment:

Fill in your payment details:
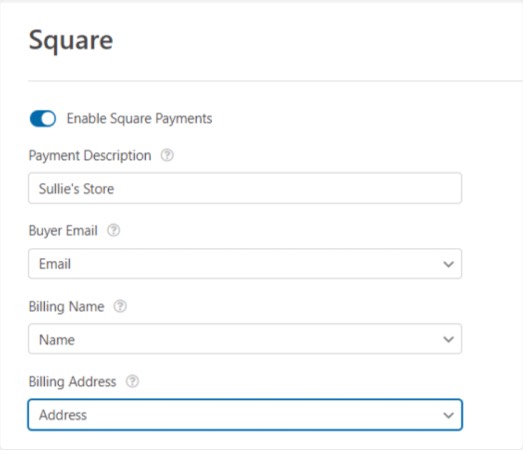
And you’re done! Don’t forget to hit Save.
Step #6: Configure Form Settings
Next, you’ll want to set up notifications and confirmations. Head over to Settings » Confirmations to configure confirmation settings:

Και στη συνέχεια στο ίδιο μενού, μεταβείτε στις Ειδοποιήσεις για να διαμορφώσετε τα μηνύματα ειδοποίησης:

Εξ ορισμού, οι ειδοποιήσεις αποστέλλονται στο email διαχειριστή του WordPress. Έτσι, αν θέλετε τα email να αποστέλλονται κάπου αλλού, όπως στο email του Επικεφαλής Πωλήσεών σας, μπορείτε να το κάνετε ακριβώς εδώ.
What to do After Installing a WordPress Square Plugin
Αυτό ήταν για αυτό το θέμα, φίλοι!
By now, you’ve created a WordPress order form. Next, you should set up form abandonment tracking to reduce your form abandonment rates.
Μετά από αυτό, το μόνο που απομένει είναι η δημιουργία κίνησης στον ιστότοπό σας, ώστε η φόρμα σας να αρχίσει να λειτουργεί και να αρχίσει να μετατρέπει. Ένας απλός τρόπος για να το κάνετε αυτό είναι να αρχίσετε να χρησιμοποιείτε ειδοποιήσεις push. Η αποστολή ειδοποιήσεων push είναι ένας εξαιρετικός τρόπος για να δημιουργήσετε επαναλαμβανόμενη κίνηση στον ιστότοπό σας. Αν αυτό είναι κάτι που σας ενδιαφέρει, θα πρέπει επίσης να δείτε αυτά τα άρθρα:
- Κόστος Ειδοποιήσεων Push: Είναι Πραγματικά Δωρεάν; (Ανάλυση Τιμών)
- Πώς να αυξήσετε την επισκεψιμότητα στο WordPress Blog σας (9 εύκολοι τρόποι)
- Πώς να Αυξήσετε το Ποσοστό Συγκατάθεσης για Ειδοποιήσεις Push στο Web (7 Τρόποι)
- Πώς να προσθέσετε ένα πρόσθετο WordPress για ειδοποιήσεις ιστού στον ιστότοπό σας
Συνιστούμε τη χρήση του PushEngage για την αποστολή των ειδοποιήσεων push σας. Το PushEngage είναι το #1 λογισμικό ειδοποιήσεων push στον κόσμο. Έτσι, αν δεν το έχετε κάνει ήδη, ξεκινήστε με το PushEngage σήμερα.


