
Looking for a simple tutorial to add WordPress Open Graph meta tags to your site?
Open Graph is how Facebook handles metadata when you share your post or page on Facebook posts. It’s how Facebook automatically fetches the featured image and meta description just from the URL.
But adding it manually to your site can be a real pain.
For one thing, you’ll have to learn how Open Graph structured data is written. Then, you’d have to insert it into your WordPress theme files. And that’s super risky. You’ll have to edit files that help your entire site run properly. A single line out of place could crash your entire site.
In this article, we’re going to add WordPress Open Graph meta tags the easy way with zero coding involved.
Ας ξεκινήσουμε.
Step #1: Install All in One SEO
All in One SEO is the #1 WordPress SEO plugin in the world. It’s the perfect plugin to add WordPress Open Graph meta tags to your site without any coding.

All in One SEO (AIOSEO) is one of the most acclaimed SEO plugins in the WordPress community. The original version was completely revamped to add a ton of new features and addons. So, if you used AIOSEO in the past you need to check out the plugin once again.
Όχι μόνο το AIOSEO είναι αρκετά ισχυρό για να εφαρμόσει τις τελευταίες βέλτιστες πρακτικές SEO, αλλά λαμβάνετε επίσης προηγμένες επιλογές για την επίλυση συγκεκριμένων προβλημάτων SEO απευθείας από το κουτί. Αυτό περιλαμβάνει:
- Ενότητες Τοπικού SEO για μικρές επιχειρήσεις με τοπικό κοινό
- SEO WooCommerce για ηλεκτρονικά καταστήματα
- Ένας βελτιστοποιητής SEO μέσα στον επεξεργαστή σας στο WordPress
- Έξυπνοι Χάρτες Ιστοτόπου (Smart Sitemaps) για άμεση ευρετηρίαση στις Μηχανές Αναζήτησης
- Ένα plugin Schema για να κατατάσσονται τα περιεχόμενά σας στα Εμπλουτισμένα Αποσπάσματα (Rich Snippets)
And a lot more! For a full list of All in One SEO’s features, check out our review of the plugin.
The first thing you need to do is install and activate the All in One SEO plugin. If you’re not sure how to do that, you should check out this guide on how to install WordPress plugins.
After you download and install the plugin, you get a Setup Wizard:
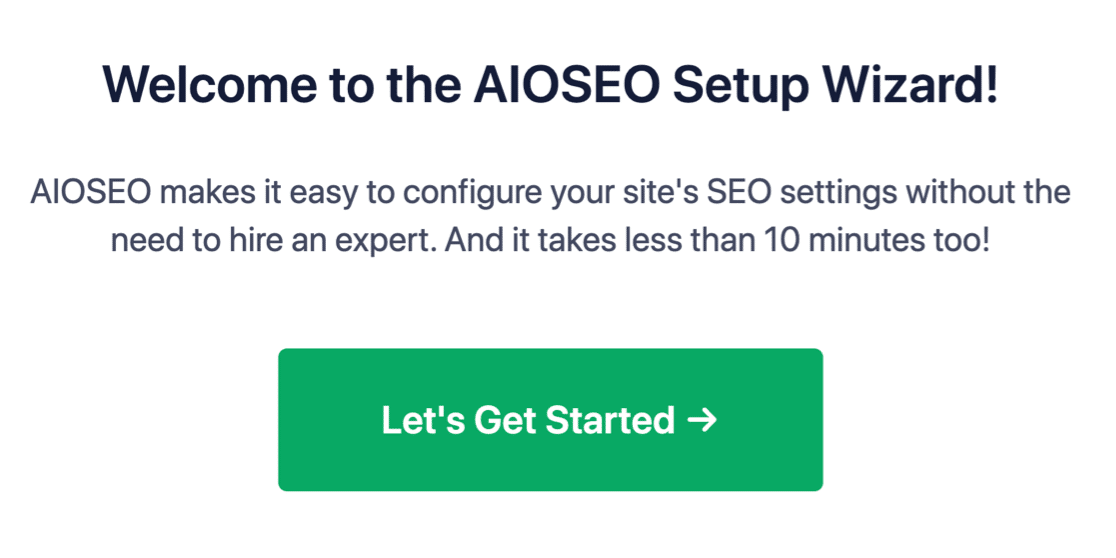
And the setup process will take less than 10 minutes.
But what if you’re migrating from another SEO plugin? Every plugin handles metadata differently. So, do you have to do everything from scratch? Is all your previous effort wasted?
No! If All in One SEO detects another SEO plugin during the Setup Wizard, it’ll offer to copy over the basic settings for you:

At the end of the setup, the Setup Wizard will prompt you to deactivate your old SEO plugin as well. This way, there are no plugin conflicts and errors:
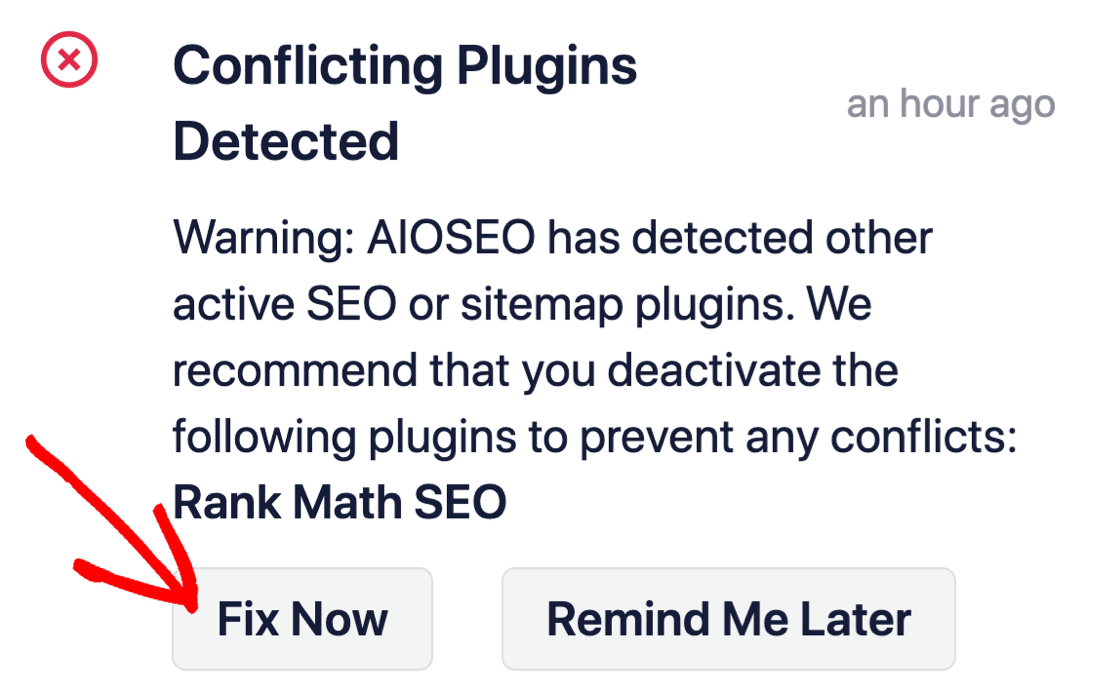
Clicking on Fix Now won’t delete the settings in your old SEO plugin. It just deactivates the plugin to prevent conflicts.
Step #2: Configure Social Media Settings
In your WordPress dashboard, go to All in One SEO » Social Networks » Social Profiles and add your social profiles to the site:
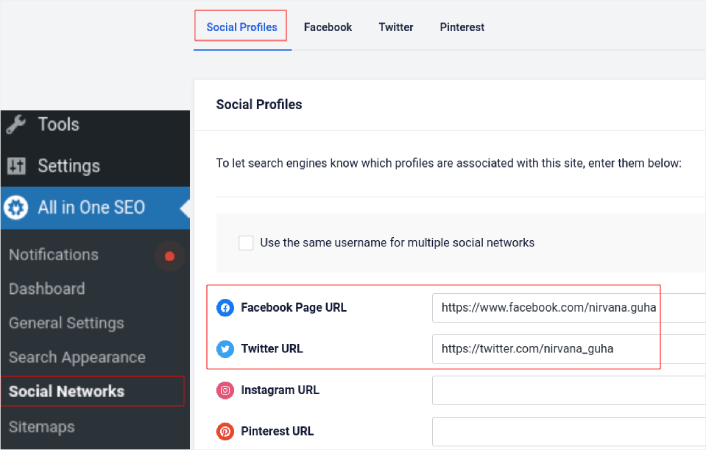
This step ensures that Search Engines such as Google and Bing know what social media profiles are associated with your site. At the same time, this helps you with your social media sharing settings as well. That’s up next.
Step #3: Edit Facebook General Settings
Go to All in One SEO » Social Networks and click on the Facebook tab. Here, you can configure your General Facebook Settings:
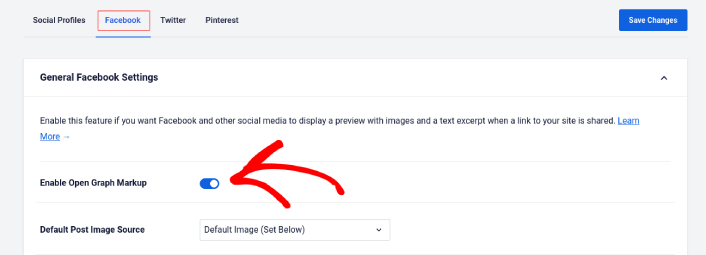
Toggle the Enable Open Graph Markup switch to activate it.
Here, you can set the Default Post Image Source and a Default Post Facebook Image:

We recommend using the Featured Image option as the image source for your posts. But should check out the other options as well:

You can set the default Facebook image to be your logo or anything that represents your brand. Click on the Upload or Select Image button to change the default image. In our example, we’re using a personal brand. So, the default Facebook image is a photo of the author.
Once you’re done, hit the Save button.
And that’s it! You’re done. Once you save the changes, you can try sharing a post on your site to your Facebook page or profile.
What to do After You Add WordPress Open Graph Meta Tags
Αυτό ήταν για αυτό το θέμα, φίλοι!
Next, you should start thinking of multiple ways to engage and convert the traffic you bring in from your social media accounts. A great way to do that is to use push notifications. Push notifications can be a powerful marketing tool to bring in traffic, engagement, and direct sales for your business.
Αν δεν είστε 100% πεπεισμένοι, θα πρέπει να ελέγξετε αυτούς τους πόρους για το πώς να χρησιμοποιήσετε αποτελεσματικά τις ειδοποιήσεις push:
- 7 Έξυπνες Στρατηγικές για την Ενίσχυση της Αφοσίωσης Πελατών
- Είναι Αποτελεσματικές οι Ειδοποιήσεις Push; 7 Στατιστικά + 3 Συμβουλές Ειδικών
- Πώς να Ρυθμίσετε Ειδοποιήσεις Push για Εγκαταλελειμμένα Καλάθια (Εύκολο Οδηγός)
- Πώς να προσθέσετε ένα πρόσθετο WordPress για ειδοποιήσεις ιστού στον ιστότοπό σας
Συνιστούμε τη χρήση του PushEngage για τη δημιουργία των καμπανιών ειδοποιήσεων push. Το PushEngage είναι το #1 λογισμικό ειδοποιήσεων push στον κόσμο. Έτσι, αν δεν το έχετε κάνει ήδη, ξεκινήστε με το PushEngage σήμερα!


