
Looking for a tutorial to create a WordPress multi-step form?
A multi-step form splits up large forms into smaller parts. Multi-step forms reduce the clutter and make it simpler for your visitors to sign up. It’s a great way to increase conversions and improve the overall user experience.
But creating one from scratch is really tiring and if you have to hire a developer to create one, it’s going to be expensive as well.
In this article, we’re going to show you how to create a WordPress multi-step form the easy way without coding.
Ας ξεκινήσουμε.
Step 1: Create a New Form With WPForms
Το πρώτο πράγμα που θα χρειαστεί να κάνετε είναι να εγκαταστήσετε και να ενεργοποιήσετε το WPForms.

Το WPForms είναι το #1 plugin δημιουργίας φορμών WordPress στον κόσμο. Αν δεν είστε σίγουροι πώς να εγκαταστήσετε το WPForms, θα πρέπει να δείτε αυτόν τον οδηγό βήμα προς βήμα για το πώς να εγκαταστήσετε ένα plugin στο WordPress.
Στη συνέχεια, μεταβείτε στον πίνακα ελέγχου του WPForms και πηγαίνετε στο Λήψεις για να λάβετε το plugin σας:
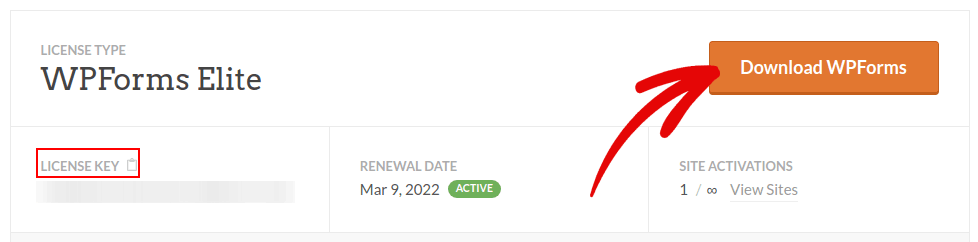
Στη συνέχεια, εγκαταστήστε και ενεργοποιήστε το plugin στον ιστότοπό σας. Και αντιγράψτε το κλειδί άδειας χρήσης σας στην ίδια καρτέλα.
Τέλος, μεταβείτε στον πίνακα ελέγχου του WordPress και πηγαίνετε στο WPForms » Ρυθμίσεις και επικολλήστε το Κλειδί Άδειας Χρήσης σας:
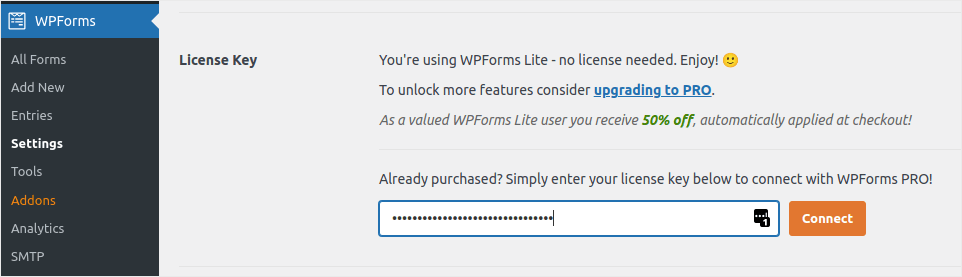
Όταν τελειώσετε, κάντε κλικ στο Σύνδεση.
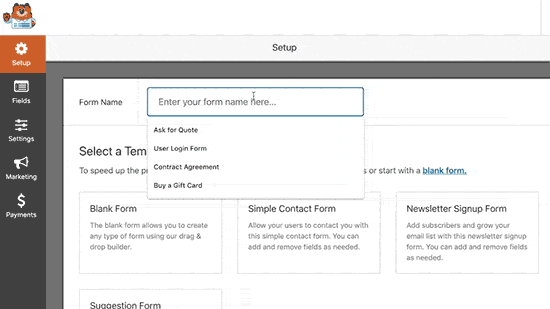
Τώρα που το WPForms είναι εγκατεστημένο και ενεργοποιημένο, είναι ώρα να δημιουργήσετε την πρώτη σας φόρμα. Μεταβείτε στο WPForms » Προσθήκη Νέας:

Αυτό θα ανοίξει τον κατασκευαστή φορμών drag and drop του WPForms.
Για να δημιουργήσετε μια νέα φόρμα, δώστε της ένα όνομα και επιλέξτε το πρότυπο φόρμας σας:
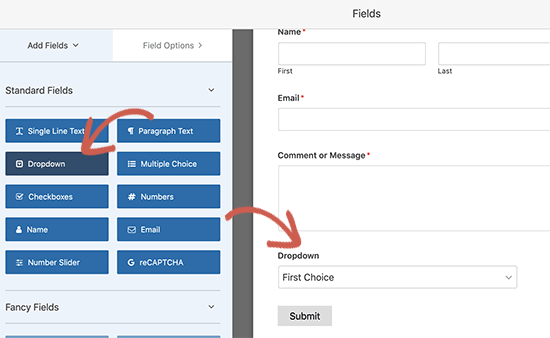
And that’s it! if you want to add or edit the fields in your contact form, you can do so from the sidebar. Darg and drop form fields to add new ones and click on the existing fields to edit them:
Όταν τελειώσετε, πατήστε Αποθήκευση.
Step 2: Insert the Page Break Field Into Your Form
Splitting your form into multiple pages is very simple and easy with WPForms.
Once you’ve added and customized all the form fields on your form, you need to add the Page Break form field to your site to split it into different pages.
To do this, drag the Page Break form field, found under Fancy Fields, from the left-hand panel to the right-hand panel.
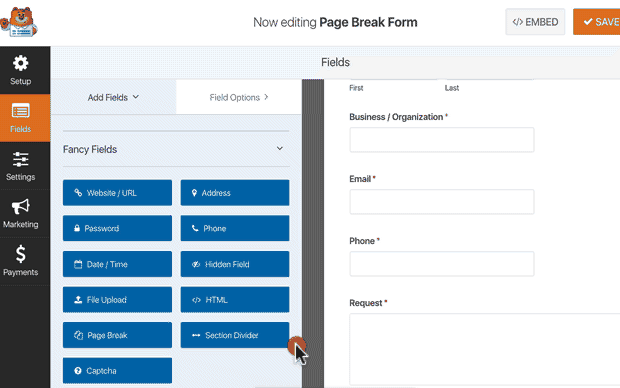
Place the field where you want the form to split. If you want multiple breaks, just use multiple page break modules.
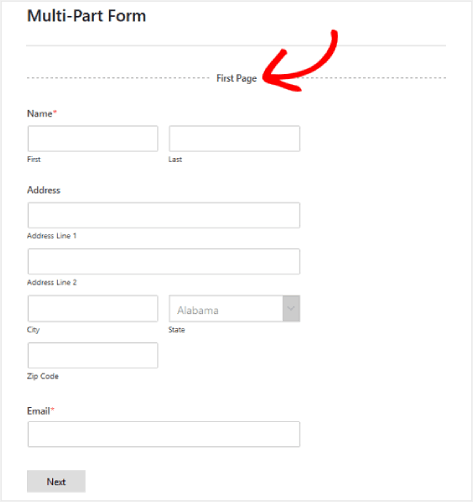
Step 3: Customize the Multi-Page Form Progress Bar
Most of your work in designing the form is done at this point. But for any multi-page form, we recommend using a progress bar to let your visitors know how far along they are in the signup process. You can go above and beyond to give your pages titles as well.
To customize the progress bar and page title of the first page of your multi-step form, click on the First Page break section.
In the sidebar, you can set the type of progress indicator as either Circles or Connectors. You can also set the title for the page.
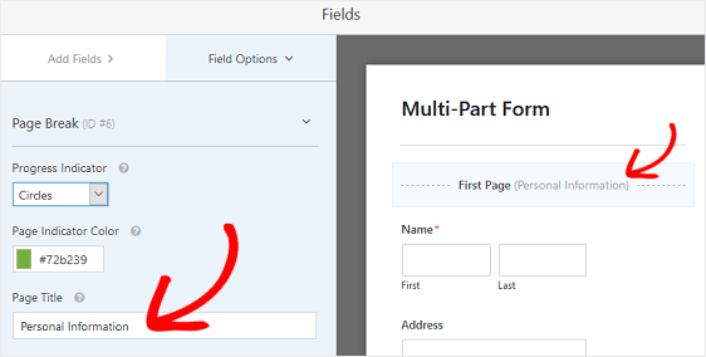
The epic thing is that you can also set a custom Page Indicator Color. When you’re happy, you can also customize the other page breaks in the exact same way.
You can also toggle on the feature that lets you show site visitors a Previous page button. This way they can return to the previous page of your form if they need to.
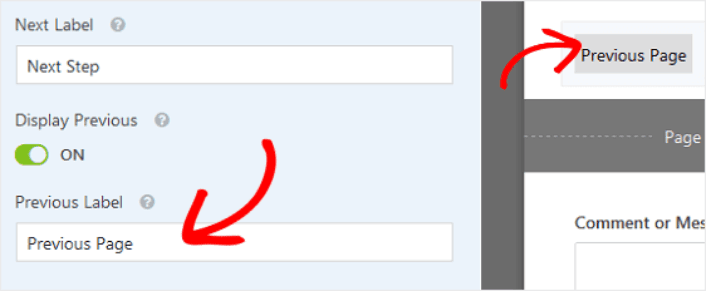
When you’re done, just hit the Save button.
Step 4: Configure Your Multi-Step Form Settings
Στη συνέχεια, θα θέλετε να ρυθμίσετε τις ειδοποιήσεις και τις επιβεβαιώσεις.
Οι ειδοποιήσεις είναι email που λαμβάνετε όταν κάποιος συμπληρώνει τη φόρμα. Οι επιβεβαιώσεις προορίζονται να ειδοποιήσουν τον χρήστη ότι έχει συμπληρώσει επιτυχώς τη φόρμα. Συνήθως, αυτό είναι ένα μήνυμα "Ευχαριστούμε", αλλά μπορείτε επίσης να ανακατευθύνετε τους χρήστες σας σε μια ειδική σελίδα.
Μεταβείτε στις Ρυθμίσεις » Επιβεβαιώσεις για να διαμορφώσετε τις ρυθμίσεις επιβεβαίωσης:

Και στη συνέχεια στο ίδιο μενού, μεταβείτε στις Ειδοποιήσεις για να διαμορφώσετε τα μηνύματα ειδοποίησης:

Εξ ορισμού, οι ειδοποιήσεις αποστέλλονται στο email διαχειριστή του WordPress. Έτσι, αν θέλετε τα email να αποστέλλονται κάπου αλλού, όπως στο email του Επικεφαλής Πωλήσεών σας, μπορείτε να το κάνετε ακριβώς εδώ.
Step 5: Add Your Multi-Step Form to Your WordPress Website
You’re done configuring your WordPress contact form at this point. So, let’s go ahead and add it to a page. There are 3 basic methods to add a WPForms contact form to your WordPress site. We’re going to take a look at each.
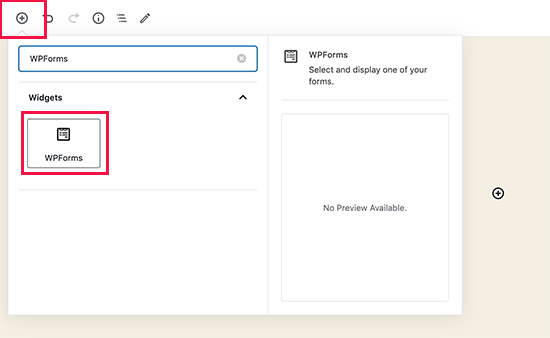
Method#1: Add the Form Using the Block Editor
Head over to whichever page you want to add your contact form and add a new WPForms block:
Then, select your newly created form using the dropdown menu:
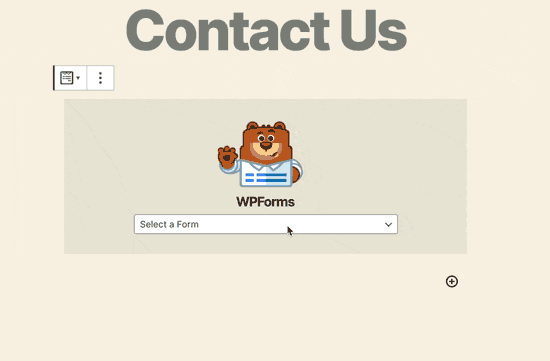
And you should see your contact form get inserted automatically into your page.
Just hit Save and Publish to see your WordPress form in action.
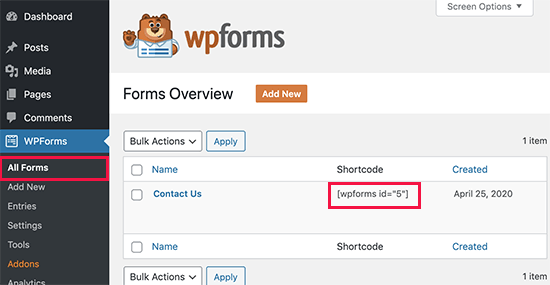
Method #2: Add Your Contact Form Using WPForms Shortcodes
WPForms also generates a shortcode for each WordPress contact form. You can copy the contact form shortcode by visiting WPForms » All Forms:
And then, paste the shortcode into any post or page you want. It’s that simple.
If you’re new to shortcodes, you should check out this article on how to add a shortcode on WordPress sites.
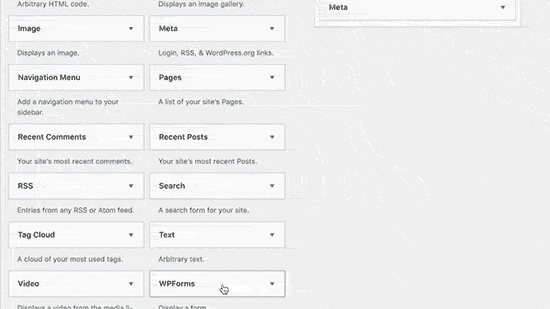
Method #3: Add Your Contact Form to the Sidebars
The sidebar is one of the most underused features in most WordPress sites. We highly recommend inserting a contact form in your site’s sidebars. Head over to Appearance » Widgets in your WordPress dashboard and add the WPForms widget to your sidebar:
Και τελειώσατε!
How to Promote Your WordPress Multi-Step Form
Αυτό ήταν για αυτό το θέμα, φίλοι!
By now, you’ve created a WordPress multi-step form. Next, you should set up form abandonment tracking to reduce your form abandonment rates.
After that, all that’s left is generating traffic to your site so that your contact forms can get to work. A simple way to do that is to start using push notifications. Sending push notifications is a great way to generate repeat traffic for your site. If that’s something you’re interested in, you should check out these articles as well:
- Κόστος Ειδοποιήσεων Push: Είναι Πραγματικά Δωρεάν; (Ανάλυση Τιμών)
- Πώς να αυξήσετε την επισκεψιμότητα στο WordPress Blog σας (9 εύκολοι τρόποι)
- Πώς να Αυξήσετε το Ποσοστό Συγκατάθεσης για Ειδοποιήσεις Push στο Web (7 Τρόποι)
- Πώς να προσθέσετε ένα πρόσθετο WordPress για ειδοποιήσεις ιστού στον ιστότοπό σας
We recommend using PushEngage to send your push notifications. PushEngage is the #1 push notification software in the world. So, if you haven’t already, get started with PushEngage today.


