
Looking for a way to create a landing page with a form for your WordPress website?
A WordPress landing page with a contact form is practically all you need to convert your web traffic into leads and sales. But how do you do it? Do you need to create a landing page in HTML? Or a contact form in HTML? Or both?
How do you launch a contact form landing page quickly without having to hire a developer? And how do you make sure that it converts?
The good news is that you don’t need any coding at all to create a contact form landing page in WordPress. All you need are a couple of plugins and you can get launched in less than 10 minutes.
In this article, we’ll show you how to create a landing page with a form in WordPress step by step.
Ακούγεται καλό; Ας βουτήξουμε.
What’s a Contact Form Landing Page?
A landing page is a webpage on your site that is specifically designed to sell your product or service. You can also use landing pages to collect leads. A contact form landing page is a simple landing page with just a contact form and no distractions so that you can focus on converting your web traffic.
In short: a landing page is a conversion machine on your site.

The way it works is also simple. You create marketing or advertising campaigns that bring traffic straight to your landing page. Then, the landing page converts that traffic into leads or paying customers. You can collect emails or push notification subscribers for remarketing. Or, you can create an order form to fill orders on autopilot.
Since the goal of a landing page is to convert more of your website traffic into customers, it has to look attractive and engaging. Most importantly, you’ll have to properly design various call-to-action elements such as:
- The buy button
- Signup forms
- Play media button
Και πολλά άλλα!
How to Create a WordPress Landing Page with a Form
In the next few sections, we’re going to show you step-by-step how to create a landing page in WordPress. As we said, creating a landing page using your theme isn’t a good solution.
That’s why we recommend using one of the top WordPress landing page plugins. Even if you’re not a developer, you can create a high-converting landing page in WordPress and boost your website traffic and sales.
Our recommendation is to use SeedProd.

SeedProd is the best WordPress landing page builder in the market. In this article, we’re going to use SeedProd to create your first landing page. If you’re not 100% convinced that this is the right landing page builder for you, you should go check out our review of SeedProd.
And then, get started!
Step #1: Install the SeedProd Plugin on Your Site
First, you’ll need to visit the SeedProd website and purchase the plugin. Then, you can download the plugin file to your computer. Then, copy the plugin license key from your SeedProd dashboard.
Next, you’ll have to log into your WordPress dashboard and install the plugin. If you need detailed instructions, check out this step-by-step guide to installing a WordPress plugin. Head over to the SeedProd plugin welcome screen on WordPress and verify your license key:

After your account is verified, you’re ready to create a landing page.
Step #2: Create a Landing Page with SeedProd
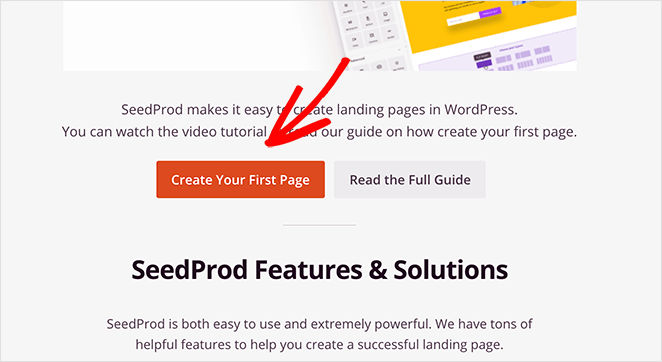
In the SeedProd welcome screen, scroll further down and click on Create Your First Page button:
Then, you’ll see 5 different types of landing pages that you can create:

Using SeedProd’s templates, you can quickly launch complicated pages such as:
- Coming Soon and Maintenace Mode Pages
- Login Pages
- 404 Pages
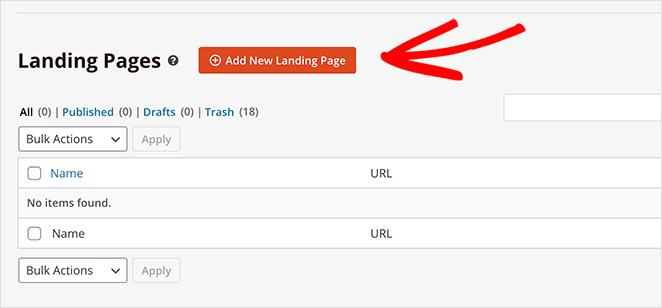
And if you scroll down a little further, you can launch a custom landing page from pre-built templates. Click on Add New Landing Page:
Then, choose a landing page template from the pre-built landing pages listed in SeedProd’s builder:
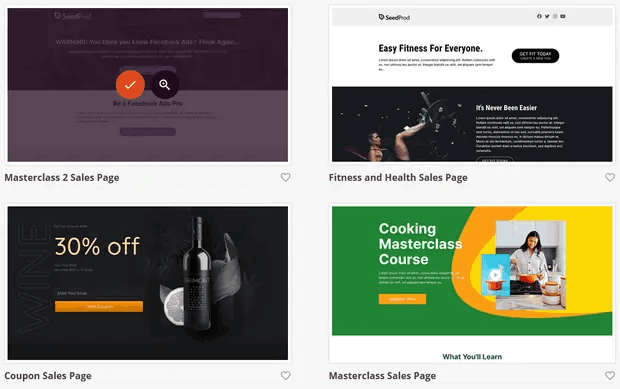
Take your time and select the right template for you. To select a template, just click the checkmark icon on the template.
Remember, the template is just a starting point. In the next section, we’ll see how to customize your landing page easily using SeedProd’s drag-and-drop builder.
Step #3: Customize the Landing Page Template
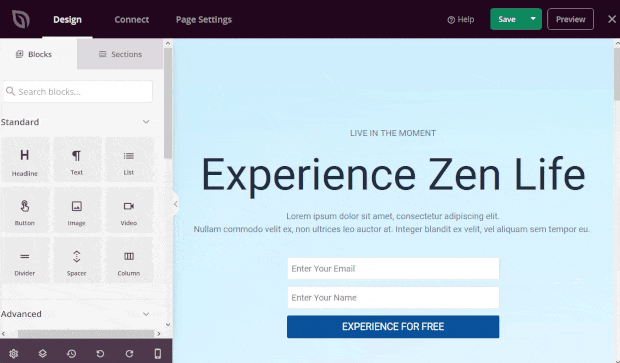
After choosing your landing page template, you’ll be redirected to SeedProd’s visual drag and drop builder where you can customize your landing page. The left hand side of the editor is a list of the design elements that you can use to customize your landing page:
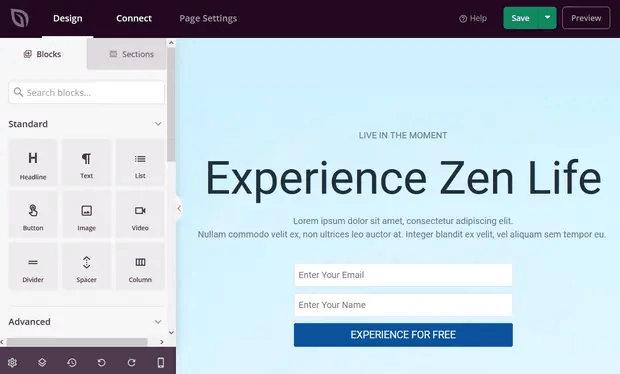
And you can also click on any of the design elements in the live preview to edit them directly on the preview:
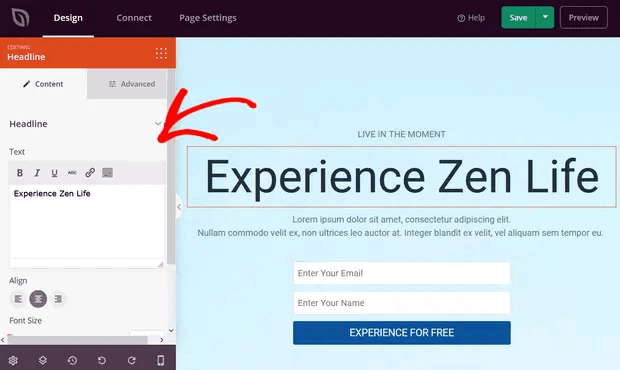
You can change the text, its style, color, alignment, and layout to fit your product or overall brand. Additionally, you can easily add new blocks such as buttons, optin forms, contact forms, social profiles, and more to your landing page template.
For instance, you can drag and drop a countdown timer to increase urgency:
When you’re done, click on Save.
Step #4: Add a WordPress Contact Form
Next, you need to do is choose a WordPress contact form plugin.
Of course, a quick Google search will show you that there are way too many contact form plugins to choose from. So, we went ahead and found the best plugin for you.
We recommend using WPForms to create contact forms on your WordPress site.
WPForms is the #1 WordPress form builder plugin with over 3 million users. You get a drag and drop form builder, which means that you can create WordPress forms with incredible features in a matter of minutes.
You can also use WPForms Lite, which is the free version of WPForms. So, if you’re looking for a free form builder to get started with, you can use the Lite version. Later, when you need more powerful features for your forms, you can upgrade to the paid plans. Check out our WPForms review for a detailed look at the features.
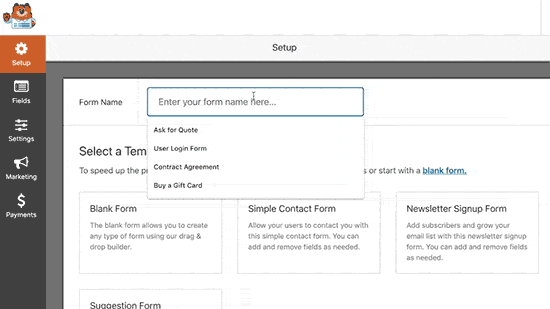
Install and activate the plugin. Once that’s done, it’s time to create your first form. Head over to WPForms » Add New:

Αυτό θα ανοίξει τον κατασκευαστή φορμών drag and drop του WPForms.
Για να δημιουργήσετε μια νέα φόρμα, δώστε της ένα όνομα και επιλέξτε το πρότυπο φόρμας σας:
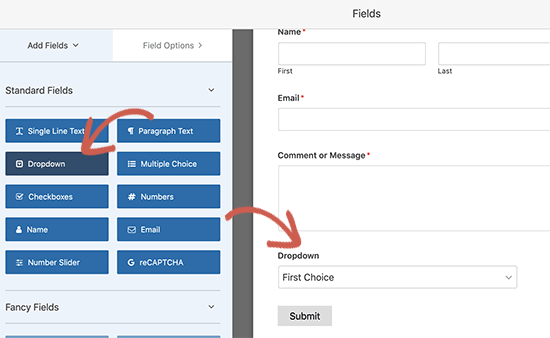
And that’s it! if you want to add or edit the fields in your contact form, you can do so from the sidebar. Darg and drop form fields to add new ones and click on the existing fields to edit them:
When you’re done, hit Save. You can then use the shortcode for the form and embed it on your landing page.
If you need a more detailed guide, check out this article on how to create a WordPress contact form.
Step #5: Connect Your Email Marketing Service
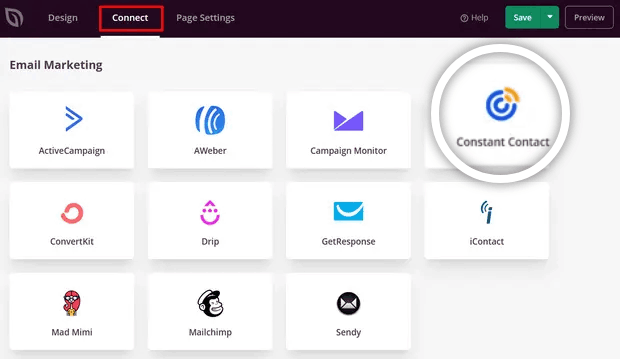
A lot of small businesses collect leads from their landing page instead of selling something. If you’re creating a landing page to collect leads on your site, then you’ll want to create an optin. Then, connect your optin to an email service provider such as Constant Contact.
To do this, go to the Connect tab on the SeedProd builder and select your email service provider from the list:
Next, click Connect New Account:
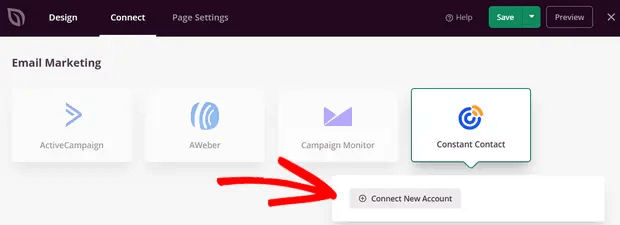
And follow the instructions to set up your email service to collect leads.
Step #6: Add a Click to Subscribe Button to Your Landing Page
You can also add a click to subscribe button to collect push notification subscribers. Push notifications are a great way to increase your repeat traffic, get more engagement and even sell official merch if you have some.
In SeedProd, just drag and drop the Custom HTML module from the sidebar.
We’ve put the subscribe button directly underneath the email signup form in the first fold.

But you can insert the button anywhere you like.
For this part, you need some experience with HTML and CSS. Or, you can copy this code and paste it into your Custom HTML block:
<button onclick="subscribeOnClickButton()" style="border: none; padding-left: 5%; padding-right:5%; text-align: center; display: inline-block; color: blue;">Get Updates via Push Notifications</button>That’s a standard button in HTML with very little styling. The only fancy bit is the onclick function in the code. It basically means that your visitors can click on the button to subscribe to something. Now, we need to give the button some extra code to allow your visitors to subscribe to push notifications.
Μεταβείτε στην αρχική σελίδα του PushEngage και κάντε κλικ στο κουμπί Έναρξη:

Στη συνέχεια, θα θέλετε να επιλέξετε το δωρεάν πρόγραμμα για να δοκιμάσετε το PushEngage ή να επιλέξετε ένα επί πληρωμή πρόγραμμα αν είστε σοβαροί σχετικά με την ανάπτυξη της επιχείρησής σας. Τα επί πληρωμή προγράμματα έρχονται με περισσότερες επιλογές καμπάνιας και τη δυνατότητα δημιουργίας ακόμη μεγαλύτερων λιστών συνδρομητών.
Στον πίνακα ελέγχου του PushEngage, μεταβείτε στις Ρυθμίσεις Ιστότοπου » Λεπτομέρειες Ιστότοπου και κάντε κλικ στο κουμπί Κάντε κλικ εδώ για οδηγίες εγκατάστασης. Κάτω από το πεδίο Οποιοσδήποτε Ιστότοπος, θα λάβετε τον κωδικό εγκατάστασής σας:

ΠΡΟΕΙΔΟΠΟΙΗΣΗ: Πρέπει να αντιγράψετε τον κωδικό που λαμβάνετε από τον πίνακα ελέγχου σας. Ο κωδικός είναι μοναδικός για κάθε χρήστη του PushEngage. Δεν θα μπορείτε να αντιγράψετε τον κωδικό στην εικόνα και να συλλέξετε συνδρομητές ειδοποιήσεων push.
Μόλις έχετε τον κωδικό στον πίνακα ελέγχου του PushEngage, προσθέστε αυτό το απόσπασμα στον κώδικά σας:
<script> window._peq = window._peq || [];</script> <script>
function subscribeOnClickButton(){
window._peq.push(['subscribe',{}.pe,function(res){
if(res.statuscode==1)
{
// Code to return response
console.log(res);
}
}]);
}
</script>
Ο τελικός σας κώδικας θα πρέπει να μοιάζει κάπως έτσι:
<script src="https://clientcdn.pushengage.com/core/02a6e92667ae2279fcba8932356c1d93.js" async></script>
<script> window._peq = window._peq || [];</script> <script>
function subscribeOnClickButton(){
window._peq.push(['subscribe',{}.pe,function(res){
if(res.statuscode==1)
{
// Code to return response
console.log(res);
}
}]);
}
</script>
You’ll want to add this code to the HTML block in your landing page after the code for the button. It should look something like this:

Feel free to customize the styles for the button any way you please. When you’re done customizing your landing page, go ahead and hit the Save button.
Step #7: Publish Your Landing Page
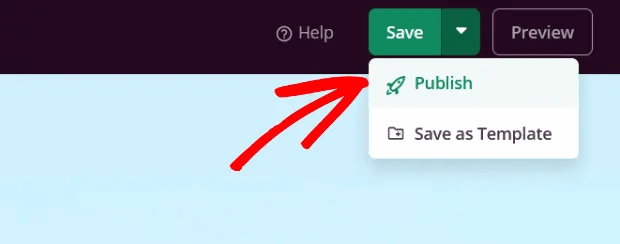
When you’re done customizing your page, click on Save. Then, click on the dropdown arrow next to the Save button and hit Publish:
You should see a success message on publishing your page that looks something like this:
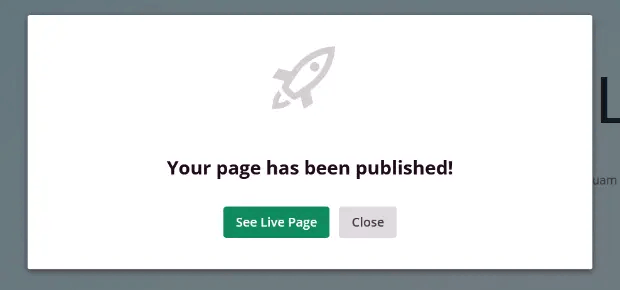
You can click on the See Live Page button to view your landing page. And you’re all done!
What to do After You Create a Landing Page with a Form
Αυτό ήταν για αυτό το θέμα, φίλοι!
Now that your landing page with a contact form is live, the only challenge you have left is to send traffic to your landing page.
Και αν ψάχνετε για έναν προσιτό τρόπο να αυξήσετε την επισκεψιμότητά σας, σας προτείνουμε να χρησιμοποιήσετε ειδοποιήσεις push. Οι ειδοποιήσεις push μπορούν να σας βοηθήσουν να προσελκύσετε περισσότερη επαναλαμβανόμενη επισκεψιμότητα και αλληλεπίδραση με τον ιστότοπο. Μπορείτε επίσης να δημιουργήσετε αυτοματοποιημένες καμπάνιες ειδοποιήσεων push που παράγουν πωλήσεις.
Δεν πειστήκατε; Ελέγξτε αυτούς τους πόρους:
- 7 Έξυπνες Στρατηγικές για την Ενίσχυση της Αφοσίωσης Πελατών
- Είναι Αποτελεσματικές οι Ειδοποιήσεις Push; 7 Στατιστικά + 3 Συμβουλές Ειδικών
- Πώς να Ρυθμίσετε Ειδοποιήσεις Push για Εγκαταλελειμμένα Καλάθια (Εύκολο Οδηγός)
- Πώς να προσθέσετε ένα πρόσθετο WordPress για ειδοποιήσεις ιστού στον ιστότοπό σας
Συνιστούμε τη χρήση του PushEngage για τη δημιουργία των καμπανιών ειδοποιήσεων push. Το PushEngage είναι το #1 λογισμικό ειδοποιήσεων push στον κόσμο. Έτσι, αν δεν το έχετε κάνει ήδη, ξεκινήστε με το PushEngage σήμερα!


