
Looking for a resource on how to sell online yoga classes?
Έχετε ήδη περάσει από πολλά πράγματα, όπως η επιλογή της σωστής πλατφόρμας, η δημιουργία της ιστοσελίδας eCommerce, η δημιουργία προϊόντων προς πώληση και η εργασία στο μοντέλο τιμολόγησής σας. Αλλά μετά συνειδητοποιείτε ακριβώς πόσοι διαφορετικοί τρόποι υπάρχουν για να πουλήσετε ψηφιακά προϊόντα στο διαδίκτυο.
Υπάρχει μια σειρά από plugins που σας βοηθούν να πουλήσετε ψηφιακά προϊόντα με λήψη στο WordPress.
Αλλά πώς επιλέγετε το σωστό plugin για να ξεκινήσετε τις πωλήσεις; Είναι το plugin δωρεάν; Παίρνετε όλες τις λειτουργίες που χρειάζεστε ή πρέπει να αγοράσετε άλλα plugins αργότερα για να ξεκινήσετε πραγματικά τις πωλήσεις;
Το πιο μπερδεμένο κομμάτι είναι...
Το plugin που εξετάζετε προορίζεται καν για ψηφιακά προϊόντα με λήψη; Ή είναι ένα γενικό plugin καταστήματος που προορίζεται κυρίως για πώληση φυσικών αγαθών και θα μείνετε κολλημένοι με έναν τόνο περιττών ρυθμίσεων που δεν χρειάζεστε καν;
Don’t worry. In this article, we’re going to show you step by step how to make money selling documents on WordPress. The best part? You can complete the setup in 10 minutes or less!
Ας ξεκινήσουμε.
How to Sell Online Yoga Classes from Scratch
Now that we understand why you should sell yoga classes online, it’s time to show you how to get started. Don’t worry if you’ve never done this before. This article is meant for complete beginners. All you have to do is follow along.
- Step #1: How to Set Up Your Hosting Server
- Step #2: How to Install WordPress on Your Server
- Step #3: How to Create a Website Theme
- Step #4: Setting Up Easy Digital Downloads
- Step #5: How to Sell Online Yoga Classes as Digital Products
- Step #6: How to Customize Your Website
- Step #7: How to Integrate Your Email Marketing Service with Your Site
- Step #8: Add a Click to Subscribe Button to Your Landing Page
- Step #9: How to Publish Your Site
- How to Sell Online Yoga Classes Even Faster
Ας ξεκινήσουμε.
Step #1: How to Set Up Your Hosting Server
Before you create a website, you need to get:
- A domain name
- Web hosting
- An SSL certificate
You might run into videos and articles online that talk about building a free website. Believe us when we say it, there’s no such thing as a truly free website. Most free hosting sites offer extremely bad hosting, no technical support, and slap their branding on your website.
If you’re testing themes for web development or looking to experiment with a web page and its design, that’s fine. But for any self-respecting business owner, “free websites” are a horrible way to go.
Select a Hosting Service
Most modern hosting services will offer a custom domain name, web hosting, and an SSL certificate. But we recommend using one of these three hosting providers to start building:
All three hosting services are completely optimized for WordPress. And you get a free domain name and SSL certificate when you buy website hosting. For this article, we will show you how to get started using Bluehost. But it’s a somewhat similar process for our other recommended hosting services.
NOTE: These are all paid hosting services. You can create a website for free using free hosting. But if you’re serious about building a business, we recommend using hosting services that take your business seriously.
Sign Up for WordPress Hosting
Head over to Bluehost and click on Get Started:
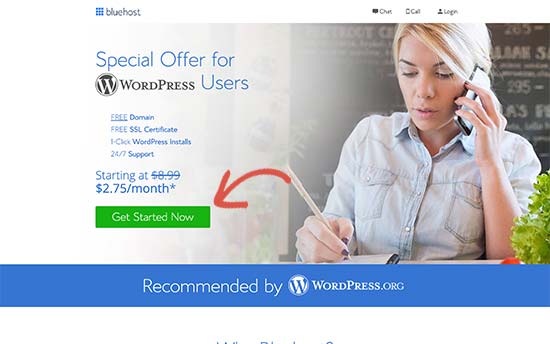
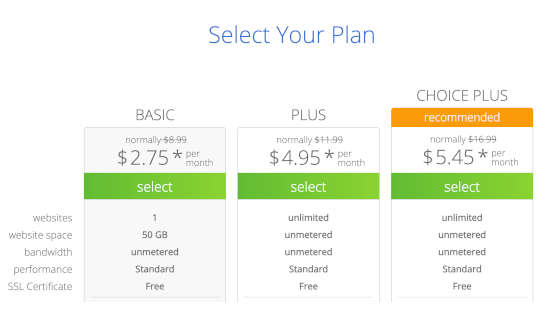
Then, choose your hosting plan on the next screen. We recommend getting the Plus plan if you’re looking to scale the business. But if you’re just looking to get started, even the Basic plan should be fine for you.
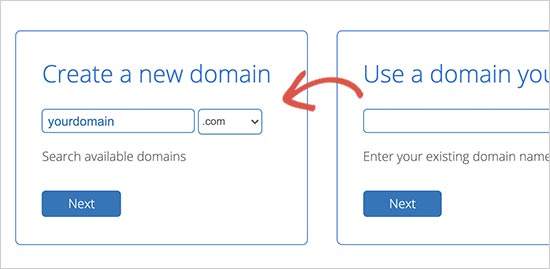
After that, you’ll choose the domain name for your website.
Finally, Bluehost will confirm your order and try to upsell you some added services such as Domain Privacy Protection. It’s entirely up to you whether you want to get this extra stuff. We don’t recommend it for small businesses, but if you think that the upsells are worth it, go ahead and add them to your cart.

After that, you complete the checkout process.
Step #2: How to Install WordPress on Your Server
Once you’re done with the checkout, Bluehost will send you an email to log in to your cPanel account. The cPanel is your web hosting control panel. From there, you can manage your email inboxes and FTP accounts, get support from Bluehost, and more.
When you log in to cPanel, you’ll see that Bluehost has already installed WordPress for you. WordPress is a website builder and content management system (CMS) to create and publish content on your website. It’s open-source software that anyone can use to make any kind of website imaginable.
Why Choose WordPress?
It started out as a blogging platform in 2003 but soon transformed into a CMS and later a full-fledged website building platform. Today it powers more than 38% of all websites on the internet.
If you want to build an eCommerce website, then you have a choice between Wix, Shopify, Squarespace and WooCommerce. These are the most popular apps to create a new website for an online store.
We recommend using WooCommerce over other platforms as it’s the leading eCommerce website software in the world and unlike most other services, it’s free. The cool part is that WooCommerce acts like a WordPress plugin and is based on WordPress. So, even if you want to build an eCommerce store, we recommend getting started with WordPress.
Log In to Your WordPress Site
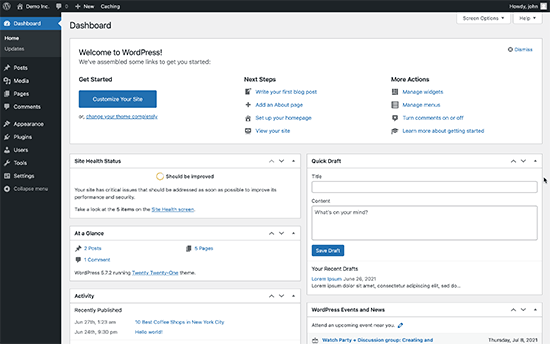
To get into your WordPress dashboard, all you have to do is click on the Log in to WordPress button:

Your WordPress dashboard will look something like this:
NOTE: The WordPress installation process is different for different hosting services. You may have to manually install WordPress if you’re not using Bluehost, depending on your hosting service. Mostly, you’ll need to locate a software installer inside your cPanel called Softaculous. Softaculous is a setup wizard that will help you install WordPress on your server.
Configure Your WordPress Settings
When you first log in to your WordPress dashboard, you’ll want to take care of a few small details before launching your product.
Head over to Settings » General to set the website title and description tags:
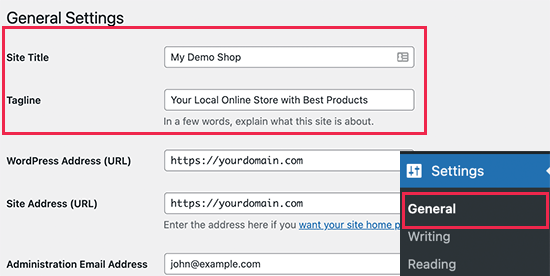
Then, change your WordPress Address and Site Address to their HTTPS versions to use SSL on your site:
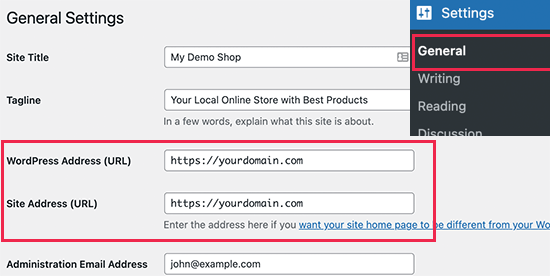
When you’re done, hit the Save Changes button at the bottom.
Step #3: How to Create a Website Theme
Before you can dive into building a lead generating machine, you need to design your website. The traditional way is to hire a designer to design a website with an amazing user experience for you.
But you can skip this step altogether and use a WordPress theme instead. Most WordPress themes come with design templates that you can use straight away and customize according to your need.
What is a Theme?
A WordPress theme allows you to create pages and posts on your site with zero coding. WordPress themes are template files written in PHP, HTML, CSS, and JavaScript. Each file works together to create the design and functionality of your WordPress site.
A typical WordPress theme will include some, if not all, of the following theme files:
- footer.php
- header.php
- index.php
- page.php
- sidebar.php
- archive.php
WordPress themes also include a functions.php file and style.css file.
If you’re not sure what any of this means, don’t worry. You don’t need to be a coding expert to install and use a WordPress theme.
Selecting a WordPress Theme
There are tons of free and paid WordPress themes that can help you create a website easily. We recommend using a theme builder such as SeedProd.

SeedProd is the #1 drag-and-drop WordPress website builder.
You get a drag-and-drop landing page builder that’s packed with options to build product sites and landing pages. Unlike WordPress website builders, you can customize every inch of your landing page including navigation menus, footers, fonts, and styles. SeedProd also works with any WordPress theme and creates mobile-friendly landing pages.
With SeedProd, you get pre-built website templates for high-converting landing pages that you can publish instantly. This includes templates for:
- Σελίδες πωλήσεων
- Σελίδες "Έρχονται Σύντομα"
- Σελίδες 404
- Σελίδες FAQ
- Σελίδες συντήρησης
- Σελίδες προορισμού εφαρμογών
- Σελίδες σύνδεσης
- Σελίδες ευχαριστίας
- Σελίδες webinar
- Σελίδες βίντεο
And lots more! You can even create your own theme using the SeedProd Theme Builder. The best part is that any website you build with SeedProd looks just as good on a mobile device. Check out the full list of features in our SeedProd review.
Install and Activate SeedProd
Go ahead and install and activate the SeedProd plugin.

If you’re not sure how to do that, check out this article on how to install a WordPress plugin.
Create a WordPress Theme Without Coding
Then, in your WordPress dashboard, head over to SeedProd » Theme Builder:
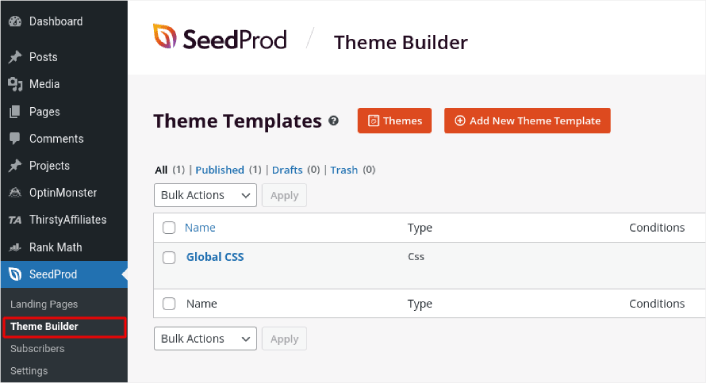
This is where you can create all the individual parts that make up your theme, including:
- Header
- Υποσέλιδο
- Single Post
- Single Page
- Archive (Blog Page)
- Home Page
- Sidebar
You can create each of these theme parts individually by clicking the Add New Theme Template button. And then, you can edit each of these elements using a drag-and-drop visual builder.
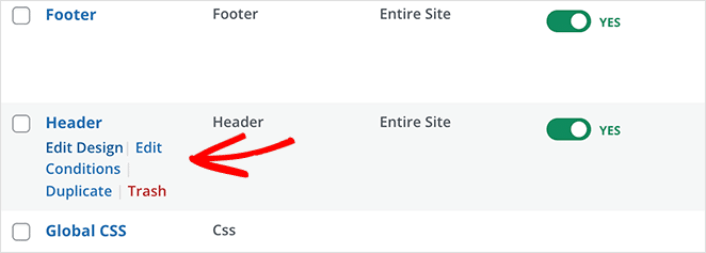
Or, you can use one of the many fully designed themes in SeedProd by clicking on the Themes button. Just choose any theme that matches your business closely to get started:
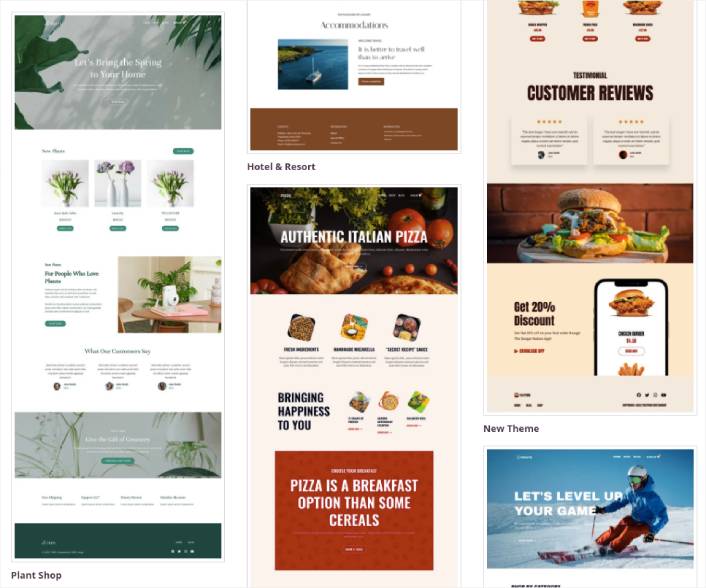
It doesn’t have to be an exact match. You can even select one based on the design. You can edit everything about these themes including fonts, the web design, and the overall user experience. But you can also check for a template for yoga classes.
Step #4: Setting Up Easy Digital Downloads
Το πιο δημοφιλές plugin eCommerce στο WordPress είναι το WooCommerce. Χωρίς αμφιβολία, αν πουλάτε φυσικά αγαθά, θα πρέπει να χρησιμοποιήσετε το WooCommerce. Αλλά εσείς δεν πουλάτε φυσικά αγαθά.
Αυτό το άρθρο αφορά το πώς να πουλήσετε ψηφιακά αγαθά στο WordPress. Για ψηφιακά προϊόντα, δεν υπάρχει καλύτερο plugin eCommerce από το Easy Digital Downloads.
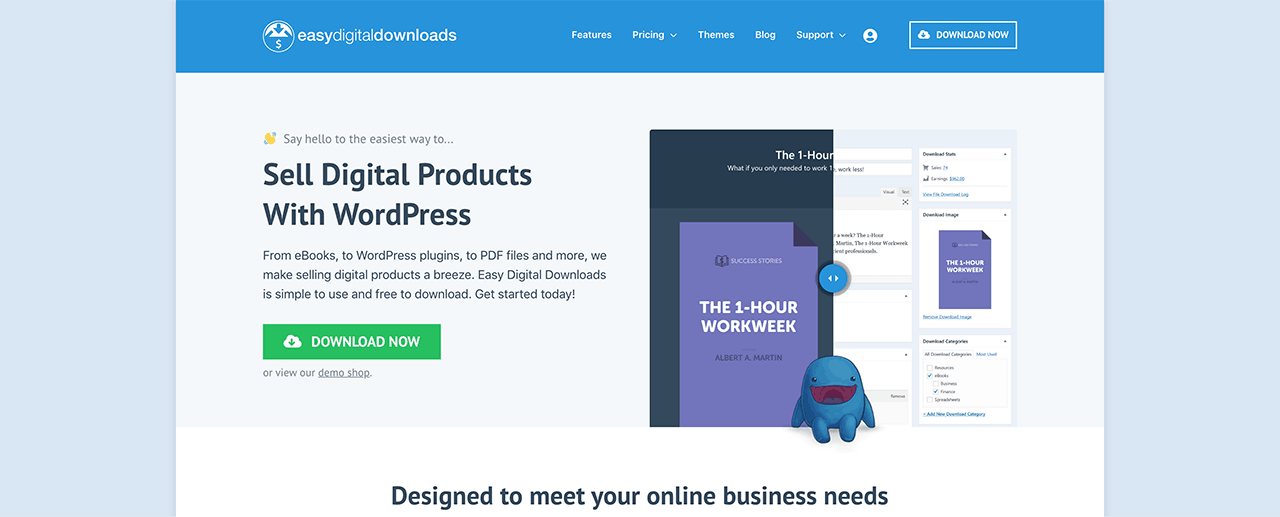
Το Easy Digital Downloads εστιάζει αποκλειστικά στην πώληση ψηφιακών προϊόντων. Έτσι, δεν χρειάζεται να ασχοληθείτε με περιττές επιλογές και διεπαφές χρήστη που έχετε στο WooCommerce. Είναι εξαιρετικά εύκολο να δημιουργήσετε ένα online κατάστημα χρησιμοποιώντας το Easy Digital Downloads και μπορείτε να χρησιμοποιήσετε το plugin για να πουλήσετε οποιοδήποτε ψηφιακό προϊόν, συμπεριλαμβανομένων:
- Online classes and courses
- Λογισμικό
- eBooks και PDF
- Έγγραφα
- Βίντεο
- Αρχεία ήχου και μουσικής
- Φωτογραφία, γραφιστικές εργασίες και ψηφιακή τέχνη
Και πρακτικά οποιοδήποτε άλλο είδος αρχείου πολυμέσων κάτω από τον ήλιο. Παίρνετε επίσης έναν τόνο δροσερών λειτουργιών, όπως:
- Πολλαπλές ενσωματώσεις πύλης πληρωμών
- Ένας δημιουργός αδειών λογισμικού για μοντέλα αδειοδότησης όπως plugins και παιχνίδια
- Επαναλαμβανόμενες πληρωμές για επιχειρήσεις με μοντέλο συνδρομής
- Πλατφόρμες πολλαπλών πωλητών για ιστοσελίδες αγοράς
- Ενσωματώσεις μάρκετινγκ μέσω email για ταχύτερη ανάπτυξη
- Προσαρμοσμένα παραδοτέα για ελεύθερους επαγγελματίες
- Προμήθειες για συνεργάτες και πωλητές αγοράς
- Κριτικές για τα προϊόντα σας
- Προσαρμοσμένο πορτοφόλι για τους πελάτες σας
- Πίνακες άμεσης σύγκρισης προϊόντων
- Προθήκες προϊόντων
Και πολλά άλλα. Μπορείτε να δείτε την πλήρη λίστα των λειτουργιών τους και πόσο εύκολο είναι να χρησιμοποιήσετε αυτές τις λειτουργίες στην κριτική μας για το Easy Digital Downloads.
Τώρα που γνωρίζουμε λίγα πράγματα για το γιατί θα θέλατε να χρησιμοποιήσετε το Easy Digital Downloads, ήρθε η ώρα να δούμε πώς να ρυθμίσετε το plugin. Πρώτα, προχωρήστε και εγκαταστήστε το plugin. Αν δεν είστε σίγουροι πώς να το κάνετε αυτό, διαβάστε αυτό το άρθρο σχετικά με το πώς να εγκαταστήσετε plugins WordPress.
Στη συνέχεια, μεταβείτε στον πίνακα ελέγχου του Easy Digital Downloads και πηγαίνετε στα Κλειδιά Άδειας Χρήσης και κάντε κλικ στο Διαχείριση Ιστοτόπων:
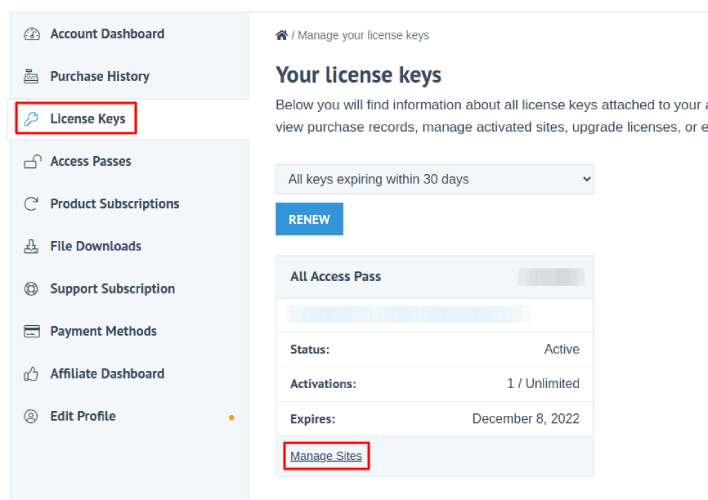
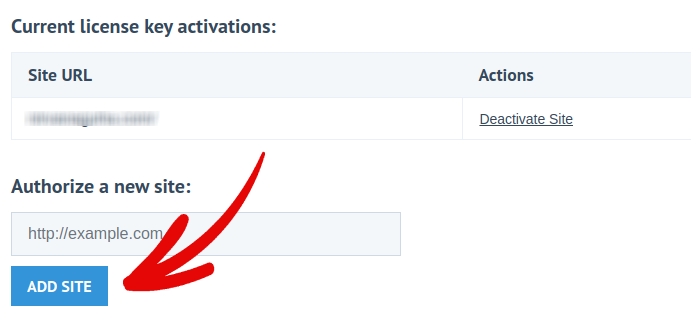
Και προσθέστε τον ιστότοπό σας στον πίνακα ελέγχου:
Μετά από αυτό, το μόνο που έχετε να κάνετε είναι να ρυθμίσετε τον επεξεργαστή πληρωμών σας. Επιστρέψτε στον πίνακα ελέγχου του WordPress. Θα πρέπει να δείτε μια νέα ενότητα στον πίνακα ελέγχου του WordPress που ονομάζεται Λήψεις.
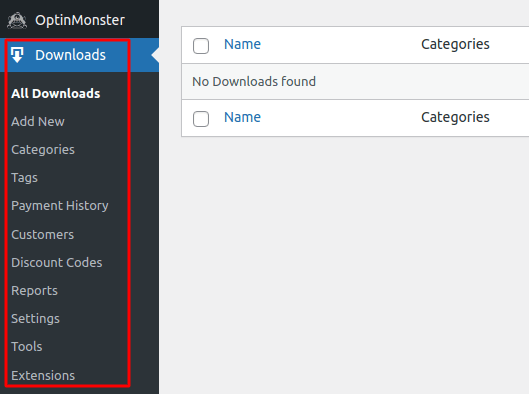
Κάντε κλικ στο Λήψεις » Ρυθμίσεις και στη συνέχεια κάντε κλικ στην καρτέλα Πύλες Πληρωμής για να επιλέξετε και να ρυθμίσετε την πύλη πληρωμής σας.
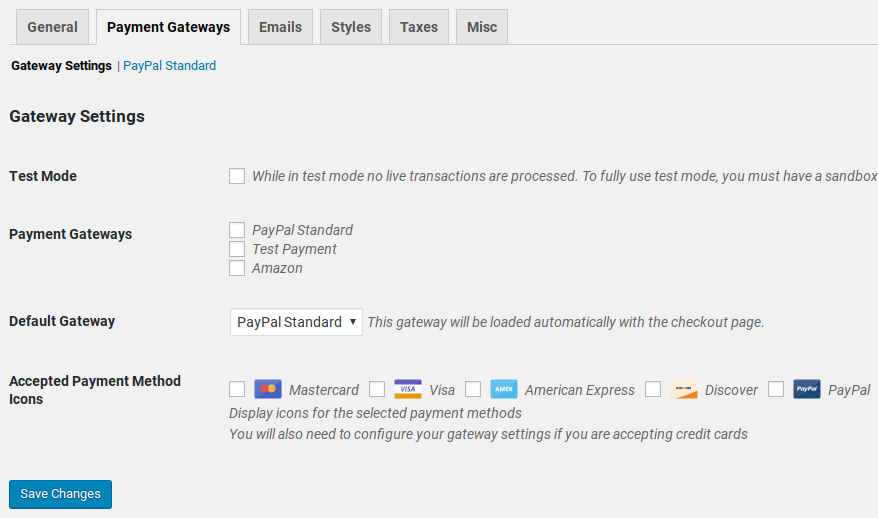
Και είστε έτοιμοι!
Step #5: How to Sell Online Yoga Classes as Digital Products
Now that your store is ready, it’s time to start adding yoga classes to your store.
By default, Easy Digital Downloads will create and set up pages for your eCommerce store. The primary checkout page, success page, failed transaction page, and purchase history page is pre-defined. So, you’re ready to start uploading your products to your store.
Μεταβείτε στο Λήψεις » Προσθήκη Νέου:
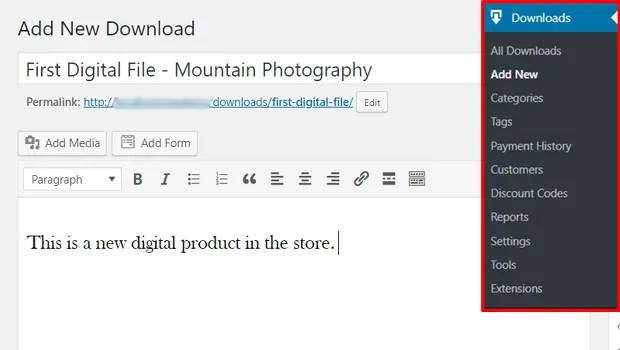
Δώστε στον προϊόν σας έναν τίτλο και μια περιγραφή για να ξεκινήσετε. Στη συνέχεια, είστε έτοιμοι, κάντε κύλιση προς τα κάτω στην ενότητα Τιμές Λήψης για να ορίσετε την τιμή για το προϊόν σας. Στη συνέχεια, ανεβάστε το αρχείο για το προϊόν σας:
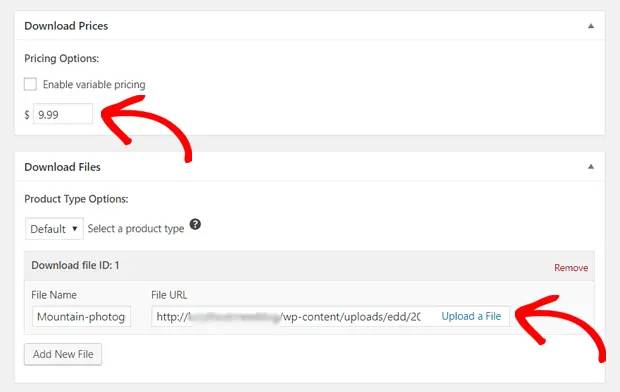
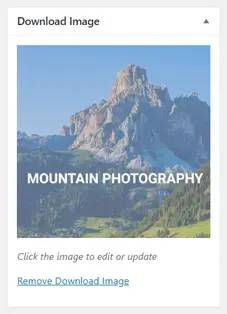
Στη συνέχεια, θα θέλετε να ανεβάσετε μια ωραία εικόνα για το προϊόν σας. Αυτή είναι η εικόνα που εμφανίζεται στις λίστες των προϊόντων σας. Οπότε, κάντε την να αξίζει ανεβάζοντας ένα σούπερ ελκυστικό σχέδιο.
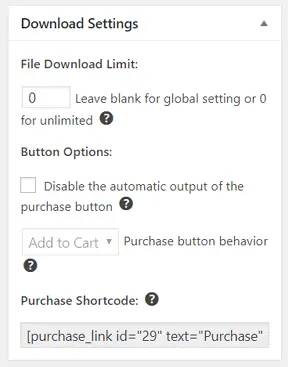
Then, scroll up to Download Settings and review the download options. If you’re selling documents as a limited edition product, you can set a limit on the product downloads. If not, go with the default options:
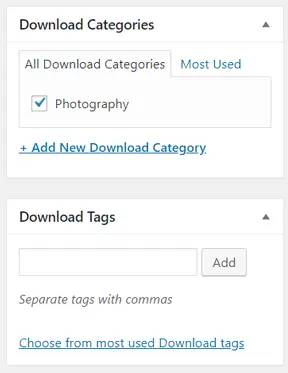
Τέλος, προσθέστε οποιαδήποτε κατηγορία ή ετικέτα προϊόντος είναι κατάλληλη για το προϊόν σας:
Αυτό είναι όλο! Προχωρήστε και κάντε κλικ στο Δημοσίευση για να δημοσιεύσετε το πρώτο σας ψηφιακό προϊόν.
Δείτε πώς θα μοιάζει η σελίδα του προϊόντος σας χωρίς καμία προσαρμογή:

Προχωρήστε και προσαρμόστε τη σελίδα σας τώρα.
Step #6: How to Customize Your Website
Now that you have a theme to get you started, you’ll want to edit that theme to suit your business. This is super easy to do.
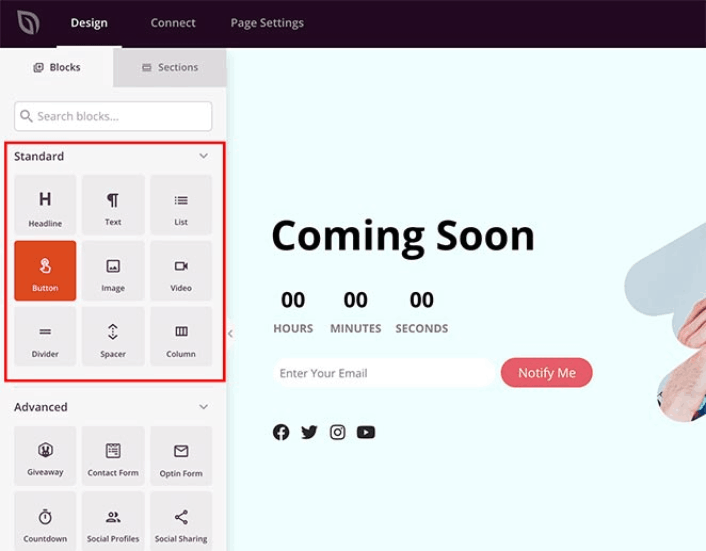
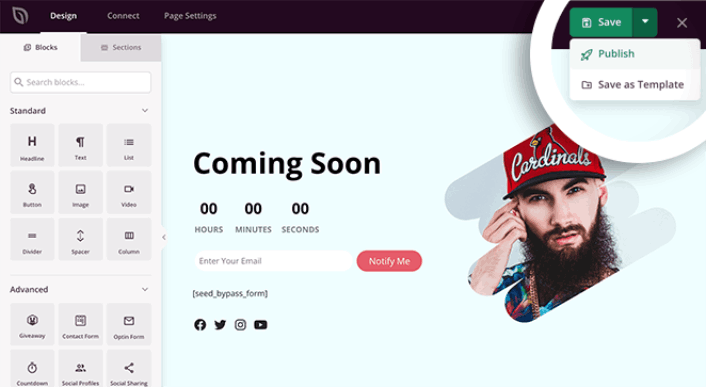
SeedProd’s page builder comes with various content blocks in a drag and drop editor. Even if you’re never used a page builder before, you’re going to find it super easy to use. Just drag and drop different design elements from the sidebar:
Μπορείτε να χρησιμοποιήσετε αυτά τα μπλοκ για να δημιουργήσετε εξαιρετικά διαδραστικές σελίδες προορισμού με:
- Διαγωνισμούς RafflePress για να αυξήσετε την αλληλεπίδραση στον ιστότοπό σας πριν από την κυκλοφορία
- Φόρμες επικοινωνίας για τη συλλογή δυνητικών πελατών στον ιστότοπό σας
- Χρονοδιακόπτες αντίστροφης μέτρησης για να αυξήσετε το FOMO και τον ενθουσιασμό γύρω από την κυκλοφορία σας
- Κουμπιά κοινωνικής δικτύωσης για να λάβετε κοινοποιήσεις στα μέσα κοινωνικής δικτύωσης
- FAQ blocks for better Search Engine Optimization
Και πολλά άλλα!
You can edit any of the content blocks on the page by simply clicking on them. This includes the navigation menu or the blog posts on your site. Once you lock down your website’s design, you can build your website any way you want it.
Step #7: How to Integrate Your Email Marketing Service with Your Site
Αφού ολοκληρώσετε τη σχεδίαση της σελίδας σας υπό κατασκευή, κάντε κλικ στην καρτέλα Σύνδεση στο επάνω μέρος του κατασκευαστή σελίδων σας και επιλέξτε τον πάροχο μάρκετινγκ email για να συλλέξετε δυνητικούς πελάτες στον ιστότοπό σας.

Marketing tools and integrations can help build your online presence. So, we highly recommend setting up an email list.
We recommend using Constant Contact as your email marketing service. It’s a robust service that allows you to create powerful email marketing campaigns easily.
When you’re done configuring your email marketing service, click the Page Settings tab at the top of your screen as an added bonus.

Εδώ, μπορείτε να προσθέσετε ένα πρόσθετο SEO και ένα πρόσθετο Google Analytics στη σελίδα προορισμού σας. Μπορείτε ακόμη και να ρυθμίσετε προσαρμοσμένους κωδικούς παρακολούθησης, όπως ένα Facebook Pixel ή ένα Pinterest pixel, για να παρακολουθείτε την απόδοση των διαφημίσεων.
Pro Tip: You should also set a blog subscription widget on your site. It doesn’t matter if you’re running a personal blog or a business website.
Step #8: Add a Click to Subscribe Button to Your Landing Page
You can also add a click to subscribe button to collect push notification subscribers. Push notifications are a great way to increase your repeat traffic, get more engagement and even sell official merch if you have some.
In SeedProd, just drag and drop the Custom HTML module from the sidebar.
We’ve put the subscribe button directly underneath the email signup form in the first fold.

But you can insert the button anywhere you like.
For this part, you need some experience with HTML and CSS. Or, you can copy this code and paste it into your Custom HTML block:
<button onclick="subscribeOnClickButton()" style="border: none; padding-left: 5%; padding-right:5%; text-align: center; display: inline-block; color: blue;">Get Updates via Push Notifications</button>That’s a standard button in HTML with very little styling. The only fancy bit is the onclick function in the code. It basically means that your visitors can click on the button to subscribe to something. Now, we need to give the button some extra code to allow your visitors to subscribe to push notifications.
Μεταβείτε στην αρχική σελίδα του PushEngage και κάντε κλικ στο κουμπί Έναρξη:

Στη συνέχεια, θα θέλετε να επιλέξετε το δωρεάν πρόγραμμα για να δοκιμάσετε το PushEngage ή να επιλέξετε ένα επί πληρωμή πρόγραμμα αν είστε σοβαροί σχετικά με την ανάπτυξη της επιχείρησής σας. Τα επί πληρωμή προγράμματα έρχονται με περισσότερες επιλογές καμπάνιας και τη δυνατότητα δημιουργίας ακόμη μεγαλύτερων λιστών συνδρομητών.
Στον πίνακα ελέγχου του PushEngage, μεταβείτε στις Ρυθμίσεις Ιστότοπου » Λεπτομέρειες Ιστότοπου και κάντε κλικ στο κουμπί Κάντε κλικ εδώ για οδηγίες εγκατάστασης. Κάτω από το πεδίο Οποιοσδήποτε Ιστότοπος, θα λάβετε τον κωδικό εγκατάστασής σας:

ΠΡΟΕΙΔΟΠΟΙΗΣΗ: Πρέπει να αντιγράψετε τον κωδικό που λαμβάνετε από τον πίνακα ελέγχου σας. Ο κωδικός είναι μοναδικός για κάθε χρήστη του PushEngage. Δεν θα μπορείτε να αντιγράψετε τον κωδικό στην εικόνα και να συλλέξετε συνδρομητές ειδοποιήσεων push.
Μόλις έχετε τον κωδικό στον πίνακα ελέγχου του PushEngage, προσθέστε αυτό το απόσπασμα στον κώδικά σας:
<script> window._peq = window._peq || [];</script> <script>
function subscribeOnClickButton(){
window._peq.push(['subscribe',{}.pe,function(res){
if(res.statuscode==1)
{
// Code to return response
console.log(res);
}
}]);
}
</script>
Ο τελικός σας κώδικας θα πρέπει να μοιάζει κάπως έτσι:
<script src="https://clientcdn.pushengage.com/core/02a6e92667ae2279fcba8932356c1d93.js" async></script>
<script> window._peq = window._peq || [];</script> <script>
function subscribeOnClickButton(){
window._peq.push(['subscribe',{}.pe,function(res){
if(res.statuscode==1)
{
// Code to return response
console.log(res);
}
}]);
}
</script>
You’ll want to add this code to the HTML block in your landing page after the code for the button. It should look something like this:

Feel free to customize the styles for the button any way you please. When you’re done customizing your webinar landing page, go ahead and hit the Save button. You should check out eCommerce push notifications if you’re still wondering how to sell online yoga classes.
Step #9: How to Publish Your Site
When you’re done editing your WordPress site, go ahead and publish it by clicking on Save » Publish:
Then, go back to your Theme Builder and click on Enable SeedProd Theme:
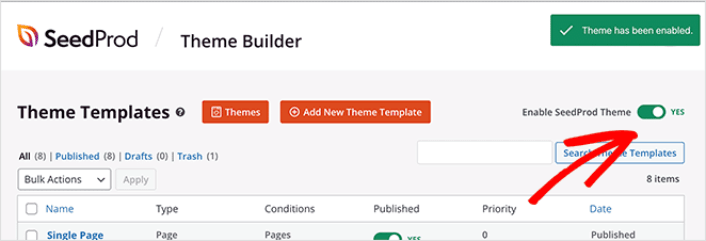
Και τελειώσατε!
How to Sell Online Yoga Classes Even Faster
Now that your product is up, it’s time to selling documents online.
Ένας εξαιρετικός τρόπος για να αυξήσετε τις πωλήσεις σας είναι να δημιουργήσετε αυτοματοποιημένες καμπάνιες ειδοποιήσεων push. Οι ειδοποιήσεις push μπορούν να είναι ένα πραγματικά εξαιρετικό εργαλείο για την αύξηση της επαναλαμβανόμενης επισκεψιμότητας, της αλληλεπίδρασης και των πωλήσεων στον ιστότοπό σας. Αν είστε νέοι στις καμπάνιες ειδοποιήσεων push, δείτε αυτούς τους απίστευτους πόρους που θα σας βοηθήσουν να αναπτυχθείτε πολύ πιο γρήγορα:
- 7 Παραδείγματα Εγγραφής Ειδοποιήσεων Push με Υψηλή Μετατροπή
- Πώς να Ρυθμίσετε Ειδοποιήσεις Push Ιστού στον Ιστότοπό σας
- Πώς να Μετατρέψετε Συνδρομητές σε Αγοραστές Χρησιμοποιώντας Ειδοποιήσεις Web Push
- Πώς να προσθέσετε ένα πρόσθετο WordPress για ειδοποιήσεις ιστού στον ιστότοπό σας
Σας προτείνουμε να ξεκινήσετε με το PushEngage για τις καμπάνιες ειδοποιήσεών σας push. Το PushEngage είναι το λογισμικό ειδοποιήσεων push #1 στον κόσμο. Έτσι, οι καμπάνιες σας θα είναι σε ασφαλή χέρια και μπορείτε να γίνετε σούπερ δημιουργικοί με τις ειδοποιήσεις push σας. Όπως αυτή:

Αν σοβαρεύεστε να αναπτύξετε την επιχείρησή σας, θα πρέπει να επενδύσετε στο PushEngage.


