Looking for a quick and easy way to create a sales page in WordPress?
Creating a sales page is the best way to showcase your products and services to potential customers and make them want to buy. But what if you’ve never designed a web page before? What if you have no coding experience and you don’t know how to add custom functionality to your pages?
Fortunately, there’s an easy way to create a sales page in WordPress. In this article, we’re going to help you launch a sales page in less than 15 minutes.
Είστε έτοιμοι; Ας ξεκινήσουμε.
What’s a Sales Page and Why Should You Care?
A sales page is a fully customizable web page that’s focused on selling a product or a service to your website visitors. Unlike a social media site or a marketplace like Amazon or Etsy, your sales page focuses on a single product or service to sell at a time. Even better, it doesn’t showcase all your competitors in the same web page!
Every sales page is designed to convince and convert website visitors into paying customers. Depending on how much time you have, your business model, and how much money you’re expecting to make from your subscribers, you could:
- Offer coupons and discounts
- Host a giveaway
- Create a free guide or checklist as a lead magnet
- Accept donations from fans
Και πολλά άλλα!
But before you get started, remember to have a very clear and specific goal for your landing page. Just because you can do a lot of things doesn’t mean that you should do them all on one page. More often than not, if you give your visitors too many things to click on, they won’t click on anything at all.
What do All Successful Sales Pages Have?
Now that you know what a sales landing page in WordPress does and why you should build one, it’s time to create a blueprint for your landing page. If you check out any successful landing pages, you’ll notice that they all have some very basic common elements:
- Headline: The headline is where you grab people’s attention and make them want to scroll down and learn more about you.
- Description: Just below the headline, you should have a description of what your viewers should expect from the rest of the page. This is a great place to convince readers to buy your product as well.
- Latest episodes: Once people know what to expect from your brand, give them a taste of your show by listing your latest episodes. We recommend showcasing 3-5 episodes at most.
- Buy button: Follow up with a purchase button so that your visitors can directly add your product to cart. This is known as the call to action (CTA) button. It’s how you nudge your visitors to take action on your page. Depending on your goal for the landing page, your CTA will vary.
- Social proof: A great way to give your readers a strong reason to subscribe is by offering social proof. Social proof simply tells your visitor that there are other people who are already taking the same action as you want them to take.
- Newsletter optin: Once you hit your visitors with the core offer, you can also ask them to become email subscribers. You can also ask them to become push notification subscribers using a click to subscribe button. It’s always best if you offer something valuable in exchange.
- Social sharing buttons: The more people talk about you on social media, the better chances you have of skyrocketing your subscribers. So, put up social sharing buttons on your landing page to encourage people to share it on social media.
Here’s a sneak peek at the WordPress sales page we’ll be creating in our tutorial.

Remember, these are only the most basic parts of any successful landing page. For your page, you can add a lot of other sections and create custom offers to increase your conversions.
How to Create a Sales Page in WordPress
Now that you know what to create, it’s time to launch your sales page in WordPress. We highly recommend using SeedProd to create your landing pages.

SeedProd is the best WordPress landing page builder. It’s perfect for businesses, bloggers, and website owners looking to build high-converting landing pages without any development skills.
With SeedPreed, you get pre-built templates for high-converting landing pages that you can publish instantly. This includes templates for:
- Σελίδες πωλήσεων
- Σελίδες "Έρχονται Σύντομα"
- Σελίδες 404
- Σελίδες συντήρησης
- Σελίδες συμπίεσης
- Σελίδες σύνδεσης
- Σελίδες ευχαριστίας
- Σελίδες webinar
- Σελίδες βίντεο
Και πολλά άλλα!
Βήμα #1: Εγκατάσταση και Ενεργοποίηση του SeedProd
Πρώτα, θα θέλετε να αποκτήσετε το plugin SeedProd Pro και να το ενεργοποιήσετε. Αν δεν είστε σίγουροι πώς να το κάνετε, διαβάστε αυτό το άρθρο για το πώς να εγκαταστήσετε ένα plugin WordPress. Στη συνέχεια, μεταβείτε στο SeedProd » Ρυθμίσεις στον πίνακα ελέγχου του WordPress και ενεργοποιήστε την έκδοση Pro:

Στη συνέχεια, μεταβείτε στο SeedProd » Σελίδες για μια επισκόπηση του πίνακα ελέγχου σελίδων προορισμού του SeedProd. Εδώ μπορείτε να δείτε τους διαφορετικούς τύπους σελίδων προορισμού που μπορείτε να δημιουργήσετε χρησιμοποιώντας το SeedProd:

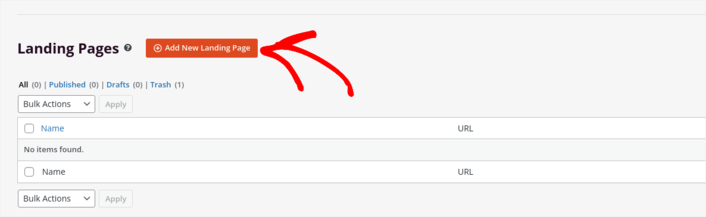
Keep in mind that these are all special pages with pre-built functionality and design templates. For a sales landing page, you don’t want to use ANY of these special landing pages. Instead, you’re going to create a custom landing page.
Scroll further down and click the Add New Landing Page button to get started:
Step #2: Create a New Sales Landing Page
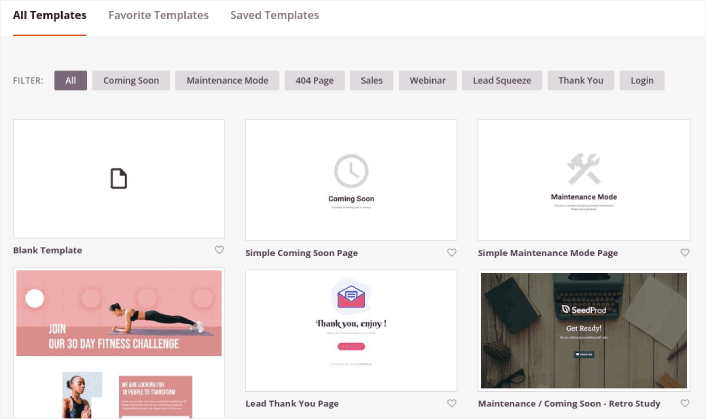
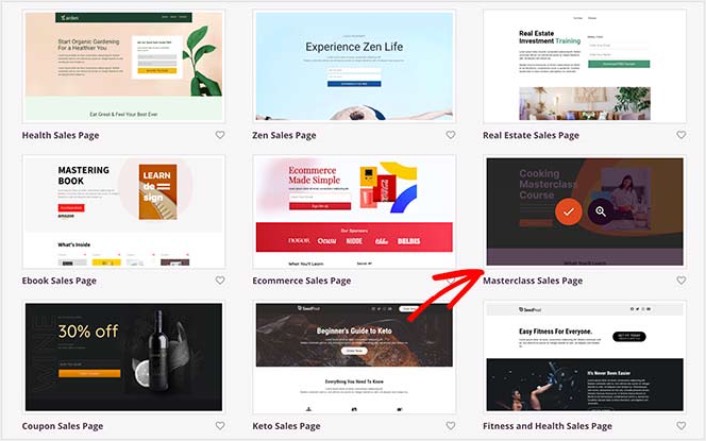
After clicking the Add New Landing Page button, you’ll see SeedProd’s library of landing page templates. These are professionally designed landing page templates that are completely responsive.
Next, you can select one of these templates to help you get started. Remember, the template is just a starting point. you can customize everything about the page later on. For now, find a template that you think will fit. When the templates page opens, you can click Sales to filter the list:
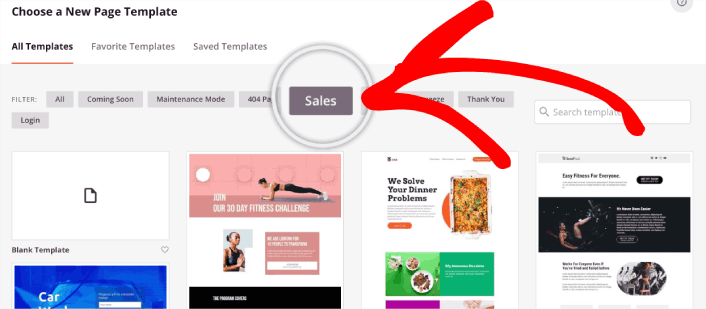
For this guide, we’ll select the Masterclass Sales Page. Go ahead and click on it now.
Net, we’re going to customize the landing page.
Step #3: Customize Your Landing Page Design
SeedProd’s visual builder allows you to customize your landing page using drag-and-drop content blocks.
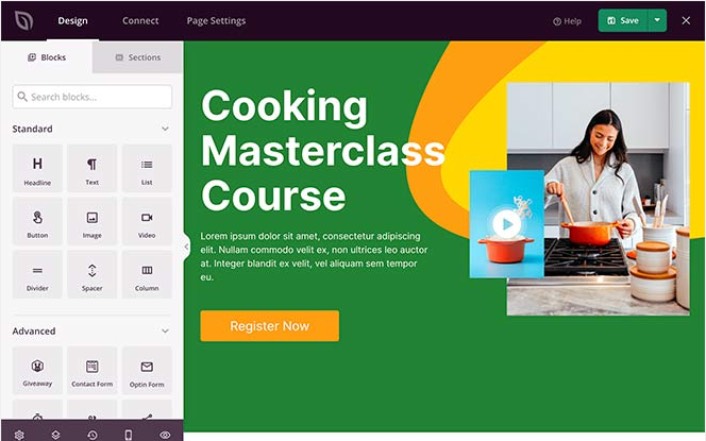
You can create a fully customized header for your landing page in a matter of minutes. You can even add custom elements to convince and convert your traffic. For instance, you can create a video module and embed a YouTube video to convince your visitors to buy your product or service.
It’s also super easy to add a section with a brief description of your product or service . Head over to the Sections tab in the visual builder and under the Hero section, you’ll find several pre-built templates that you can import with a single click.
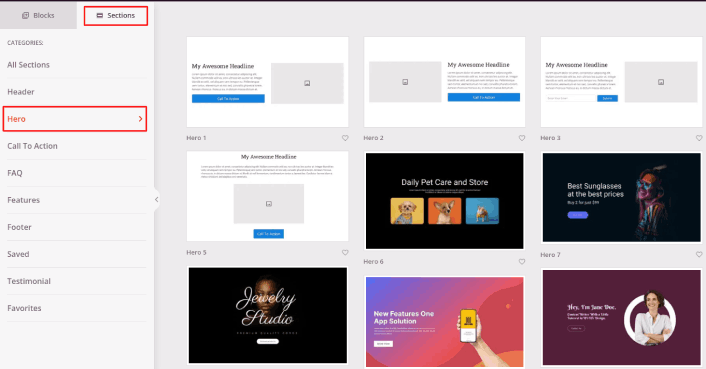
Go ahead and select one that you like.
Don’t worry about the colors or the content. You can edit all of it. What you should look for is a layout that goes well with your template.
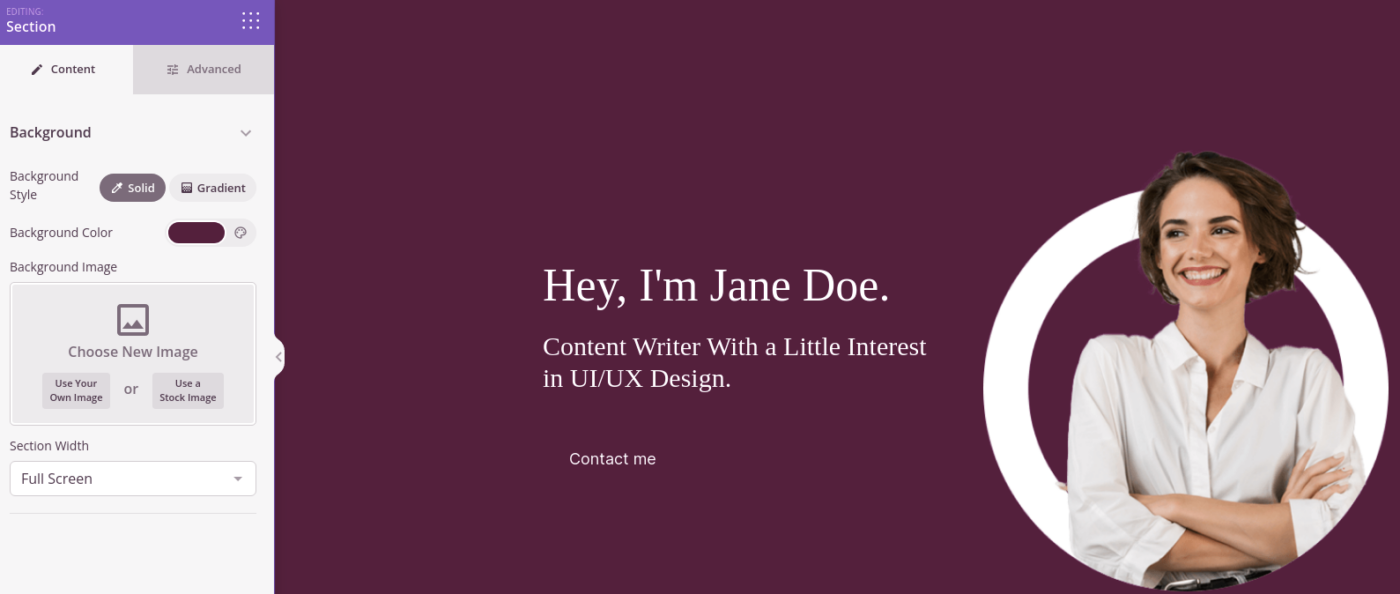
You can customize the hero section the same way we did earlier by choosing a different image and changing the headline and description. While you’re at it, add a call-to-action button that nudges visitors to buy from you.
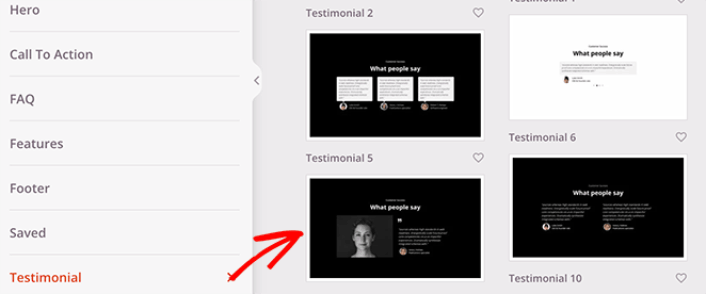
Next, from the Sections tab, select the Testimonial heading, and choose a design you like. And just like that, you have a testimonials section on your landing page.
It’s so simple!
Step #4: Add a Click to Subscribe Button to Your Sales Page
You can also add a click to subscribe button to collect push notification subscribers. Push notifications are a great way to increase your repeat traffic, get more engagement and even sell official merch if you have some.
In SeedProd, just drag and drop the Custom HTML module from the sidebar.
We’ve put the subscribe button directly underneath the email signup form in the first fold.

But you can insert the button anywhere you like.
For this part, you need some experience with HTML and CSS. Or, you can copy this code and paste it into your Custom HTML block:
<button onclick="subscribeOnClickButton()" style="border: none; padding-left: 5%; padding-right:5%; text-align: center; display: inline-block; color: blue;">Get Updates via Push Notifications</button>That’s a standard button in HTML with very little styling. The only fancy bit is the onclick function in the code. It basically means that your visitors can click on the button to subscribe to something. Now, we need to give the button some extra code to allow your visitors to subscribe to push notifications.
Μεταβείτε στην αρχική σελίδα του PushEngage και κάντε κλικ στο κουμπί Έναρξη:

Στη συνέχεια, θα θέλετε να επιλέξετε το δωρεάν πρόγραμμα για να δοκιμάσετε το PushEngage ή να επιλέξετε ένα επί πληρωμή πρόγραμμα αν είστε σοβαροί σχετικά με την ανάπτυξη της επιχείρησής σας. Τα επί πληρωμή προγράμματα έρχονται με περισσότερες επιλογές καμπάνιας και τη δυνατότητα δημιουργίας ακόμη μεγαλύτερων λιστών συνδρομητών.
Στον πίνακα ελέγχου του PushEngage, μεταβείτε στις Ρυθμίσεις Ιστότοπου » Λεπτομέρειες Ιστότοπου και κάντε κλικ στο κουμπί Κάντε κλικ εδώ για οδηγίες εγκατάστασης. Κάτω από το πεδίο Οποιοσδήποτε Ιστότοπος, θα λάβετε τον κωδικό εγκατάστασής σας:

ΠΡΟΕΙΔΟΠΟΙΗΣΗ: Πρέπει να αντιγράψετε τον κωδικό που λαμβάνετε από τον πίνακα ελέγχου σας. Ο κωδικός είναι μοναδικός για κάθε χρήστη του PushEngage. Δεν θα μπορείτε να αντιγράψετε τον κωδικό στην εικόνα και να συλλέξετε συνδρομητές ειδοποιήσεων push.
Μόλις έχετε τον κωδικό στον πίνακα ελέγχου του PushEngage, προσθέστε αυτό το απόσπασμα στον κώδικά σας:
<script> window._peq = window._peq || [];</script> <script>
function subscribeOnClickButton(){
window._peq.push(['subscribe',{}.pe,function(res){
if(res.statuscode==1)
{
// Code to return response
console.log(res);
}
}]);
}
</script>
Ο τελικός σας κώδικας θα πρέπει να μοιάζει κάπως έτσι:
<script src="https://clientcdn.pushengage.com/core/02a6e92667ae2279fcba8932356c1d93.js" async></script>
<script> window._peq = window._peq || [];</script> <script>
function subscribeOnClickButton(){
window._peq.push(['subscribe',{}.pe,function(res){
if(res.statuscode==1)
{
// Code to return response
console.log(res);
}
}]);
}
</script>
You’ll want to add this code to the HTML block in your landing page after the code for the button. It should look something like this:

Feel free to customize the styles for the button any way you please. When you’re done customizing your sales page, go ahead and hit the Save button.
Step #5: Configure Your Page Settings
After you’re done designing your sales page, click the Connect tab at the top of your page builder, and select your email marketing provider to collect leads on your site.

Στη συνέχεια, κάντε κλικ στην καρτέλα Ρυθμίσεις Σελίδας στο επάνω μέρος της οθόνης σας.

Here, you can add an SEO plugin and a Google Analytics plugin to your sales page. You can even set up custom tracking codes such as a Facebook Pixel or a Pinterest pixel to track ad performance.
Step #6: Publish Your Sales Page in WordPress
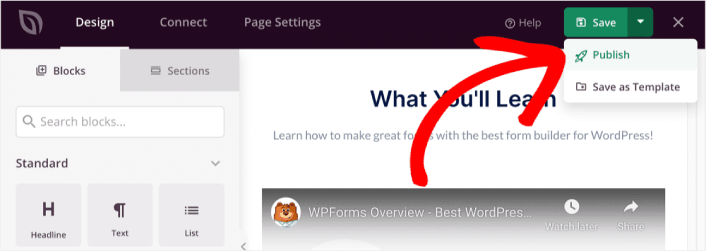
Now let’s go ahead and publish your design. To do this, click the dropdown arrow next to the save button and click Publish.
You can then click the See Live Page button to see how it looks.
Congratulations! You just published your very first sales page.
What to do After You Build a Sales Page
Now that your sales page is live, it’s time to work on your traffic, engagement, and sales. You should try using push notifications on your site. Push notifications are a great marketing tool that can help you grow your business.
Ρίξτε μια ματιά σε αυτούς τους επικούς πόρους και θα καταλάβετε τι εννοούμε:
- 7 Έξυπνες Στρατηγικές για την Ενίσχυση της Αφοσίωσης Πελατών
- Είναι Αποτελεσματικές οι Ειδοποιήσεις Push; 7 Στατιστικά + 3 Συμβουλές Ειδικών
- Πώς να Ρυθμίσετε Ειδοποιήσεις Push για Εγκαταλελειμμένα Καλάθια (Εύκολο Οδηγός)
Συνιστούμε τη χρήση του PushEngage για τη δημιουργία των καμπανιών ειδοποιήσεων push. Το PushEngage είναι το #1 λογισμικό ειδοποιήσεων push στον κόσμο. Έτσι, αν δεν το έχετε κάνει ήδη, ξεκινήστε με το PushEngage σήμερα!


