Looking for a way to create a lightbox popup for your site?
A lightbox popup can be incredibly effective for capturing leads. They’re designed to convince and convert.
But having to code one from scratch is a real pain. For one thing, you’d have to know enough HTML, CSS, and Javascript to create the popup along with trigger rules for when to show it. Then, you’d have to create a manual integration with your email service provider. And finally, you’d have to deal with any privacy and security issues.
Good news: there’s a much simpler way.
In this article, we’re going to show you how to launch a lightbox popup with zero coding in less than 10 minutes.
Ας ξεκινήσουμε.
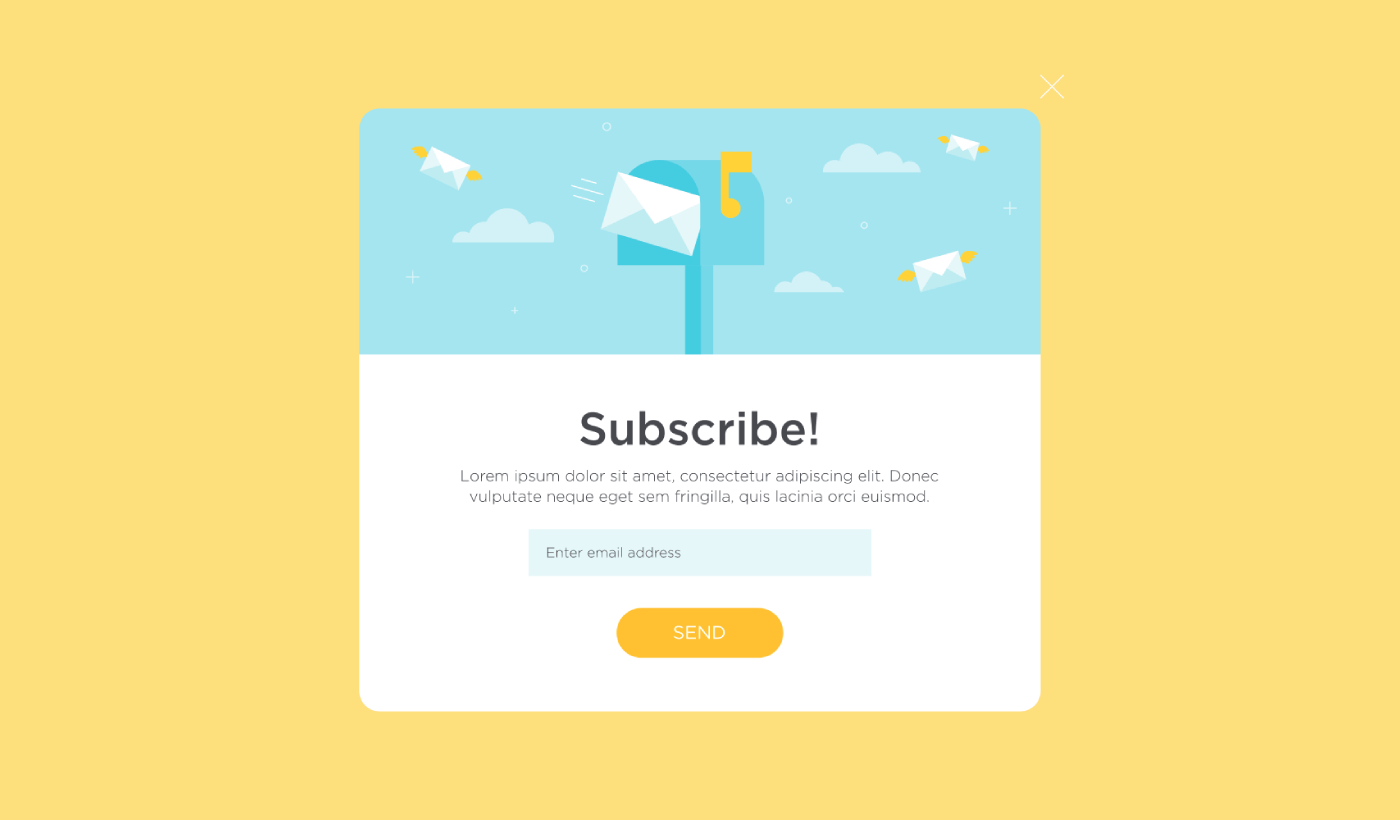
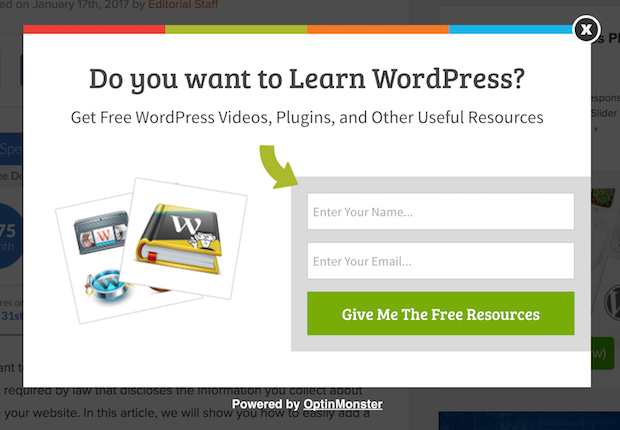
What is a Lightbox Popup?
A lightbox popup is an opt-in form that popups up with a cinematic effect. When a lightbox pops up, it blurs out the rest of the site in the background. This way, your entire focus is on the popup.
Originally, the concept of lightboxes come from outdoor advertising:
And then, some developers thought that this was a really cool effect and they created a Javascript library to recreate the same effect on web assets. Later on, the idea of using lightbox popups came into play.
Why Lightbox Popups Work
Lightbox popups capture more emails than a traditional email optin form.
But why do they work?
Let’s take a quick look at the main reasons why lightbox popups work so well.
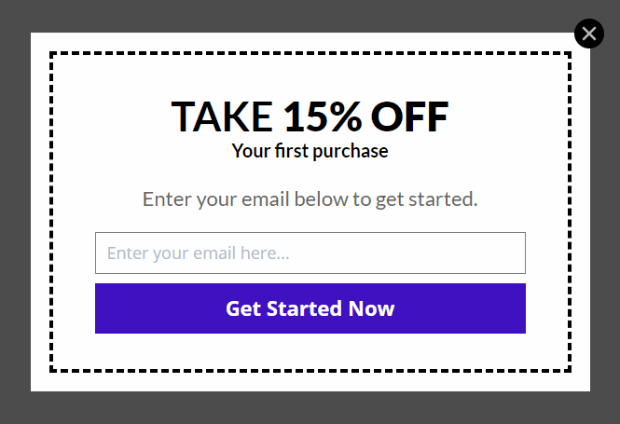
#1. Lightbox Popups Feature a Clear Call to Action
Most people believe that it’s a great thing to give their customers a lot of options.
But that’s not really true.
If you’re looking for direct conversions, you want a single, clear call to action that your audience can focus on. This way, you remove all distractions from the user’s mind. And lightbox popups do a great job of highlighting your core offer and getting people to focus on your call to action.
So, naturally, the conversion rates are pretty great.
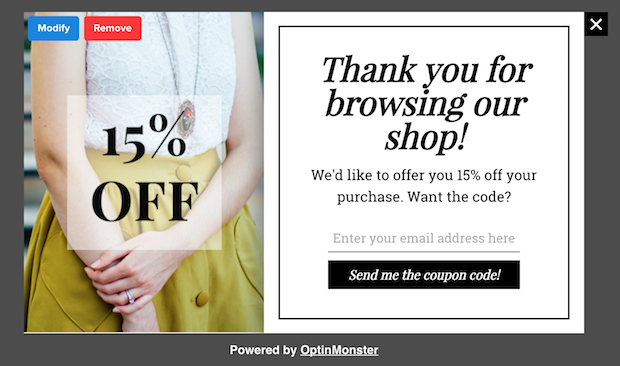
#2. Lightbox Popups Are Impossible to Ignore
Lightbox popups take up the entire screen and blur out everything else. So, it’s practically impossible to ignore them.
This is especially true if they’re animated:
Of course, you have to ensure that your popups aren’t intrusive. And you can do that by customizing when to trigger different popups on your site. As long as your audience isn’t annoyed by the interruption, you can very easily convince and convert them.
#3. Lightbox Popups Have Personalized Triggers
You shouldn’t be showing the same offer to all your web visitors. If you’re running an eCommerce store, you’ll need very different offers for new and returning customers.
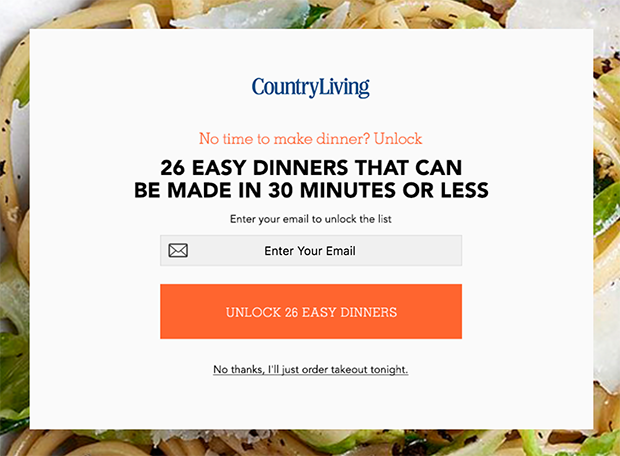
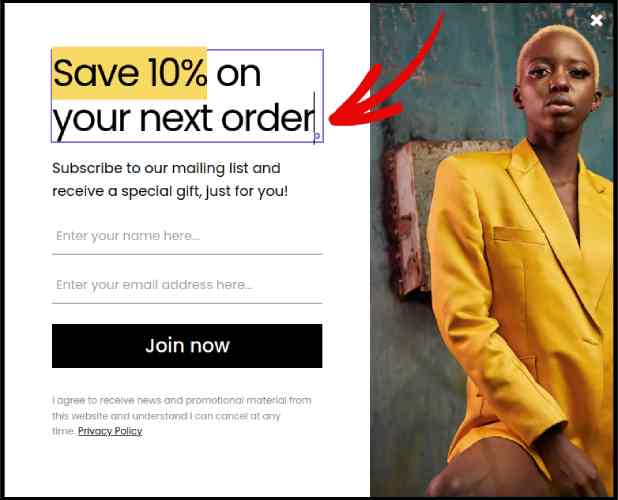
For a new customer, you can trigger a welcome campaign:
But for a returning customer, you may want to send them a different offer:
Notice how the discount amounts for both offers are exactly the same. But the way in which the offer is framed is drastically different. And this is super important because lightbox popups are built for theatrical effects. So, a more personalized approach will get you much better results for sure.
You could even personalize the offer based on your user’s content preferences. If they’re reading an article on dinner recipes, it makes more sense to show them an offer related to dinner recipes rather than showing them an offer for cars.
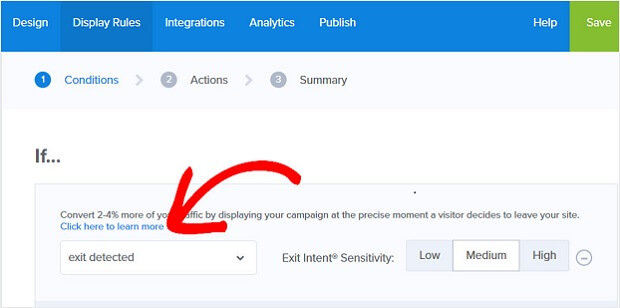
#4. Lightbox Popups Can Capture Abandoning Visitors
Lightboxes are just a method of displaying your popup. So, there’s really nothing stopping you from customizing the trigger to any extent you like. We recommend creating exit-intent lightbox popups.
Exit-intent popups get triggered when your visitors try to exit your website. As a result, you retain a huge number of visitors who would have otherwise abandoned your site. So, if you’re suffering from site abandonment, you should definitely create an exit-intent lightbox popup.
How to Create a Lightbox Popup
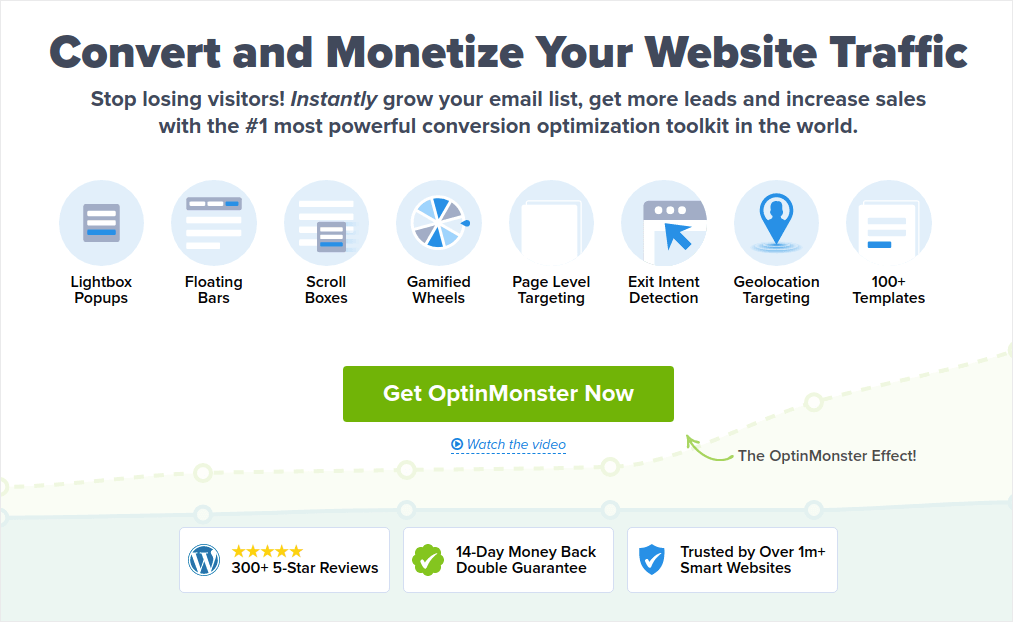
Now that you understand what a lightbox popup is and why you’d want to create one, how do you a lightbox popup? We recommend using OptinMonster to create your popups.
Το OptinMonster είναι το #1 εργαλείο μετατροπών στον κόσμο και το έχουμε χρησιμοποιήσει οι ίδιοι. Το OptinMonster καθιστά εξαιρετικά απλή τη δημιουργία ισχυρών popups που μετατρέπουν. Και δεν θα χρειαστεί ποτέ να χρησιμοποιήσετε καθόλου κώδικα.
We even wrote a full review of OptinMonster.
You can check that out, or get started with your campaign right now. All you have to do is signup for OptinMonster and follow along with the rest of this article.
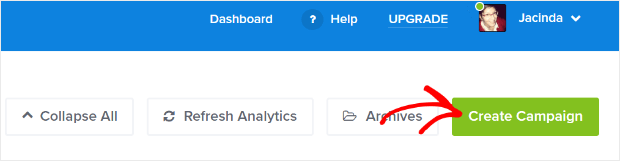
Step #1: Create a Campaign
Μεταβείτε στον πίνακα ελέγχου του OptinMonster και πατήστε το κουμπί Δημιουργία:
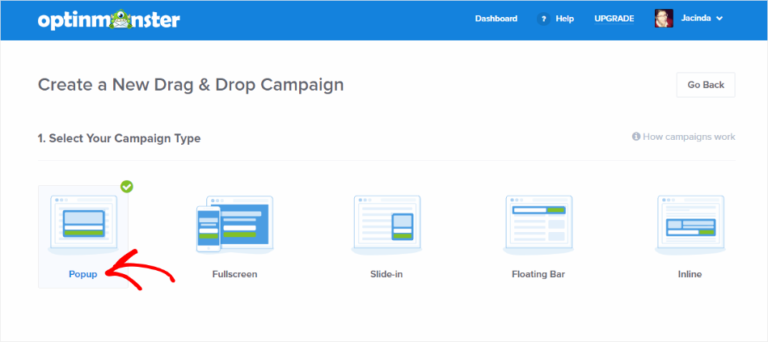
Select the Lightbox Popup campaign type:
Then, choose a campaign template. You can choose whatever template you like, but we’re going with the Simple campaign type for this tutorial.

Now, give your campaign a name. Remember, this campaign name is for you and you’ll likely create a whole bunch of these popups with different targeting options. So, give the campaign a meaningful name or you’ll end up really confused later on.
Also, depending on your plan, you can also use OptinMonster on multiple sites. So, select the website where you want to display your campaign as well.
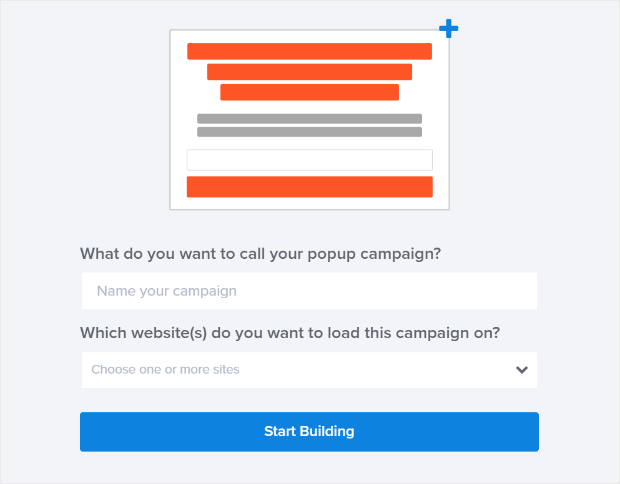
Press Start Building when you’re done.
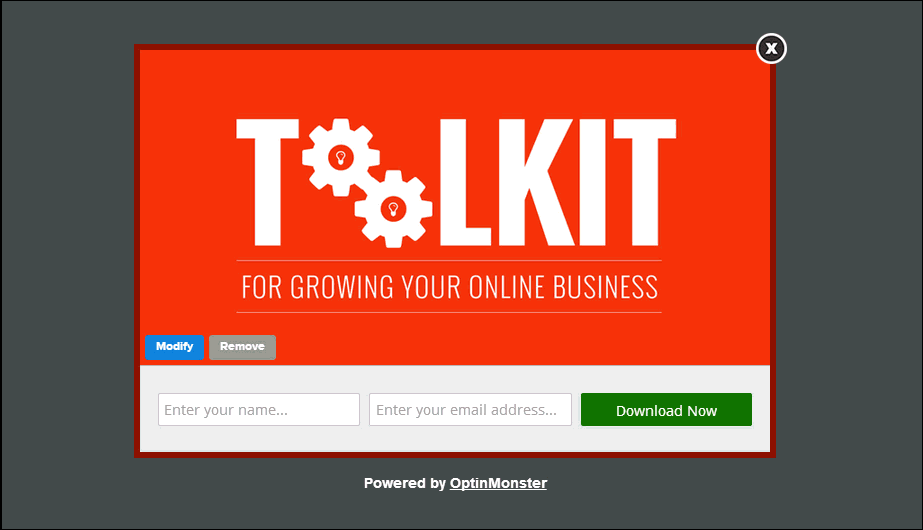
Step #2: Edit Your Lightbox Popup
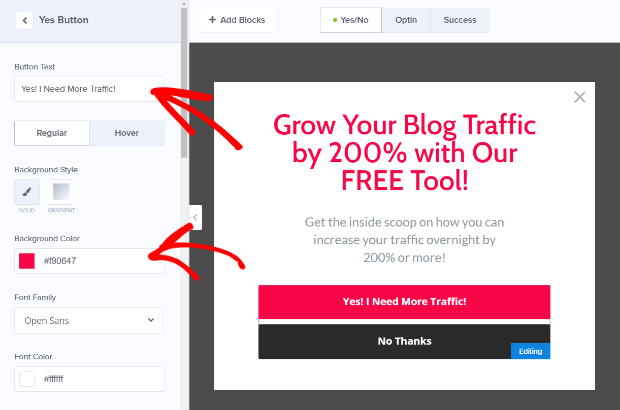
With OptinMonster, you’ll get a visual drag and drop popup builder. Once you’re done creating your campaign, you’ll be able to edit even the tiniest details about your popup. Start by editing your popup headline:
Το πιο εκπληκτικό μέρος εδώ είναι ότι απλά κάνετε κλικ σε οποιοδήποτε κείμενο θέλετε να επεξεργαστείτε και το αλλάζετε απευθείας. Δεν υπάρχει ανάγκη να συμπληρώσετε μια φόρμα ή να επεξεργαστείτε οποιονδήποτε κώδικα HTML στο popup.
And then, adjust your button text and appearance to create a clear call to action:
When you’re happy with your popup’s appearance, you can move on to more advanced settings.
Step #3: Set Display Rules
Display rules are meant to define when your campaign shows up on your site and who sees it.
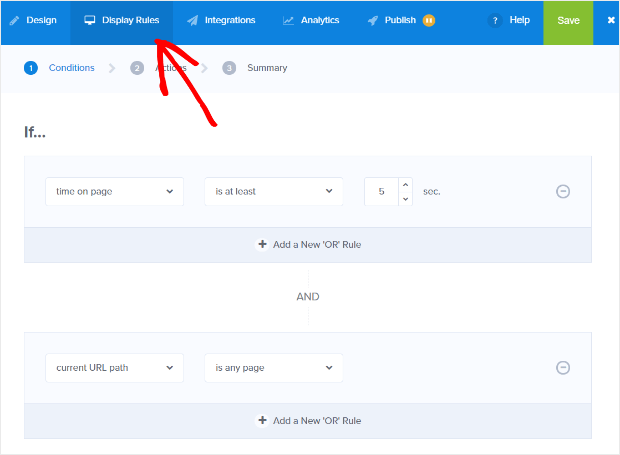
Our recommendation is that you change the trigger condition to exit-intent:
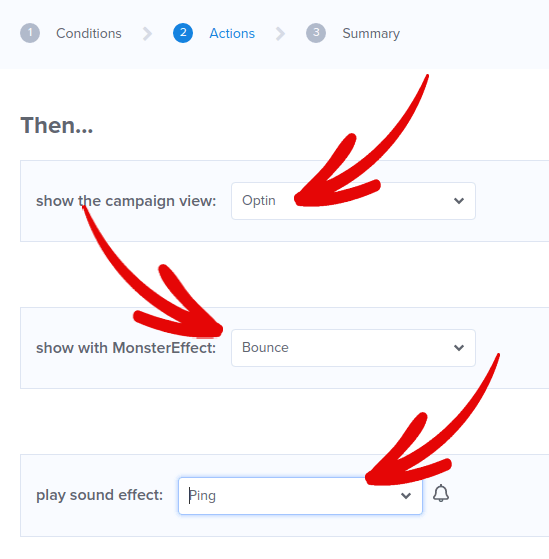
Click Next Step to choose the Action. Here, we recommend that you set Show the campaign view to Optin View, set the show with MonsterEffect to any entry animation you like, and play sound effect to any sound effect for your popup.
And then, click the Next Step button. You can see the full extent of your settings in the Summary tab.
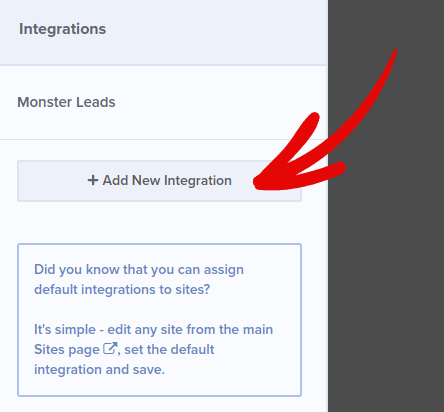
Step #4: Setup Your Email Integration
The next step is to set up your email integration. Click Add New Integration from the Integrations tab and select your email service provider:
We recommend using Drip for your email marketing if you don’t already have an email service provider.
Step #5: Publish Your Lightbox Popup
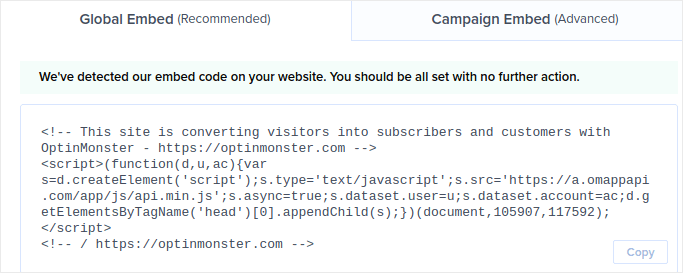
Όταν δημιουργείτε μια νέα καμπάνια, είναι Σε παύση εξ ορισμού.
Μεταβείτε στην καρτέλα Δημοσίευση από το επάνω μενού για να δείτε τις Επιλογές Δημοσίευσης. Στη συνέχεια, ορίστε την κατάσταση σε Δημοσίευση και επιλέξτε την πλατφόρμα του ιστότοπου:
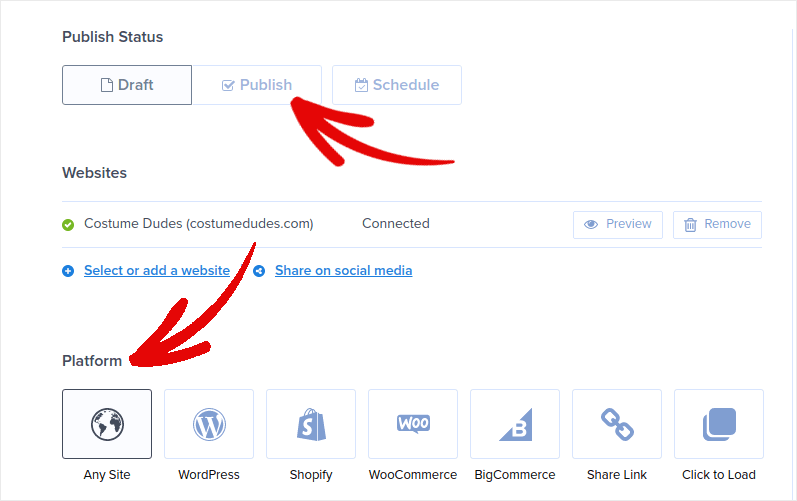
Αν διαχειρίζεστε έναν ιστότοπο WordPress, το πρόσθετο OptinMonster χειρίζεται αυτόματα την υπόλοιπη ρύθμιση. Το ίδιο ισχύει για Shopify και BigCommerce. Για οποιονδήποτε άλλο ιστότοπο, κάντε κλικ στο Οποιοσδήποτε Ιστότοπος και επικολλήστε τον κώδικα ενσωμάτωσης στο κεφάλι του ιστότοπού σας:
Και τελειώσατε!
BONUS: Collect Push Notification Subscribers from Your Popup
Push notifications help you grow your website traffic and engagement on autopilot. Web push notifications are an effective way to bring back users who may have abandoned their session or left the website. It helps in re-engaging users by notifying them of new content, offers, or events.
Push notifications also include clear and actionable messages and call to action buttons, encouraging users to take specific actions, such as reading an article, completing a purchase, or participating in an event.
Μπορείτε να προσαρμόσετε τις ειδοποιήσεις push με βάση τις προτιμήσεις, τη συμπεριφορά και τα ενδιαφέροντα των χρηστών, για να διασφαλίσετε ότι τα μηνύματα είναι σχετικά και πολύτιμα για κάθε χρήστη. Οι χρήστες πρέπει να συμφωνήσουν για να λαμβάνουν ειδοποιήσεις push στο web. Αυτό διασφαλίζει ότι τα μηνύματα δεν θεωρούνται spam και ότι αποστέλλονται με την άδεια των χρηστών.
The coolest part is that you can collect push notification subscribers from your email popup. So, just in case your site visitors don’t want to give up their email ID, you can still get them to subscribe using web push notifications.
And that’s what we’re going to work on.
Βήμα #1: Επιλέξτε μια Υπηρεσία Ειδοποιήσεων Push
We recommend using PushEngage to send web push notifications.

Here’s a quick glance at what you get with PushEngage:
- Αυτοματοποιημένες εκστρατείες με υψηλή μετατροπή
- Multiple targeting and campaign scheduling options
- Παρακολούθηση στόχων και προηγμένα αναλυτικά στοιχεία
- Smart A/B testing
- Ένας Αφοσιωμένος Διαχειριστής Επιτυχίας
Μπορείτε να ξεκινήσετε δωρεάν, αλλά αν σοβαρά θέλετε να αναπτύξετε την επιχείρησή σας, θα πρέπει να αγοράσετε ένα επί πληρωμή πρόγραμμα. Επίσης, πριν αγοράσετε οποιαδήποτε υπηρεσία ειδοποιήσεων push, θα πρέπει να δείτε αυτόν τον οδηγό για το κόστος ειδοποιήσεων push.
Και αν διαχειρίζεστε ένα online κατάστημα, το PushEngage σας βοηθά επίσης να αυξήσετε τις πωλήσεις σας, βοηθώντας σας να δημιουργήσετε αυτοματοποιημένες ειδοποιήσεις push για ηλεκτρονικό εμπόριο.
Θα δείτε ότι η PushEngage είναι μακράν η καλύτερη επιλογή αν θέλετε να αυξήσετε την επισκεψιμότητα, την αφοσίωση και τις πωλήσεις για την επιχείρησή σας. Και αν έχετε περιορισμένο προϋπολογισμό, μπορείτε πάντα να γίνετε λίγο δημιουργικοί με τις ειδοποιήσεις push σας.
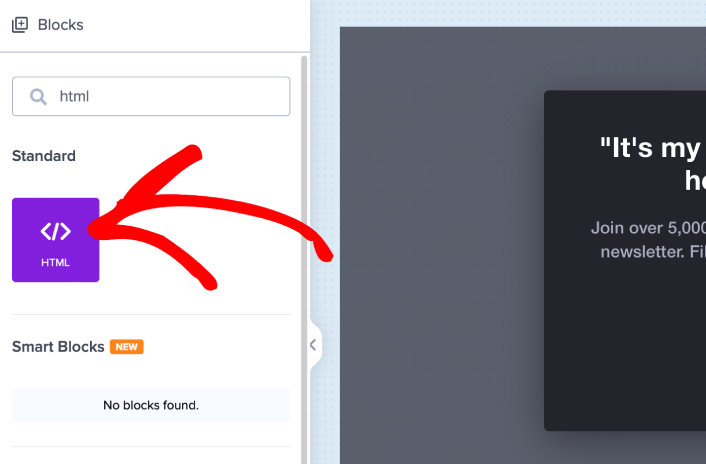
Step #2: Add an HTML Block to Your Popup
Πρώτα, προσθέστε ένα μπλοκ HTML στο αναδυόμενο παράθυρό σας από την πλαϊνή μπάρα στο OptinMonster.
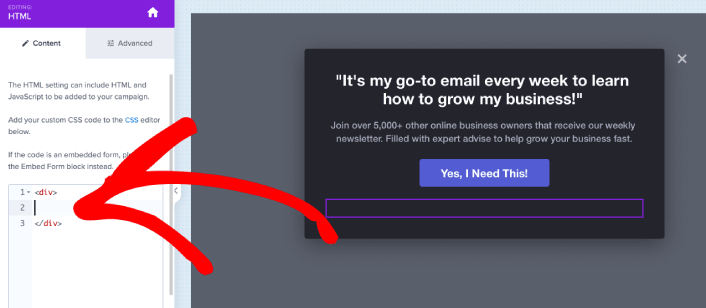
Εδώ θα προσθέσουμε τον κώδικα για τη συλλογή συνδρομητών ειδοποιήσεων push. Πρώτα, επικολλήστε τον παρακάτω κώδικα για να δημιουργήσετε ένα κλικ κουμπί:
<button onclick="subscribeOnClickButton()" style="border: none; width: 100%; padding-left: 15%; padding-right:15%; text-align: center; display: inline-block; color: white;">Get Updates via Push Notifications Instead</button>Επικολλήστε τον κώδικα εκεί που λέει ότι μπορείτε να προσθέσετε HTML:
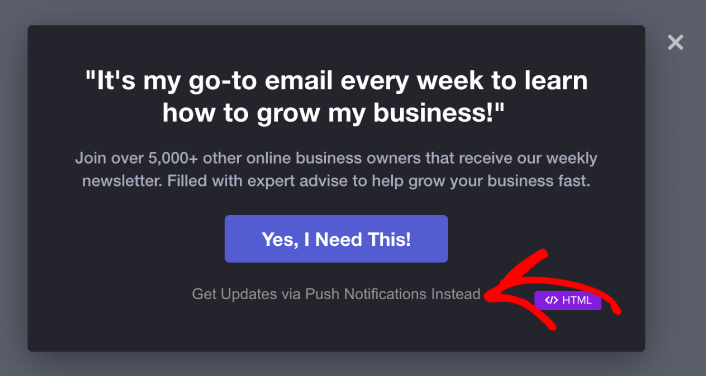
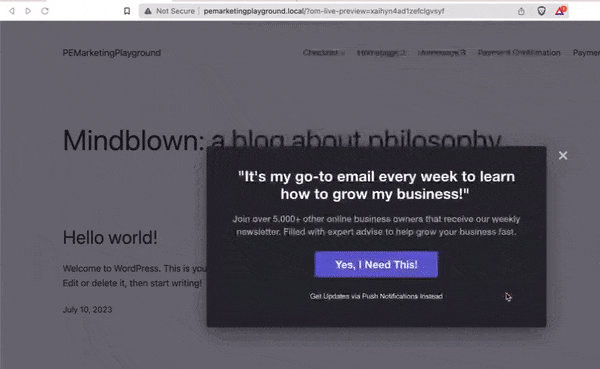
At this point, you should see a new button in your popup that says, “Get Updates via Push Notifications Instead” right below the email subscription button:
Φυσικά, μπορείτε να πειραματιστείτε με τα στυλ για να το κάνετε να φαίνεται πιο ελκυστικό. Στη συνέχεια, θα κάνουμε το κουμπί να συλλέγει συνδρομητές ειδοποιήσεων push όταν κάνετε κλικ.
Step #3: Get Subscription Code from PushEngage
Μεταβείτε στην αρχική σελίδα του PushEngage και κάντε κλικ στο κουμπί Έναρξη:

Στη συνέχεια, θα θέλετε να επιλέξετε το δωρεάν πρόγραμμα για να δοκιμάσετε το PushEngage ή να επιλέξετε ένα επί πληρωμή πρόγραμμα αν είστε σοβαροί σχετικά με την ανάπτυξη της επιχείρησής σας. Τα επί πληρωμή προγράμματα έρχονται με περισσότερες επιλογές καμπάνιας και τη δυνατότητα δημιουργίας ακόμη μεγαλύτερων λιστών συνδρομητών.
Στον πίνακα ελέγχου του PushEngage, μεταβείτε στις Ρυθμίσεις Ιστότοπου » Λεπτομέρειες Ιστότοπου και κάντε κλικ στο κουμπί Κάντε κλικ εδώ για οδηγίες εγκατάστασης. Κάτω από το πεδίο Οποιοσδήποτε Ιστότοπος, θα λάβετε τον κωδικό εγκατάστασής σας:

ΠΡΟΕΙΔΟΠΟΙΗΣΗ: Πρέπει να αντιγράψετε τον κωδικό που λαμβάνετε από τον πίνακα ελέγχου σας. Ο κωδικός είναι μοναδικός για κάθε χρήστη του PushEngage. Δεν θα μπορείτε να αντιγράψετε τον κωδικό στην εικόνα και να συλλέξετε συνδρομητές ειδοποιήσεων push.
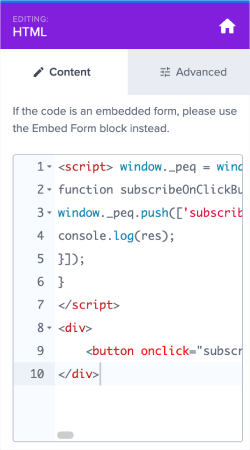
Μόλις έχετε τον κωδικό στον πίνακα ελέγχου του PushEngage, πάρτε το δεύτερο script και προσθέστε του επιπλέον κώδικα. Ο τελικός σας κώδικας θα πρέπει να μοιάζει κάπως έτσι:
<script src="https://clientcdn.pushengage.com/core/02a6e92667ae2279fcba8932356c1d93.js" async></script>
<script> window._peq = window._peq || [];
function subscribeOnClickButton(){
window._peq.push(['subscribe',{}.pe,function(res){
console.log(res);
}]);
}
</script>
Step #4: Add Your Subscription Code to the HTML Block in Your Popup
Add this code to the HTML block in OptinMonster and you’re done!
When you’re done, just hit the Save and Publish buttons.
If you check out your website, you should now see the lightbox popup collecting both email and push notification subscribers:
And just like that, you’re collecting push subscribers from your popup. Push notifications come with their own popup modals. But they’re a bit difficult to customize. So, you can create beautiful popups using OptinMonster and then use them as your push notification popups.
What to do After You Create a Lightbox Popup
Αυτό ήταν για αυτό το θέμα, φίλοι!
Let us know if this article helped. Creating popups on your site can help you convert your traffic into email subscribers and genuine business leads. And we highly recommend that you start creating lightbox popups right away.
Και αν ψάχνετε για έναν προσιτό τρόπο να αυξήσετε την επισκεψιμότητά σας, σας προτείνουμε να χρησιμοποιήσετε ειδοποιήσεις push. Οι ειδοποιήσεις push μπορούν να σας βοηθήσουν να προσελκύσετε περισσότερη επαναλαμβανόμενη επισκεψιμότητα και αλληλεπίδραση με τον ιστότοπο. Μπορείτε επίσης να δημιουργήσετε αυτοματοποιημένες καμπάνιες ειδοποιήσεων push που παράγουν πωλήσεις.
Δεν πειστήκατε; Ελέγξτε αυτούς τους πόρους:
- 7 Έξυπνες Στρατηγικές για την Ενίσχυση της Αφοσίωσης Πελατών
- Είναι Αποτελεσματικές οι Ειδοποιήσεις Push; 7 Στατιστικά + 3 Συμβουλές Ειδικών
- Πώς να Ρυθμίσετε Ειδοποιήσεις Push για Εγκαταλελειμμένα Καλάθια (Εύκολο Οδηγός)
Συνιστούμε τη χρήση του PushEngage για τη δημιουργία των καμπανιών ειδοποιήσεων push. Το PushEngage είναι το λογισμικό ειδοποιήσεων push #1 στον κόσμο. Έτσι, αν δεν το έχετε κάνει ήδη, ξεκινήστε με το PushEngage σήμερα!


