注意:此项目没有可用的旧版文档,因此您看到的是当前文档。
PushEngage Flutter SDK 可轻松将推送通知集成到您的 Flutter 应用中,并与 Android 和 iOS 平台无缝兼容。
本指南将引导您完成设置 PushEngage Flutter SDK 并为您的 Android 和 iOS 应用启用推送通知的步骤。
开始之前
以下是您需要准备的清单
- 一个 Flutter 项目和 PushEngage 账户。如果您没有账户,可以在此处注册。
- 一个已为 Android 设置 Firebase Cloud Messaging (FCM) 的 Firebase 账户。
- 一个 Apple Developer 账户,用于配置 iOS 的 Apple Push Notification (APN) 服务。
安装
1. 在您的代码编辑器中打开您的 Flutter 项目。
2. 在您的 pubspec.yaml 文件中添加以下依赖项:
dependencies:
	pushengage_flutter_sdk: ^1.0.0
3. 运行以下命令来安装该软件包。
dependencies:
flutter pub get
设置 Android
Add the JitPack repository. The PushEngage Android SDK is distributed via JitPack so it is a must have repository for your SDK setup to run successfully.
Newer projects →
Inside android/settings.gradle
dependencyResolutionManagement { repositories { … } } Older projects →
Inside android/build.gradle
allprojects { repositories { … } } Groovy:
maven { url 'https://jitpack.io' } Kotlin DSL:
maven { url = uri("https://jitpack.io") }Firebase Cloud Messaging (FCM) 设置
要为 Android 启用推送通知,您需要配置 Firebase Cloud Messaging (FCM):
1. 使用您的 Google 账户访问 Firebase 控制台。
2. 创建新项目或选择现有项目: 点击“添加项目”以创建新项目,或从列表中选择一个现有项目。如果您使用的是现有项目,请直接进入第 4 步。

3. 输入项目详细信息: 为您的项目添加一个名称,然后点击 继续。在最终屏幕上点击“创建项目”以完成设置过程。
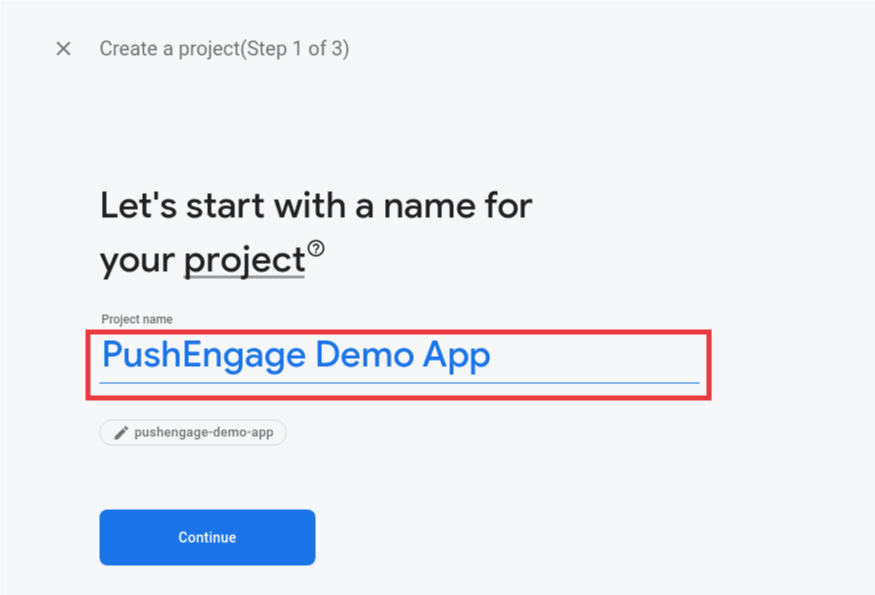
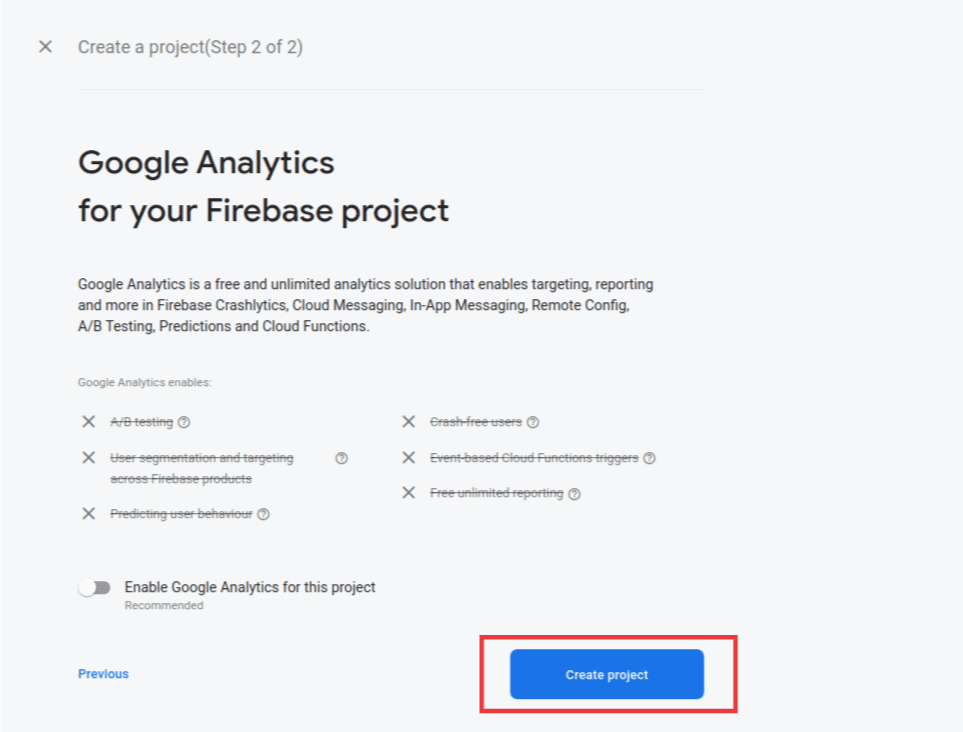
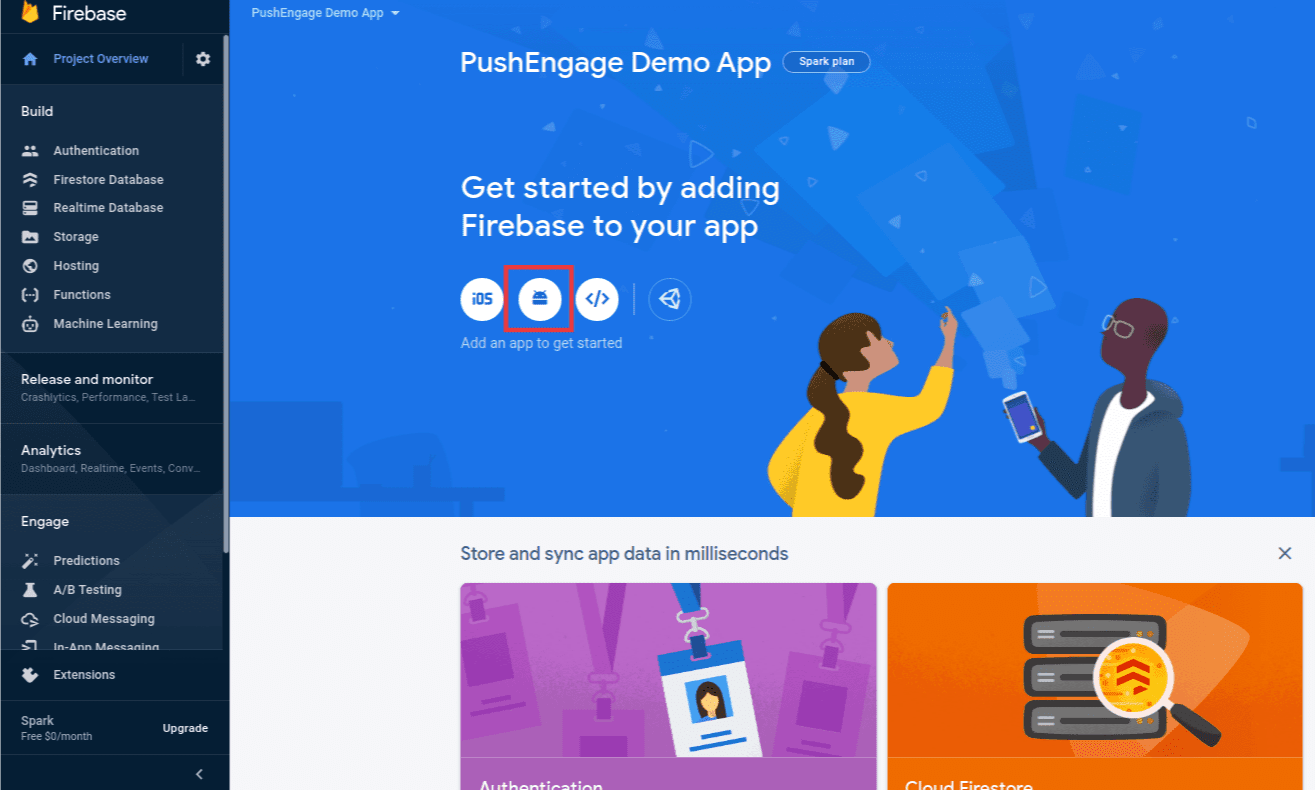
4. 向项目中添加 Android 应用: 在您的 Firebase 项目信息中心,点击 Android 图标以添加一个 Android 应用。
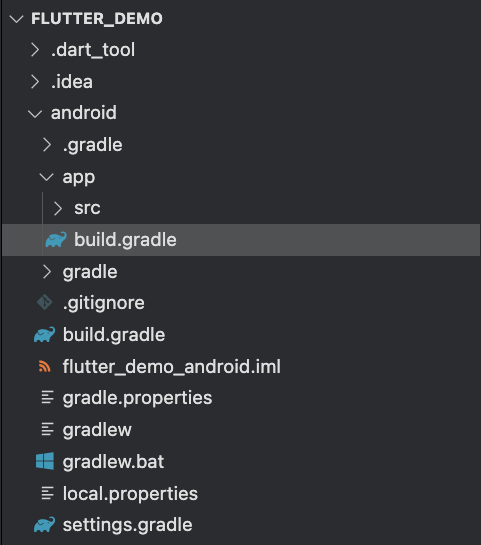
5. 配置 Android 应用: 输入您的 Android 应用的程序包名称(可在 android/app/build.gradle 的 android 块中找到)并提供应用名称。完成后点击注册。
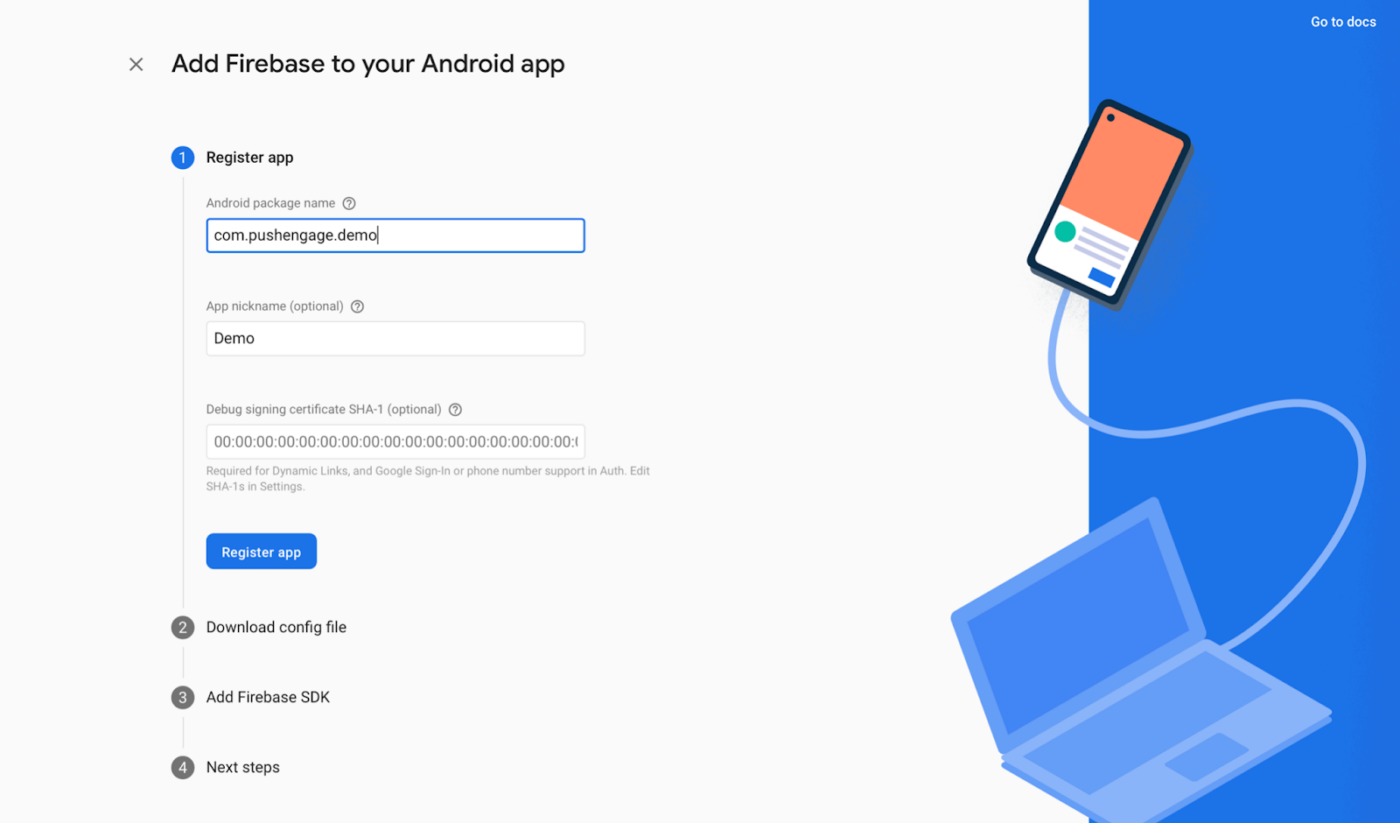
6. 下载配置文件: 下载 google-services.json 文件,并将其放置在您的 Android 应用模块根目录下的 android/app/ 中。
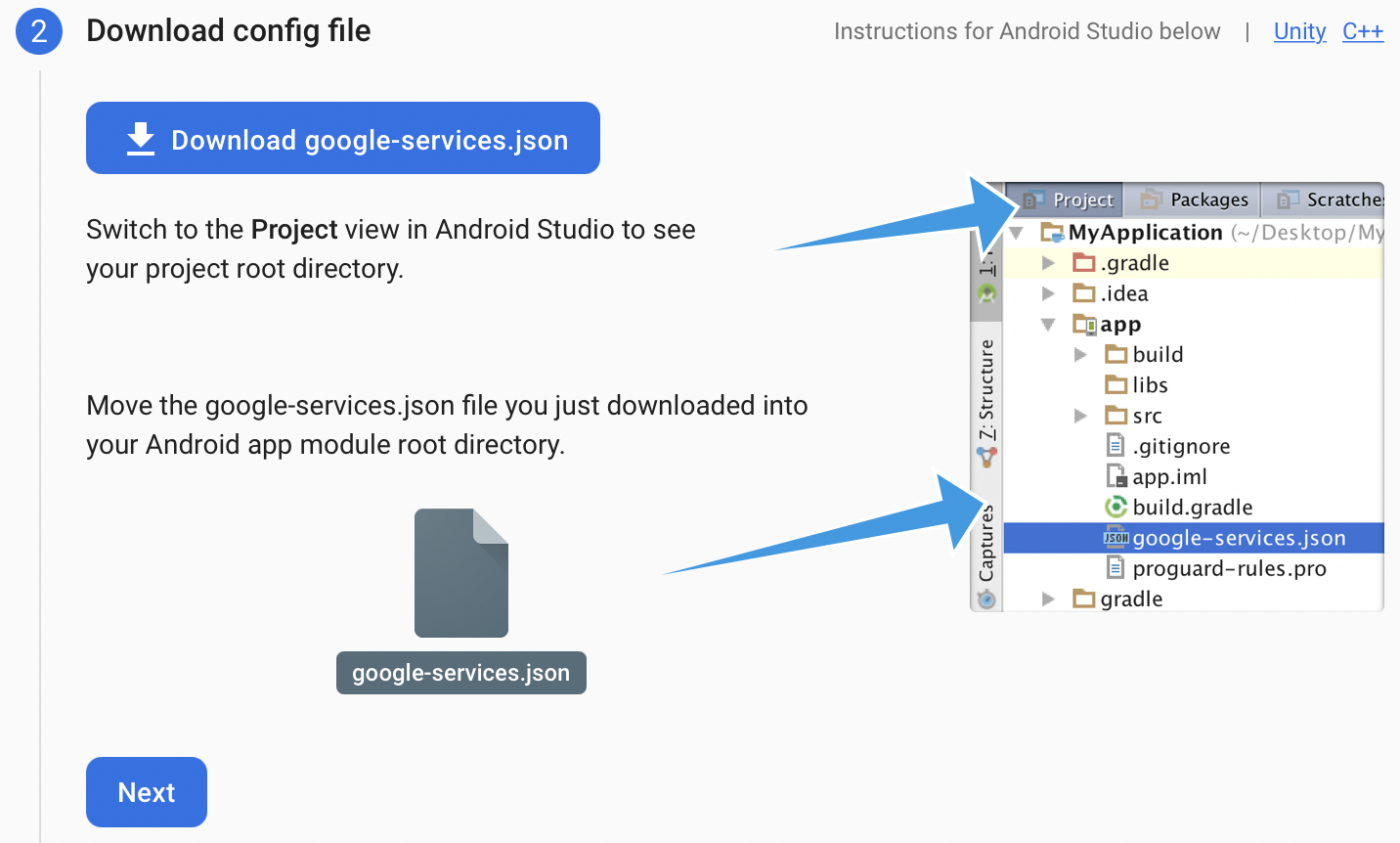
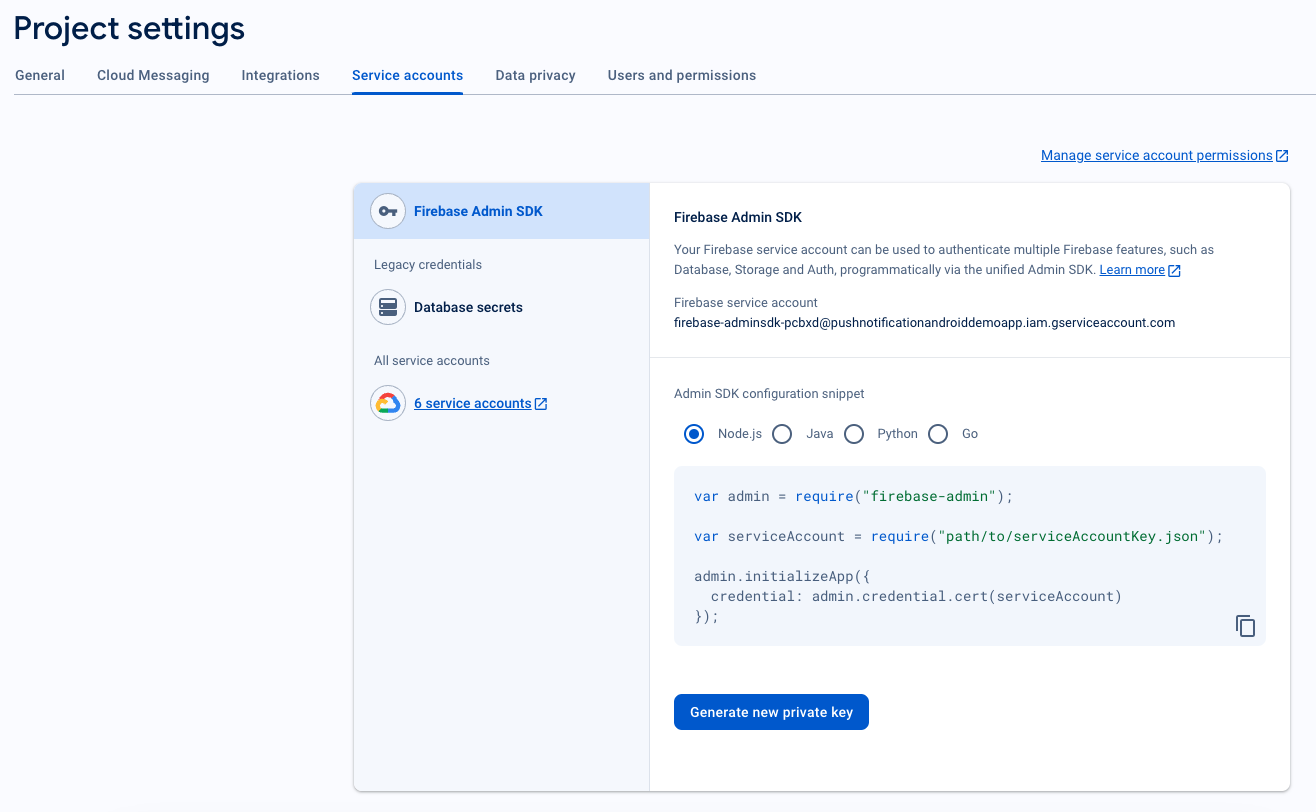
7. 生成服务账户 JSON
- 在 Firebase 控制台中,点击左上角“项目概览”旁边的设置图标,然后选择项目设置。
- 导航到服务账户选项卡。
- 点击生成新的私钥,然后下载 .json 文件。
- 妥善保管此文件,因为您将在 PushEngage 信息中心设置中使用它。
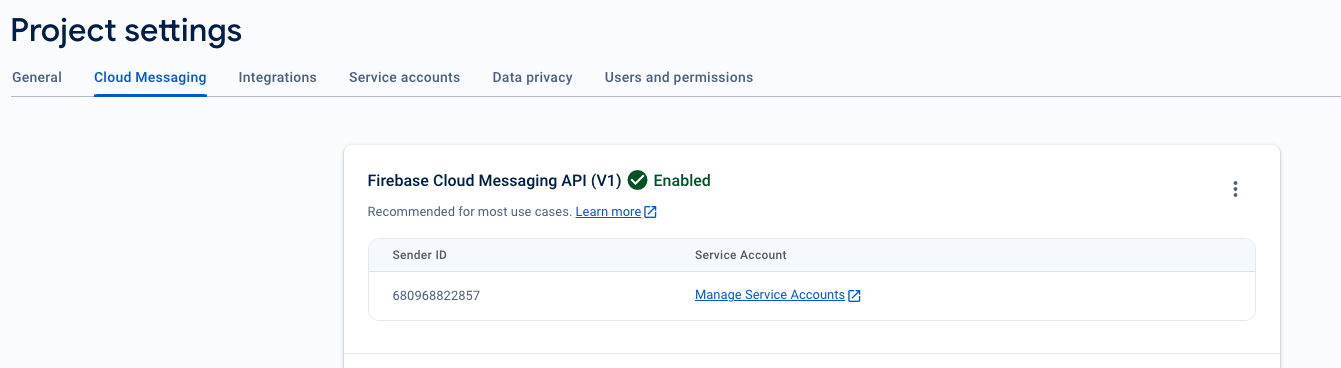
8. 检索发送方 ID
- 在 Firebase 控制台中,点击左上角项目概览旁边的设置图标,然后选择“项目设置”。
- 选择Cloud Messaging选项卡,您可以在此处找到发送方 ID,这是 PushEngage SDK 初始化所必需的。
将 FCM 与 PushEngage 信息中心集成
要将 FCM 详细信息与 PushEngage 信息中心无缝集成,请按照以下步骤操作:
- 通过使用您的凭据登录来访问您的 PushEngage 帐户。
- 导航到 设置 » 安装,然后选择 Android SDK 选项卡
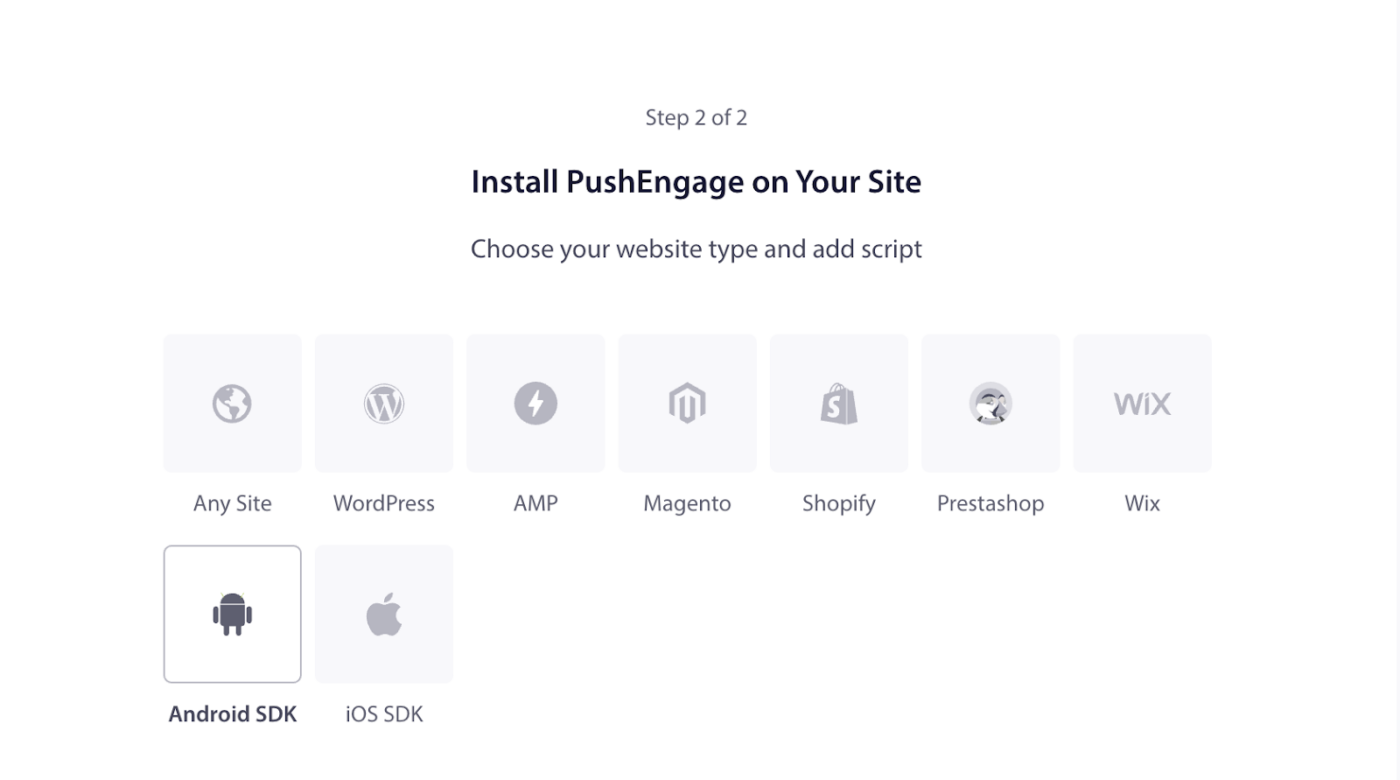
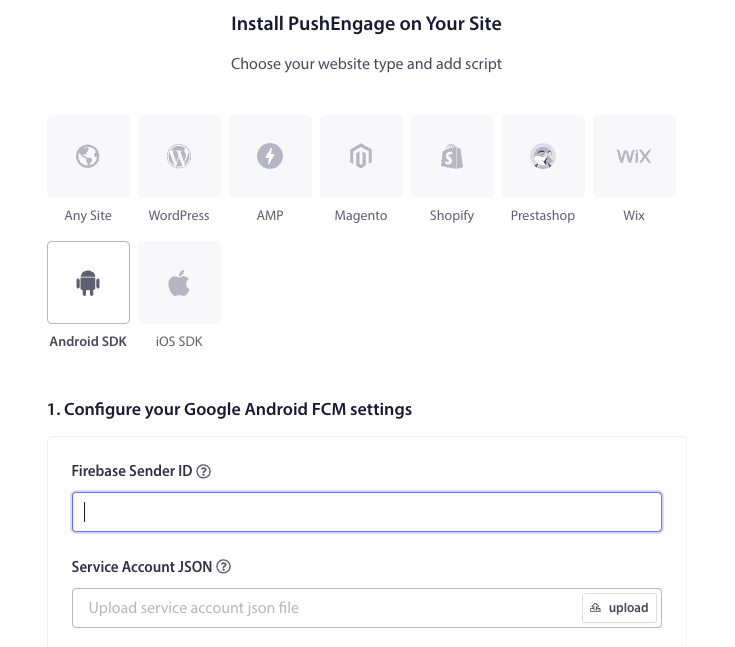
- 现在,配置 FCM 设置
- 输入您的 Firebase 发送者 ID(从 Firebase 控制台检索)。
- 上传 服务帐户 JSON 文件(从 Firebase 下载)。
- 单击更新按钮以保存这些设置。
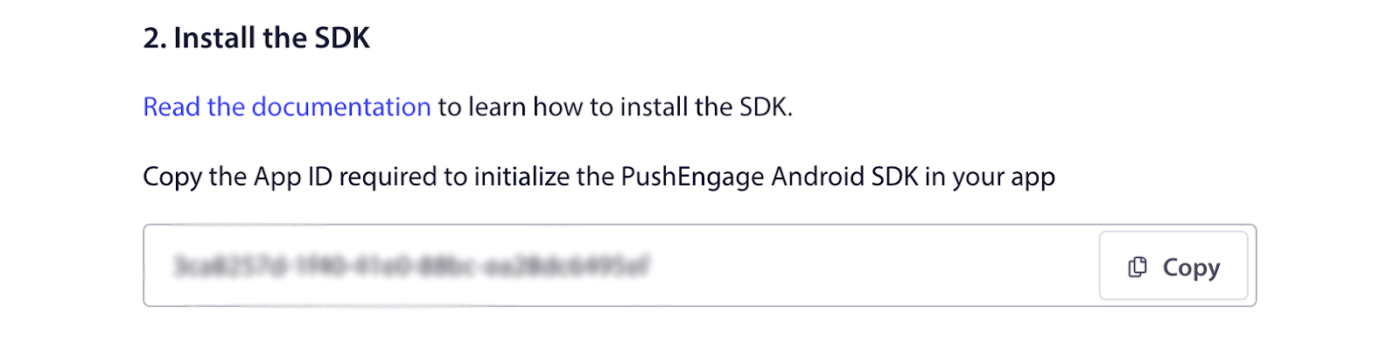
5. 复制应用 ID:配置 FCM 设置后,您将获得一个应用 ID。复制此应用 ID,因为它是在 Flutter 应用中初始化 PushEngage Android SDK 所必需的。
设置 iOS
设置项目
我们请求您在打开项目后遵循以下步骤。
以下是打开项目的方法:your_project_name » iOS » Runner.xcworkspace。
1. 启用远程通知
- 打开您的 Xcode 项目,然后在项目导航器中选择根项目。
- 选择您的主应用目标。
- 导航到“签名与功能”。
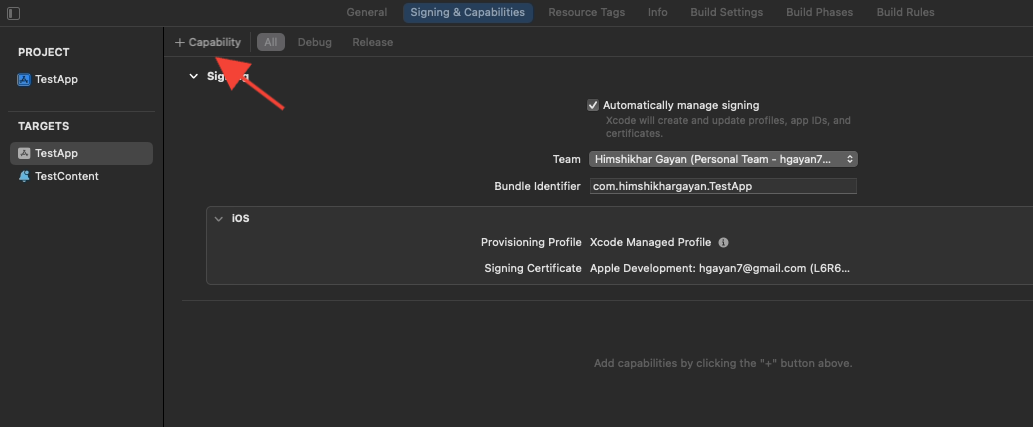
- 确保已添加后台模式功能。如果没有,请单击“+ 功能”按钮添加它。
- 同样,请确保已添加推送通知功能。如果没有,请使用“+ 功能”按钮添加它。
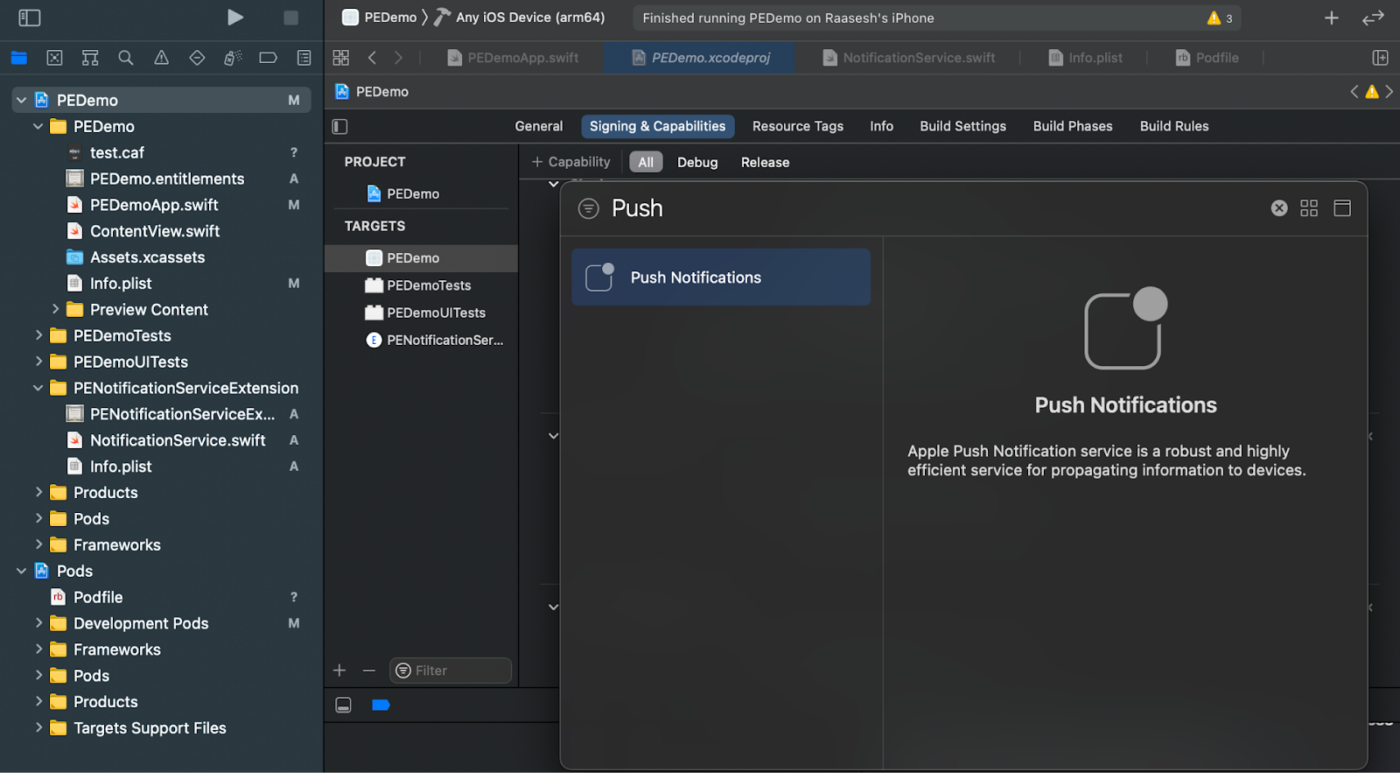
如果 Xcode 中未显示“推送通知”功能:
- 转到您的 Apple Developer 帐户。
- 导航到“证书、标识符和配置文件”。选择您的应用标识符。
- 编辑您的 App ID 的配置,并确保启用了推送通知。
- 返回 Xcode 并尝试再次添加推送通知功能。
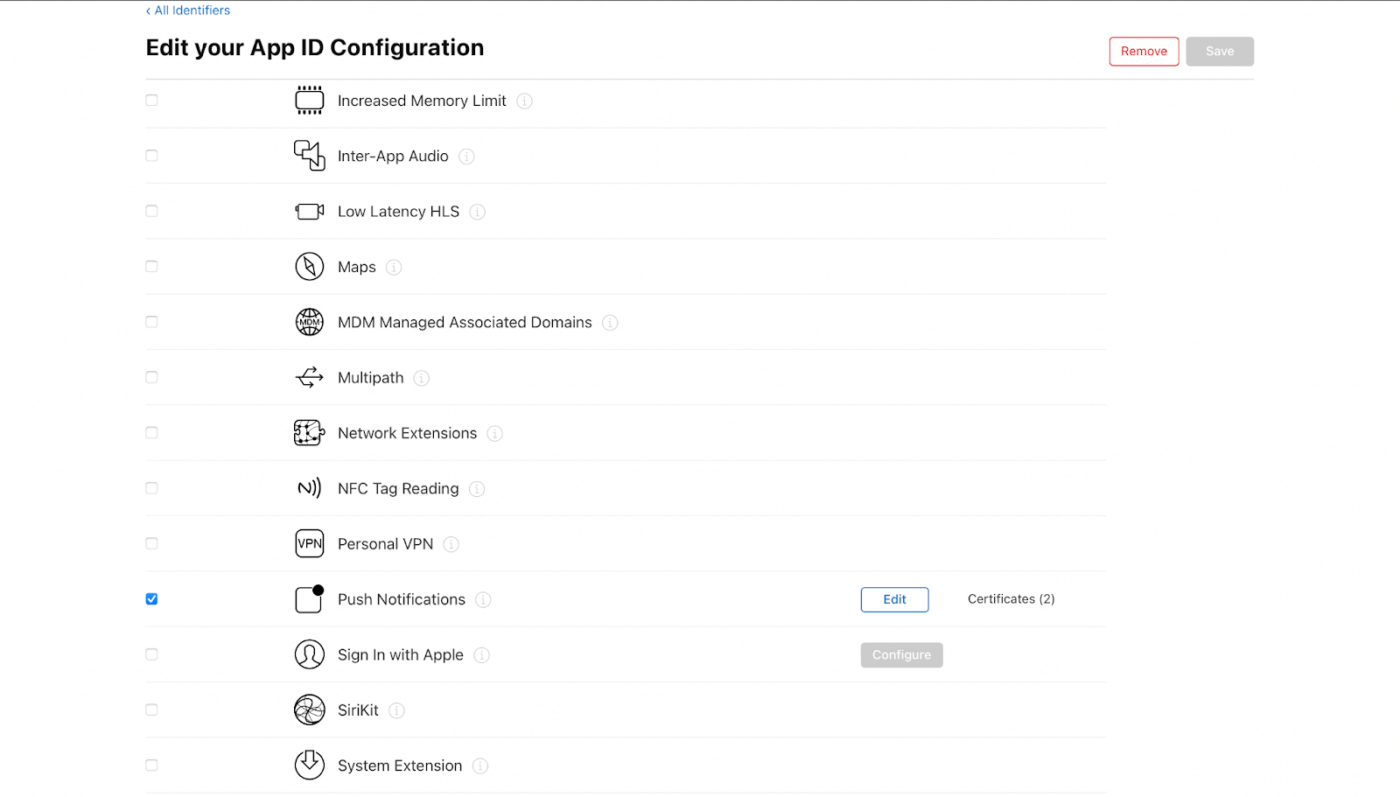
2. 启用后台模式
- 在您的 Xcode 项目中,导航到“签名与功能”。
- 在“后台模式”中,同时启用“远程通知”和“后台获取”。
- 此步骤可确保您的应用能够高效地处理远程通知和后台获取。
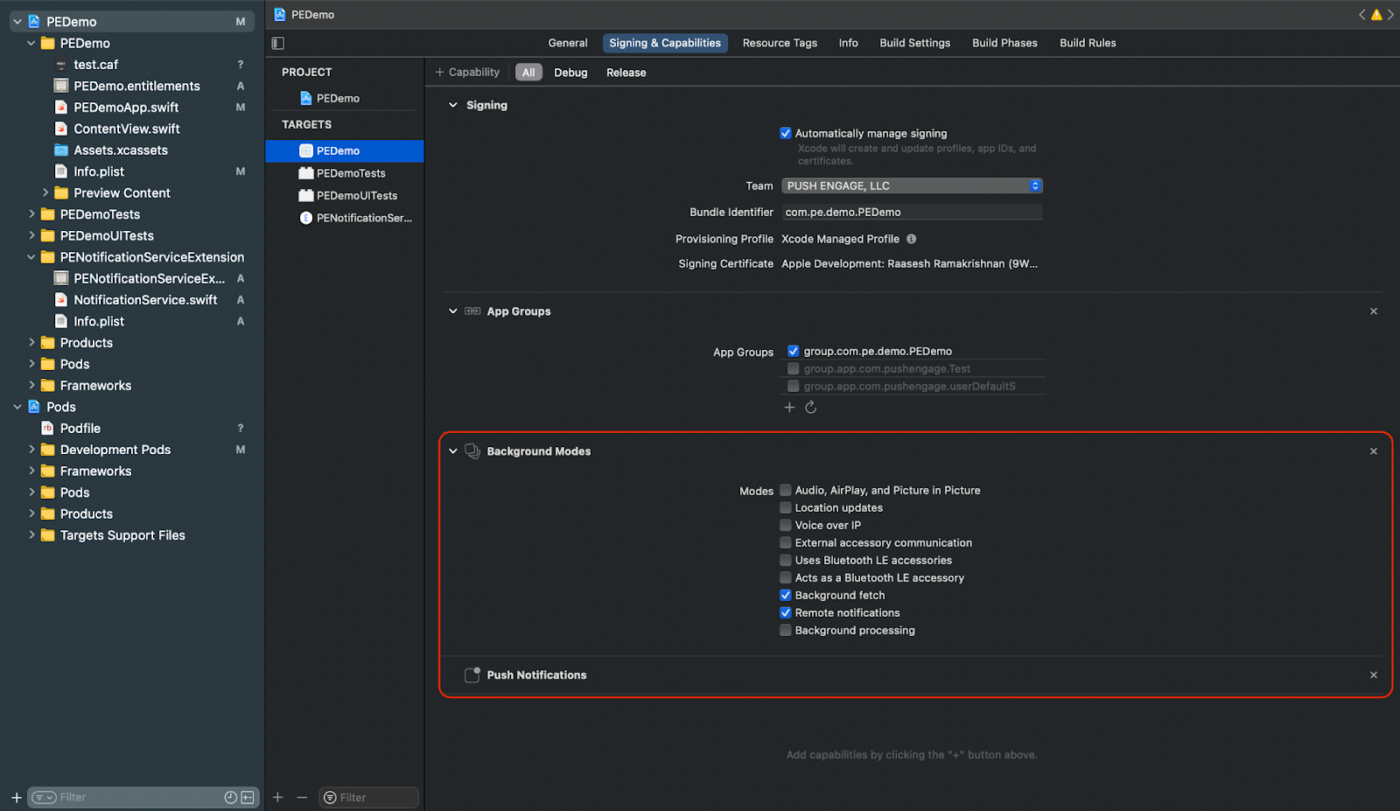
如果您没有 iOS 的 APN 证书,可以使用此处的指南创建一个。
接下来,您需要仅为 iOS 添加通知服务扩展和通知内容扩展。
创建通知服务扩展
通知服务扩展增强了您的 iOS 应用接收通知的能力。它用于在接收通知时修改通知内容或获取/处理任何数据。请按照以下步骤创建通知服务扩展:
- 打开 Xcode 并导航到您的项目。
- 从菜单中选择 文件 » 新建 » 目标。
- 在模板选择窗口中,选择 通知服务扩展,然后点击 下一步。
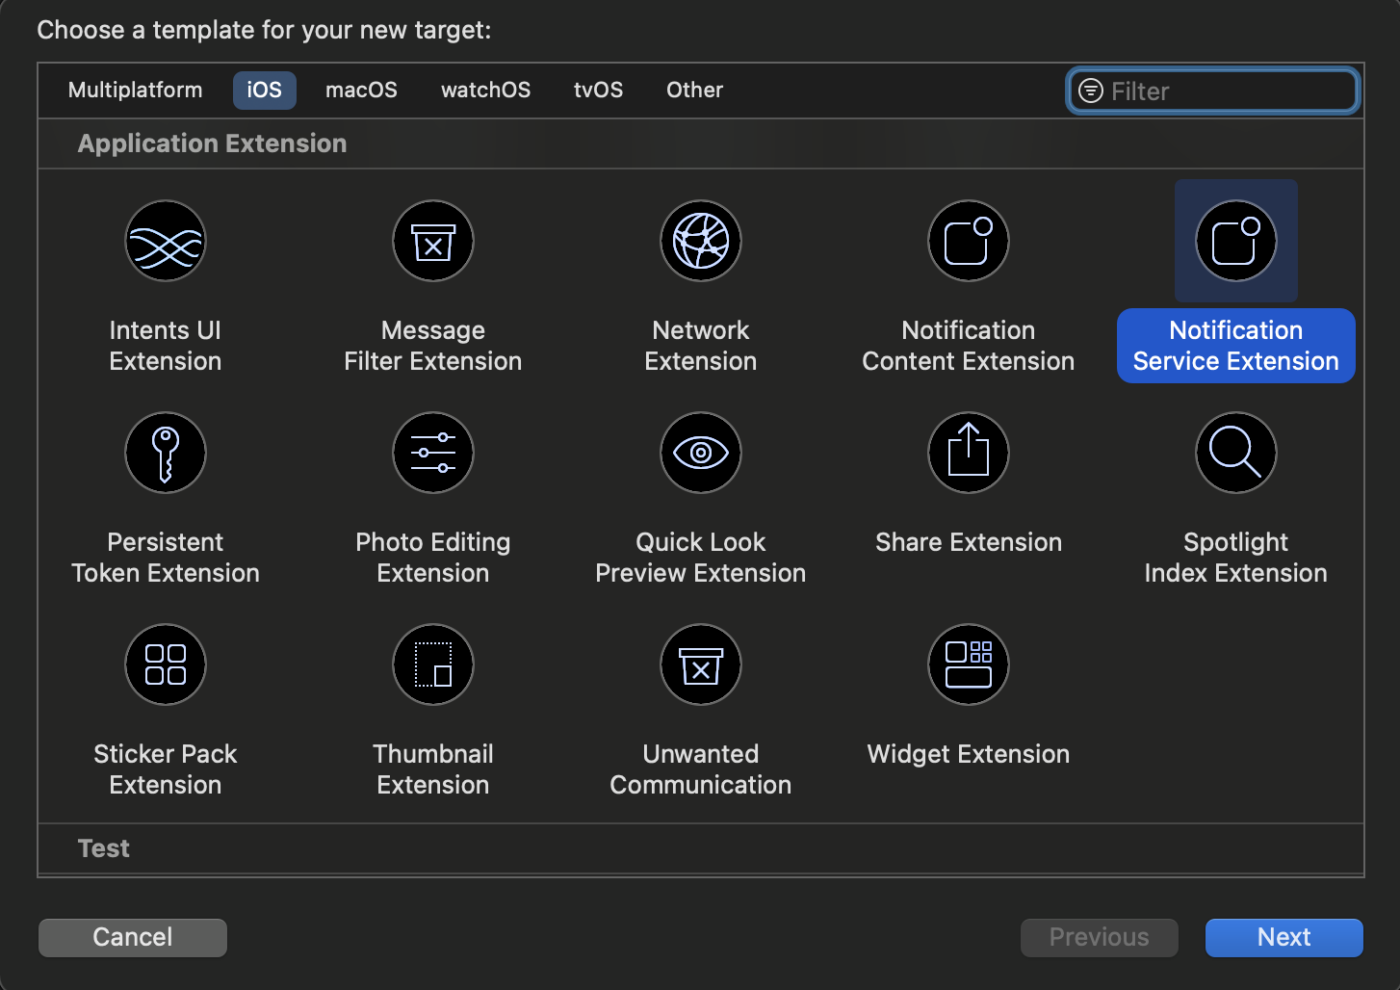
4. 为您的扩展名提供一个名称,例如 PushEngageNotificationServiceExtension,然后点击 完成。
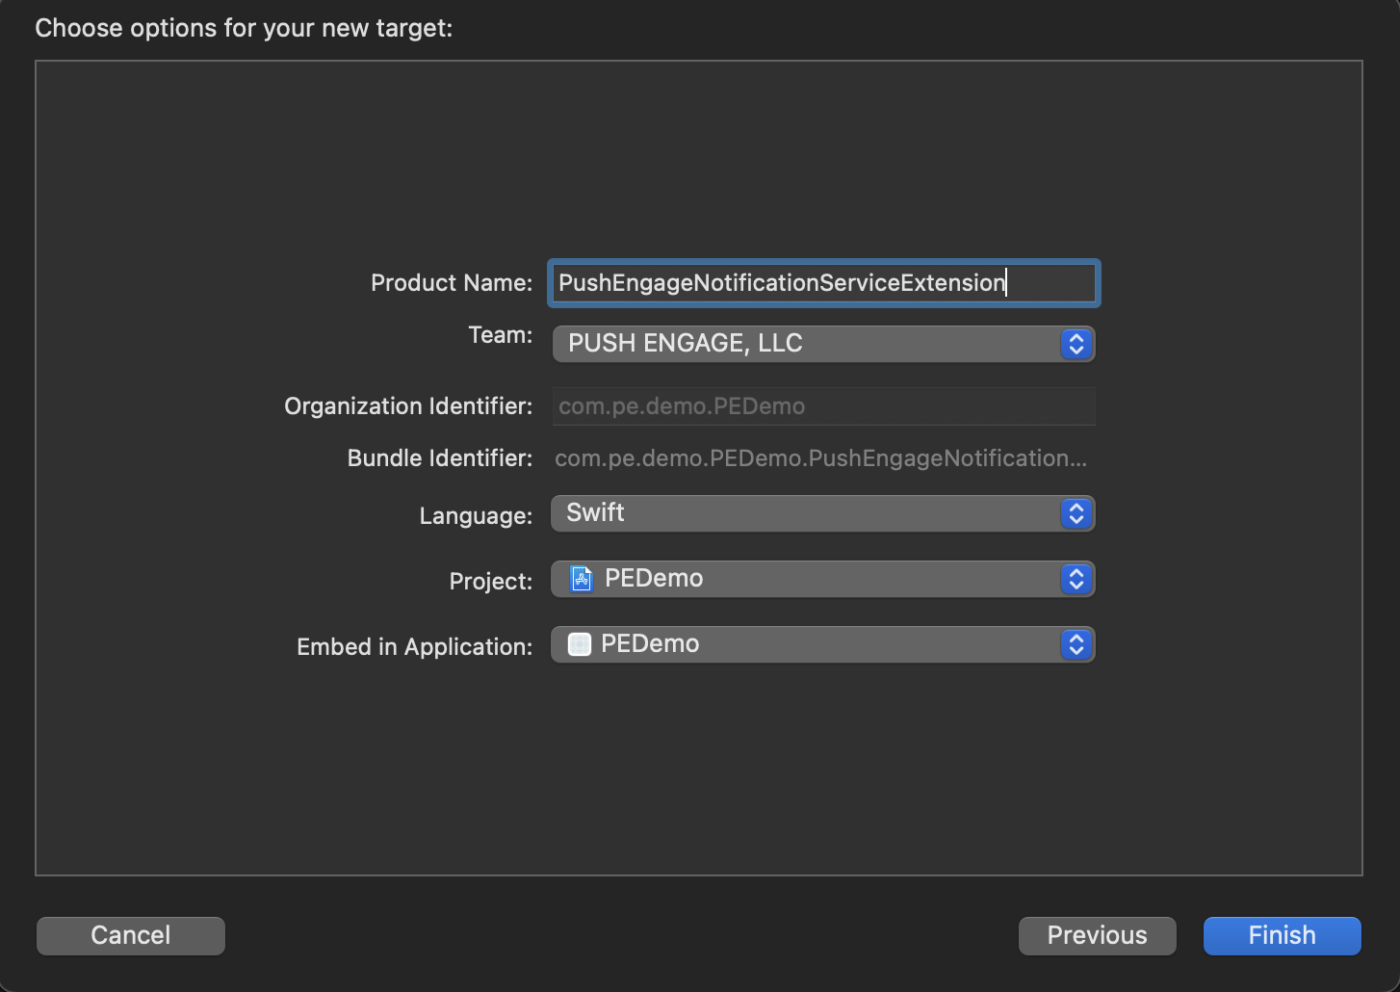
4. 为您的扩展名提供一个名称,例如 PushEngageNotificationServiceExtension,然后点击完成。
5. 完成创建通知服务扩展后,系统可能会提示您激活它。请勿立即激活。激活扩展程序会将 Xcode 的调试焦点从您的应用转移到扩展程序。如果您不小心激活了它,请不要担心;您可以在 Xcode 中切换回调试您的应用。
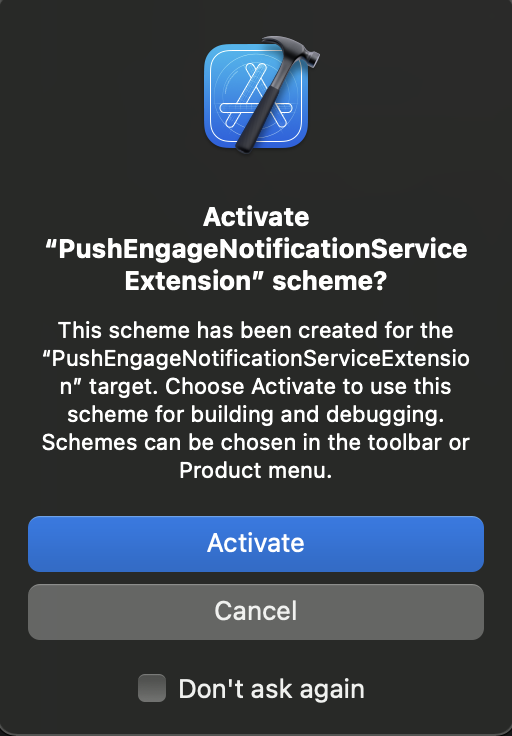
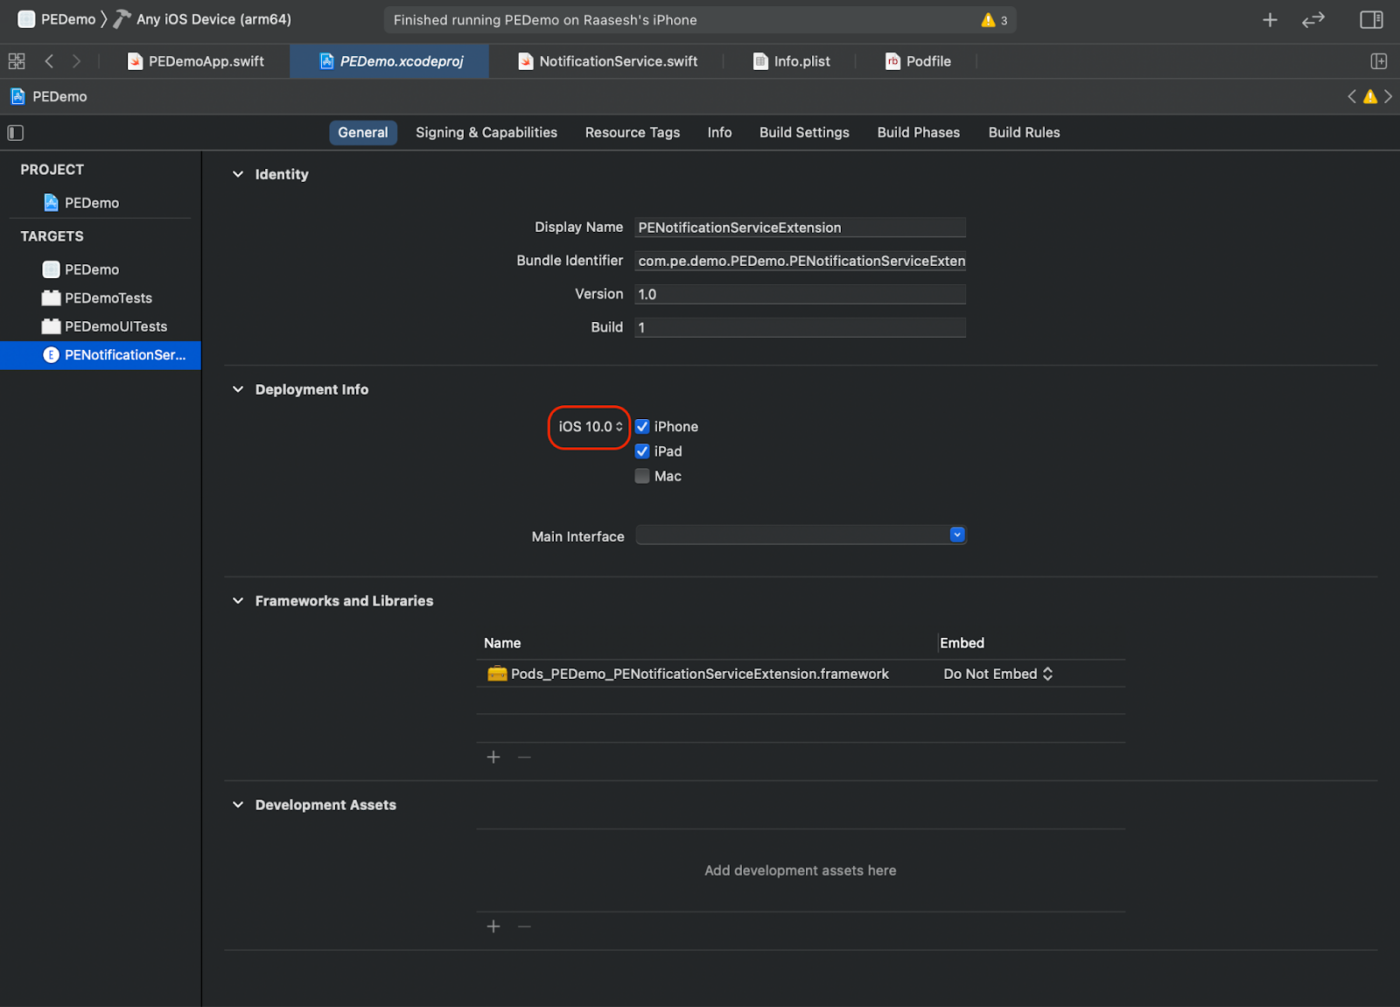
6. 在项目导航器中,选择顶级项目目录,然后在目标列表中选择在第 4 步中创建的 NotificationServiceExtension 目标。
7. 将部署目标设置为 iOS 10 或更高版本,这是 Apple 发布此扩展程序支持的版本。
初始化通知服务扩展的 PushEngage SDK
为确保 PushEngage SDK 在您的 iOS 通知服务扩展中正常运行,请按照以下步骤操作
- 打开 your_project_name » ios » Podfile。
- 将以下内容添加到您的 Podfile 底部:
post_install do |installer|
  installer.pods_project.targets.each do |target|
    flutter_additional_ios_build_settings(target)
  end
end

target 'Your_Notification_Service_Extension_Name' do
    use_frameworks!
    pod 'PushEngageExtension', '1.0.0'

  end
- 安装依赖项:
现在您需要进入项目中的 iOS 目录并执行以下命令:
pod repo update

pod install
- 在您的通知服务扩展目标中,请确保导入 PushEngage 框架并添加必要的初始化代码。您可以使用 Swift 进行操作,如下所示。
import UserNotifications
import PushEngageExtension

class NotificationService: UNNotificationServiceExtension {

    var contentHandler: ((UNNotificationContent) -> Void)?
    var bestAttemptContent: UNMutableNotificationContent?
    var request: UNNotificationRequest?

    override func didReceive(_ request: UNNotificationRequest,
                             withContentHandler contentHandler: @escaping (UNNotificationContent) -> Void) {
        self.request = request
        self.contentHandler = contentHandler
        self.bestAttemptContent = (request.content.mutableCopy() as? UNMutableNotificationContent)

        if let bestContent = bestAttemptContent {
            PushEngageExtension.didReceiveNotificationExtensionRequest(request, bestContentHandler: bestContent)
            contentHandler(bestContent)
        }
    }

    override func serviceExtensionTimeWillExpire() {
        if let contentHandler = contentHandler,
           let request = request,
           let bestAttemptContent = bestAttemptContent {
            guard let content = PushEngageExtension.serviceExtensionTimeWillExpire(request, content: bestAttemptContent) else {
                contentHandler(bestAttemptContent)
                return
            }
            contentHandler(content)
        }
    }
}
创建通知内容扩展
为了通过添加自定义 UI 来改进显示方式,您需要创建一个通知内容扩展。请按照以下步骤进行设置:
- 在 Xcode 中,转到 文件 » 新建 » 目标。
- 选择通知内容扩展,然后点击下一步。
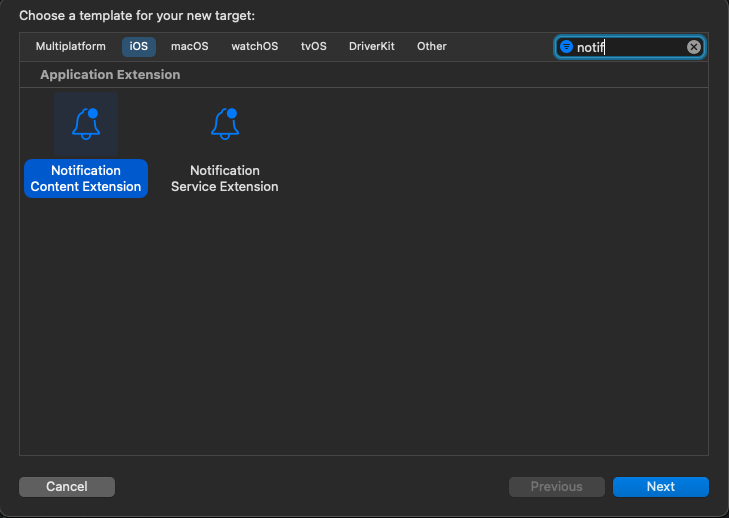
3. 点击完成后的对话框中,不要选择“激活”。取消会使 Xcode 继续调试您的应用而不是扩展。如果您不小心激活了它,请在 Xcode 中切换回调试您的应用(位于运行按钮旁边)。
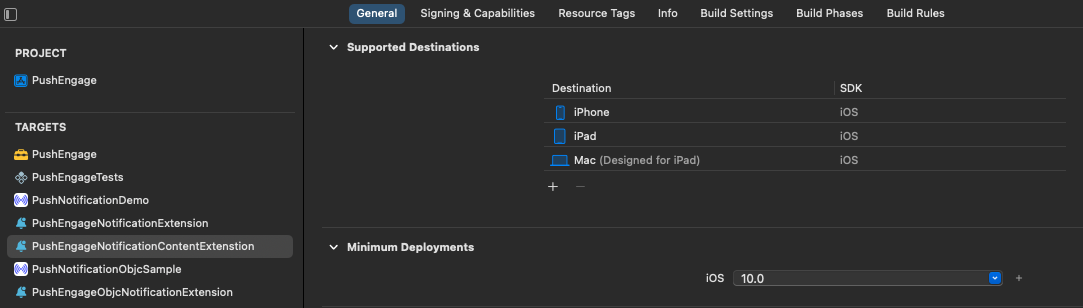
4. 在项目导航器中,选择顶级项目目录,然后在目标列表中选择在第 2 步中创建的 NotificationContentExtension 目标。
5. 将部署目标设置为 iOS 10 或更高版本,这是 Apple 发布此扩展程序支持的版本。
初始化通知内容扩展的 PushEngage SDK
为确保 PushEngage SDK 在您的 iOS 通知内容扩展中正常运行,请按照以下步骤操作:
打开 your_project_name » iOS » Podfile。
将以下内容添加到您的 Podfile 底部:
target 'Your_Notification_Content_Extension_Name' do
    use_frameworks!
    pod 'PushEngageExtension', '1.0.0'
  end
- 安装依赖项:这是您需要在命令行中运行的代码。
e
pod repo update
pod install
- 在您的通知内容扩展目标中,请确保导入 PushEngage 框架并添加必要的初始化代码。以下是使用 Swift 进行操作的方法,并附带一些 UI 元素示例。
import UIKit
import UserNotifications
import UserNotificationsUI
import PushEngageExtension

@available(iOSApplicationExtension 10.0, *)

class NotificationViewController: UIViewController, UNNotificationContentExtension {
    fileprivate var hostingView: UIHostingController<ContentView>?
    override func viewDidLoad() {
        super.viewDidLoad()
        self.view.backgroundColor = .white
    }

    func didReceive(_ notification: UNNotification) {
        if(notification.request.content.categoryIdentifier == "your_identifier"){
            let payLoad = PushEngageExtension.getCustomUIPayLoad(for: notification.request)
  //pass the payload to your custom View
            let view = CustomView(payLoadInfo: payLoad)
            hostingView = UIHostingController(rootView: view)
If let customView = self.hostingView {
            addChild(hostingView!)
}
        }
    }
}
添加应用组
应用组对于实现主应用、通知服务扩展和通知内容扩展之间的通信至关重要。请按照以下步骤将应用组添加到您的 iOS 项目中:
如果您已有应用组并只想使用该应用组,请跳至第 4 步。
- 在 Xcode 项目中,于项目导航器中,选择应用的顶层项目目录并选择应用的主目标。
- 导航至“签名与功能”选项卡。
- 点击“+ 功能”按钮,然后从列表中选择“应用组”。
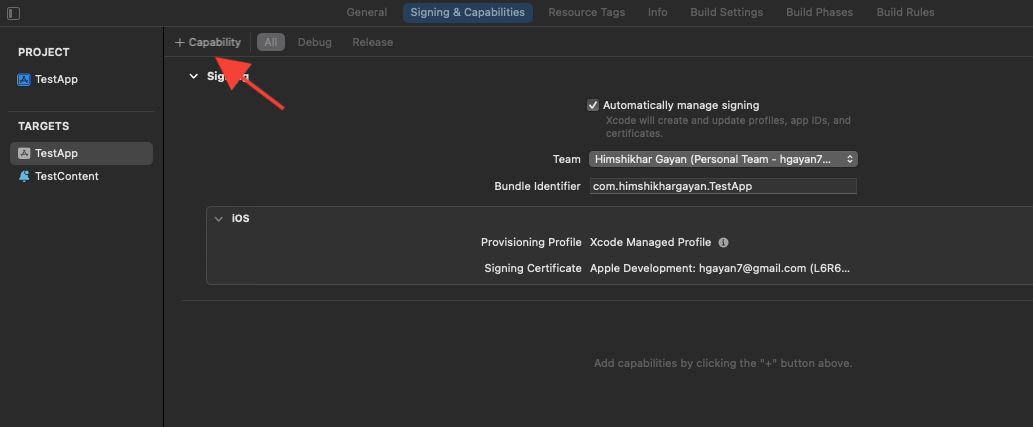
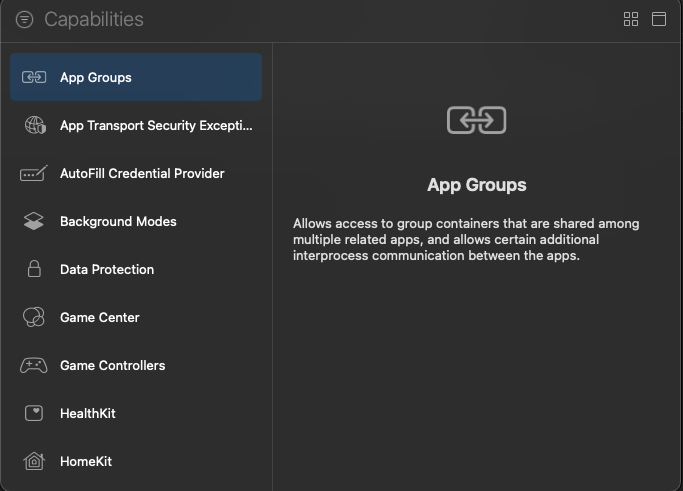
4. 点击“+”按钮添加一个应用组。
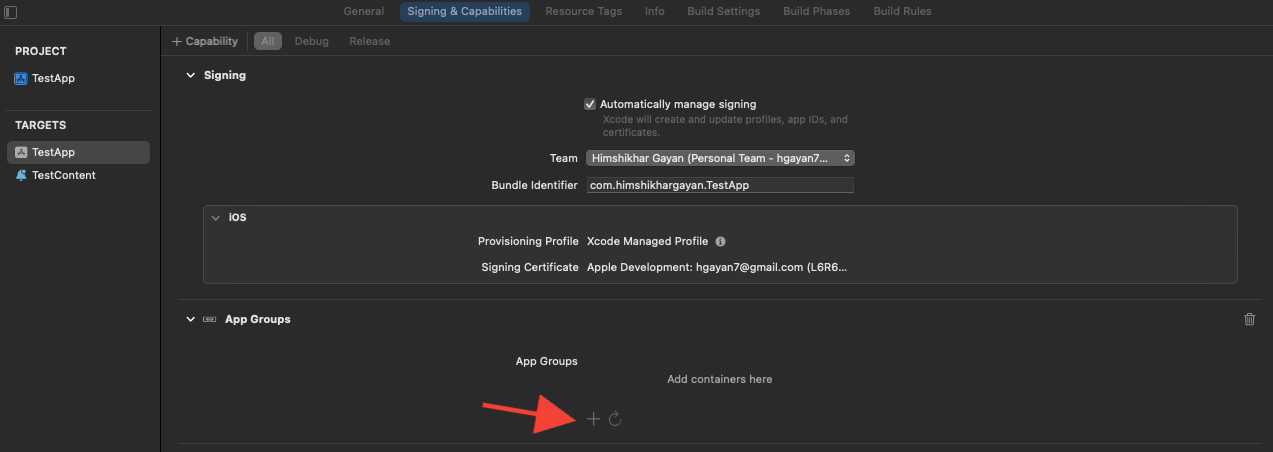
5. 为您的应用组添加一个唯一的名称,然后点击“确定”。
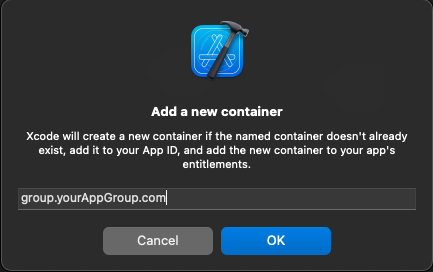
6. 在主编辑器区域,选择您应用的主目标。创建应用组后,请在您的应用 Info.plist 文件中提供该组的名称,键为 PushEngage_App_Group_Key。
7. 在通知服务扩展的 Info.plist 文件中添加相同的键和值。
8. 确保在主应用目标和您的通知服务扩展中都选择了相同的应用组。
初始化 PushEngage SDK
在您的 main.dart 文件中,初始化 PushEngage SDK。
void main() {
  runApp(const MyApp());
}

class MyApp extends StatefulWidget {
  const MyApp({super.key});
  @override
  State<MyApp> createState() => _MyAppState();
}

class _MyAppState extends State<MyApp> {
  @override
  void initState() {
    super.initState();
    initPlatformState();
  }

  Future<void> initPlatformState() async {
    PushEngage.setAppId("your_pushengage_app_id");
  }
  @override
  Widget build(BuildContext context) {
    return const MaterialApp(
      title: 'PushEngage',
      debugShowCheckedModeBanner: false,
      home: Home(),
    );
  }
}
在 iOS 应用的 AppDelegate.swift 文件中
import Flutter
import UIKit
import PushEngage

@UIApplicationMain
@objc class AppDelegate: FlutterAppDelegate {

    override init() {
        super.init()
        PushEngage.swizzleInjection(isEnabled: true)
    }

    override func application(
        _ application: UIApplication,
        didFinishLaunchingWithOptions launchOptions: [UIApplication.LaunchOptionsKey: Any]?
    ) -> Bool {
        if #available(iOSApplicationExtension 10.0, *) {
            UNUserNotificationCenter.current().delegate = self
        }
        GeneratedPluginRegistrant.register(with: self)
        PushEngage.setBadgeCount(count: 0)
        PushEngage.setNotificationWillShowInForegroundHandler { notification, completion in
            if notification.contentAvailable == 1 {
                // in case developer failed to set completion handler. After 25 sec handler will call.
                completion(nil)
            } else {
                completion(notification)
            }
        }
        return super.application(application, didFinishLaunchingWithOptions: launchOptions)
    }
}
处理 deepLink
deepLinkStream 是一个发出 deep link 数据的流。
class Home extends StatefulWidget {
  const Home({super.key});

  @override
  _HomeState createState() => _HomeState();
}

class _HomeState extends State<Home> {
  late StreamSubscription _deepLinkSubscription;

  @override
  void initState() {
    super.initState();
    PushEngage.deepLinkStream.listen((data) {
      _handleDeepLink(data);
    });
  }

  void _handleDeepLink(Map<String, dynamic>? data) {
    // Parse the deep link and navigate accordingly
    Uri uri = Uri.parse(data?['deepLink']);
    print('Path: ${uri.path}');
    updateResponseText(data.toString());
    switch (uri.path) {
      case 'trigger':
      case '/trigger':
        print(‘your_implementation’)
        break;
    }
  }
就是这样,您已成功为 Android 和 iOS 应用集成了 Flutter SDK。
如果您遇到任何问题,请 联系我们 。我们的支持团队将能够帮助您。


