Uyarı: Bu öğe için eski belgelere ulaşılamıyor, bu nedenle geçerli belgeleri görüyorsunuz.
Creating a campaign from scratch can feel overwhelming. But we’ve got your back! We’ve put together a bunch of templates from different industries and use cases. These templates are designed to make your life easier and save your time.
In this article, we’ll show you how to use these templates to customize your campaigns effortlessly while saving time.
Please log in to the PushEngage dashboard and navigate to Campaigns » Push Broadcasts.
You can then either go ahead and create a new push broadcast from scratch or choose from templates. For that, you can click on Choose From Templates button.

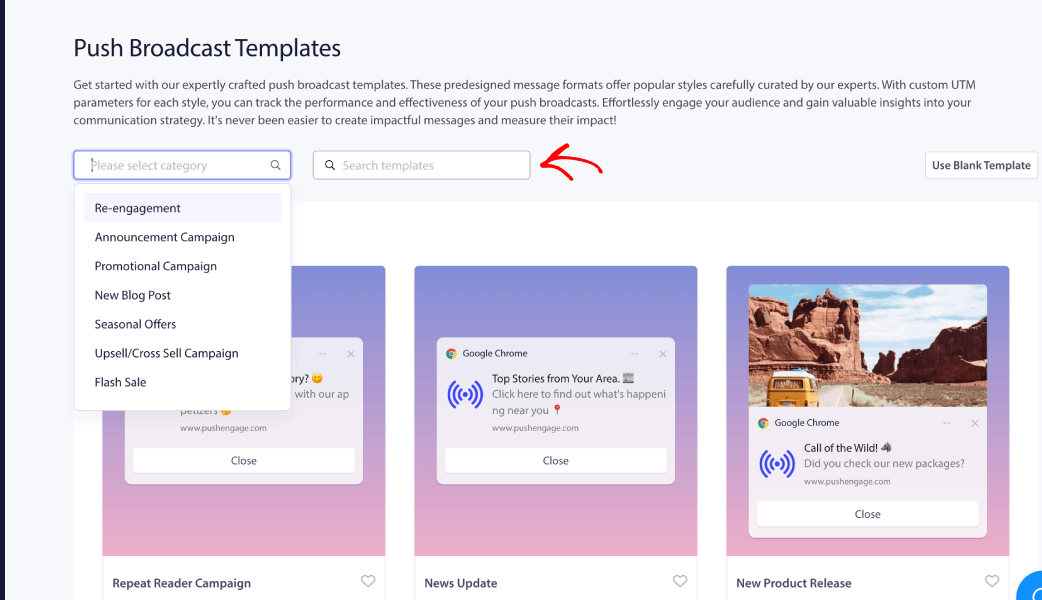
All the templates will open up for you to explore and choose the right campaign. You can search with keywords or choose the campaign category from the dropdown.
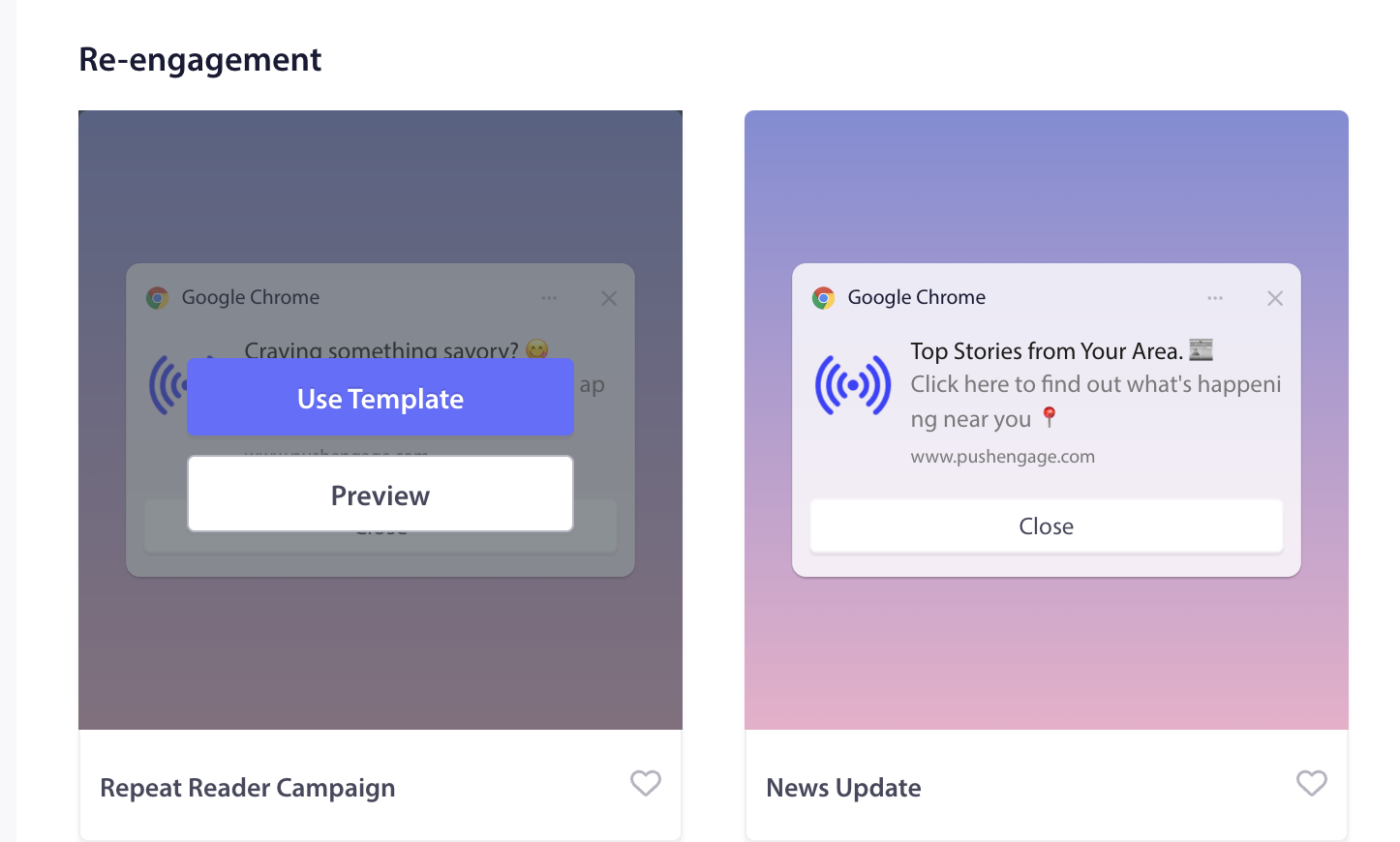
You can click on Preview to understand how it would look in various operating systems and browser combinations. Web push campaign appearance depends a lot upon the device and browsers. Here is an example –

If you click on Use Template, the campaign editor will open with pre-filled text as displayed in the campaign. You can move to the audience to choose target subscribers or customize the content per your strategy.
Customizing the Template
You can customize the selected template or send it as it is to your audience.
Note: You can avail to get a free campaign created as broadcast for the subscribers you have collected by our team. If you have issues, you can reach out to us, and we will create it for free
Editing Campaign Content
The campaign title, message, and URL will be pre-filled. Your site logo will also be added as a notification image. Here are a few things to keep in mind while you start customizing the campaigns –
- You can create any Broadcast message of up to 135 characters (including emojis 😊)
- Add a title of up to 85 characters
- An image of up to 1MB
- Landing URL (192px x 192px) – This URL opens on clicking on the broadcast message.
Campaign Behaviour & Tracking
Notification Duration: You need to set the Duration of all the notifications before sending to avoid overwhelming your subscribers with notifications. This pours your subscribers with loads of notifications and paves the way to increased unsubscribes. You can set the expiry of the notification to a maximum of 28 days.
UTM parameters for Google Analytics Tracking: Adding UTM parameters lets you analyze data in Google Analytics. When you send out notifications, setting up UTM parameters will help to capture the data that populate in GA. You can mention the mandatory fields – UTM Source, UTM Medium & UTM Campaign, as shown in the below example.
Testing Campaigns
A Test send will show you what the broadcast would look like when it is sent to the subscribers. Scroll down & click on Test Send Notification. Make sure that you have Allowed notifications for PushEngage.
Kitleyi Seçme
Tüm abonelere gönderebilir, kitle grubuna gönderebilir veya özel bir kitleye gönderebilirsiniz.

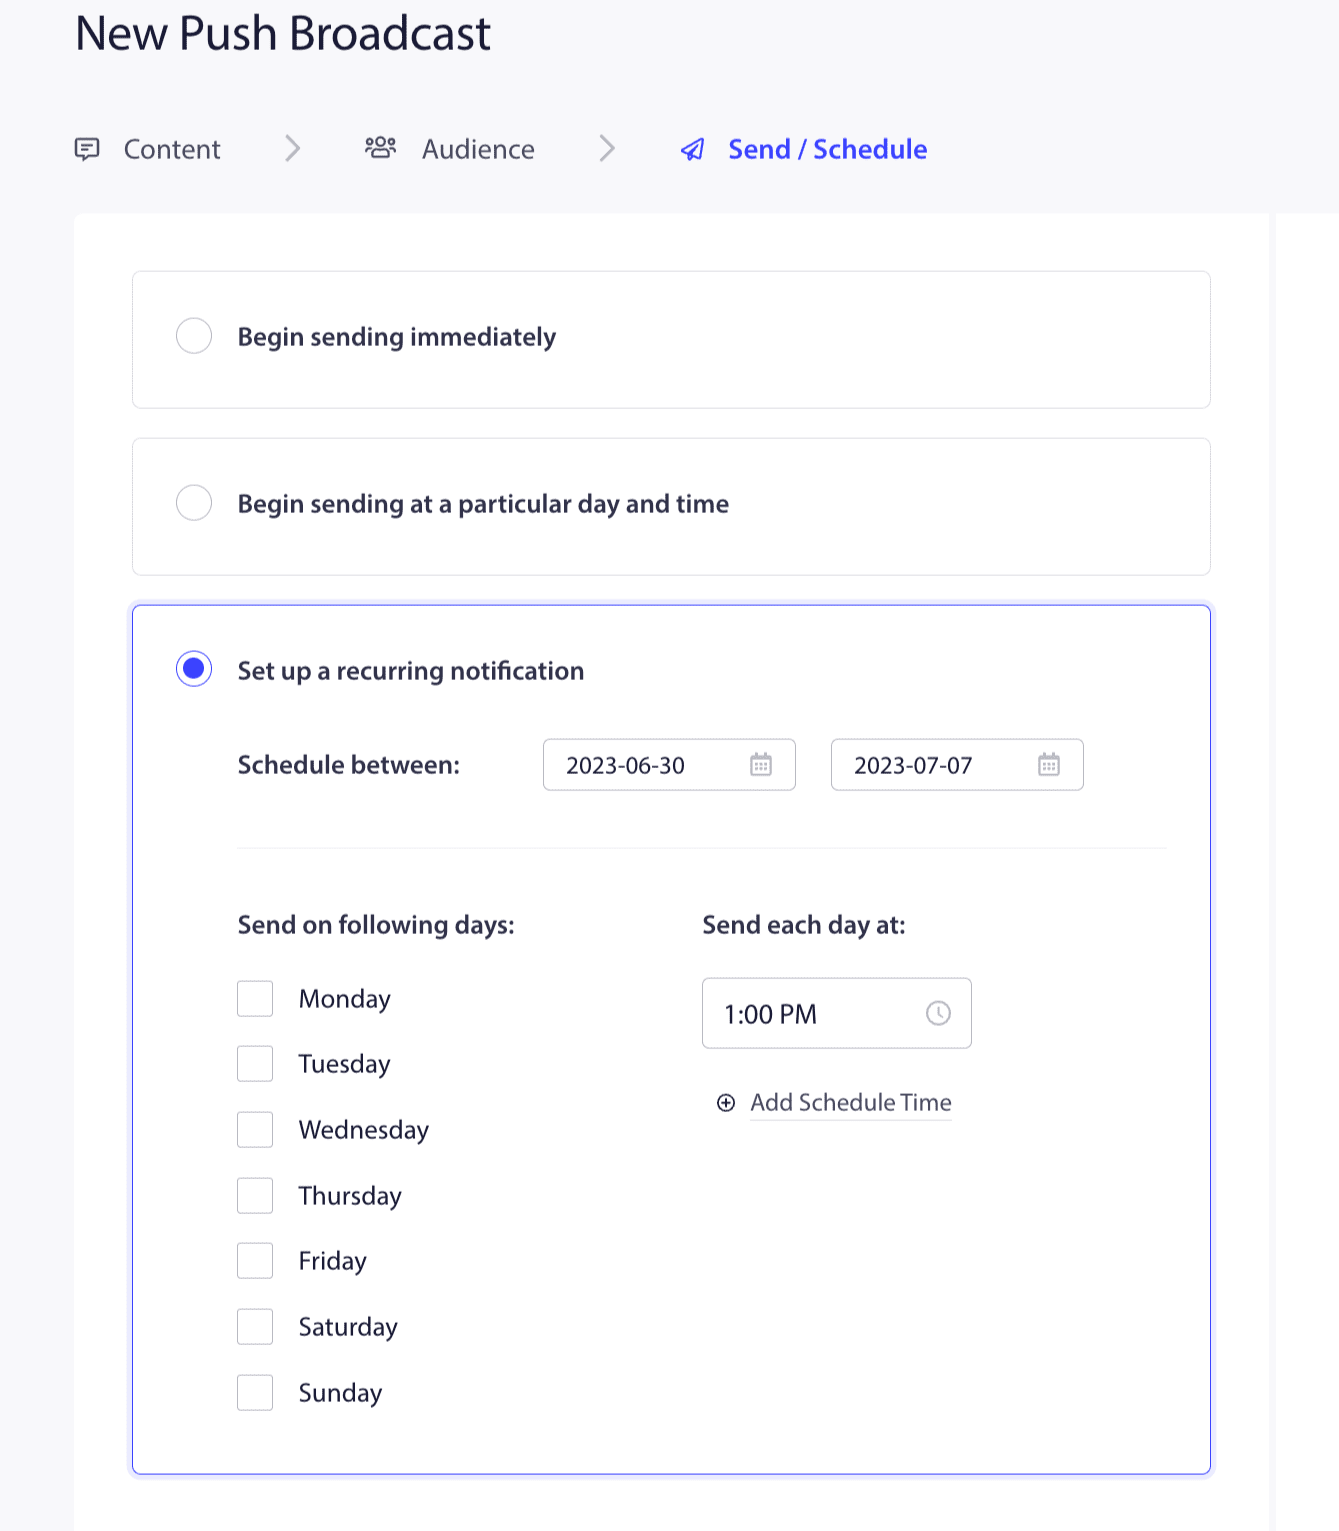
Gönderme/Zamanlama Seçenekleri
Bir kampanyayı zamanlayabilir veya hemen kitlenize gönderebilirsiniz.
İşte bu kadar; bir şablon kullanmaya ve abonelerinize göndermeye hazırsınız.
Herhangi bir sorunla karşılaşırsanız, lütfen buraya tıklayarak bizimle iletişime geçmekten çekinmeyin. Destek ekibimiz size yardımcı olabilecektir.


