Σημείωση: Δεν υπάρχει διαθέσιμη παλιά τεκμηρίωση για αυτό το στοιχείο, επομένως βλέπετε την τρέχουσα τεκμηρίωση.
Οι καμπάνιες Drip ή οι Drip Autoresponders είναι μια νέα έννοια στις Ειδοποιήσεις Web Push. Θα προσπαθήσουμε να κάνουμε το έργο ευκολότερο και να περιγράψουμε συγκεκριμένα βήματα για να τις εκτελέσετε στο PushEngage.
You can enable a Web Push Notification Autoresponder campaign and send it to all subscribed users or to a list/segment of users in PushEngage. To segment your users into specific lists, this can happen on specific pages, or when the user specifically subscribes to a curriculum of notifications.
How to Use Drip Campaigns in Web Push Notifications?
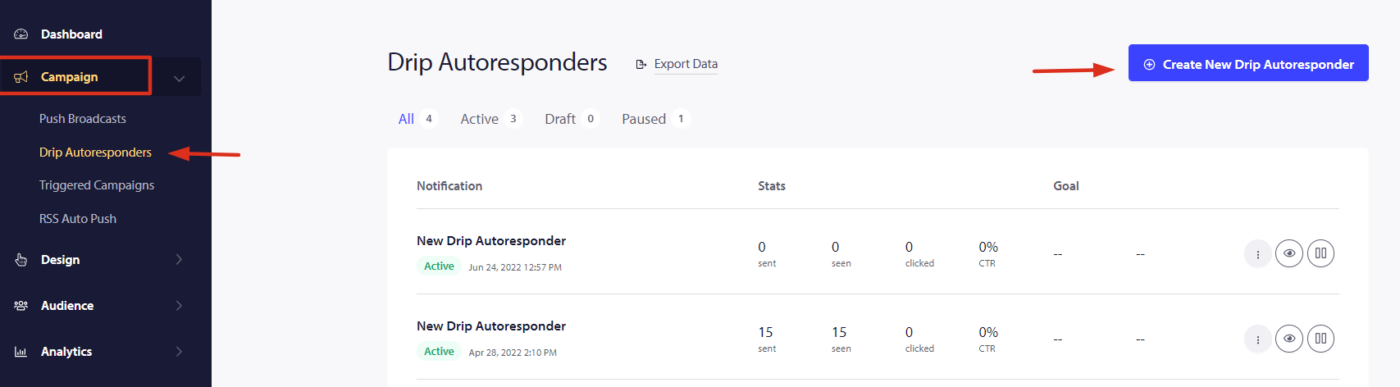
Step 1 – Login to your PushEngage dashboard and navigate to Campaign > Drip Autoresponder. Click on “Create New Drip Autoresponder”.
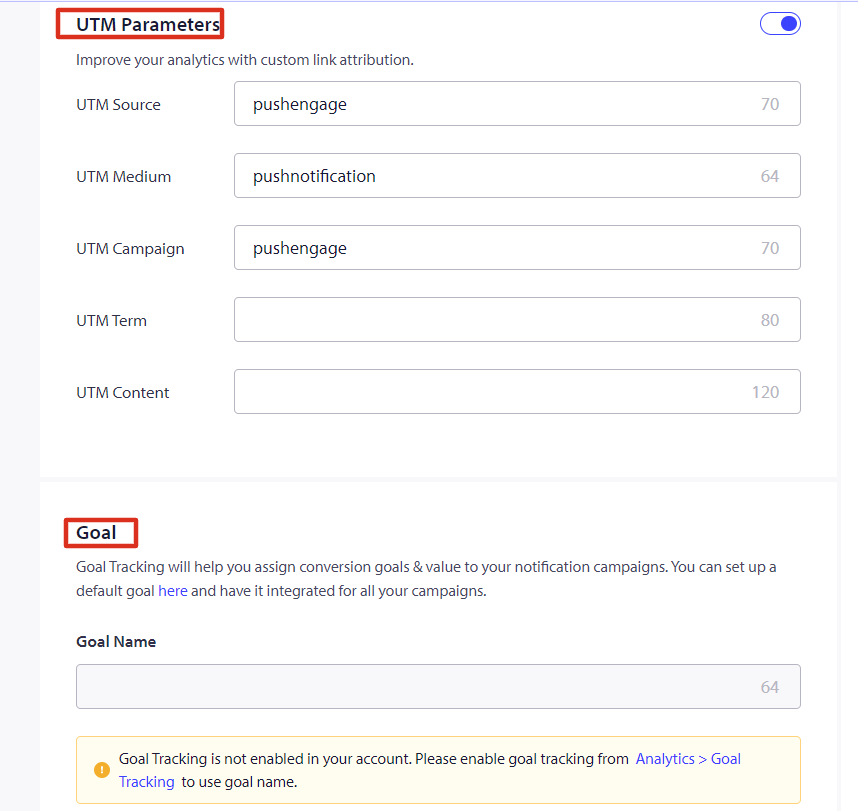
Step 2 – Now Create the Auto Responder Series and we configure the UTM variables for tracking.
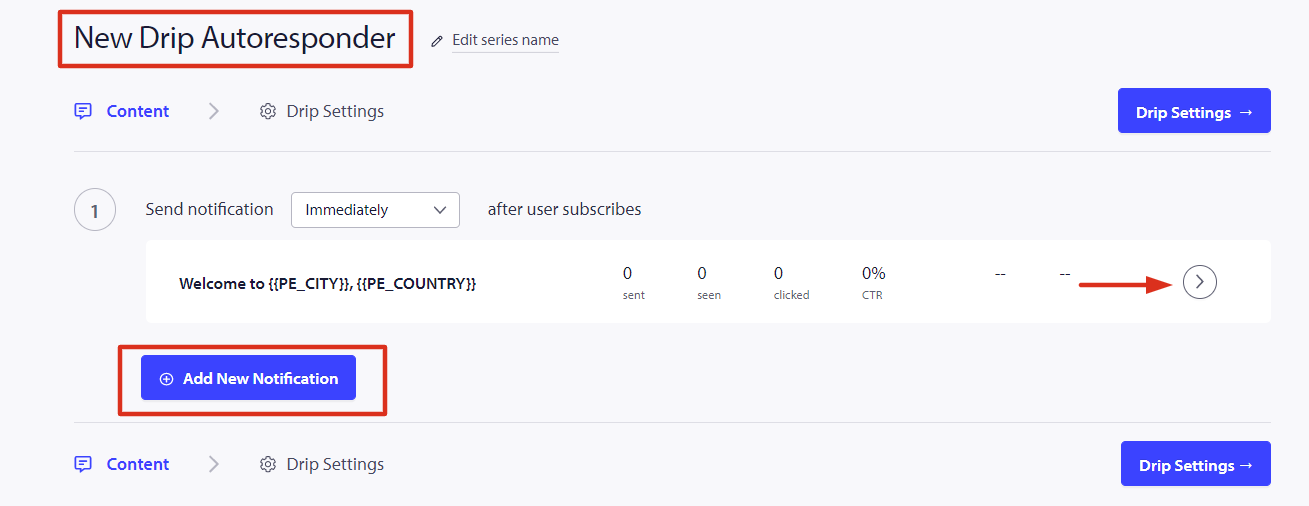
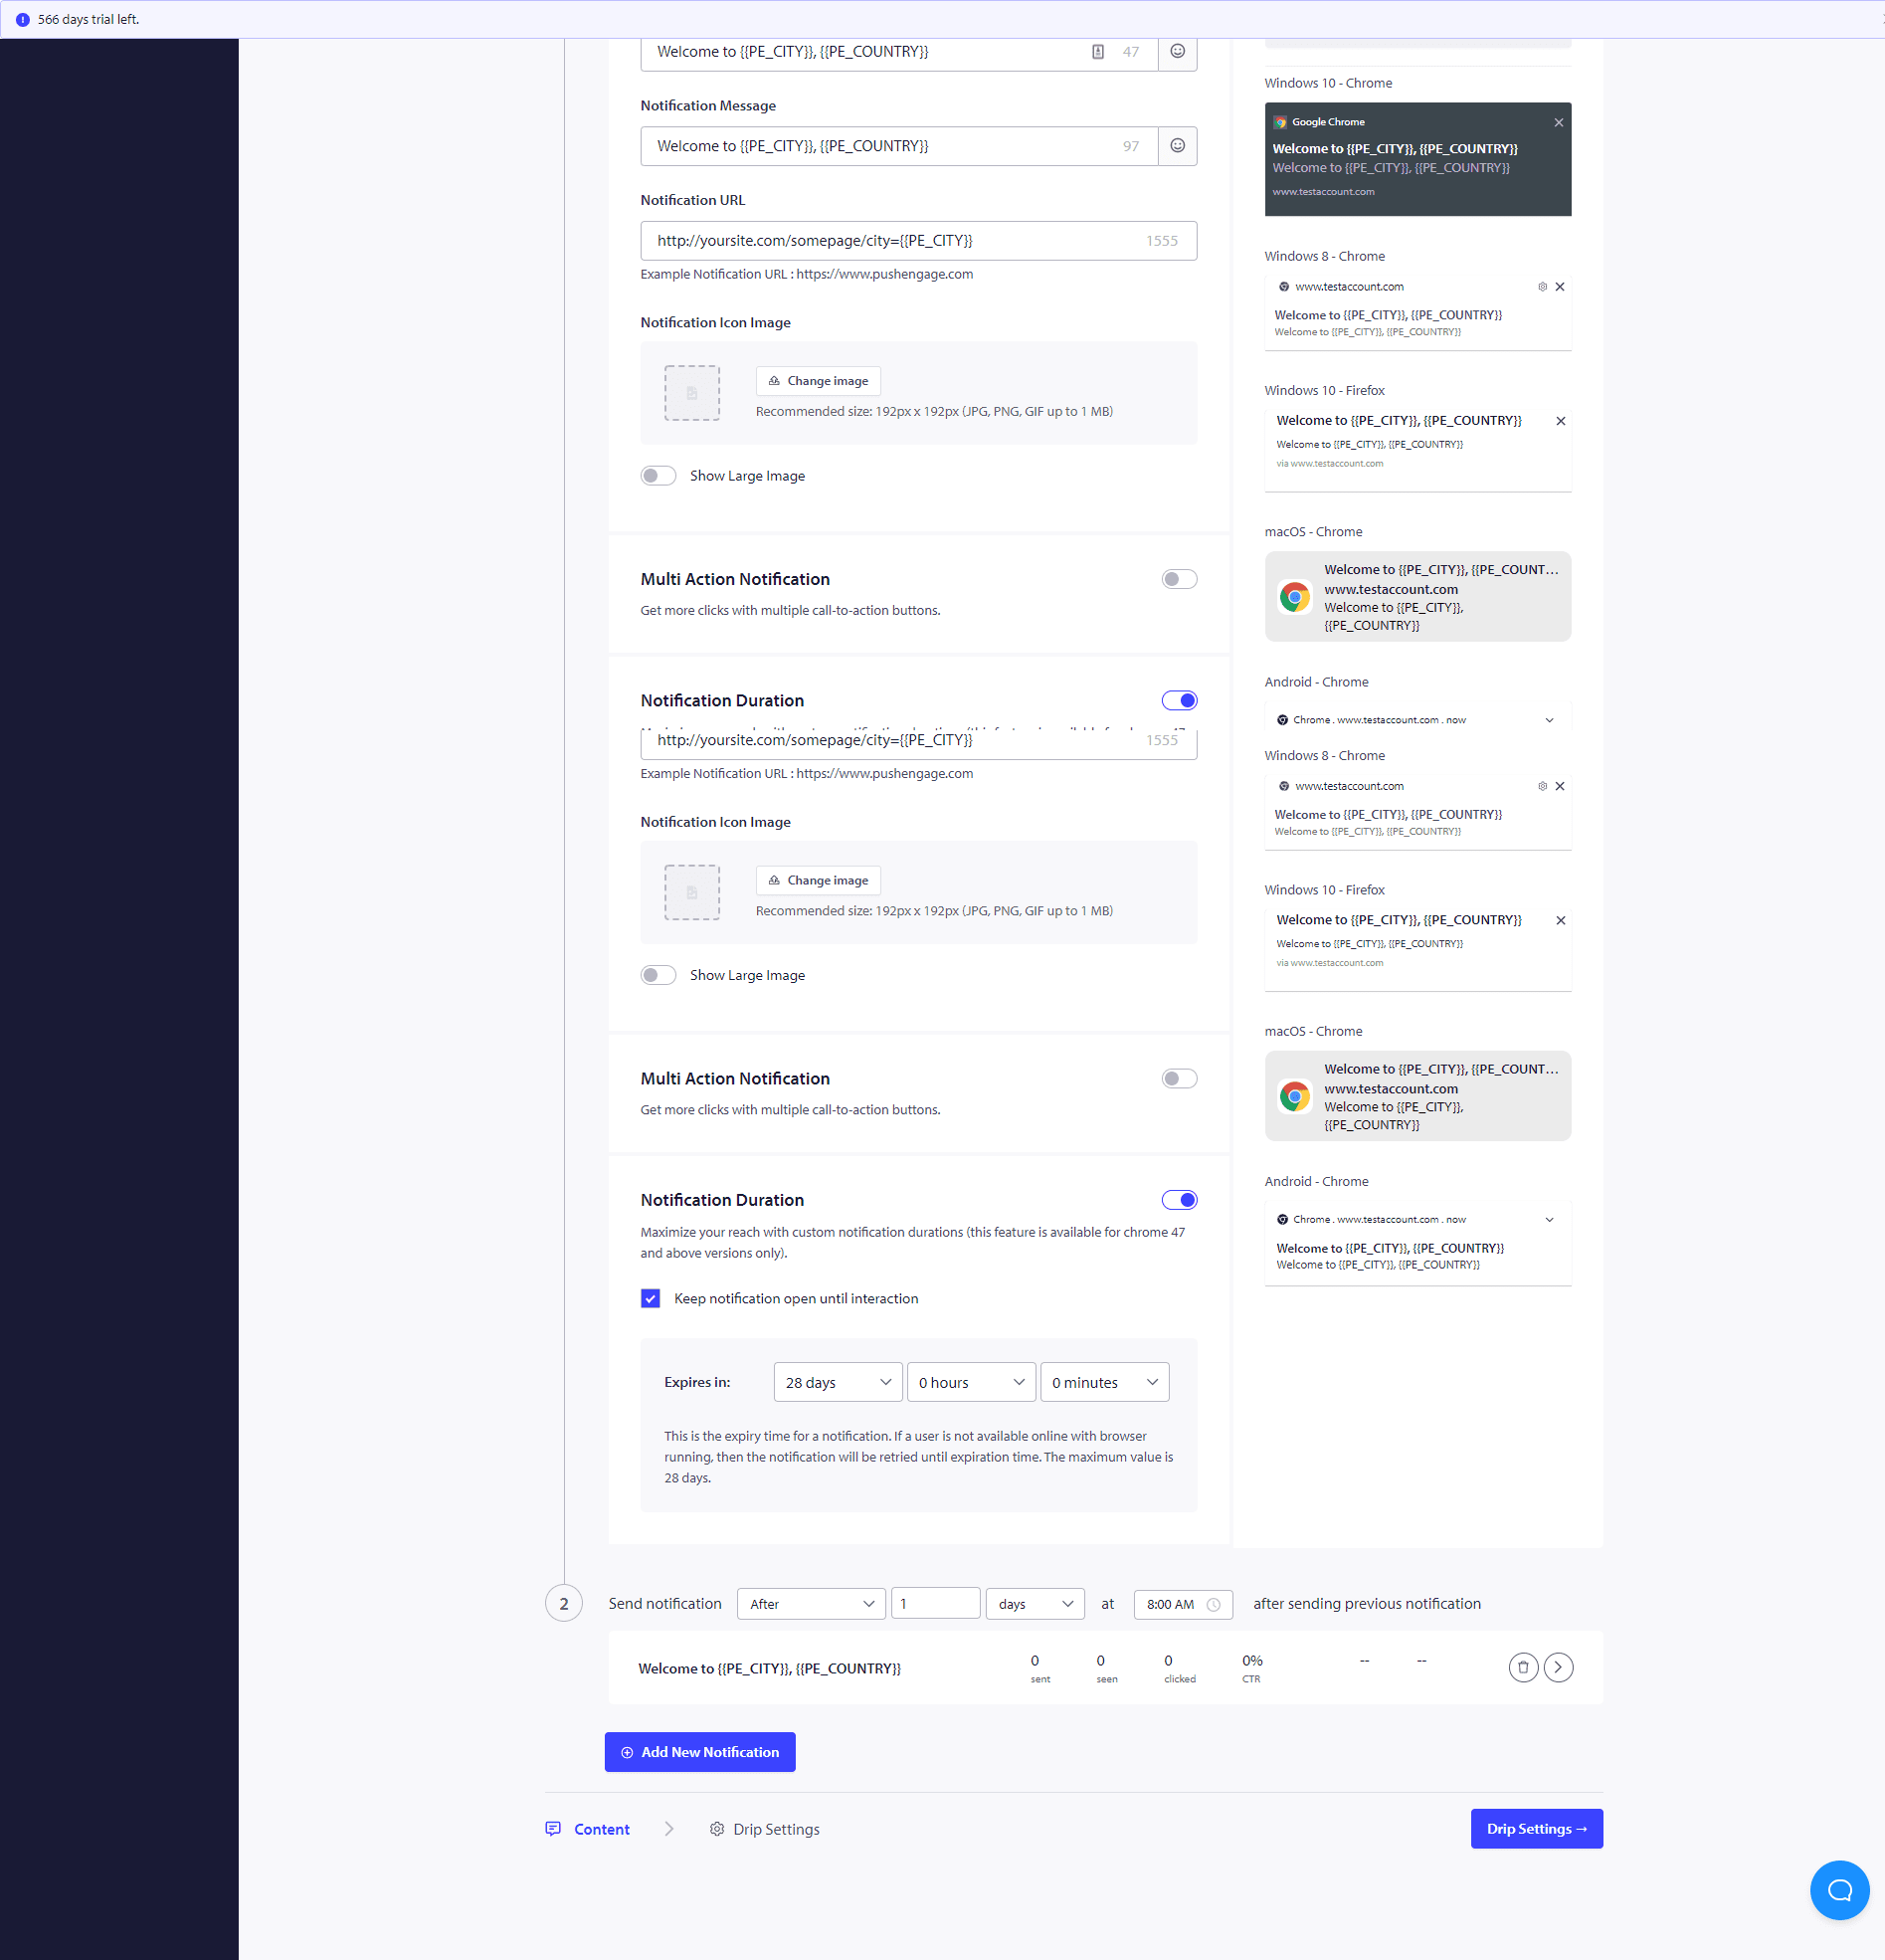
Step 3 – Set The Delay – Now Create series of Notifications to be sent after 10 mins or 1 hour and after 1 day as an example.
Once you have completed these Drip Campaigns, you would be interested in seeing how each of the stages of notification is performing. For that Visit Autoresponder Analytics and Click on the Just Created Drip Campaign.
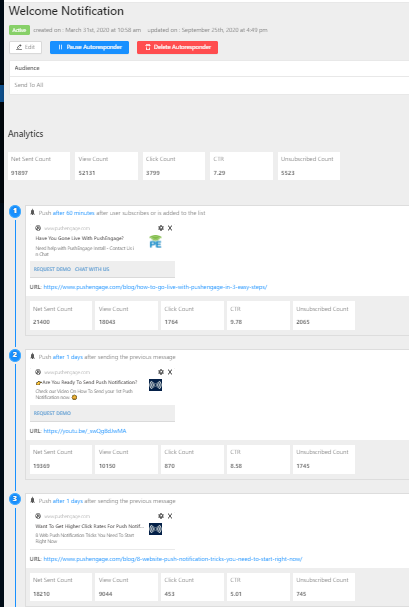
Your drip autoresponder is all set now. That is it, sit back and watch traffic increase and visitors engage and come back to your site with the Drip campaigns.
How to Personalize The Drip Campaign?
To personalize the drip or if you wish to send it to a particular group of people/segment or to geolocation you can select the relevant segment name or the geolocation you wish to notify from the dropdown
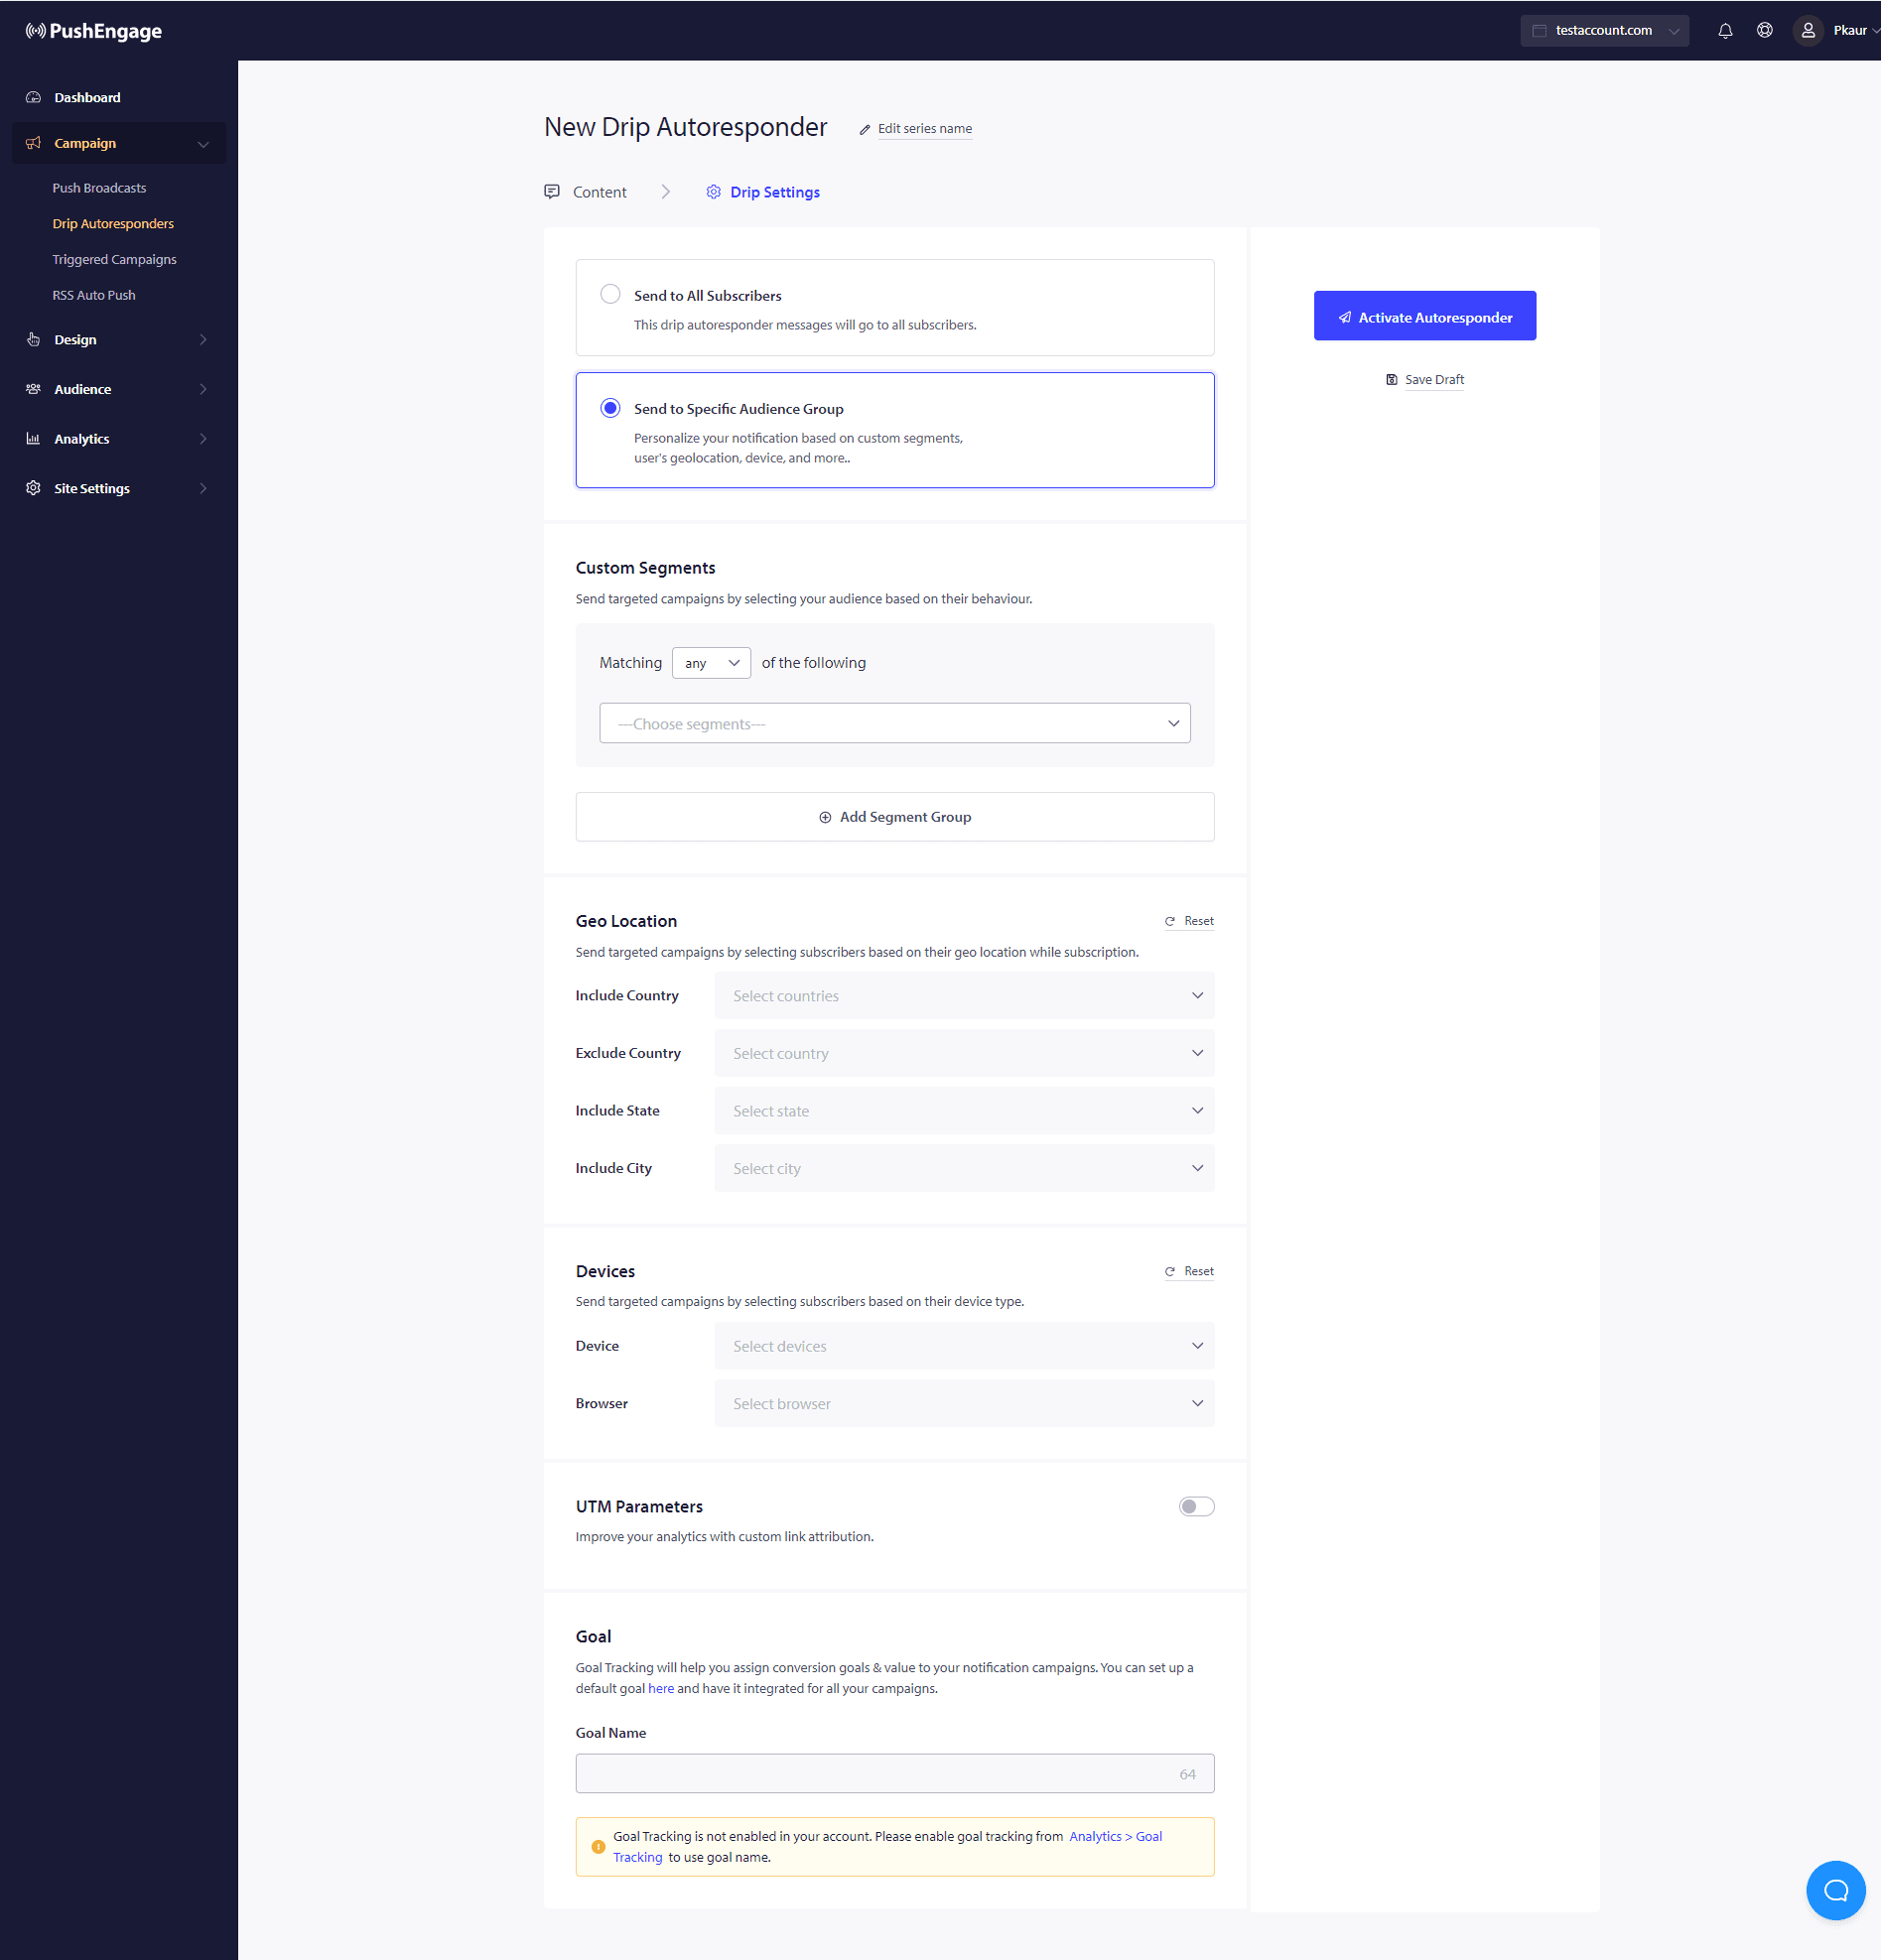
Further, this campaign can be used to build Form abandonment, cart, and browser abandonment campaigns using drip notifications as well.
Σε περίπτωση που αντιμετωπίσετε προβλήματα, μη διστάσετε να επικοινωνήσετε μαζί μας κάνοντας κλικ εδώ. Η ομάδα υποστήριξής μας θα μπορέσει να σας βοηθήσει.


