Looking for a simple guide to push notification A/B testing?
A/B testing can help you figure out exactly what your audience responds to the most. But how do you do it with push notifications? Most push notification software comes with A/B testing tools.
But…
- What do you test?
- What results are good results?
- Can you do it with without APIs and coding?
In short: What should you know before you jump into push notification A/B testing?
We’re going to answer all these questions and more in this article. So, let’s dive in.
What is Push Notification A/B Testing?
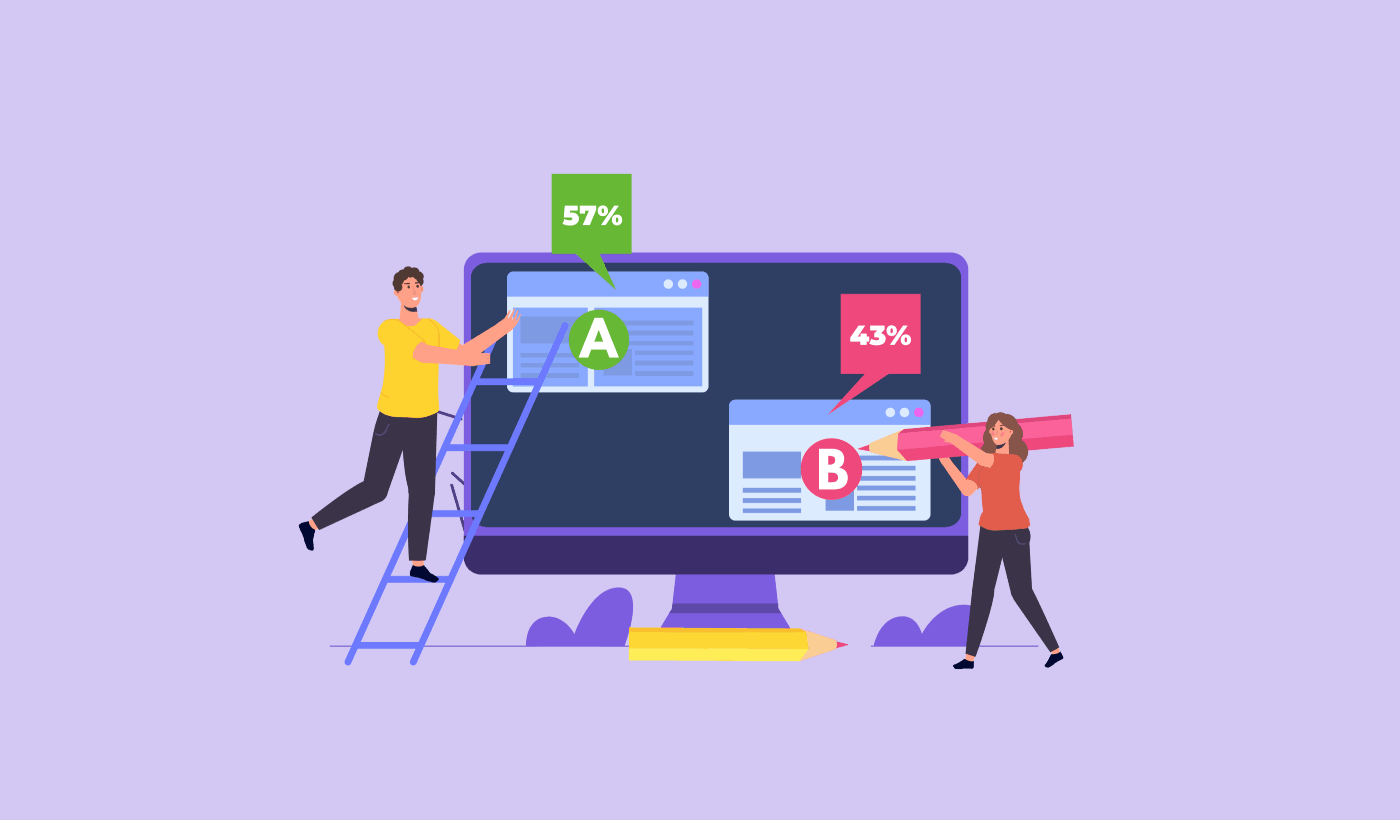
Push notification A/B testing is a method of optimizing your conversions from push notification campaigns. You can choose to optimize different parts of your push notifications based on what kind of results you want to improve.
The idea behind A/B testing (or split testing) push notifications is super simple.
You send out one version of your notification (version A) to 50% of your audience and another version with small changes (version B) to the rest of your audience. And you get to see which push notification works better for your audience.
If you’re smart, you can even limit your A/B testing to a small segment of your audience to get better campaign performance. This is called Intelligent A/B Testing.
In Intelligent A/B Testing, you run the test on a part of your total audience. We recommend running a Intelligent A/B Test on 30% of your audience. This way, you send version A to 15% of your audience, and version B to another 15%. Whichever push notification performs better automatically gets sent to the rest of your audience.
So, in Intelligent A/B Testing, you can send the winning push notification to 85% of your audience instead of sending it to 50%. This improves your overall campaign performance instantly and it’s super simple to set up.
What Can You Split Test in Push Notifications?
It’s time to answer the bigger question with push notification A/B testing. What can you split test in a push notification?
The most common performance metrics for push notifications are:
- Click rate: The click rate on a push notification is how often your subscribers saw your push notification and then clicked on it.
- View rate: The view rate of a push notification is how often a subscriber received your push notification and saw it before it expired.
- Goal conversions: You can set goals for your campaign and set up goal tracking for your campaigns. The goal conversions is a measure of how many times you achieved your goal.
To increase your view rates, you want to use a large image in your push notifications. Using images in your notifications instantly makes it more appealing.

You can also experiment with power words in your push notification title.

So, you can A/B test notifications with images and without one. You can also test view rates by split testing push notifications with and without power words in the title.
If you’re looking to improve your click rate, you want to focus on the core message and work on making it super relevant. Mostly, this is about one of two things:
And there’s nothing to A/B test in that area. But you can A/B test your click rates with the Call to Action (CTA) buttons on your push notifications. Try A/B testing push notifications with one or no CTA against one with two CTAs.
If you’re not sure how to create multiple CTAs, check out this article on how to add buttons to your push notifications.
With goal conversions, it’s mostly a matter of setting up relevant eCommerce push notifications. So, again, there’s not a LOT to split test here. That said, if you can optimize your push notifications for better clicks to a really good offer, your goal conversions will increase. You can get more conversion-focused clicks by testing your push notification copy.
How to Get Started with Push Notification A/B Testing
Now that we know what push notification A/B testing is and what you should be testing, let’s give you a look at how to get started quickly.
Step #1: Select a Push Notification Service
We recommend using PushEngage to send your push notifications.

PushEngage is the #1 push notification software in the world.
Push notifications help you grow your website traffic and engagement on autopilot. And if you’re running an online store, PushEngage also helps you grow your sales by helping you create automated eCommerce push notifications.
You can get started for free, but if you’re serious about growing your business, you should buy a paid plan. Also, before buying any push notification service, you should check out this guide to push notification costs.
Here’s a quick glance at what you get with PushEngage:
- High-converting automated campaigns
- Multiple targeting and campaign scheduling options
- Goal tracking and advanced analytics
- Intelligent A/B testing
- A Dedicated Success Manager
You’ll see that PushEngage is hands down the best bet if you want to build traffic, engagement, and sales for your business. Check out this comparison of the best push notification services if you have any doubts. And if you’re on a budget, you can always get a little bit creative with your push notifications.
Step #2: Create a Push Notification
Head over to your PushEngage dashboard and go to Campaign » Push Broadcasts and click on the Create a New Push Broadcast button:

Under the Content tab, add your push notification content:

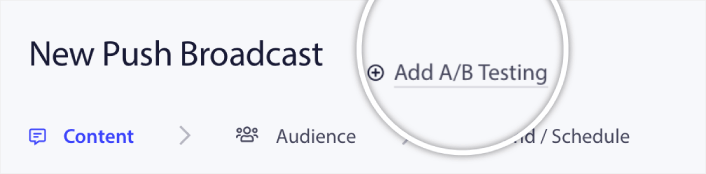
Step #3: Add an A/B Test
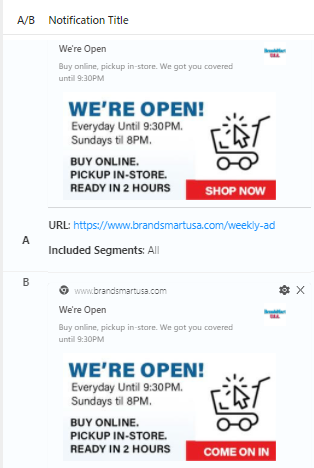
Click on the Add A/B Test link to create an A/B test for your push notification instantly:
And then, you can simply create two versions of you push notification:

And you can change anything you like in your version B. If you scroll down, you can even split test your push notification action buttons. Once you’re done setting up the content in the two versions, click the Save and Select Segments button.
You can select a custom audience here:
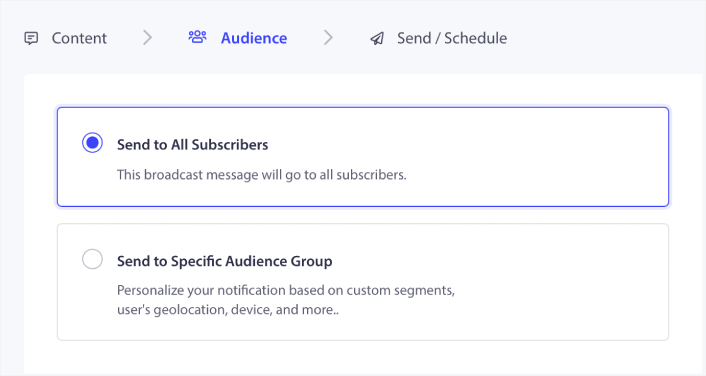
Or, you can send it to all your push notification subscribers. When you’re done, click the Send/Schedule button.
Step #4: Create an Intelligent A/B Test
Here, you can enable Intelligent A/B Testing:
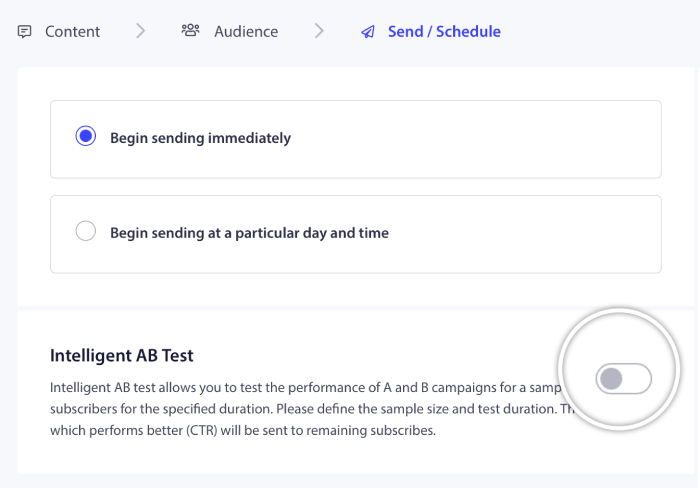
Turn the Intelligent A/B test on and set the sample size for the test.
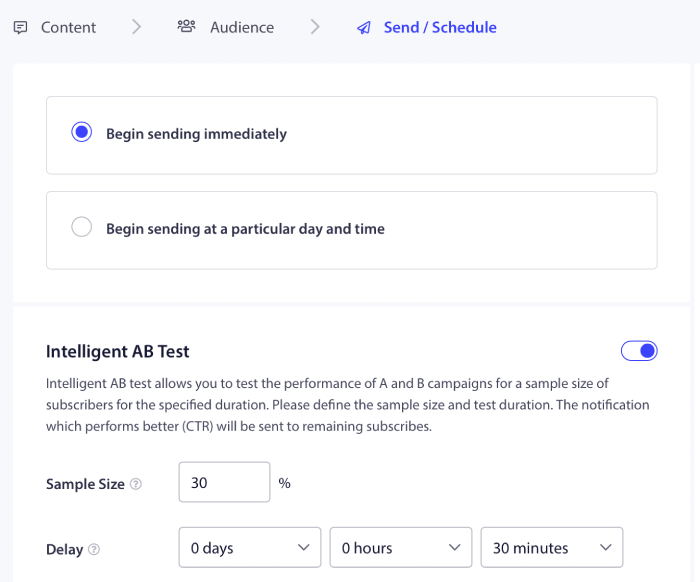
And just schedule or send your push notification. You’re done!
A/B Testing Best Practices
Let’s take a quick look at some of the best practices for A/B testing so that you can make the most of your experiments.
- Test the Right Items: Before you create a split test, be sure of what you want to optimize. Don’t try to optimize 5 different metrics at the same time or you’ll just end up ruining the experiment with too many variables.
- Pay Attention to Sample Size: The sample size you use for your split test can change a lot. You don’t want to run tests on 5% of your total audience because the results will be statistically insignificant. And you don’t want the test audience to be so large that your overall performance tanks either. Intelligent A/B testing is perfect for this balance.
- Make Sure Your Data Is Reliable: Sometimes, you’ll see great results on your A/B tests. But we recommend using a statistical significance calculator to know if your data is actually reliable.
- Schedule Your Tests Correctly: If you schedule an A/B test during Black Friday, and expect the results to be comparable with any odd Wednesday, you’re going to get very misleading information.
- Test One Element at a Time: If you test too many elements of a push notification at the same time, you won’t know what’s creating the difference.
Use these simple practices to create a process around your A/B testing. Of course, we recommend using push notification best practices first and then improving your performance with push notification A/B testing afterwards.
What to do After You Learn Push Notification A/B Testing
That’s all for this one, folks!
By now, you’ve already started push notification A/B testing.
Now, all that’s left is generating traffic to your site so that can get push notification subscribers to run A/B tests. Sending push notifications is a great way to generate repeat traffic for your site. If that’s something you’re interested in, you should check out these articles as well:
- Push Notification Cost: Is It Really Free? (Pricing Analysis)
- How to Get More Traffic to Your WordPress Blog (9 Easy Ways)
- How to Boost Your Web Push Notification Opt-In Rate (7 Ways)
We recommend using PushEngage to send your push notifications. PushEngage is the #1 push notification software in the world. So, if you haven’t already, get started with PushEngage today.


