Ever wondered why is personalization important for push notifications?
Personalized push notifications make your subscribers feel like they were tailor-made for them. The best part? Our customers get around 8% conversion rates for personalized campaigns.
Clearly, personalized push notifications can change the way you do business online.
But according to a study, 70% of personalization experiences on an eCommerce website happen only when the user has logged into the account. But ideally, you’d want to offer a personalized experience even when they’re not logged in.
Push notifications even help you reach out to your customers whenever they’re online, no matter whether or not they’re on your site.
So, in this article, we’re going to give you the tools to send personalized push notifications on autopilot. We’ll even give you specific strategies that have worked for our customers in the past.
Let’s dive right in.
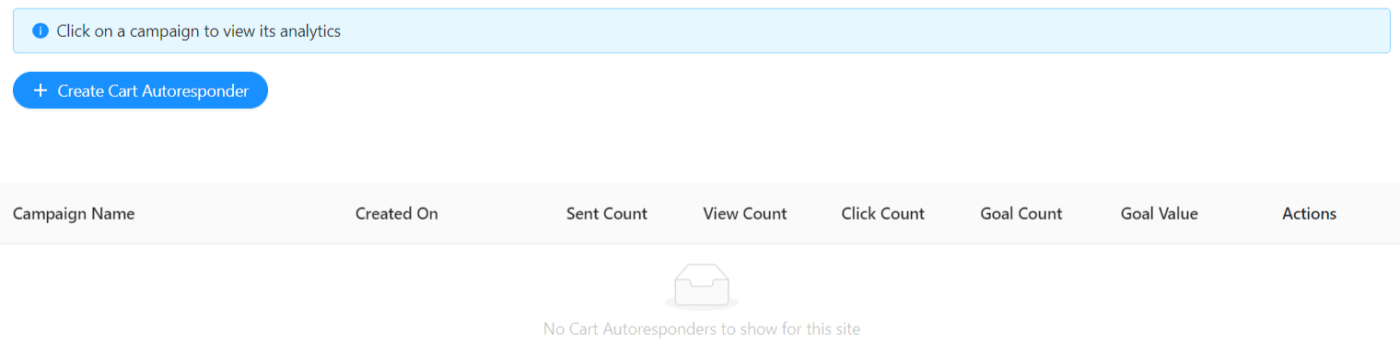
- Browse Abandonment Campaigns
- Inventory Alerts
- Price Drop Alerts
- Personalization By Location
- Cart abandonment Campaigns
- Transactional Messaging
- Product Review Campaigns
- Live Event Reminders and Updates
#1. Browse Abandonment Campaigns
If a web visitor browsing your website suddenly decides to go away from your website, that’s called browse abandonment. Browse abandonment campaigns are personalized push notifications that attempt to recover the abandoning browsers by re-engaging with them.
Typically, for an eCommerce site, the goal for browse abandonment campaigns is to get your subscribers to add something that they’re interested in to their shopping cart.
It’s like hiring someone at your store to get window shoppers back to your store to buy something from you.
For a publisher, it can be something as simple as getting someone who read half your article to come back and read the rest!
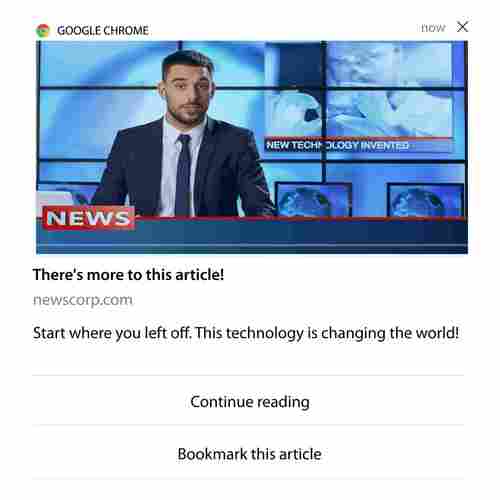
Now, let’s set up a browse abandonment campaign using PushEngage.
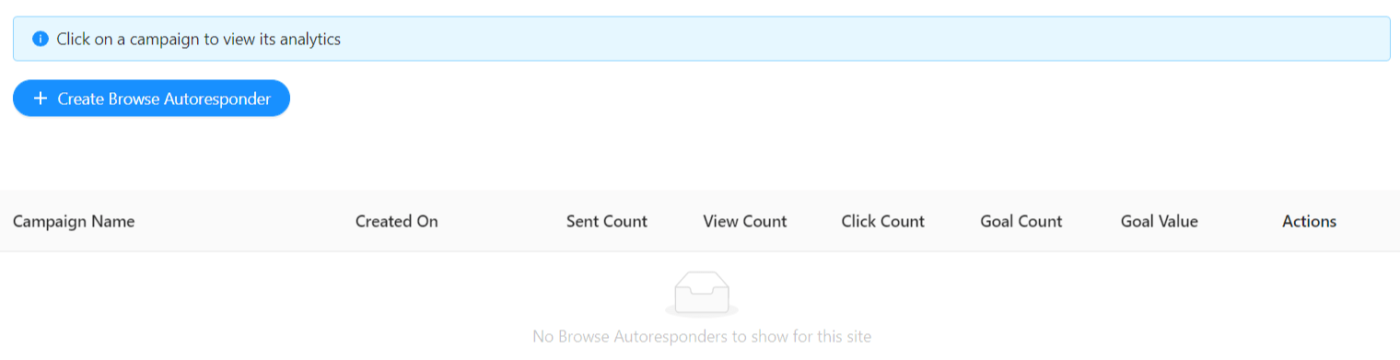
From your PushEngage dashboard, head to Automation » Browse Abandonment » Create:
Next, you’ll want to configure the basic campaign details, trigger limits, and UTM parameters:

You’re now ready to draft your campaign right from the PushEngage dashboard:
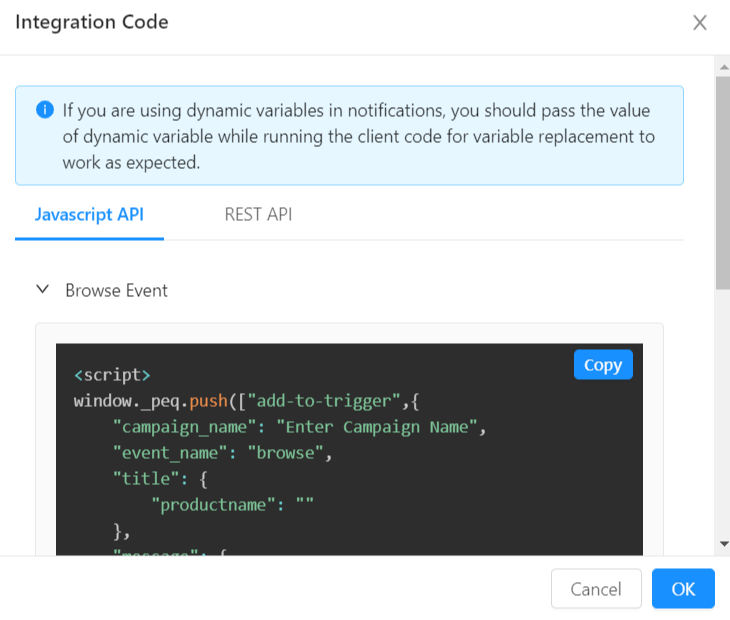
Finally, for the campaign to work, you’ll have to add the Javascript code snippet to your website:
And you’re all set!
#2. Inventory Alerts
For eCommerce websites, you’ll often find customers who save a product in their wishlist and come back later to buy it.
The only problem is… everyone forgets about their wishlist.
Even worse, not everyone will add a product to their wishlist. Some people may just browse through your site a couple of times and never buy it.
So, what can you do? You can send inventory alerts to nudge your customers into buying.
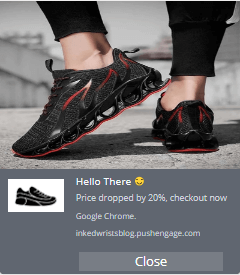
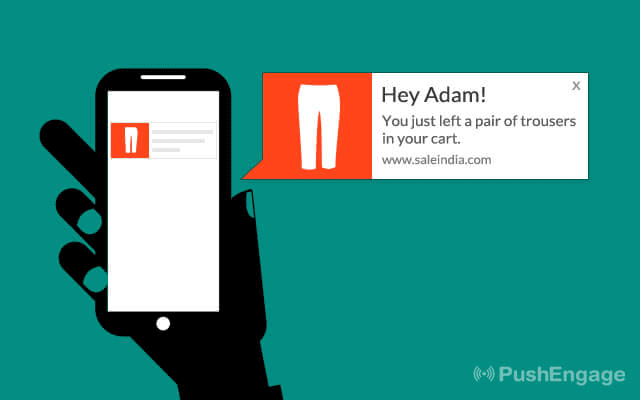
Inventory alerts are push notifications to notify your subscribers that the product they were interested in is going out of stock. The Fear Of Missing Out (FOMO) does the rest. You’ll see a huge portion of your audience rushing back in to buy the product that’s going out of stock.

The truth is, no one likes to miss out on something they want for themselves.
On the flip side, you might get loads of people trying to buy the same product. And of course, some people will miss out on the action.
No worries. You can simply send them a notification like this one:
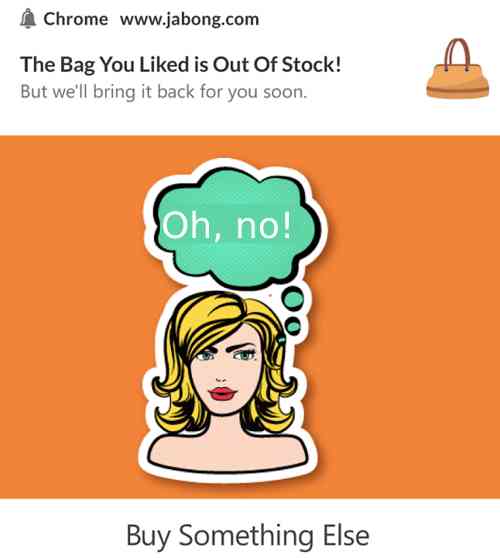
Nudging your customers to “Buy Something Else” will at least get your subscribers back to your shop page to browse similar products.
Of course, inventory alerts aren’t the only personalized push notifications you can send to boost sales. You can also use Price Drop Alerts (up next).
For now, let’s get you building your very own inventory alert on PushEngage.
Log in to your PushEngage dashboard and navigate to Automation » Price Drop / Inventory Alert » Create Price Drop/Inventory Alert:
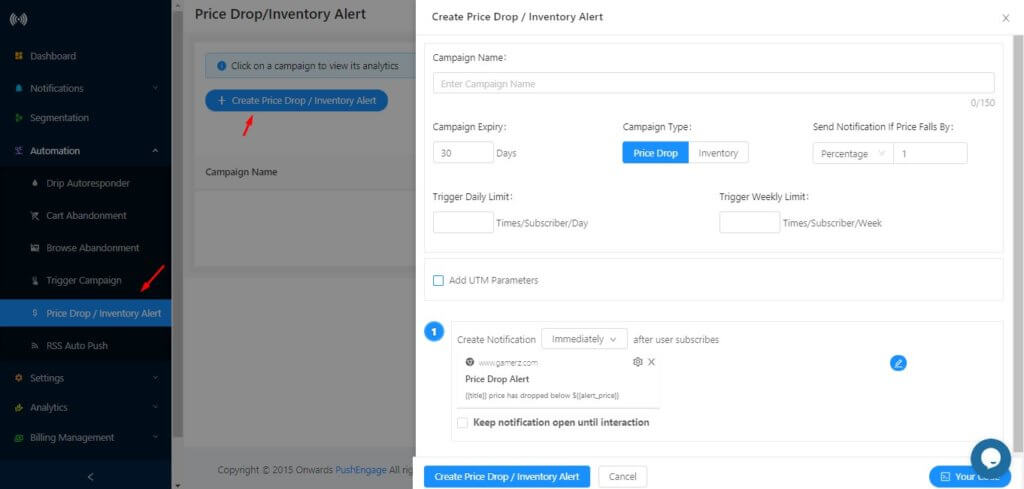
Set up your basic campaign details such as campaign name, type, expiration date, daily and weekly notification limits, and UTM parameters.
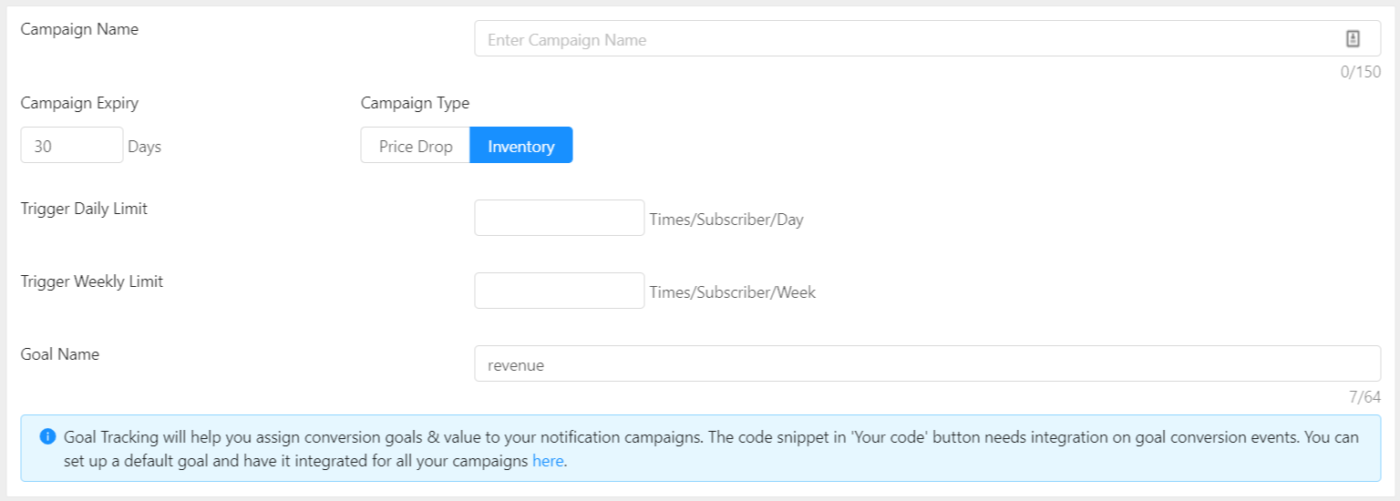
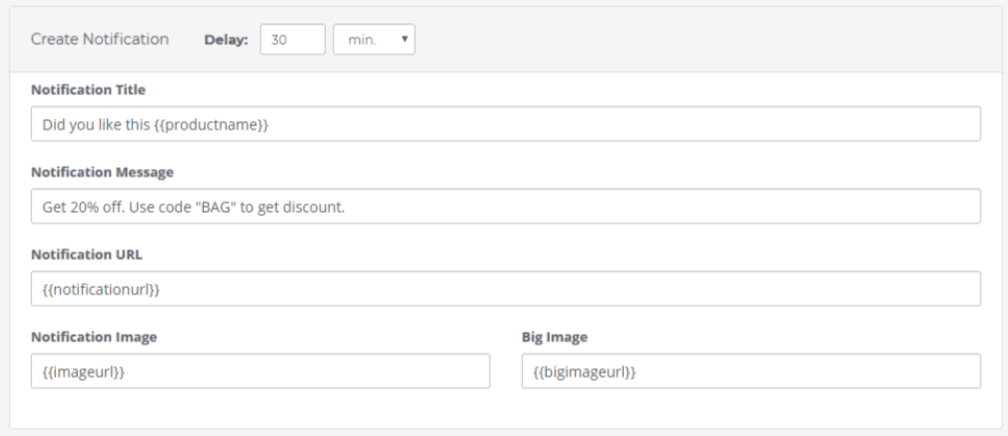
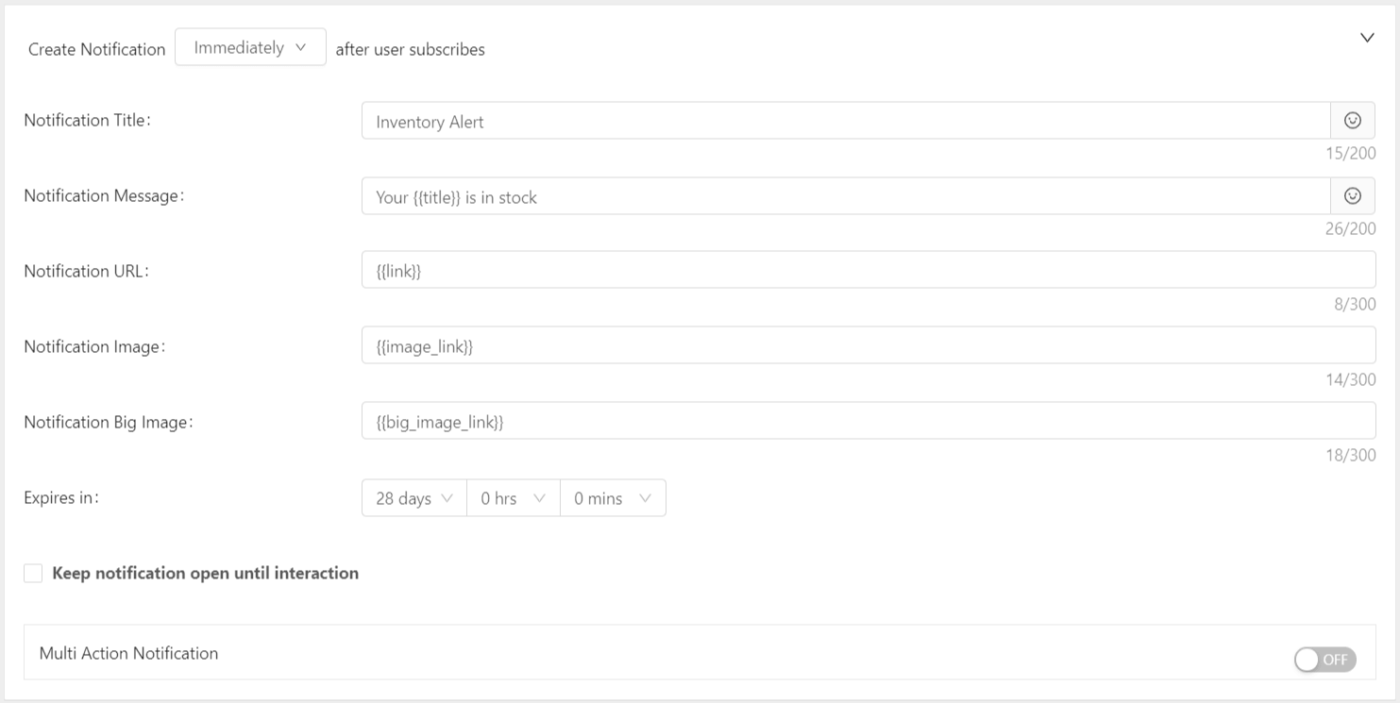
Then, create your notifications (yes, you can create a series of alerts to add follow-ups):

Finally, add the Javascript code snippet to your website:
And that’s it!
Pro-Tip: You can use the PushEngage Attributes API, to send more personalized notifications. You can add the subscriber’s name, custom triggers, and parameters.
#3. Price Drop Alerts
Price Drop Alerts are exactly what they sound like. If a subscriber browsed a product or added it to their wishlist and the price of that product went down, price drop alerts notify your subscribers that they can buy it for a cheaper price one last time.
Price drop alert campaigns are personalized push notifications that help boost your sales instantly by getting people interested in your products to buy them.
Let’s check out how to set up a price drop alert on PushEngage.
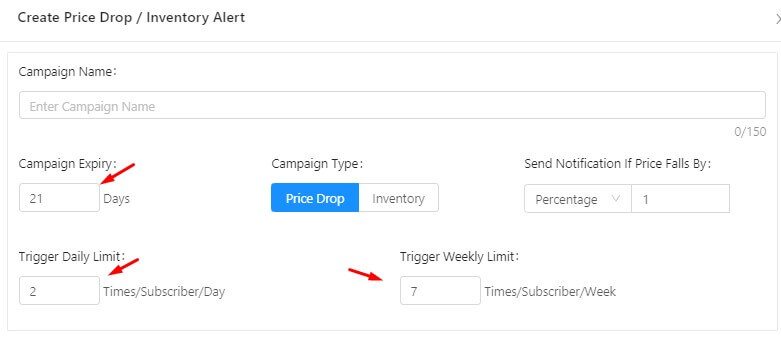
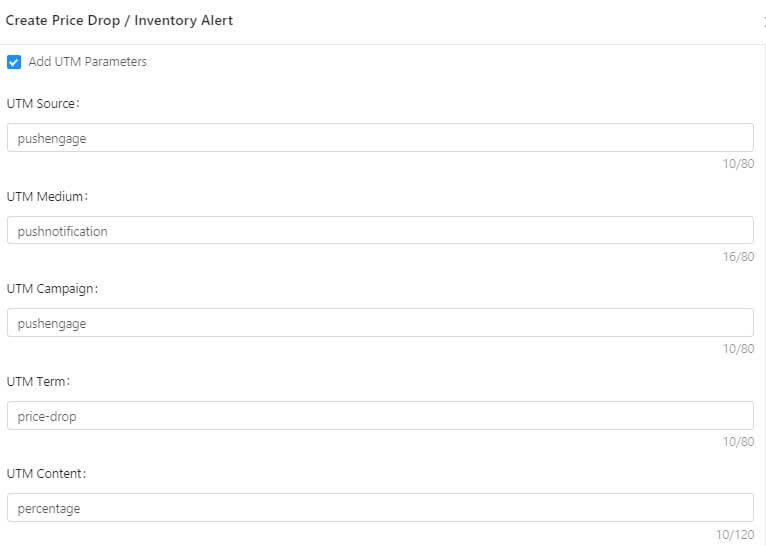
The first part is exactly like setting up an inventory alert. From your PushEngage dashboard, navigate to Automation » Price Drop / Inventory Alert » Create Price Drop/Inventory Alert:
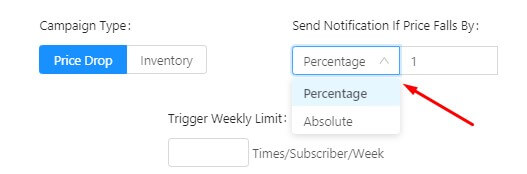
Select the campaign type and set a threshold for the price drop alert so that it automatically triggers the campaign when the price drops by a specified percentage or value:
Then set the trigger limits to control the number of notifications a subscriber receives in a day and the expiration date for the campaign:
You can also set up UTM parameters for exact performance data on Google Analytics:
Next, create the notifications in your campaign:
And finally, add the code for this push notification campaign on your website:
And you’re done!
#4. Personalization by Location
There are certain campaigns that you can customize according to your subscriber’s geolocation.
Of course, this may not be the real-time location. But even using the city to customize your messaging can leave a lasting impact.
This is a very basic way to send personalized push notifications. But it’s pretty effective. For example, if you’re running an online apparel store, you shouldn’t be sending a winter sale notification during summer:

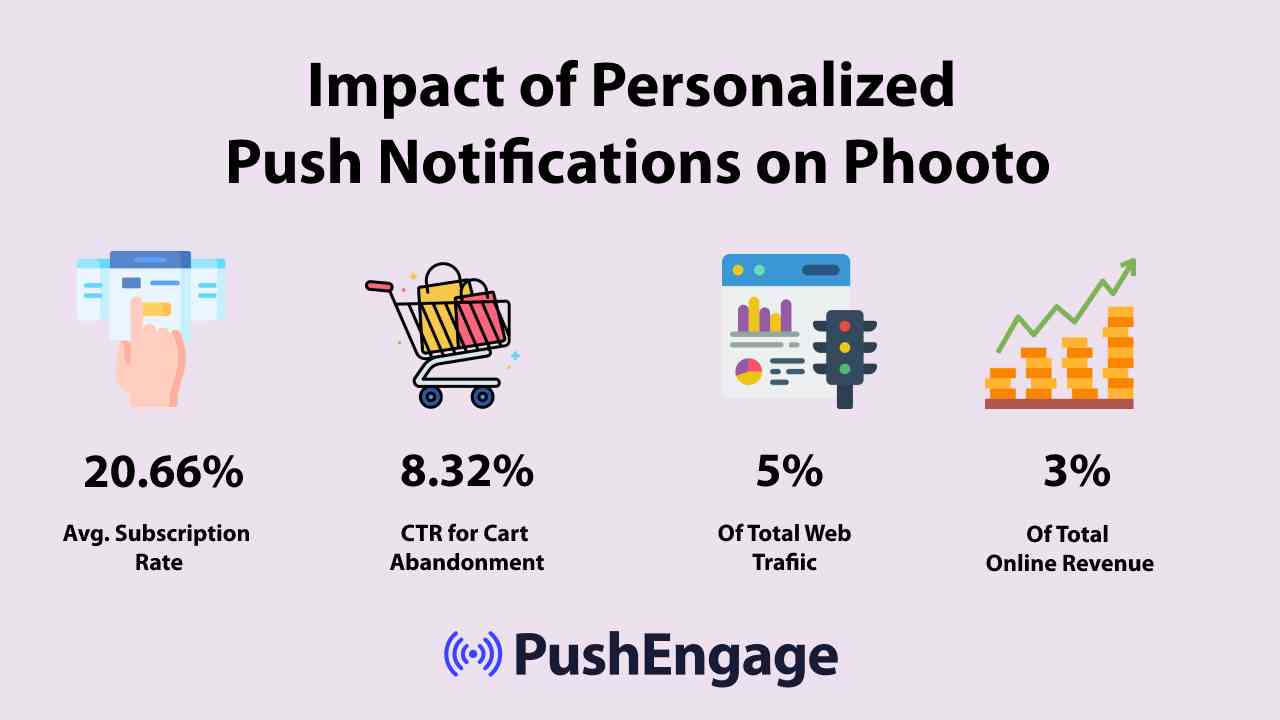
For instance, Phooto used their subscriber’s locations to change the language of their push notifications. Read the full case study to see how Phooto used regional languages to boost engagement and sales.
Now, let’s set up personalized push notifications based on location using PushEngage.
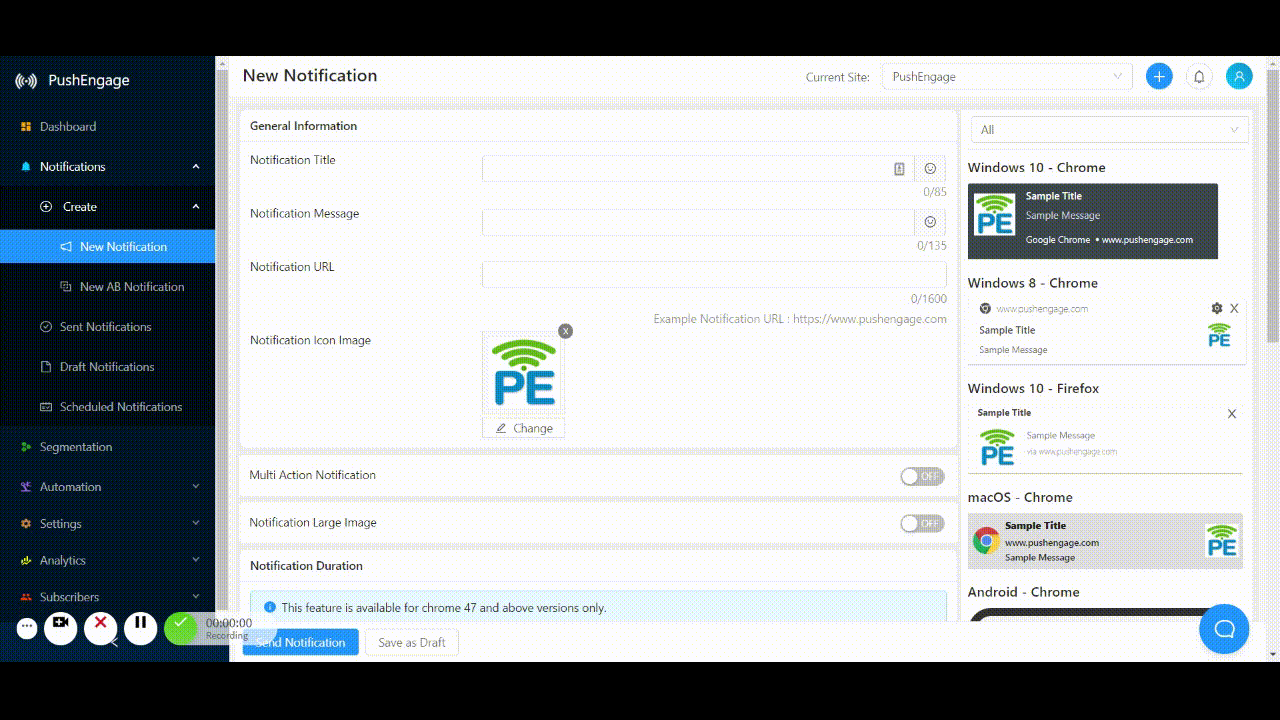
First, let’s create a segment based on location. Head over to Notifications » New Notifications and go to Select Audience. Here, you can select the location you want to target:
And that’s not all. Along with the targeting, you should remember that you can customize the notifications as well. PushEngage allows you to create messages that include emojis and foreign languages for added personalization.
If you’re enjoying this post so far, keep reading. There are some really great tactics coming up next. And don’t forget to leave a comment below to know which of these tips you found the most useful.
#5. Cart Abandonment Campaigns
Cart abandonment is when someone likes your product enough to add it to their shopping cart, but doesn’t buy it for some reason. Cart abandonment campaigns can help you recover a lot of sales that you would otherwise have lost completely.
The good news is that you can create personalized push notifications to recover cart abandonment using PushEngage.
If you’re new to cart abandonment or if your website has a high abandonment rate, then you should check out our article on 15 ways to reduce shopping cart abandonment.
The tips mentioned in that article have helped a bunch of our customers. In fact, some of those tips were based on successful campaigns by some of our other customers.
Wicked Weasel gets 9.58% conversion rates from their cart abandonment push campaign. And that’s no mean feat. If that sounds interesting to you, you should go read the full case study.
Now, let’s help you launch a cart abandonment campaign with PushEngage.
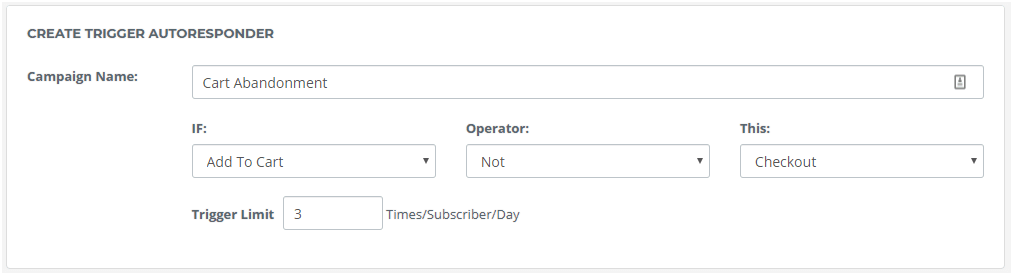
Head over to Automation » Cart Abandonment in the PushEngage dashboard and create a new Cart Abandonment Campaign:
Next, use the predefined PushEngage cart abandonment trigger to send out automated push notifications:
Then, create a sequence of reminders and follow-ups to recover lost sales:
A cart abandonment push notification series in PushEngage ends when your subscriber buys the products in their cart. So, you don’t have to worry about bothering your subscribers after they’ve purchased your products.
In any case, it’s a completely automated push notification series that expire after all the notifications are sent out.
Pro-Tip: Cart abandonment is a really difficult problem to combat and you’ll want to reduce cart abandonment rates as much as possible. You could recover 53% of abandoning visitors like OptinMonster customer Fastrack using exit-intent popups.
We highly recommend that you start using OptinMonster today. OptinMonster is the world’s most powerful conversion optimization toolkit. So, if you’re serious about scaling your business, you should really consider using it.
#6. Transactional Messaging
Getting orders for your eCommerce site is great. But you need to understand that customers expect to be kept in the loop even after they place their order.
Transactional notifications are personalized push notifications that:
- Confirm your customer’s order;
- Notify that the package is being delivered;
- Inform the customer about the delivery schedule;
And pretty much send out real-time notifications that keep your customers in the trust loop.
One of the really cool things that you can do with PushEngage is that when your customer places an order and the transaction is complete, you can send them a confirmation push notification. Like this one (but via push notifications):
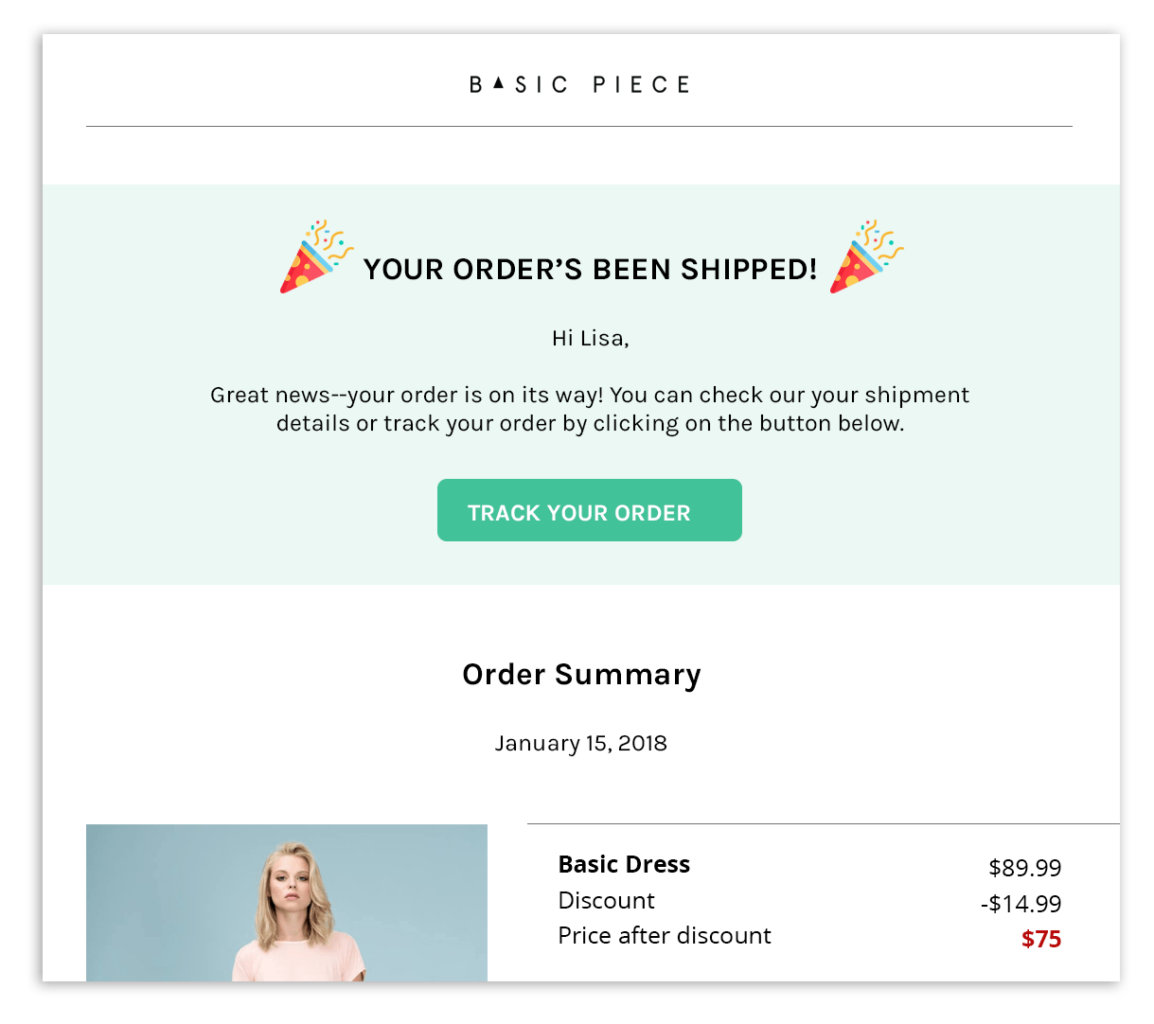
WooCommerce generates the order confirmation page any which way. All you have to do is set up a trigger campaign that sends your customers to this URL after the order is completed.
NOTE: You may want to talk to your developer about this feature. It’s pretty advanced and requires some custom coding. If you don’t have a developer in your team, it’s probably a good idea to steer clear of this idea.
#7. Product Review Campaigns
According to a study, 88% of consumers trust online reviews as much as personal recommendations.
But forget studies for an instant.
Think like an average consumer. Don’t you feel more confident about spending your money on a product that has great reviews?
Perhaps you should create a campaign like this one as well:
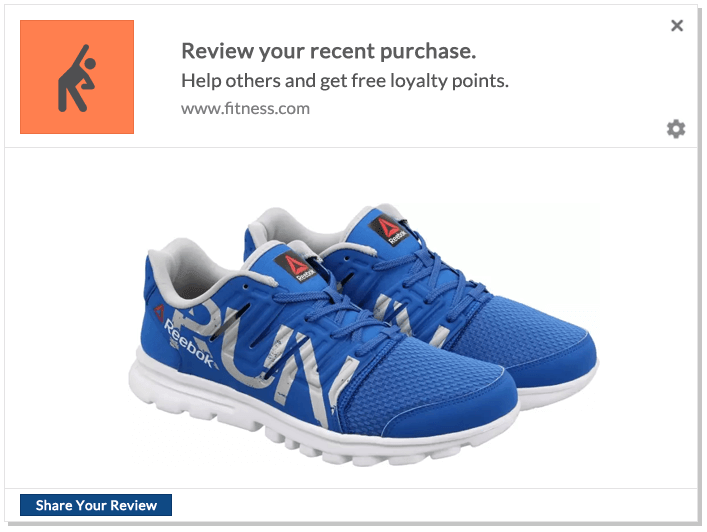
Product review campaigns are exactly what you’d expect. They are personalized push notifications that ask your subscribers to leave a review for a product they recently purchased.
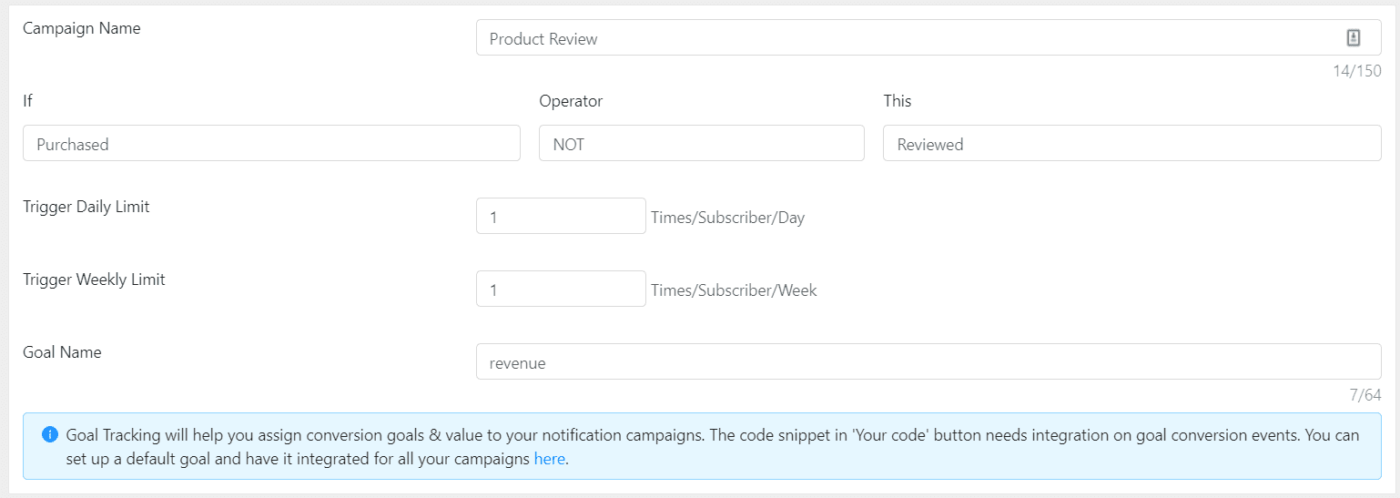
To get started with your very own product review push notification campaign, head over to Automation » Trigger Campaign » Create.
And create your campaign trigger with the conditions Purchased and NOT Reviewed:
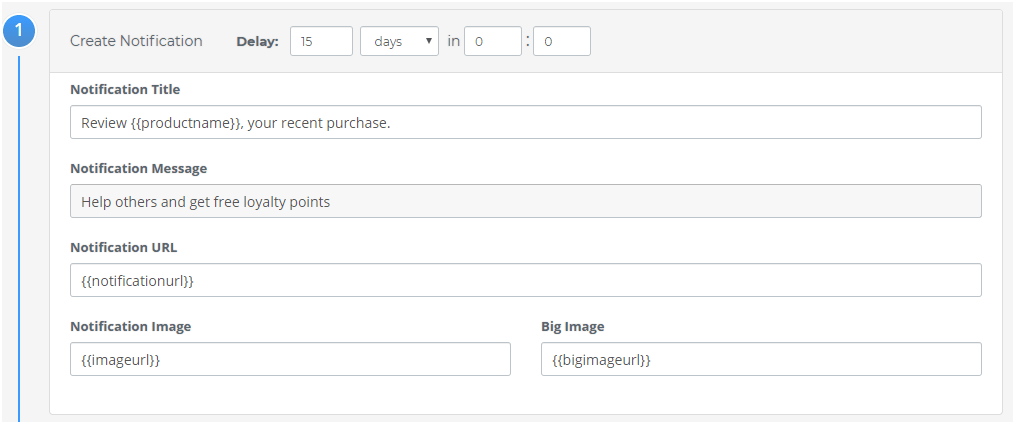
Then, create your personalized push notifications:
And just embed the code for this campaign. That’s it!
#8. Live Event Reminders and Updates
You can use personalized push notifications to send reminders and updates for live events as well. In fact, that was one of the biggest reasons why WickedWeasel loves using PushEngage.
The fact is that you can control your audience much better using web push notifications than with YouTube or Facebook native notifications.
One of the cool ways to send reminders to live events is to use repeated notifications.
Head over to Notifications » New Notification and add a notification in your PushEngage dashboard. Then, scroll down to the scheduling section and go to the Repeat Scheduling tab:
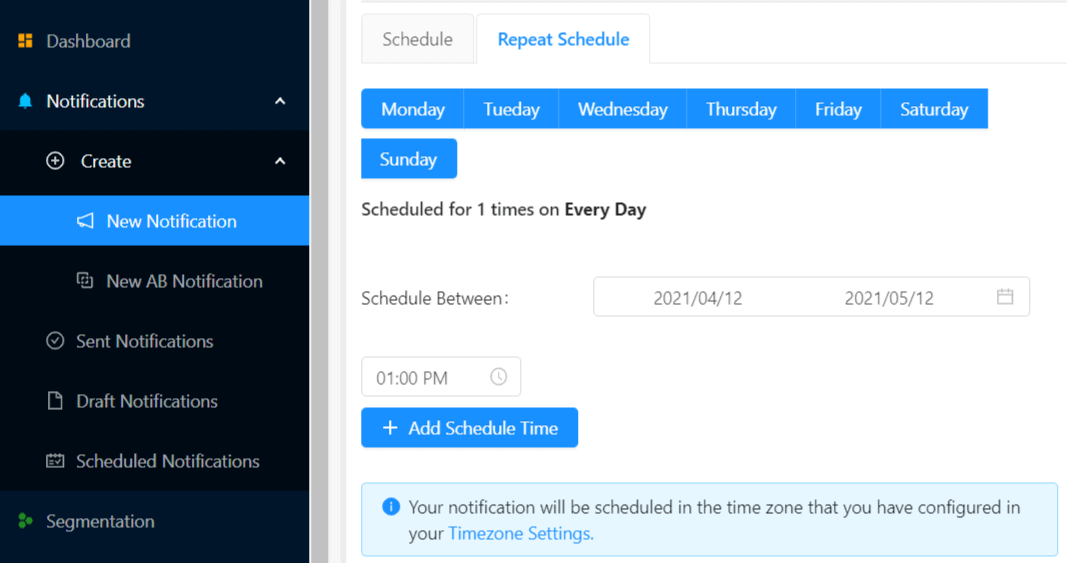
Just set up the timing and you’re done!
Wrapping Up
Personalized push notifications are only the tip of the automated push notification iceberg.
But hey, if you liked these ideas, leave us a comment below.
You should also check out different ways to schedule your push notifications for maximum impact. At PushEngage, we love to help our customers succeed. That’s exactly why we’re the #1 push notifications software in the market.
So, if you haven’t already, get started with PushEngage today.


