
Looking for an easy guide to set up WooCommerce push notifications?
We’ve got just the thing for you!
It’s hard enough to grow an eCommerce business without having to get slowed down by technical details. That’s why you chose WooCommerce in the first place, right?
But WooCommerce doesn’t come with built-in push notification functionality.
That didn’t stop us and it won’t stop you either.
In this article, we’re going to show you how to install WooCommerce push notifications using the PushEngage plugin. PushEngage is the #1 push notification software in the world. So, your subscribers are in safe hands.
The best part? PushEngage comes with a free tier that you can get started with.
Let’s dive in.
Step 1: Setting Up Your PushEngage Account
The first thing you need to do is head over to PushEngage and hit the Get Started button:

Get started with the free plan. As your subscriber base grows, you can always upgrade your account and gain access to more powerful features and campaigns.
Once you’ve signed up for an account, head over to the PushEngage dashboard and go to Settings » Site Settings » Installation Settings:
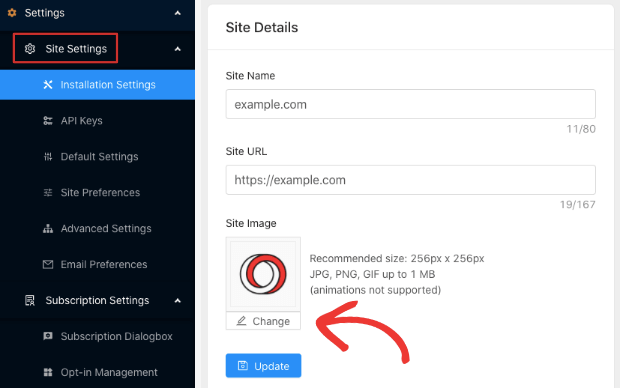
This is where you configure your site details and branding. Set a logo and site URL for your push notifications and you’re good to go.
Step 2: Install the PushEngage Plugin
Next, you’ll need to head over to the WordPress repository and install the PushEngage plugin.
You can start by heading over to Settings » Site Settings » WordPress in your PushEngage dashboard:
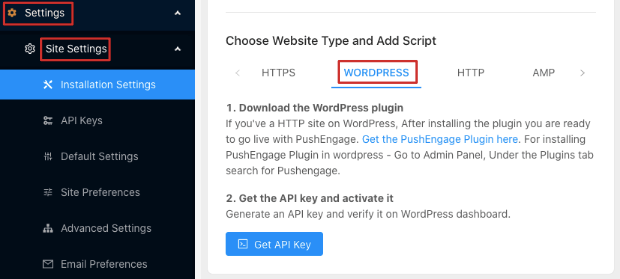
Typically, for a normal HTTPS site, you would need to upload a file named service-worker.js to the root folder of your server. But if you install the WordPress plugin, you won’t need to do all that. That’s for a manual installation and the plugin takes care of it automatically.
Step 3: Connecting PushEngage to WordPress
Once you’re done with the plugin installation, you can open your WordPress dashboard and select the PushEngage plugin from the menu. And then head over to the Setup tab:
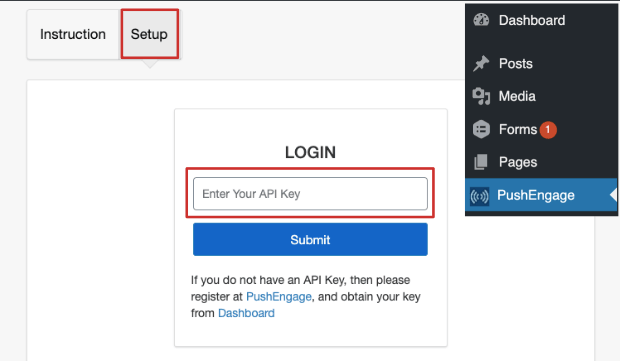
It’s time to enter your API key and connect your website with the PushEngage dashboard.
In your PushEngage dashboard, you’ll need to go to Settings » Site Settings » API Keys:
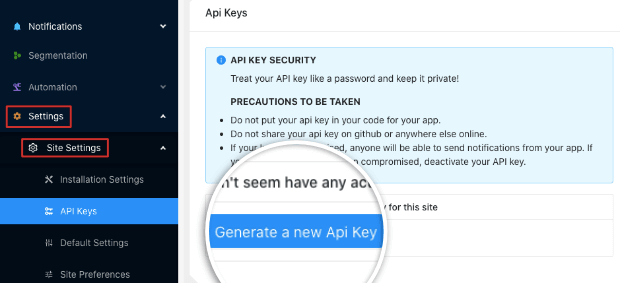
Just click on the ‘Generate a new API Key’ button and grab the API key that gets automatically generated for you.
And then paste it into the API Key field inside the PushEngage plugin from your WordPress dashboard.
Boom! You’re done.
Step 4: Creating WooCommerce Push Notifications
Next, you’ll want to set up an opt-in for your push notifications and a welcome notification for new subscribers.
You can do this from the PushEngage plugin. Let’s start with the opt-in.
In your PushEngage plugin settings, go to the Subscription Dialogbox tab:
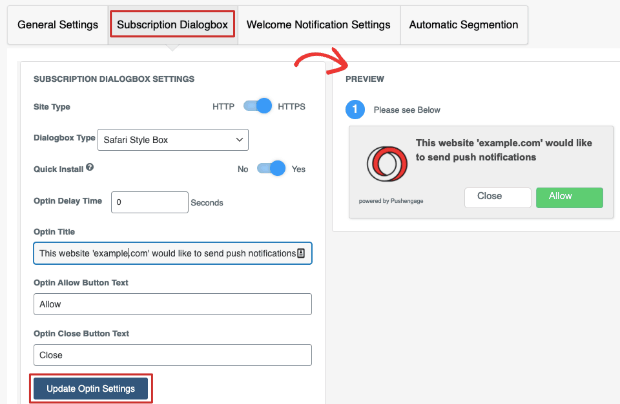
You can completely customize the opt-in according to your style. If you need some inspiration, check out this article on high-converting opt-in examples.
And then, click on the Welcome Notification Settings tab on the same screen:
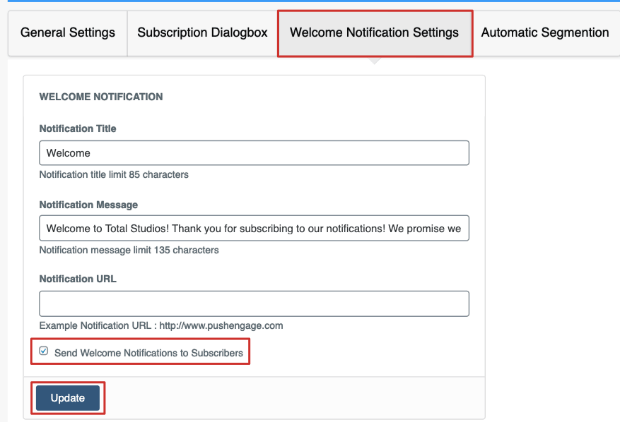
Check the Send Welcome Notifications to Subscribers checkbox and craft your welcome message.
When you’re done, hit Update.
And you’re done.
Pro-Tip: You should also test whether your push notifications are working properly. Check out this guide to testing push notifications for step-by-step instructions.
Wrapping Up
That’s all for this one, folks!
If you’re running an eCommerce website, you should also check out our article on epic eCommerce push notification examples. You know, for inspiration…
Done right, push notifications can help you drive traffic, sales, and engagement to your site.
We recommend using PushEngage for all your push notification campaigns. So, if you haven’t already, get started with PushEngage today!


